Trigger Grip (HA-D51TG) Instruction
• After reading this instruction, keep it in a safe place for future reference.
• This instruction describes only how to install the Trigger Grip on the IT-600.
• For information on safety precautions, operating precautions, etc., refer to the IT-600 User’s Guide.
E
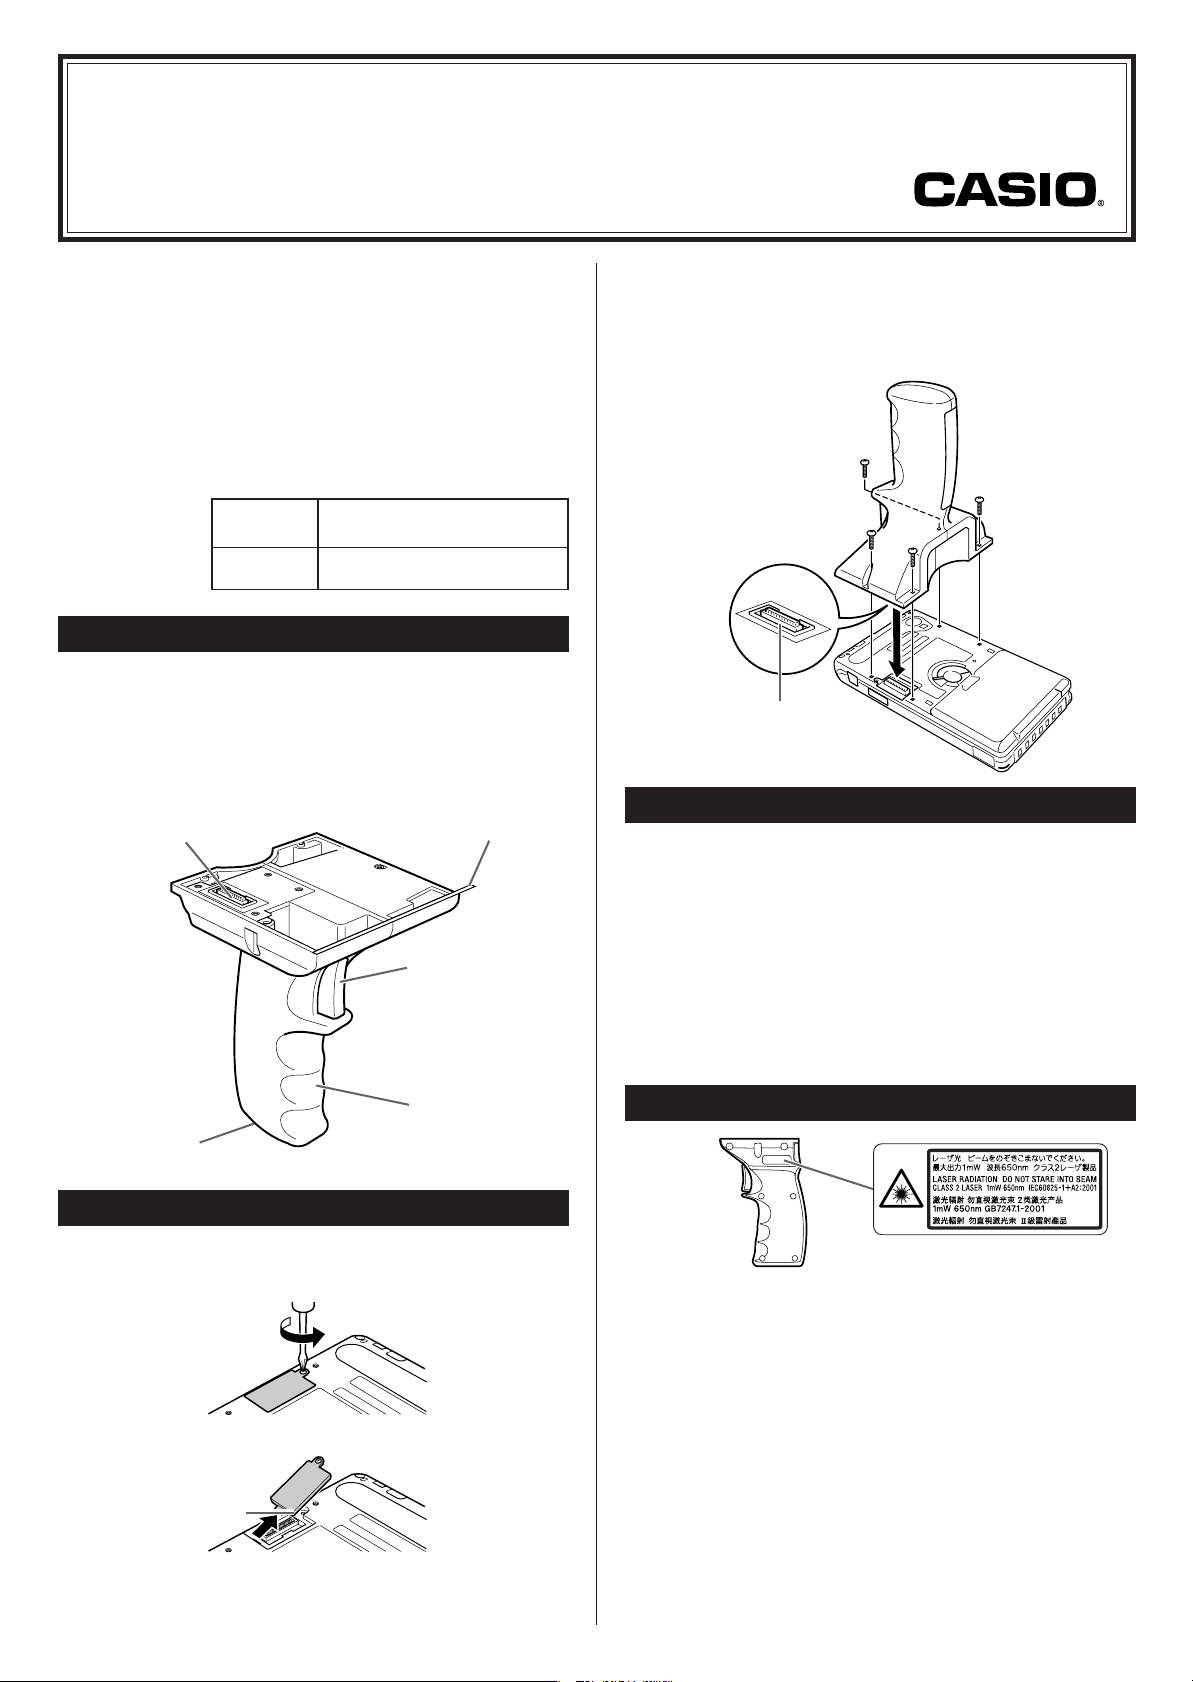
Trigger Grip
1Connector
Plug this connector (male) into the
connector (female) of the expan-
sion port on the back of the IT-600.
See the illustration in step no. 2 of
“Installing the Trigger Grip”.
3Trigger Lever
Trigger this lever
to scan bar
codes.
4Grip
5Drip Hole
2Adhesive Tape
Peel off the surface
on the tape before
installing the Grip.
General Guide
Installing the Trigger Grip
1Remove the expansion port cover on the back of
the IT-600.
Keep the removed cover in a safe place for use in future.
Cover
2Peel off the surface on the adhesive tape. Slowly
descend the Grip straight down to the IT-600
and plug the connector of the expansion port.
Make sure that each screw hole of the Grip is
aligned with that of the IT-600 and then tighten
all the screws.
Warning Label
Handling Precautions
• While you are installing the Grip on the IT-600, take care not to
scratch or damage the screen. After installing the Grip, do not
place the IT-600 anywhere with the screen facing down as it
may be a cause of damage on the screen.
• The Grip is designed to meet a level of water-splash proof. In
any event if water gets the inside of the Grip, it will drain out
through the drip hole. Thus, the operability of the Grip will not
be affected by the ingress of water.
• The adhesive tape on the Grip may loose its adhesive power if
the Grip is removed from the IT-600.
• This label is a warning and caution label for Class 2 laser
products that comply with IEC60825-1:1993+A1:1997+A2:2001.
• Although Class 2 laser light is only emitted momentarily, never
look directly into the beam light.
• The laser light emitted by this laser scanner has a maximum
output of less than 1 mW and a wavelength of 650 nm.
• Use of controls or adjustments or performance of procedures
other than those specified in the IT-600 series User’s Guide
may result in hazardous radiation exposure.
Connector
The HA-D51TG Trigger Grip (hereafter referred to as
“the Grip” in this instruction) is an add-on option
available for the IT-600. Follow the instruction below
to install it.
Specifications
Accessories • Screws (4 pcs)
• Instruction (this reference guide)
Dimensions
85 (W) ×77.8 (D) ×127 (H) mm
33
/
8"W ×31
/
16"D ×5"H
Weight 105 g (3.7 oz)
HA-D51TGE.p65 06.9.25, 13:15Page 2 AdobePageMaker6.5J/PPC