manuals.online logo
Brands
  1. Home
  2. •
  3. Brands
  4. •
  5. Casio
  6. •
  7. Digital Camera
  8. •
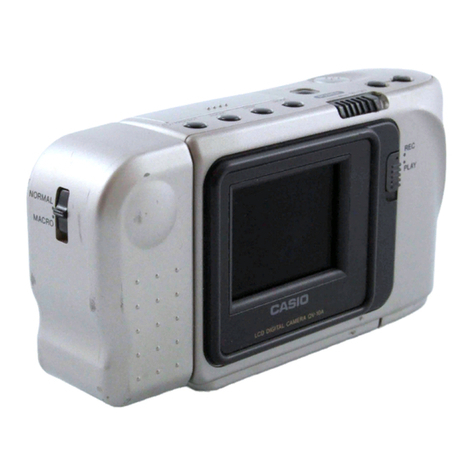
  9. Casio QV-30 User manual

Casio QV-30 User manual

Other manuals for QV-30

3

Other Casio Digital Camera manuals

Casio EX-M20U - 3 User manual

Casio

Casio EX-M20U - 3 User manual

Casio EXILIM EX-ZR400 User manual

Casio

Casio EXILIM EX-ZR400 User manual

Casio EX-Z3 - Exilim 3.2MP Digital Camera User manual

Casio

Casio EX-Z3 - Exilim 3.2MP Digital Camera User manual

Casio QV-70C Troubleshooting guide

Casio

Casio QV-70C Troubleshooting guide

Casio Exilim EX-ZR10 User manual

Casio

Casio Exilim EX-ZR10 User manual

Casio Exilim EX-Z4U Instruction and safety manual

Casio

Casio Exilim EX-Z4U Instruction and safety manual

Casio EXILIM EX-ZR310 Guide

Casio

Casio EXILIM EX-ZR310 Guide

Casio QV-3EX User manual

Casio

Casio QV-3EX User manual

Casio Exilim EX-Z600 User manual

Casio

Casio Exilim EX-Z600 User manual

Casio EXILIM EX-ZS5 User manual

Casio

Casio EXILIM EX-ZS5 User manual

Casio QV-R62 Service manual

Casio

Casio QV-R62 Service manual

Casio EXILIM EX-Z370 User manual

Casio

Casio EXILIM EX-Z370 User manual

Casio Exilim EX-N5 User manual

Casio

Casio Exilim EX-N5 User manual

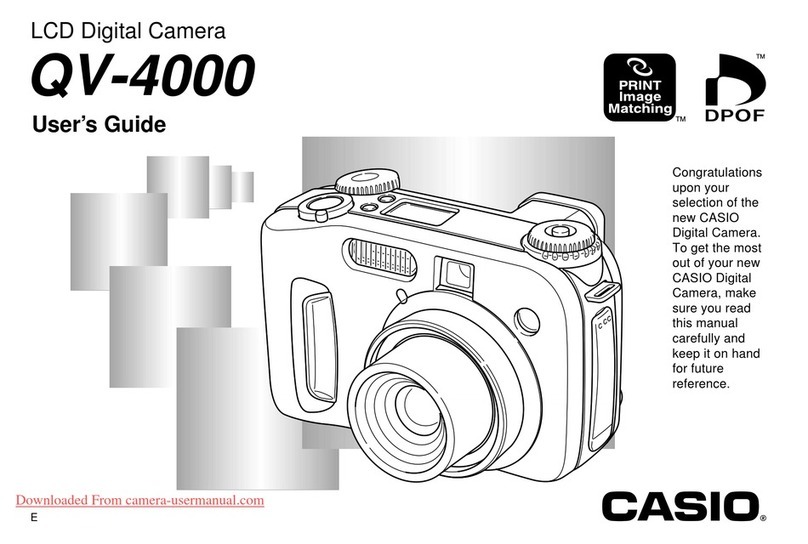
Casio QV-4000 User manual

Casio

Casio QV-4000 User manual

Casio ExilimEX-Z280 User manual

Casio

Casio ExilimEX-Z280 User manual

Casio EX-F1 - EXILIM Pro Digital Camera User manual

Casio

Casio EX-F1 - EXILIM Pro Digital Camera User manual

Casio QV-3500 User manual

Casio

Casio QV-3500 User manual

Casio EX-TR600 User manual

Casio

Casio EX-TR600 User manual

Casio EXZ85BN Owner's manual

Casio

Casio EXZ85BN Owner's manual

Casio GV-10 User manual

Casio

Casio GV-10 User manual

Casio K823PCM1DMX User manual

Casio

Casio K823PCM1DMX User manual

Casio EXILIM EX-JE10 User manual

Casio

Casio EXILIM EX-JE10 User manual

Casio Exilim EX-Z750 User manual

Casio

Casio Exilim EX-Z750 User manual

Casio EXILIM G MA0910-A 1170 User manual

Casio

Casio EXILIM G MA0910-A 1170 User manual

Popular Digital Camera manuals by other brands

Canon WP-DC35 user guide

Canon

Canon WP-DC35 user guide

Xiaomi 70mai Dash Cam Lite user manual

Xiaomi

Xiaomi 70mai Dash Cam Lite user manual

Samsung PL70 Quick start manual

Samsung

Samsung PL70 Quick start manual

GE E1680W user manual

GE

GE E1680W user manual

Canon EOS 1200D instruction manual

Canon

Canon EOS 1200D instruction manual

Tevion MD 86497 user guide

Tevion

Tevion MD 86497 user guide

Exakta VX Features

Exakta

Exakta VX Features

Kodak Digital Science DC120 user guide

Kodak

Kodak Digital Science DC120 user guide

Nikon FM3A Specifications

Nikon

Nikon FM3A Specifications

Vectra Fitness H1 Quick reference guide

Vectra Fitness

Vectra Fitness H1 Quick reference guide

Nikon COOLPIX 775 quick start guide

Nikon

Nikon COOLPIX 775 quick start guide

Olympus IR 500 - 4MP Digital Solutions Camera Manuel de Référence

Olympus

Olympus IR 500 - 4MP Digital Solutions Camera Manuel de Référence

Samsung EC-L100ZBBA brochure

Samsung

Samsung EC-L100ZBBA brochure

FujiFilm FINEPIX BL01124-201 owner's manual

FujiFilm

FujiFilm FINEPIX BL01124-201 owner's manual

Panasonic DMC-L10KPP Service manual

Panasonic

Panasonic DMC-L10KPP Service manual

Hyundai Electric HYU-CC-CHBF12001 Quick installation guide

Hyundai Electric

Hyundai Electric HYU-CC-CHBF12001 Quick installation guide

Sony DSC-WX80 specification

Sony

Sony DSC-WX80 specification

Nikon Nuvis S - Point & Shoot instruction manual

Nikon

Nikon Nuvis S - Point & Shoot instruction manual

manuals.online logo
manuals.online logoBrands
  • About & Mission
  • Contact us
  • Privacy Policy
  • Terms and Conditions

Copyright 2025 Manuals.Online. All Rights Reserved.

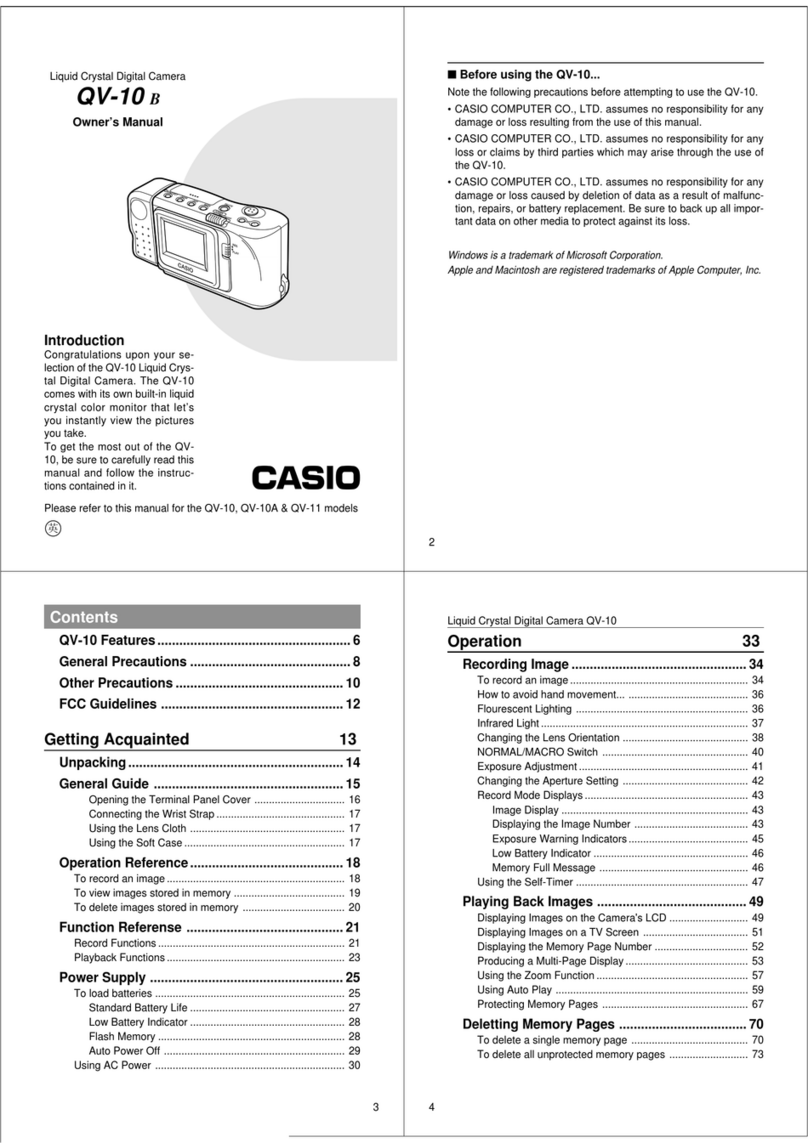
Liquid Crystal Digital Camera
QV-30 Owner’s Manual
英
2
Introduction
Congratulations upon your selection of the QV-30 Liquid Crystal Digi-
tal Camera. The QV-30 comes ith its o n built-in liquid crystal color
monitor that let’s you instantly vie the pictures you take.
To get the most out of the QV-30, be sure to carefully read this
manual and follo the instructions contained in it.
3
Contents
Precautions ..........................................................5
Unpacking.............................................................
General Guide ....................................................10
Top and Display .................................................................. 10
Lens .................................................................................... 10
Bottom ................................................................................ 11
Terminals ............................................................................ 11
Power Supply ..................................................... 13
To load batteries ................................................................. 13
Using AC Po er ................................................................. 18
Recording Images..............................................20
To record an image............................................................. 20
Ho to avoid hand movement…......................................... 22
Fluorescent Lighting ........................................................... 22
Infrared Light....................................................................... 22
Shooting images outdoors .................................................. 23
Changing the Lens Orientation ........................................... 23
NORMAL/MACRO S itch .................................................. 25
S itching Bet een Lenses ................................................. 25
Exposure Adjustment.......................................................... 26
Changing the Aperture Setting ........................................... 27
Record Mode Displays........................................................ 28
Using the Self-Timer ........................................................... 31
Playing Back Images ......................................... 33
Displaying Images on the Camera’s LCD ........................... 33
Displaying Images on a TV Screen .................................... 35
Displaying the Memory Page Number ................................ 36
Producing a Multi-Page Display.......................................... 37
4
Using the Zoom Function.................................................... 41
Using Auto Play .................................................................. 43
Protecting Memory Pages .................................................. 46
Hiding Protected Memory Pages ........................................ 49
Deleting Memory Pages .................................... 50
To delete a single memory page ........................................ 50
To delete all unprotected memory pages ........................... 53
Connecting to Other Devices............................56
The camera terminals ......................................................... 56
Using the Camera with a Connected Device ......
57
Troubleshooting.................................................63
Specifications.....................................................6
About the camera’s backlight… ....................... 70
• CASIO COMPUTER CO., LTD. assumes no responsibility for any
damage or loss resulting from the use of this manual.
• CASIO COMPUTER CO., LTD. assumes no responsibility for any
loss or claims by third parties hich may arise through the use of
the QV-30.
• CASIO COMPUTER CO., LTD. assumes no responsibility for any
damage or loss caused by deletion of data as a result of malfunc-
tion, repairs, or battery replacement. Be sure to back up all impor-
tant data on other media to protect against its loss.
5
General Precautions
Be sure to observe the follo ing important precautions henever us-
ing the QV-30.
All references in this manual to “this camera” and “the camera” refer
to the CASIO QV-30 Digital Camera.
• Never try to take pictures or use the built-in display hile operating
a motor vehicle or hile alking. Doing so creates the danger of
serious accident.
• Never try to open the case of the camera or attempt your o n re-
pairs. High-voltage internal components create the risk of electrical
shock hen exposed. Al ays leave maintenance and repair ork
up to authorized CASIO service providers.
• Keep the camera a ay from ater and other liquids, and never let it
get et. Moisture creates the danger of fire and electrical shock.
Never use the camera outdoors in the rain or sno , at the seashore
or beach, in the bathroom, etc.
• Should foreign matter or ater ever get into the unit, immediately
turn po er off, unplug the AC adaptor from the po er outlet, and
contact your dealer or nearest CASIO service provider. Using the
unit under these conditions creates the danger of fire and electrical
shock.
• Should you ever notice smoke or a strange odor coming out of the
unit, immediately turn po er off and unplug the AC adaptor from the
po er outlet. Using the unit under these conditions creates the dan-
ger of fire and electrical shock. After making sure there is no more
smoke coming from the unit, take it to your nearest CASIO service
provider for repair. Never attempt your o n maintenance.
• If the unit’s case should ever become cracked due to dropping it or
other ise subjecting it to rough treatment, immediately turn po er
off, unplug the AC adaptor from the po er outlet, and contact your
nearest CASIO service provider.
Precautions Liquid Crystal Digital Camera
6
• Never use the unit inside of an air craft or in any other areas here
its use is prohibited. Doing so can result in an accident.
• Physical damage and malfunction of this unit can cause the image
data stored in its memory to be deleted. Be sure to al ays keep
backup copies of data by transferring them to personal computer
memory.
• Never open the battery compartment cover, disconnect the AC
adaptor from the camera or unplug it from the all socket hile the
“WAIT” message is on the LCD. Doing so ill not only make storage
of the current image impossible, it can also corrupt other image data
already stored in camera memory.
MEMORY ERROR message
Any of the follo ing can cause data stored in the camera’s memory to
become corrupted.
• Removal of batteries or disconnection of the AC adaptor during a
record or data communication operation
• Performing an image record operation hile the lo battery indica-
tor is on the display, or disconnection of the connecting cable during
data communication
• Other incorrect operation
In each of the above cases, one of the follo ing memory error mes-
sages appears, and further operation of the camera ill become im-
possible. If this should happen, contact your dealer or the nearest
CASIO service provider as soon as possible.
MEMORY ERROR
#1
CONSULT
THE OWNER'S
MANUAL!
MEMORY ERROR
#2
CONSULT
THE OWNER'S
MANUAL!
MEMORY ERROR
#3
CONSULT
THE OWNER'S
MANUAL!
Memory Error
Message #2 Memory Error
Message #3
Memory Error
Message #1
7
Operating conditions
• This camera is designed for use in temperatures ranging from 0°C
to 40°C (32°F to 104°F).
• Do not use or keep the camera in the follo ing areas.
— In areas subject to direct sunlight
— In areas subject to high humidity or dust
— Near air conditioners, heaters, or other areas subject to tem-
perature extremes
— Inside of a closed vehicle, especially one parked in the sun
— In areas subject to strong vibration
Condensation
• When you bring the camera indoors on a cold day or other ise ex-
pose it to a sudden change of temperature, there is the possibility
that condensation can form on the exterior or on interior compo-
nents. Condensation can cause malfunction of the camera, so you
should avoid exposing it to conditions that might cause condensa-
tion.
• To keep condensation from forming, place the camera into a plastic
bag before moving it into a location that is much armer or colder
than your current location. Leave it in the plastic bag until the air
inside the bag has a chance to reach the same temperature as the
ne location. If condensation does form, remove the batteries from
the camera and leave the battery compartment cover open for a fe
hours.
Precautions Liquid Crystal Digital Camera
8
GUIDELINES LAID DOWN BY FCC RULES FOR USE OF
THIS UNIT IN THE U.S.A. (not applicable to other areas).
Properly shielded cables ith ferrite core must be used for connec-
tion to computer in order to meet FCC emission limits.
Caution : Changes or modification to the product not expressly ap-
proved by CASIO could void the user's authority to operate the prod-
uct.
NOTICE
This equipment has been tested and found to comply ith the lim-
its for a Class B digital device, pursuant to Part 15 of the FCC
Rules. These limits are designed to provide reasonable protection
against harmful interference in a residential installation. This
equipment generates, uses and can radiate radio frequency en-
ergy and, if not installed and used in accordance ith the instruc-
tions, may cause harmful interference to radio communications.
Ho ever, there is no guarantee that interference ill not occur in a
particular installation. If this equipment does cause harmful inter-
ference to radio or television reception, hich can be determined
by turning the equipment off and on, the user is encouraged to try
to correct the interference by one or more of the follo ing mea-
sures:
This device complies ith Part 15 of the FCC Rules. Operation is
subject to the follo ing t o conditions: (1) this device may not cause
harmful interference, and (2) this device must accept any interference
received, including interference that may cause undesired operation.
• Reorient or relocate the receiving antenna.
• Increase the separation bet een the equipment and receiver.
• Connect the equipment into an outlet on a circuit different from that
to hich the receiver is connected.
• Consult the dealer or an experienced radio/TV technician for help.

9
Unpacking
Soft case
Alkaline batteries (AA-size
×
4)
Cleaning Cloth
Wrist Strap
Manual
Special video cable
Check to make sure that all of the items sho n belo are included
ith your camera. If something is missing, contact your dealer as
soon as possible.
Camera
Getting Acquainted
10
General Guide
The follo ing illustrations sho the names of each component, but-
ton and s itch on the camera.
Top and Display
POWER s itch
Function s itch
/PROTECT
(Timer/Protect)
button
ZOOM button
NORMAL/MACRO
s itch
DEL (Delete) button
Shutter button
[+] (For ard)
button
[–] (Reverse)
button
Lens
Lens
DISP (Display) button MODE button
Aperture s itch
LCD
TELE(telephoto)/
WIDE(Wide-angle) s itch
11
Bottom
BRIGHT (brightness) control
• BRIGHT control adjusts the brightness of the image on the LCD.
The brightness is set at the factory to the optimum setting, and nor-
mally does not need adjustment.
General Guide
Battery
compartment
lock
Battery compartment cover
Tripod
hole
Terminals
AC Po er terminal
VIDEO OUT terminal
DIGITAL
terminal
Terminal panel cover
Opening the Terminal Panel Cover
Important!
Make sure that the terminal panel cover is slid fully a ay as sho n in
step 2 above before trying to raise it. Forcing the cover up can seri-
ously damage it.
11
11
122
22
233
33
3
Getting Acquainted
12
Connecting the Wrist Strap
Pass the rist strap through the hole on
the side of the camera as sho n in the
illustration.
Using the Cleaning Cloth
Use the cleaning cloth to ipe finger-
prints and smudges from the LCD and
lens.
• Be sure to avoid applying too much
pressure hen iping the LCD. Too
much pressure can cause permanent
discoloration, abnormal images, and
cracks.
Using the Soft Case
Keep the camera in its soft case to pro-
tect it hen not in use.
11
11
1
22
22
2
13
Power Supply
The camera features a t o- ay po er supply that lets you use either
batteries (AA-size Alkaline) or household AC current.
To load batteries
Be sure that camera po er is turned off henever loading or replac-
ing batteries.
1. Slide the battery compartment lock on the bottom of the
camera in the direction indicated by arrow 11
11
1, and swing
open the battery compartment cover as indicated by arrow
22
22
2.
Be sure to use only AA-size Alkaline batteries. Never use
manganese batteries (see precautions on the next page).
• Make sure that the positive + and negative - ends of the
batteries are facing correctly.
2. Insert four batteries.
Getting Acquainted
14
3. Close the battery compartment cover.
A
• Press do n on the battery compartment cover at the point
marked A in the above illustration until the cover locks into
place ith a click.
Battery Handling Precautions
Incorrect use or handling of batteries can cause them to leak or burst
and seriously damage your camera. Be sure to note the follo ing
important precautions to avoid problems ith batteries.
• Use only LR6 (AM-3) type alkaline
dry cell batteries ith this camera.
Never mix old batteries ith ne
ones. Failure to do so can result in
bursting or leaking of batteries, creat-
ing the danger of fire or personal in-
jury.
• Al ays make sure that the positive +
and negative - ends of the batteries
are facing correctly, as noted by the
markings on the camera itself. Im-
proper loading of batteries can result
in bursting or leaking of batteries, cre-
ating the danger of personal injury or
soiling of objects nearby.
Caution
15
• Remove batteries from the camera if you do not plan to use it for
more than t o eeks.
• Never recharge batteries, never allo direct connection bet een
t o ends of a battery, and never try to take batteries apart.
• Do not expose batteries to direct heat or dispose of them by burn-
ing. Doing so can create the danger of explosion.
• Never mix batteries of different types.
• Dead batteries are susceptible to leakage, hich can cause serious
damage to your camera. Remove batteries from the camera as
soon as you notice they are dead.
• The batteries that po er this camera normally become arm hen
they lose po er. This does not indicate malfunction.
Standard Battery Life
The follo ing sho s standard battery life of batteries hen the cam-
era is used ithout interruption under normal temperatures. Lo er
temperatures can cause shortening of the standard battery life.
Battery type : LR6 (AM-3) alkaline dry cell
Battery Life : Approximately 2 hours
Approximately 96 images
(consecutive recording, one image per minute)
Po er Supply Getting Acquainted
16
Low Battery Indicator
A lo battery indicator ( ) appears on the LCD henever remain-
ing battery po er drops belo a certain level.
When this indicator appears, replace all four batteries ith a fresh set
of ne ones. Once the lo battery indicator appears, you can expect
only about 10 more minutes of operation before total po er failure.
Flash Memory
The camera features flash memory for storage of images. Flash
memory does not require electrical po er to store data, so image
data is retained in memory even hen you turn camera po er off. If
batteries go dead, simply load a set of ne batteries or connect the
AC adaptor and you ill be able to vie images in camera memory.
17
Auto Power Off
Po er automatically turns off henever you do not perform any cam-
era operation for a period of time. Po er turns off after about t o
minutes in the Record Mode or after about five minutes in the Play-
back Mode.
• To restore po er, simply slide the POWER s itch to the right as
you normally do.
Po er Supply
Important!
The Auto Po er Off function does not operate under the follo ing
conditions.
• During Auto Play (page 43)
• When operations are being performed on a computer connected to
the camera via the camera’s DIGITAL terminal.
Getting Acquainted
18
Using AC Power
To po er the camera from standard AC po er, use the optional AC
adaptor (AD-C60).
AC po er terminal
AC adaptor
AC outlet
AC Adaptor precautions
• Never use an electrical outlet hose
voltage is outside the rating marked
on the camera. Doing so can create
the danger of fire or electrical shock.
Use only the optional AC adaptor
specified for this camera.
• Should the cord of the AC adaptor
become damaged (exposed internal
iring or shorts), request a replace-
ment from an authorized CASIO ser-
vice provider. A damaged AC adap-
tor cord creates the danger of fire or
electrical shock.
Caution
19
Po er Supply
• Al ays be sure to use the AD-C60
AC adaptor only. Using any other AC
adaptor can cause damage to the
camera not covered by the arranty.
• When unplugging the AC adaptor
from the all socket, be sure to
grasp the adaptor (not the cord).
• Avoid an undue bending, pulling,
and t isting of the AC adaptor's
cord, and never try to lengthen the
cord by splicing it ith other ire.
• Be sure to s itch po er off before connecting or disconnecting the
adaptor.
• Al ays turn camera po er off before disconnecting the AC adaptor,
even if the camera has batteries installed. If you don't, the camera
ill turn off automatically hen you disconnect the AC adaptor.
Even so, you run the risk of damaging the camera henever you
disconnect the AC adaptor ithout first turning po er off.
• The AC adaptor may become arm to the touch after extended pe-
riods of use. This is normal and is not cause for alarm.
• After use turn off the po er s itch of the camera and unplug adap-
tor from the AC outlet.
Caution
Operation
20
Recording Images
The follo ing procedure provides the basic steps for recording an
image.
To record an image
1. Enter the Record Mode.
• Slide the function s itch to the
REC position.
2. Turn on the camera.
• Slide the POWER s itch in the di-
rection indicated by the arro .
• The POWER s itch automatically
slides back to its original position
hen you release it.
• When po er comes on, the image of the object that is in
front of the camera’s lens appears on the LCD.
• You can perform steps 1 and 2 in either order (1 then 2, or 2
then 1).
3. Set the NORMAL/MACRO switch to the NORMAL position.
• For close-ups, set the NORMAL/
MACRO s itch to MACRO. See
page 25 for details on using this
s itch.
Note
• The camera is designed to refresh the image on the LCD about
seven times per second. Because of this, you may experience a
feeling of jerkiness in the changing image if you move the camera
quickly. This is normal and does not indicate malfunction.
REC
PLAY
MACRO NORMAL
21
Recording Images
4. Record the image.
• Compose the image you ant to
record hile vie ing it on the
LCD.
• It is best to look at the LCD di-
rectly, and not from an angle.
• Take care that your finger is not
blocking the lens.
• Should the lens become dirty, use
the cloth that comes ith the cam-
era to clean it off.
• When the image is situated on the
LCD as you ant it, press the
shutter button.
• Press the shutter button lightly to avoid moving the camera.
See page 22 for information on ho to avoid hand move-
ment.
• The message “WAIT” appears on the LCD for about six sec-
onds along ith the image that as recorded hen you
pressed the shutter button. You can use the camera to take
the next picture after the “WAIT” message disappears.
• Here you could change the function s itch to the PLAY posi-
tion and vie the image you just recorded.
Caution
• Never open the battery compartment cover, disconnect the
AC adaptor from the camera or unplug it from the all
socket hile the “WAIT” message is on the LCD. Doing so
ill not only make storage of the current image impossible, it
can also corrupt other image data already stored in camera
memory.
MACRO NORMAL
REC
PLAY
Operation
22
How to avoid hand movement…
Any hand movement hen you press the shutter button can causes
blurring of the recorded image. Note the follo ing points on avoiding
hand movement.
• Make sure there is no excessive movement of the image of the ob-
ject on the LCD.
• Use a tripod henever possible hen recording images in dim light-
ing. The camera automatically adjusts shutter speed in accordance
ith the brightness of the object hose image is being recorded.
Shutter speed is quite slo for dimly lit objects, increasing the pos-
sibility of blurring caused by hand movement.
Fluorescent Lighting
Fluorescent lighting actually flickers at a frequency that cannot be
detected by the human eye. When using the camera indoors under
such lighting, you may experience some brightness or color problems
ith recorded images. The actual extent of the problems depends on
hat cycle of the fluorescent light’s flicker is occurring hen the
camera’s shutter actually releases. For best results, use a commer-
cially available video lights.
Infrared Light
Infrared light generated by a flash or other source can create image
color problems, such as red areas being recorded as green. Such
color problems ill sho up in the LCD hile you are composing the
image.
23
Recording Images
Shooting Images Outdoors
Strong direct or reflected sunlight can cause recorded images to take
on a greenish tinge. This is due to the characteristics of the camera’s
optical pickup and it does not indicate malfunction of the camera. One
ay you can try to minimize this problem is to set the aperture to [●]
(F8).
Changing the Lens Orientation
The lens of the camera is built into a lens body that is designed to
rotate. This means you can change the angle of the lens ithout mov-
ing the rest of the camera.
Rotates up to 90
°
to ards the front
Rotates up to 180
°
to ards the back
Operation
24
• Any images recorded hile the lens body is rotated so the lens is
pointed from the back of the camera are stored as mirror images of
the image that appears in the LCD before the shutter button is
pressed.
AA
AA
ALCD when shutter button is
pressed (in the Record Mode)
BB
BB
BLCD when image is played
back from camera memory BB
BB
B
AA
AA
A
Important!
• Do not apply excessive force hen rotating the lens body. Doing so
can cause serious damage to the lens.
• Do not carry the camera or move it around hile holding onto only
the lens body.
• Return the lens body to its normal position ( ith the lens pointing
from the front of the camera) before storing the camera.
25
Recording Images
NORMAL/MACRO Switch
The NORMAL/MACRO s itch tells the
camera ho much distance there ill be
bet een the lens and the object hose im-
age you are recording. The follo ing table
describes the conditions covered by each
s itch setting.
Switching Between Lenses
This camera gives you a choice bet een
telephoto (TELE) and ide-angle (WIDE)
lenses. The follo ing sho s the optimum
distances at hich you should use each of
these lenses.
TELE
WIDE
Distances
Lens Aperture Normal Macro
(NORMAL) (MACRO)
Wide Angle (WIDE)
F2.8(○) 50cm ~ ∞10cm ~ 13cm
f = 4.0mm (1.6' ~ ∞) (3.9" ~ 5.1")
F8 (●) 24cm ~ ∞8cm ~ 19cm
(9.4" ~ ∞) (3.1" ~ 7.5")
Telephoto (TELE)
F2.8(○) 250cm ~ ∞50cm ~ 65cm
f = 9.0mm (8.2' ~ ∞) (1.6' ~ 2.1')
F8 (●) 120cm ~ ∞40cm ~ 95cm
(3.9' ~ ∞) (1.3' ~ 3.1')
MACRO NORMAL
* See page 27 for information on changing the aperture.
Operation
26
Exposure Adjustment
This camera features an automatic exposure (AE) function that auto-
matically changes the shutter speed in accordance ith lighting. In
addition, you can also manually adjust the exposure to compensate
for backlighting, indirect indoor lighting, dark backgrounds, and other
special conditions.
To manually adjust the exposure
1. Enter the Record Mode.
• Set the function s itch to the REC
position.
2. Use the [+] and [–] buttons to manually adjust the exposure.
• Pressing [+] makes the image on
the LCD brighter. Use it to adjust
for dim indoor lighting and back-
lighting.
• Pressing [–] makes the image on
the LCD darker. Use it to adjust
for bright sunlight.
3. After adjusting the exposure, press the shutter button to
record the image.
REC
PLAY
+ –
+ –
+
–
27
Recording Images
Notes
• Exposure adjustment is generally expressed in terms of an expo-
sure adjustment value. The exposure adjustment value is al ays
set to zero henever you turn on the camera.
• The exposure adjustment value is changed by 0.25 ith each press
of [+] or [–]. The range of the value is -2 to +2.
• The exposure adjustment value automatically reverts to zero hen-
ever the shutter button is pressed. You can manually reset the ex-
posure adjustment value by using [+] and [–] to change the value
back to zero, hich is indicated hen the
+ –
indicator disappears
from the monitor.
Changing the Aperture Setting
There are t o aperture settings you can use to match lighting condi-
tions. Use the aperture s itch to change the aperture setting.
• Use the [●] (F8) setting to decrease expo-
sure. This setting orks best outdoors.
• Use the [○] (F2.8) setting to increase ex-
posure. This setting orks best indoor and
ith back lit images.
Note
• Also see page 29 for information about exposure arning indica-
tors.
MACRO NORMAL
Operation
28
Record Mode Displays
The follo ing provides details on the images, indicators and mes-
sages that appear on the LCD in the Record Mode.
Image Display
An image of the object that is picked up by the camera’s lens appears
on the LCD. The camera is designed to refresh the image on the LCD
about seven times per second. Because of this, you may experience
a feeling of jerkiness in the changing image if you move the camera
quickly. This is normal and does not indicate malfunction.
Note
• The LCD image that appears in the Playback Mode is more detailed
than the image produced in the Record Mode. Because of this, you
should consider the Record Mode image to be a reasonable fac-
simile of the image that is actually stored in memory.
Displaying the Image Number
The image number is a value that indicates the number of the next
image that ill be recorded. Up to 96 images can be stored in camera
memory.
1. Enter the Record Mode.
• Set the function s itch to the REC
position.
2. Press the DISP button.
REC
PLAY
29
Recording Images
• The image number appears in
the upper right corner of the
LCD. It indicates the number of
the next image that ill be re-
corded. The number 21, for ex-
ample, indicates that there are
20 images in memory, and the
next image ill be number 21.
• To clear the image number from the LCD, press the DISP
button again.
Note
• Note that turning display of the image number on and off in the
Record Mode also affects the display of the memory page number
in the Playback Mode (page 36), and the zoom area indicator used
in the zoom operation (page 41). If you turn display of the image
number off in the Record Mode, for example, the memory page
number ill not be sho n in the Playback Mode.
Exposure Warning Indicators
Exposure arning indicators appear on the LCD henever the light
being picked up by the lens ould result in under exposure or over
exposure of an image.
Under exposure Over exposure
Operation
30
Use the procedure described on page 27 to change the aperture or
change the lighting of the image so the indicator disappears from the
LCD.
Important!
• The exposure arning indicators also appear hen lighting is out-
side the range of the camera. In such a case, changing the aperture
ill not clear the indicator from the LCD.
• The manual exposure adjustment procedure (page 26) cannot be
used hen an exposure arning indicator is on the LCD. Clear the
arning indicator by changing the aperture s itch setting.
• Pressing the [+] or [–] button to adjust exposure hile an exposure
arning indicator is on the LCD clears the arning indicator and
causes a positive [+] or negative [–] exposure correction (EV shift)
indicator to appear.
Low Battery Indicator
The lo battery indicator ( ) appears on the LCD henever re-
maining battery po er drops belo a certain level.
When this indicator appears, replace all four batteries ith a fresh set
of ne ones. Once the lo battery indicator appears, you can expect
only about 10 more minutes of operation before total po er failure.
• See page 13 for details on ho to replace batteries.
31
Recording Images
Memory Full Message
The message “MEMORY FULL” appears
on the LCD henever you press the shut-
ter button hile camera memory is full. If
you ant to record more images, you must
first delete some of the images already
stored in camera memory. See page 50 for
details on ho to delete images.
Using the Self-Timer
With the Self-Timer, the shutter is released 10 seconds after you
press the /PROTECT button.
1. Enter the Record Mode.
• Set the function s itch to the REC
position.
2. Start the Self-Timer operation.
• Place the camera securely on a tripod, desk or other stable
surface, ith the image to be recorded in the LCD.
• After composing the image, press
the /PROTECT button.
• A 10-second countdo n starts on
the LCD. The shutter ill release
automatically hen the end of the
countdo n is reached.
REC
PLAY
Operation
32
• To cancel on ongoing Self-Timer
operation, press the /PRO-
TECT button or shutter button.
Note
• If you use the Self-Timer ith the lens body rotate 180° (page 23),
you can vie the countdo n on the LCD hile aiting for the shut-
ter to release.
Important!
• If battery po er is lo , camera po er may turn off hile a count-
do n is in progress. If this happens, replace the batteries ith ne
ones.
33
Playing Back Images
Playing Back Images
This section describes ho to recall and vie images stored in cam-
era memory.
Displaying Images on the Camera’s LCD
The camera can store up to 96 images in memory. Images are se-
quentially numbered from 1 through 96. Think of camera memory like
a 96-page album of the images you record.
The follo ing procedure describes ho to display images on the
camera’s built-in LCD.
1. Enter the Playback Mode.
• Slide the function s itch to the
PLAY position.
2. Turn on the camera.
• Slide the POWER s itch in the di-
rection indicated by the arro .
The POWER s itch automatically
slides back to its original position
hen you release it.
• When po er comes on, the page
that as displayed hen you last
turned po er off appears on the
LCD.
• You can perform steps 1 and 2 in
either order (1 then 2, or 2 then 1).
REC
PLAY
Operation
34
3. Scroll through the memory pages until the image you want
to view is displayed.
• Press [+] to display the next memory page or [–] to display
the previous memory page.
Notes
• If you set the function s itch to PLAY after recording an image, that
image appears on the LCD first.
• The message “MEMORY EMPTY” appears on the LCD if there are
no images stored in memory hen you enter the Playback Mode.
–
+
–
+
35
Playing Back Images
INPUT
VIDEO
LR
AUDIO
Displaying Images on a TV Screen
Use the special video cable that comes ith the camera to connect it
to a television as illustrated belo , and you can then vie the images
stored in camera memory on the TV’s screen.
Important!
• The camera can be connected only to a TV that is equipped ith a
VIDEO IN terminal.
• Make sure that the po er of both the camera and the TV are turned
off hen making connections.
Accessory video cable
TV
VIDEO IN terminal
After connecting the camera and TV, set the
channel of the TV to the channel used for
video input.
After connecting the camera and TV, use the same procedures as
those described under “Displaying Images on the Camera’s LCD” on
page 33.
Important!
• Note that only images already stored in camera memory can be
vie ed on the TV screen. If you change to the camera’s Record
Mode, the image picked up by the camera’s lens ill not appear on
the TV screen.
VIDEO OUT terminal
Operation
36
REC
PLAY
Displaying the Memory Page Number
The memory page number is a value in the upper right corner of the
LCD that indicates the number of the currently sho n memory page.
1. Enter the Playback Mode.
• Set the function s itch to the
PLAY position.
2. Press the DISP button.
• The memory page number ap-
pears in the upper right corner of
the LCD.
• To clear the memory page num-
ber from the LCD, press the DISP
button again.
Notes
• The letter “P” next to the memory page number indicates that page
is “protected” and cannot be deleted. See page 46 for details about
protecting memory pages.
• Note that turning display of the memory page number on and off in
the Playback Mode also affects the display of the image number in
the Record Mode (page 28), and the zoom area indicator used in
the zoom operation (page 41).
37
Playing Back Images
Producing a Multi-Page Display
Four or nine memory pages can be displayed at the same time. This
feature can be used to display multiple memory pages on the
camera’s built-in LCD, or on the screen of a connected TV.
1. Enter the Playback Mode and turn on the camera.
2. Switch to multi-page display.
• Press the MODE button to
change bet een the different dis-
play formats.
• Each press of MODE changes the
display format in the follo ing se-
quence.
• You cannot use the multi-page
display hile protected memory
pages are hidden (page 49).
REC
PLAY
* The memory page that is sho n on the screen hen you
change to the 4-page or 9-page format is in the first (upper
left) position in the multi-page display.
Operation
38
12
34
56
78
910
11
+
–
+
–
3. Scroll through the pages on the display.
• Use [+] (for ard) and [–] (back) to scroll through the memory
pages. Pages are scrolled one, four, or nine at a time, de-
pending on the display format you are using.
Unused pages are colored gray.
Note
• The brightness of the images on a multi-page display may differ
slightly from the brightness hen a single image is sho n. This is
because the camera automatically uses the brightness setting for
the brightest image contained in the multi-page display for all of the
images.
39
Playing Back Images
Selecting a Memory Page in a Multi-Page Display
You can use the follo ing procedure to select one of the memory
pages in a multi-page display. Then hen you return to the 1-page
display, the memory page you selected ill be the one displayed. The
follo ing procedure uses the 4-page display as an example, but you
can use the same procedure ith the 9-page display.
1. In the Playback Mode, press the MODE button.
• This changes to the 4-page dis-
play.
2. Press the DISP button.
• This causes a hite line to appear
under the first (upper left) page.
This hite line indicates the
memory page that is currently se-
lected.
• If you do not perform any opera-
tion for about 10 seconds, the
hite line disappears from the dis-
play.
In this example, e ill select this page.
Operation
40
3. Move the white line to the memory page that you want to
select.
• Press [+] to move the line to the
right or [–] to move it to the left. In
this example, press [+] three
times or [–] once.
4. Press the ZOOM button.
• The image in the selected
memory page appears as a 1-
page display.
+
X 3