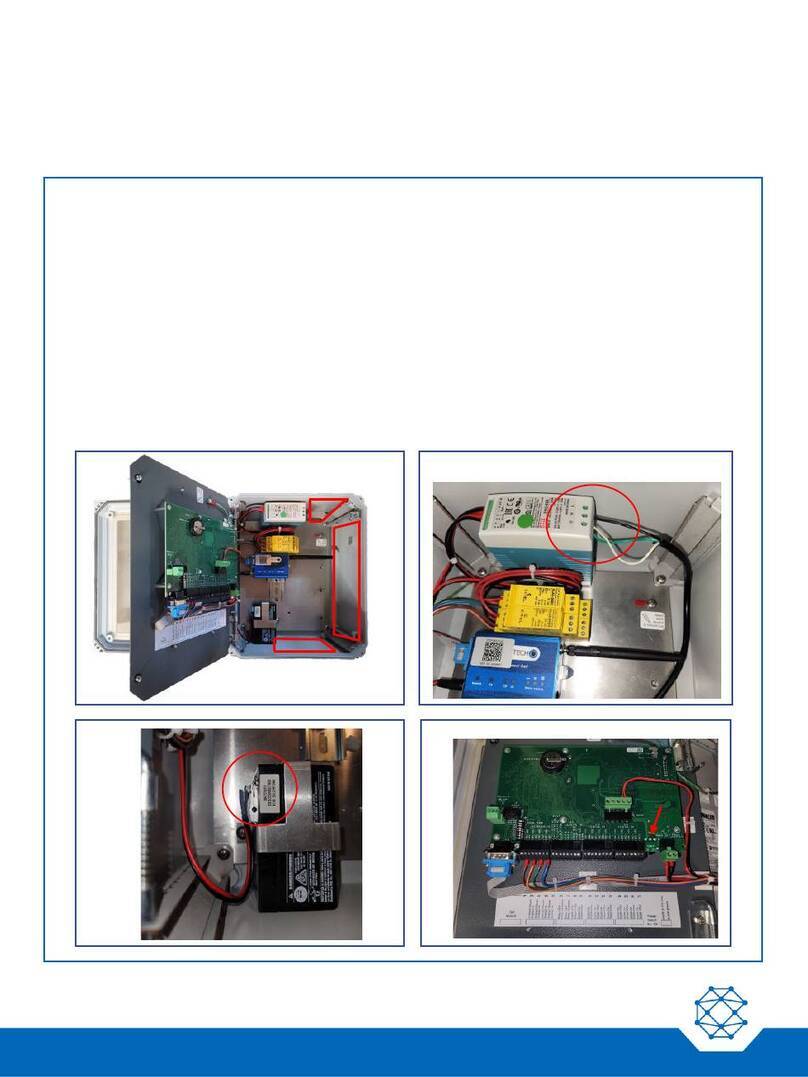
Cattron Aquavx User manual

Aquavx
Remote Monitoring and Alarm Notification
System
User’s Manual
9M02-3100-A001-EN

Aquavx
User’s Manual
2
9M02-3100-A001-EN
Version A
Revision History
VERSION
DATE
NOTES
6.02
Changed some system channel reporting defaults.
Added support for 10 physical digital inputs and 2 physical relay outputs.
RS-485 supported on-board and settings added to System>Port 2 menu.
6.04
Changed FTP default setting.
6.06
RS-485 receiver modifications.
Allow end-of-day report to be set as anytime of the day.
Added Call on Change modem for analog inputs. A user-defined delta of
consecutive readings triggers this alarm.
6.08
Changes to remote diagnostic handler and modem initialization.
6.10
Allow Modbus slave device to be set on/offline through thekeypad.
List of Maintenance options is now circular.
6.12
Changes to debug menus.
7.10
Added support for delta change alarm on analog inputs.
Added support for flow rate and total flow being reported from analog
or digital (pulse) inputs.
Added support for relay control to be energize, de-energize or do nothing
on transitions into and out of alarm conditions.
Added Operator alarms when on-site too long without reporting in
A
10/2020
Document rebranded and contact information updated
Any information furnished by Cattron™ and its agents is believed to be accurate and reliable. All specifications are subject to change without notice.
Responsibility for the use and application
ofCattronproductsrestswiththeendusersinceCattronanditsagentscannotbeawareofallpotentialuses.
Cattronmakesnowarrantiesastonon-infringementnorastothefitness, merchantability,orsustainabilityofanyCattronproductsforanyspecific
or general uses. Cattron Holdings, Inc., or any ofits affiliates or agents shall not be liable for incidental
or consequential damages of any kind. All
CattronproductsaresoldpursuanttotheTermsandConditionsof Sale,a copyof whichwillbe furnisheduponrequest.Whenusedas a tradename
herein,
Cattron means Cattron Holdings, Inc. or one or more subsidiaries of Cattron Holdings, Inc. Cattron™, corresponding logos, and other marks are
trademarks or registered trademarks of Cattron Holdings, Inc. Other marks may be the property of third parties. Nothing herein provides a license
underanyCattronoranythirdpartyintellectualpropertyright.

Aquavx
User’s Manual
3
9M02-3100-A001-EN
Version A
Contents
1 Introduction...........................................................................................................................................................5
1.1 General Operation ....................................................................................................................................5
1.1.1 Acknowledging Alarms ................................................................................................................5
1.1.2 Store and Forward Buffer ............................................................................................................5
2 Installation............................................................................................................................................................6
2.1 Enabling Power...................................................................................................................................... 11
2.2 SIM Card Installation on a Cellular Modem........................................................................................... 11
2.3 Cellular Signal Strength and Registration.............................................................................................. 11
2.4 Connecting to Serial Port 2 for Modbus................................................................................................. 12
3 Navigating the Menu ......................................................................................................................................... 13
3.1 Keypad and Navigating the Menus........................................................................................................ 14
3.2 Menu Structure ...................................................................................................................................... 15
4 Operator Login/Logout ...................................................................................................................................... 16
5 Viewing Channel Data....................................................................................................................................... 17
6 Viewing Alarms and Cellular Status.................................................................................................................. 19
7 Viewing the HOME Screen ............................................................................................................................... 21
8 Armed and Disarmed ........................................................................................................................................ 22
9 User-Defined Keys............................................................................................................................................ 23
10 Viewing Alarm History....................................................................................................................................... 24
11 Viewing Event History ....................................................................................................................................... 25
12 Scrolling Channel Status................................................................................................................................... 26
12.1 Program a Channel to be Included in the Scrolling Screens................................................................. 26
12.2 Scrolled Channels.................................................................................................................................. 26
13 Manually Controlling Relays.............................................................................................................................. 27
14 Programming from the Keypad......................................................................................................................... 28
14.1 How to Read the Program Screen......................................................................................................... 28
14.2 Site Setup .............................................................................................................................................. 29
14.3 Pump Setup........................................................................................................................................... 31
14.3.1 Pump Parameters..................................................................................................................... 31
14.4 Cell Setup .............................................................................................................................................. 33

Aquavx
User’s Manual
4
9M02-3100-A001-EN
Version A
14.4.1 Cell Parameters........................................................................................................................ 33
14.5 FTP Setup.............................................................................................................................................. 34
14.5.1 FTP Parameters ....................................................................................................................... 34
14.6 Serial Ports 1 and 2 Setup..................................................................................................................... 35
14.6.1 Serial Port Parameters ............................................................................................................. 35
14.7 Channel Setup....................................................................................................................................... 37
14.7.1 System Channel Parameters.................................................................................................... 37
14.7.2 Digital Input Parameters........................................................................................................... 39
14.7.3 Relay Output Parameters......................................................................................................... 40
14.7.4 Analog Input Parameters.......................................................................................................... 41
14.7.5 Modbus Digital Input Parameters............................................................................................. 42
14.7.6 Modbus Analog Input Parameters............................................................................................ 43
14.7.7 Modbus Digital Output Parameters .......................................................................................... 44
14.7.8 Derived Analog Parameters ..................................................................................................... 45
15 Receiving SMS Commands.............................................................................................................................. 46
15.1 Overview................................................................................................................................................ 46
15.2 SMS Commands.................................................................................................................................... 46
15.3 Making Configuration Changes ............................................................................................................. 46
16 Technical Support ............................................................................................................................................. 61
17 Certifications ..................................................................................................................................................... 62
18 Glossary............................................................................................................................................................ 63
18.1 Cell Statuses.......................................................................................................................................... 69

Aquavx
User’s Manual
5
9M02-3100-A001-EN
Version A
1 Introduction
Aquavx is the most user-friendly and reliable remote monitoring, reporting and alarm notification system available.
Mounted in a NEMA 4X enclosure, Aquavx provides simple programming either locally through the integral
keypad and display or remotely via the Aquavx internet-based hosted services.
Installation is made easy, as all wiring connections are made through quick disconnect-type connectors.
1.1 General Operation
Aquavx monitors 10 dry contact/digital inputs, four analog inputs, 20 Modbus digital inputs and 30 Modbus analog
inputs continuously. Control, either locally or remotely, is available through two relays and eight Modbus digital
outputs.
Aquavx reports information to the RemoteIQ hosted-service system based on the following:
•
Time interval
•
Channels going into/out of alarm conditions
•
Daily statistics reported at the end of day
Alarms and Event History can be viewed locally on the Aquavx display, allowing the operator an easy method of
determining how the system has been operating over time.
Aquavx supports Operator login/logout, with this information sent immediately to the hosted-service system.
This manual is applicable to firmware versions 6.00 and later.
1.1.1 Acknowledging Alarms
Alarms are automatically acknowledged once the Aquavx hosted-service system has successfully received the
data from Aquavx.
Aquavx will continue to send information until the internet hosted-service has successfully received the data.
1.1.2 Store and Forward Buffer
Aquavx has a 390 entry store and forward buffer to save any records that should be sent to the internet hosted-
service in the event that communication to the hosted-service has been interrupted for any reason. When
communication is re-established, the buffer is sent all at once.
The buffer can be cleared through the Maintenance Menu –either one entry at a time or all entries at once.

Aquavx
User’s Manual
6
9M02-3100-A001-EN
Version A
2 Installation
Aquavx is shipped mounted inside a NEMA 4X enclosure. The dimensions of the enclosure are shown below.
Figure 1: Panel Mount Mounting Holes
The connectors for Primary Power, Phone and I/O use quick disconnect plugs. The diagram below shows the
location of these connections for the NEMA 4X enclosure.
Figure 2: Field Wiring Diagram

Aquavx
User’s Manual
7
9M02-3100-A001-EN
Version A
Connection Point
Function
Power
Connect the included power connection from the wall-mount power supply to Aquavx.
Power requirement is 9-12 VDC.
On/Off
To supply power to Aquavx, flip the switch. Aquavx will power up and the display will
read “RMS Aquavx”.
Digital Inputs
For Dry Contacts:
Connect from the ‘DIN+’ to one side of your dry contact and connect from the DIN#
SIG to the other side of your contact.
For example, DIN1 below is connected to a normally open contact and DIN3 is
connected to a normally closed contact.

Aquavx
User’s Manual
8
9M02-3100-A001-EN
Version A
Connection Point
Function
Digital Voltage
Inputs
For Voltage inputs up to 25 VDC:
Connect the positive voltage of your input to the DIN# SIG input on Aquavx.
For example, DIN3 below is connected to a voltage input.
Note: Do not connect anything to the ‘+’ input.
Note: If the grounds are not already common between your device and Aquavx,
connect the “-”signal of the Aquavx power supply to a signal ground on your
device.
For Contacts that Close to Ground:
Jumper the DIN# ‘+’ and DIN# SIG input together. Connect another wire from the
DIN# SIG input to the contact that will close to ground.
Note: Set the channel to Normally Closed.

Aquavx
User’s Manual
9
9M02-3100-A001-EN
Version A
Connection Point
Function
Relay Output
Normally Open 0.5 A relay output:
Connect your device or another interposing relay to the two contacts of the desired
relay.

Aquavx
User’s Manual
10
9M02-3100-A001-EN
Version A
Connection Point
Function
Analog Inputs
For Voltage inputs up to 5 VDC:
Set the Dip Switch for the desired channel to the left, which specifies the input is a
voltage input.
Wire the ground or (-) input to the AIN# GND contact.
Wire the voltage or the (+) to the AIN# IN contact.
For Current inputs up to 20 mA:
Set the Dip Switch for the desired channel to the RIGHT, which specifies the input is a
4-20 mA input.
CAUTION
WHEN USING CURRENT INPUTS (0-20 MA OR4-20 MA):
•
SET THE DIP SWITCH PRIOR TO CONNECTING ANY WIRES INTO
AQUAVX.
DO NOT APPLY A CURRENT IF THE SWITCH IS SET TO VOLTAGE.
!

Aquavx
User’s Manual
11
9M02-3100-A001-EN
Version A
2.1 Enabling Power
Connect the provided DC power supply, or another source of 9 to 17.5 VDC, to thePower connection. Move the
On/Off switch to the ON position. Aquavx will start its power-up diagnostics.
Upon completing the power-up diagnostics, Aquavx displays the HOME screen, which shows the current state of
Aquavx as well as the date and time.
If the On/Off switch is left ON and there is no DC power being applied, Aquavx will run on battery power. Aquavx
can run on battery for 16 hours without DC power and then it will be recharged when DC power is restored.
Note: If Aquavx is left running on battery for longer than 16 hours, the battery will be drained. It will not be
able to be recharged and it will have to be replaced.
2.2 SIM Card Installation on a Cellular Modem
Aquavx is equipped with an internal cellular modem. A SIM card mustbe installed for Aquavx to send reports to
the hosted-service system. The SIM card is installed in a slot on the side of the cellular modem.
The card is installed with the circuit facing down. Be sure to LOCK the SIM card in place. The SIM should NOT
stick out; it should be pushed in far enough to allow the latch to close freely and lock.
2.3 Cellular Signal Strength and Registration
The Cellular signal strength and registration can be viewed by pressing the ENTER key from the HOME
(Armed/Disarmed) screen.

Aquavx
User’s Manual
12
9M02-3100-A001-EN
Version A
2.4 Connecting to Serial Port 2 for Modbus
Serial port 2 is used to communicate to Modbus devices.
Physically, you can connect to serial port 2 via RS-232 using the cable that has a DB9 on one end and a 2x5
rectangular connector on the other. This cable attaches to the Aquavx board at location J1 on the far left-hand
side of the board.
Optionally, you can connect via RS-485 using the 3-position terminal block located atJ6, next to the J1 connector.
Dip Switch position 1 is used to insert a RS-485 terminator into the circuit. Move the switch to the Right or ON
position to insert the terminator into the circuit.
You must configure Serial Port 2 from the System menu. Set the port to Master with the appropriate baud rate;
the other settings rarely need to be modified from the system defaults, but they are available if they need to be
altered for your configuration.

Aquavx
User’s Manual
13
9M02-3100-A001-EN
Version A
3 Navigating the Menu
Navigating the menu structure is much like a cellular phone. The arrow keys are used to navigate between
options using the left and right keys and to drill down into an optionby pressing the DOWN arrow ().
Key
Function
ENTER
Accept the current entry.
Move to the Previous option –on this level.
Move to the Next option –on this level.
Menu movement –Move Into this option.
In PROGRAMMING –select available option for this parameter. Hold down to cycle faster.
Program
Enter PROGRAMMING for this option.
Control
Relay On/Off Control and Operator In/Out Control.
Clear
Single press erases the previous character.
Holding down erases the entire entry.
HOME
Move Up a level.
Arm/Dis
Arm and Disarm Aquavx from reporting to the hosted-services.
A-Z
In PROGRAMMING –cycle through upper-case alphabet. Hold down to cycle faster.
a-z
In PROGRAMMING –cycle through lower-case alphabet. Hold down to cycle faster.
0-9
In PROGRAMMING –cycle through numbers, period and minus sign. Hold down to cycle
faster.
Symbols
In PROGRAMMING –cycle through available symbols. Hold down to cycle faster.
f1-f3
User-defined keys. Press and hold down while on any screen in the entire menu system to
save it as the function of the key. When pressed again, Aquavx will display that screen and
jump to that portion of the menu system.

Aquavx
User’s Manual
14
9M02-3100-A001-EN
Version A
3.1 Keypad and Navigating the Menus

Aquavx
User’s Manual
15
9M02-3100-A001-EN
Version A
3.2 Menu Structure

Aquavx
User’s Manual
16
9M02-3100-A001-EN
Version A
4 Operator Login/Logout
To assist in keeping track of who and when personnel are on-site, Aquavx provides an Operator Login/Logout
screen. This not only provides validation of on-site visits, but it can act as a lone-man or man-down system as
well.
Aquavx immediately reports both Login and Logout actions to the internet hosted-services.
To Login when arriving on a site:
To Logout when leaving a site:

Aquavx
User’s Manual
17
9M02-3100-A001-EN
Version A
5 Viewing Channel Data
There are two methods available to view channel data, as follows:
•
Automatically using the Scrolling feature
•
Manually selecting a desired channel
For each channel being viewed, the current value is displayed first. To view more detailed information about a
channel, press the DOWN arrow () key.
The following shows the type of information available for each channel type that can be accessed by repeatedly
pressing the DOWN arrow once viewing the desired channel.
The DOWN arrow can also be used from the Scrolling screen to view more detailed information.
Digital
(system, physical and Modbus)
Analog
(physical, Modbus and derived)
1st screen
State
Normal, Alarm
State
Normal, Low, High
2nd screen
Value
Current value
Value
Current value
3rd screen
Min cycle
Minimum time in the non-
normal state during a
single cycle today (*)
High limit
Current setting for the high
limit
4th screen
Max cycle
Maximum time in the
non-normal state during
a single cycle today (*)
Low limit
Current setting for the low
limit
5th screen
Duration Limit
Current setting for the
duration (run-time) limit
(*)
Min
Minimum value for today
6th screen
Count Limit
Current setting for the
count (cycle) limit (*)
Max
Maximum value for today
7th screen
Duration
Total time in the non-
normal state for today (*)
Total
Totalized value for today;
added every second (*)
8th screen
Count
Total number of counts
(cycles) for today (*)
Continuing to press the DOWN arrow cycles the screen back to the top of the list of details.
(*) –Not available on Modbus Channels

Aquavx
User’s Manual
18
9M02-3100-A001-EN
Version A

Aquavx
User’s Manual
19
9M02-3100-A001-EN
Version A
6 Viewing Alarms and Cellular Status
To View Alarms and Cell status from the HOME (Armed/Disarmed) screen, press the ENTER key.
When Alarms are active, the HOME screen displays Alms in the bottom right-hand corner of the screen. To view
active alarms, press the ENTER key. To view additional details about the alarm, continue to press the DOWN
arrow () key.
Press the HOME key to move back up the menus, or the UP/DOWN arrow () keys to move between detail
screens.

Aquavx
User’s Manual
20
9M02-3100-A001-EN
Version A
Alarm conditions include the following:
Alarm State
Meaning
Digital Channels (physical, system and Modbus)
notnorm
Input is in the Not Normal state for less than the Alarm Delay time specified for
this channel.
alm
Input has been in the Not Normal state for more than the Alarm Delay period.
run
A Run (duration) Alarm exists since the input has been in the Not Normal state
for longer than the Duration Limit during this day. (Not available on Modbus).
starts
A Counts (start) Alarm exists since the input has moved from the Normal to
Not Normal state more times than the Counts Limit during this day. (Not
available on Modbus).
Analog Channels (physical, derived and Modbus)
lo
Input has been below the Low Limit for longer than the Alarm Delay.
hi
Input has been above the High Limit for longer than the Alarm Delay.
fsafe
Input has been either above the High Fail Safe or below the Low Fail Safe for
longer than the Alarm Delay.
notnorm
Input is in the Not Normal state for less than the Alarm Delay time specified for
this channel.
Other manuals for Aquavx
2
Table of contents
Other Cattron Water System manuals
Popular Water System manuals by other brands

BIO-MICROBICS
BIO-MICROBICS MicroFAST 4.5 installation manual

NDS
NDS Dura Slope quick start guide

Kenmore
Kenmore 625.347001 owner's manual

Beretta
Beretta IDRA MS 150 LE Installation and operation manual

EcoQuest
EcoQuest SpringHouse owner's manual

Werner Dosiertechnik
Werner Dosiertechnik Sauna Plus 8 Basic operating instructions

Elkay
Elkay MFWSF100 Mounting instructions

kinetic
kinetic Arsenic Guard Homeowner's information

Alpha
Alpha SolarSmart 100 Installation and servicing instructions

Beko
Beko QWIK-PURE 10 Installation and operation manual

Latham
Latham COVERSTAR AutoDrain Usage and installation manual

EINHELL
EINHELL Royal HWA 2800 operating instructions