CBT Supply flipIT RIMLESS User manual

flipIT®
RIMLESS
Convertible Computer Workstation
ASSEMBLY INSTRUCTIONS
US Patent No. 7,784,412
How to install flipIT® Rimless
Convertible Computer Workstation
into a factory desktop.
Technical Support: 800-770-7042 © 2012 CBT Supply, Inc. All rights reserved.

Tools Required
Cordless power driver
#2 driver
blade screwdriver
straight edge
3/8” hex nut driver
5/32” hex key
adjustable crescent wrench
3/8” open end wrench
7/16” open end wrench
WARNING:
Always use power tools in accordance with
manufacturer’s safety instructions.
Parts Identification
Euroscrews 8mm, for installing flipIT lid
brackets and VESA mount: 9 total
Post for gas spring, 1.
Installs to arm.
Pivot posts, 2, installs into
flipIT brackets.
Keyboard screws: 8.
flipIT bracket screws: 8.
1/2” #2 Phillips drive wood
screws.
VESA mounting bracket. Use your LCD monitor’s VESA
mounting screws.
2 FIK19R Rimless flipIT ® by SMARTdesks® www.smartdesks.com ©2012 CBT Supply, Inc. 800-770-7042

Simple arm with nylon
bushing, cable to
keyboard tray, beta clip,
short bracket.
Post arm with nylon
bushing, cable to
keyboard tray, beta
clip, long bracket.
Rest assembly: padded
rest, adjustment nut &
bolt, mounting bracket.
Gas spring, pneumatic
cylinder with locking hubs.
FIK19R Rimless flipIT ® by SMARTdesks® www.smartdesks.com ©2012 CBT Supply, Inc. 800-770-7042 3

4 FIK19R Rimless flipIT ® by SMARTdesks® www.smartdesks.com ©2012 CBT Supply, Inc. 800-770-7042
1. Place flipIT lid into cut-out.
Keyboard installs here
Mounting holes “point”
to keyboard edge
It is easiest to assemble on a table prepared
with a furniture blanket to protect the ther-
mofoil surface. Place the flipIT lid into the
cut-out with the VESA bracket mounting
holes “pointing”to the side with curved edge,
where the keyboard tray installs.
On flipIT lid, use a #2 Phillips to break the thermofoil
pilot holes for easier installation.
2. Install simple arm
Using two 1/2” Phillips drive wood screws,
install the short bracket loosely so the micro-
gap can later be adjusted. The bracket slots
are oblong for this purpose.
Install the pivot into
the short bracket,
finger tight, so it
can be adjusted for
depth.
Press a nylon bushing
into the simple arm
so the spacer washer
is between the
moving parts.

FIK19R Rimless flipIT ® by SMARTdesks® www.smartdesks.com ©2012 CBT Supply, Inc. 800-770-7042 5
Capture the pivot in the simple arm nylon
bushing. Use the 7/16”open end wrench
and 5/32” hex key to tighten the pivot. This
operation is setting the depth of the flipIT lid
flush with the top surface. It is using the work
surface as a reference.
This adjustment may have to be refined after
the monitor is installed. Note that this is the
pivot that will be loosened and re-tightened
to complete that adjustment using a straight
edge as a reference on the top surface.
3. Install post arm
Orient the long bracket with the curve to
the keyboard and the L going away from the
cutout. Install fully tightened with four 1/2”
wood screws.
Insert the post for the
gas spring into the
middle position of
the front slot of the
long bracket.
Fully tighten using
7/16”open end wrench
and adjustable
crescent wrench.

6 FIK19R Rimless flipIT ® by SMARTdesks® www.smartdesks.com ©2012 CBT Supply, Inc. 800-770-7042
Press the nylon bushing into the post arm so
the bushing spacer works between the
moving parts.
Insert the pivot into the nylon bushing and
insert the threaded part into the back slot of
the long bracket.
Spin on hex nut and
lock washer, then
fully tighten the pivot
using 7/16”open end
wrench and 5/32”hex
key. This uses the work
surface as a reference
to set the lid flush with
the top.
Note that this adjust-
ment may need to be
refined after the moni-
tor is installed.
Using 3 Euroscrews
each, install the arm
assemblies to the
flipIT lid.

FIK19R Rimless flipIT ® by SMARTdesks® www.smartdesks.com ©2012 CBT Supply, Inc. 800-770-7042 7
4. Install gas spring cylinder
Use a flat blade screwdriver to remove the locking hubs, then press
the black barrel end of the cylinder onto the arm mounting post.
Leave the silver shaft end uninstalled.
Press the locking hub into place to finish the installation.
5. Install VESA mount Use three Euroscrews
to install the VESA
bracket.
Most monitors use
the second from the
top position for bal-
anced operation.
Your monitor should
clear the rest by 1/2”
or less. Choose the
set of pilot holes that
fits your monitor.
Check and set the microgap
Inspect the microgap to
make sure it is even on all
sides. Set this in position
now by tightening the
short bracket all the way.
Refer to step 2, simple arm.

8 FIK19R Rimless flipIT ® by SMARTdesks® www.smartdesks.com ©2012 CBT Supply, Inc. 800-770-7042
Assemble the rest
bracket and padded
rest together using
the hex nut, lock
washer and hex key
head bolt.
Leave the hex nut
finger tight so it can
be adjusted.
Use two 1/2” wood
screws to install
bracket.
Use the 5/32” hex key and 3/8” open end
wrench to tighten the rest. This is using the
table top as a reference and the pressure you
place on the rest to simulate the weight of
the monitor.
The weight of the monitor compresses the
rest, so it will be necessary to adjust the top
again after the monitor has been installed.
Be familiar with this adjustment.
7. Install three legs
Use a Phillips #2 drive or 3/8”hex drive to
install eight 1/2” bolts for each leg.

FIK19R Rimless flipIT ® by SMARTdesks® www.smartdesks.com ©2012 CBT Supply, Inc. 800-770-7042 9
8. Install keyboard tray
Install L bracket mounts, tabs in, using the 3rd hole from the L. Self-
tapping machine screws are packaged with the brackets. Use a #2
screwdriver—NOT a power driver.
Place the keyboard
tray over its pilot
holes, then install
using two 1/2” wood
screws per bracket: 8
total.
Insert tray cable
through slot in tray
that allows the cable to
clear the mechanism.
Secure it with a
beta clip.

10 FIK19R Rimless flipIT ® by SMARTdesks® www.smartdesks.com ©2012 CBT Supply, Inc. 800-770-7042
Almost done.
Everything is complete, except for install-
ing the LCD monitor, CPU, modesty panel
and doing the wire management.
Once the LCD monitor is installed, the lid
will need to be adjusted flush with the
top.
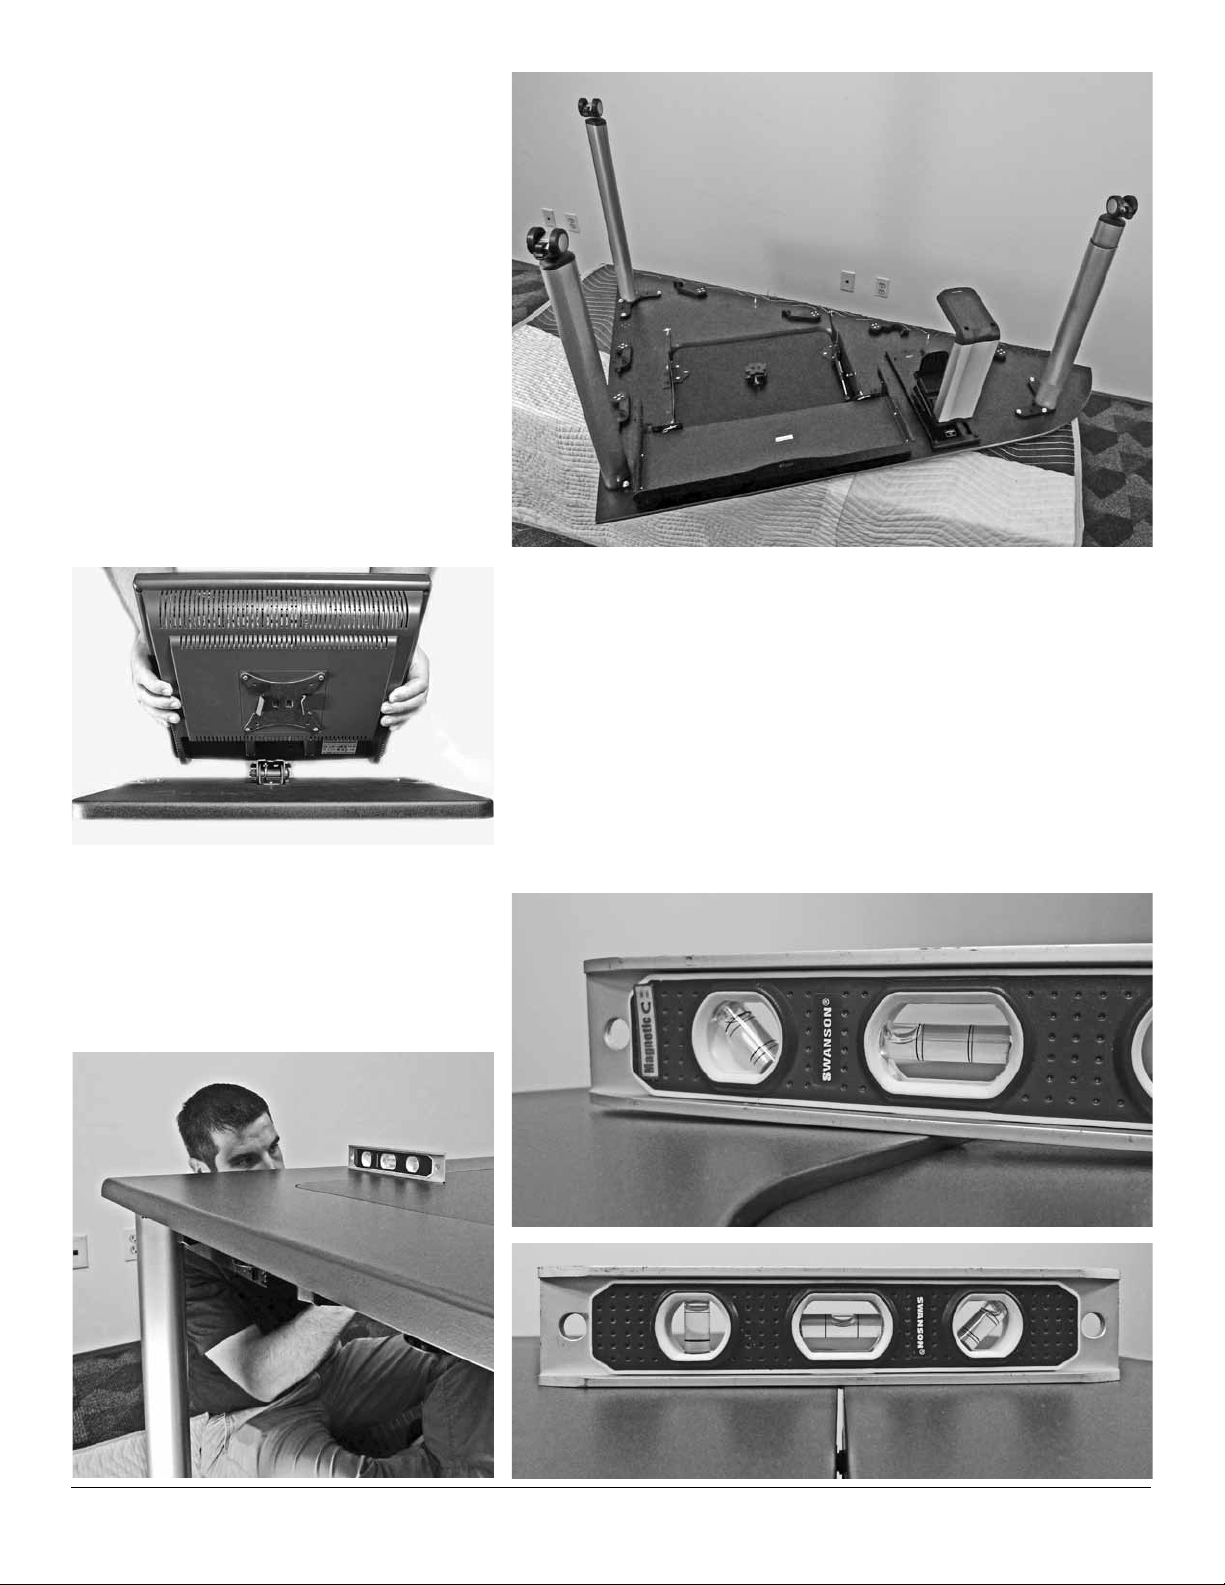
Turn the table on its feet to complete the
installation.
Use the 4 screws provided with your monitor to install the VESA
mount. The VESA mount captures the bracket and gravity does the
rest. A spring-loaded pin holds the monitor in place at every angle.
Close the lid CAREFULLY, because the gas spring is not connected.
Now its time to fine tune the flipIT Lid.
Install the monitor
Make lid flush
Use a straight edge as a reference. Use the
weight of the monitor to make the front rest
adjustment first.
Monitor weight may compress the pad,
causing the lid to sink in.
Use 3/8” open end wrench and 5/32” hex key to loosen,
adjust and re-tighten the rest.

Making the lid flush
with the top
The sides will probably be very close, because
you used the work surface as a reference for
the pivots, but the weight of the monitor
compresses the pad in its own way that can’t
be simulated on the initial installation.
Use 3/8”open end wrench and 5/32”hex
key on the rest with the monitor installed.
Install the gas spring, silver shaft to the long bracket.
Remove locking hub, press end onto post, press in locking
hub. Install monitor.
Then remove the monitor to get access to the side adjustments. If necessary, adjust
the left and right pivots using the 5/32”hex key and 7/16”open end wrench.
800 770 7042
shaping conferencing & educationsm
FIK19R Rimless flipIT ® by SMARTdesks® www.smartdesks.com ©2012 CBT Supply, Inc. 800-770-7042 11

Table of contents
Other CBT Supply Desktop manuals