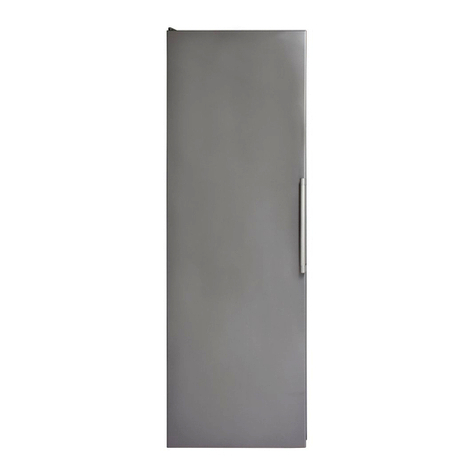
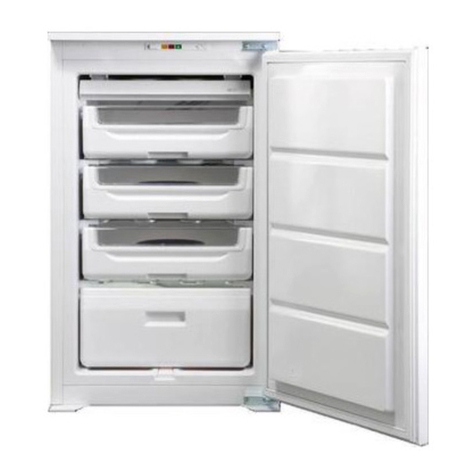
CDA FF881 User guide

1
FF881
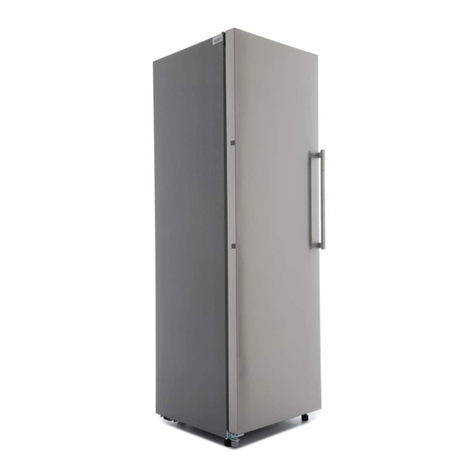
Freestanding full height frost free freezer
Use and maintenance

2
Contents:
3 Important information
4 Before first use
5 Important safety notes
6 Important notes on use of the freezer
7 Important notes on first use and general usage
8 Freezer layout and storage
9 Control panel layout
10 Setting the temperature
10 Super freeze mode
11 Eco mode
11 Safety key lock
11 Screen saver mode
12 Timer function
12 Mute function
12 Door open alarm
13 Maintenance, care and cleaning
14 Troubleshooting
15 Freezer noise
16 Fault codes
16 Installation and ventilation
17 Appliance dimensions
18 Electrical information
19 Climate range
20 Warranty and service

3
Important
CDA cannot be held responsible for injuries or losses caused by
incorrect use or installation of this product. Please note that CDA
reserve the right to invalidate the guarantee supplied with this product
following incorrect installation or misuse of the appliance.
Under no circumstances should any external covers be removed for
servicing or maintenance except by suitably qualified personnel.
Do not use the appliance if the plug, the mains cord or the
appliance itself is damaged. If the mains cord is damaged, you
must have it replaced by the manufacturer, or an authorised
service centre or similarly qualified person in order to avoid a
hazard.
Appliance information:
Please enter the details on the appliance rating plate below for
reference, to assist CDA Customer Care in the event of a fault with
your appliance and to register your appliance for guarantee purposes.
Appliance Model
Serial Number
EU Declarations of Conformity:
This appliance meets the requirements of all applicable EU directives
with the corresponding harmonised standards which provide for CE
marking.
WARNING: Risk of fire/flammable materials

4
IMPORTANT INFORMATION FOR CORRECT DISPOSAL OF THE
PRODUCT IN ACCORDANCE WITH WEEE DIRECTIVE 2012/19/EU.
At the end of its working life, the product must not be disposed
of as urban waste. It must be taken to a special local authority
dierentiated waste collection centre or to a dealer providing this
service.
Disposing of a household appliance separately avoids possible
negative consequences for the environment and health deriving from
inappropriate disposal and enables the constituent materials to be
recovered to obtain significant savings in energy and resources. As a
reminder of the need to dispose of household appliances separately,
the product is marked with a crossed-out wheeled dustbin .
Before first use of the freezer
You must allow the freezer to settle for at least five hours prior to
switching the power on.
It is recommended that you clean the interior of the appliance prior to
first use, using a solution of bicarbonate of soda and warm water then
thoroughly dry the interior.
The freezer may have an odour to it at first use. This will disappear
as the appliance cools.
This appliance has been designed with ease of use in mind but
please read the following instructions carefully to ensure you
familiarise yourself with the appliance and its operation. This will help
you to get the best results and also help to prevent you from being
charged for unnecessary service calls.

5
Important
This appliance is not intended for use by persons (including children)
with reduced physical, sensory or mental capabilities, or lack of
experience and knowledge, unless they have been given
supervision or instruction concerning use of the appliance by a person
responsible for their safety.
•Children must not play with the appliance.
•Cleaning and user maintenance must not be carried out by chil-
dren without supervision.
•If the appliance is switched o, you should allow five minutes
before switching it on again to prevent unnecessary damage to
the compressor.
•WARNING - Keep ventilation openings clear of obstruction.
•WARNING - Do not use mechanical devices or other means to
accelerate the defrosting process.
•WARNING - Do not use electrical appliances inside the food
storage compartments of the appliance.
•WARNING - Do not damage the refrigerant circuit.
•WARNING - Do not store explosive substances such as aerosol
cans, with a flammable propellant, within this appliance.
•Children should be supervised to ensure that they do not play with
the appliance.
•This appliance is not intended for use at altitudes exceeding 2000
metres.
•This appliance is a household freezer and is intended to be used
in domestic environments and similar applications such as sta
kitchen areas, farm houses and bed and breakfast type environ-
ments. It should not be used in commercial environments.
•If your appliance uses R600a as a refrigerant (this information will
6
be provided on the rating plate) you must take care during trans-
portation and installation to prevent the cooling system elements
from being damaged. R600a is an environmentally friendly and
natural gas, but is explosive. In the event of a leak due to damage
to the cooling system, move your freezer away from open flames
or heat sources and ventilate the room in which the appliance is
located for 5 minutes.
Freezer use
•The freezer compartments are designed to store only frozen food.
•Never put hot or warm foods in the freezer, allow them to cool fully
before putting them into the freezer.
• Follow the instructions on the food packaging for storage of frozen
food. If no information is provided, foods should not be stored for
more than three months after the purchase date.
•Store food in small packages (ideally less than 2kg). This reduces
the freezing time and improves the quality of the food after
thawing.
•Wrap food before putting into the freezer. To stop the wrapping
sticking together, ensure it is dry.
• Label the food before freezing with information including type of
food and dates of storage and expiry.
•Once food is thawed, it must not be refrozen. Only defrost as much
food as is required to prevent wastage.
• Bottled or canned drinks should not be stored in the freezer
compartments as they could explode.

7
•The maximum amount of fresh food that can be frozen within a 24
hour period is 8 kg.
•Do not attempt to freeze more than the maximum amount.
•To freeze fresh food more quickly, set the control panel to super
freeze a few hours prior to placing the food in the freezer. After
the food is frozen, cancel the setting.
• Where possible, do not overload your freezer compartments.
This allows for air circulation around the contents and keeping
airways etc. as unobstructed as possible will ensure optimum
performance.
Important notes on first use and usage
•This refrigeration appliance is not intended for use as a built in
appliance
•When you first switch on the appliance, you should ideally run
it without any contents for the first 24 hours and not open the
appliance doors. If you need to use it straight away, try not to put a
large quantity of food inside.
•The appliance will work continuously until it comes down to the
correct temperature.
•This appliance features a five minute delay function which, after
power has been cut and restored or the appliance turned o and
on again, allows five minutes to pass before switching the cooling
system on again. This is to prevent unnecessary damage to the
compressor.
•The climate class for this appliance is T/SN. This means ambient
temperatures should not fall below 10°C or exceed 38°C.

8
Freezer layout and storage
1 - Control panel 4 - Bottom freezer drawer
2 - Freezer flaps 5 - Large freezer drawer
3 - Freezer drawers
Note: If the appliance does not have a freezer compartment ( )it is
not suitable for freezing foodstus.
Fig. 1
1
2
3
4
5

9
Control panel and usage
A - Temperature key K - Safety key lock symbol
B - Low voltage symbol (page 16) L - Alarm/error symbol
C - Eco mode symbol M - Mute key
D - Super freeze symbol
E - Temperature display Please note: The ‘e’ of the
F - Mute symbol eco mode symbol is always
G - Timer display illuminated. This is not a
H - Timer key fault.
J - Mode key
•The ‘e’ on the display board is always on (except when screen
saver is active). THIS IS NOT A FAULT.
•A capital ‘E’ on the display merely indicates that Eco mode is
active. See page 11 for more information.
A B C D E F G H
J
Fig. 2
K L M

10
Setting the temperature
The default temperature for the fridge at first switch on should be
-18°C. To adjust the temperature:
•Press the key. The temperature display should start to flash.
•Each press of the key should adjust the temperature on the
display by 1 degree, with the range available being -16 to -24°C.
If you go too far, keep pressing the key to cycle through the
temperatures.
•Once the desired temperature is shown on the display, press
nothing for approximately 5 seconds. The temperature is set.
Recommended temperatures
Super freeze mode
Super freeze mode brings the freezer down to approximately -32°C
quickly. We recommend using this function when introducing large
amounts of fresh food at once, such as your weekly shop.
•Press the key repeatedly until ‘SF’ shows on the temperature
display. If no button is pressed for at least 3 seconds, the mode
will activate. This is confirmed by the super freeze symbol (two
snowflakes) flashing alternately.
•The super freeze mode will deactivate automatically after 24
hours or once -32°C or less is achieved. Alternatively, press the
key again to deactivate.
When to adjust Inner
Temperature
For minimum freezing capacity -16 oC, -17 oC
In normal usage -18 oC, -19 oC,
-20 oC or -21 oC
For maximum freezing capacity -22 oC, -23 oC or
-24 oC

11
Eco mode
This mode stores goods at approx. -18°C, consuming minimal
energy. It oers the best balance between food storage and energy
consumption.
•Press the key repeatedly until the eco symbol ‘e’ has a box
around it. If no button is pressed for a second, the mode will
activate. This is confirmed by the box around the eco symbol
flashing 3 times, an ‘E’ on the display and an acoustic signal.
•Press the key again to cancel eco mode.
Safety key lock
This function helps to protect against inadvertent use of the control
panel.
•Press and hold the and keys simultaneously for
approximately 5 seconds. Once activated, a padlock will illuminate.
• Press and hold the and keys simultaneously for
approximately 5 seconds to deactivate the lock. The padlock
symbol should extinguish.
Screen saver mode
This function helps to save energy.
• Press and hold the key for approximately 5 seconds and press
nothing else for another 5 seconds to activate screen saver mode.
•Press any key to re-illuminate the control panel at any time.
Adjustments can be made as per usual in this manner. The display
will then go o after approximately 5 seconds of inactivity.
•Press and hold the key for approximately 5 seconds to
deactivate screen saver mode.

12
Timer function
This feature allows a timer to be set in 5 minute increments up to a
maximum time of 30 minutes. If you want to chill something quickly,
you can use this function to remind you that the item is in the freezer.
•Press the key to activate the timer. Each press increases the
time by 5 minutes. The time will be shown on the timer display.
This time will flash.
•When the timer ends, an alarm will sound. Press any key to stop it.
•To cancel the timer, press the key. The timer display will be
solidly lit for a few seconds and then should turn o.
Mute function
It is possible to mute all sounds from the display board, this is useful
on religious holidays or late at night.
•Press the key. The mute symbol should illuminate on the
display board.
•To cancel, press the key.
Door open alarm
If the door is left open for 2
minutes or more, an alarm
sounds on the appliance. Shut
the door to stop the alarm. If the
alarm does not stop, check that
the door is closing properly and
that nothing is obstructing the
small panel on the bottom of the
fridge frame (circled). The sensor
is behind this. If the alarm Sensor

13
continues, contact service.
Maintenance, care and cleaning
Always disconnect the appliance from the power before ANY
cleaning or maintenance.
• Leave spaces between food items wherever possible to allow air to
flow between them. Do not allow food items or containers to touch
the rear or side walls of the appliance.
• Avoid contact of oily or acidic foods with the rear and side walls.
Oils and acids can damage the liner material. If any such foods
come into contact with the walls, clean the spot with warm water
and bicarbonate of soda.
• The freezer sections should be cleaned using a solution of
bicarbonate of soda and lukewarm water. Make sure that no water
enters the electrical components.
• Do not use abrasive products or detergents.
• Clean the drawers and flaps separately by hand, using soap and
water. Do not put them in the dishwasher.
• Keep the door seal clean to avoid damage and to help to ensure
that they continue to function correctly.
• Once cleaning is complete, then reconnect the power.
• If the appliance is not used for prolonged periods of time, unplug
and clean it. The doors should be left slightly open to prevent the
formation of mildew or odours.
• Where possible, clean the condenser (black grille on the back of the
appliance) with a soft bristle brush at least twice a year.
Sensor

14
Troubleshooting
If you have any problems with your appliance, you should check
the troubleshooting prior to calling CDA Customer Care, to prevent
unnecessary service calls and potential cost. Contact details for CDA
Customer Care are on the rear cover of this manual.
If the appliance is not working, check the following;
• There is power to the appliance.
• The house fuses are intact and the fuse in the plug has not blown.
• The plug socket is functioning correctly. To check this, plug another
electrical appliance in to see if the socket is working.
If the appliance is working, but not very well, check the following;
• The appliance is not overloaded and the door is operating properly
(See below on water/frost).
• The temperature is set to an appropriate level (see page 10).
• The cooling system at the rear of the appliance (page 17) is clean
and free of dust, and not touching the rear wall.
• The appliance is not next to a heat source.
If there is water or excessive frost/ice in the lower part of the
freezer, check the following:
•Check that there is some resistance when opening the door of the
appliance. If it opens at the slightest touch it may mean that the
door seal needs to be replaced.
• Check the door seal for any kinks, debris or damage. If you notice
any, and are unable to resolve the issue yourself, contact CDA
Customer Care so that the seal can be replaced.

15
If ice/frost has formed;
• It is normal for some ice droplets and/or frost to form on the back
wall and drawer fronts of the appliance, particularly if the door has
been opened a lot. This does not constitute a fault .
•Carry out the door seal checks mentioned in the previous
troubleshooting point.
If the appliance is noisy, check the following;
• The appliance is level and stable. The side, underside and rear
walls are clear, and there is nothing resting on the appliance.
• It is normal to hear the compressor running. This will operate
periodically and more so when the appliance door is opened.
• The appliance may make what seem to be peculiar noises, even
when the compressor is not running:
Cracking noise, similar to ice cracking - Normal noise that can occur
when the appliance is cooling or warming. Due to the expansion and
contraction of appliance materials.
Loud click - Normal noise and is usually the thermostat switching the
compressor on or o.
Ticking sound - Normal noise that is usually caused by the functions
of a valve at the back of the refrigerator.
Motor sound - Normal noise caused by the compressor running,
sometimes accompanied by a brief metallic rattle. This sound may be
more intense for the first seconds after the compressor starts. If the
metallic noise (i.e. metal hitting metal) is constant then it may be that a
compressor mount is loose.
Bubbling noise - Normal noise caused by the movement of the
refrigerant within the appliance’s pipework.

16
Fault codes
•A capital ‘E’ on the display merely indicates that Eco mode is
active. See page 11 for more information.
•The lower case ‘e’ on the display board is always on (except
when screen saver is active). THIS IS NOT A FAULT.
•A constant beeping and no cooling performance from the
appliance suggests a faulty door sensor. Contact Service.
Installation and ventilation
•When installing this product we recommend you seek the
help of another individual. This product may have some
sharp edges. Please take care and wear adequate PPE when
handling.
•This appliance must never be installed close to heat sources
such as heating elements, radiators, ovens and cookers nor
installed in damp places or direct sunlight.
•Failure to provide adequate ventilation can lead to increased
running costs and premature failure; it may also invalidate the
warranty provided with the product.
ERROR TYPE MEANING REASON REMEDY
SR Failure warnings
Appears when one or
more of the freezer parts
fail or there is a problem
in the cooling system.
Call a service agent for assistance as
soon as possible.
LF Freezer compartment is
not cold enough
This warning especially
appears if there has
been a power failure
for a long period or
when the refrigerator is
time.
1. Use food within a short time period.
Do not freeze food that has thawed.
2. Set the freezer temperature to colder
values or set to Super Freeze until
the compartment gets to normal
temperature.
3. Do not put fresh food in the appliance
until the fault has cleared.
LP "Low voltage" Warning
Freezers switches to
standby mode when
the voltage supply falls
below 170 Volts.
This feature prevents the compressor
from damage due to low voltage. The
freezer will start operating automatically
when the voltage restores to the
required level.
4. Check the door closes and seals
properly (see previous pages).

17
650
1860
595
(700
with
handle)
• The plug should be fully accessible at all
times.
• Ensure ventilation openings are kept
clear.
• Do not use a multi-plug adaptor in
the socket to connect this appliance
alongside other appliances.
• Do not tilt the freezer beyond 45º.
• Do not exert excessive pressure on the
appliance.
• Ensure that there is a gap of no less
than 10cm above and to the sides of
the appliance to allow for ventilation.
The clearance between the sides and
adjacent furniture must also allow the doors to open fully. Note
that a greater side gap will be required if the appliance is to be
positioned next to a wall to allow the doors to open fully.
• A gap of 7cm should be allowed for ventilation between the
rear wall and the back of the appliance. There is a plastic guide/
stopper supplied with the appliance
that should be fitted when aligning
the appliance with a wall. Place the
guide into the condenser and turn
it by 90° (Fig 6). The guide will then
lock into place. Take extreme care
not to damage the condenser whilst
doing this. The guide will protect the
condenser and ensure a minimum air
gap.
Fig. 5 Appliance dimensions
Fig. 6

18
Electrical information
Warning! This appliance must be earthed.
The mains lead of this appliance has been fitted with a specially
earthed plug.
Important: Do not use the appliance without the fuse cover in
position. Should the fuse need to be replaced, it must be replaced
with a 13A fuse, ASTA approved to BS1362.
The plug must be used with a specially earthed socket of 13
amperes. If there is no such socket in your house, please have
one installed by an authorised electrician. If in doubt regarding the
electrical connection of this appliance, consult a qualified electrician.
Do not shorten the supply cable, the appliance may require removal
for servicing.
N.B. Ensure that the plug socket is situated in an easily accessible
place. If the power supply cable or plug is damaged, it must be
replaced by a CDA authorised agent. If the plug socket does not
match the freezer plug, it must be replaced by the manufacturer or
an authorised service agent in order to avoid a hazard.
WARNING: When positioning the appliance, ensure the supply
cord is not trapped or damaged.
WARNING: Do not locate multiple portable socket outlets or
portable power supplies at the rear of the appliance.
WARNING: Do not use plug adapters with this appliance.

19
Climate range
The information about the climate range of the appliance is provided
on the rating plate. It indicates at which ambient temperature (that is
room temperature in which the appliance is working) is optimal for the
operation of the appliance.
Climate class Allowable ambient temperature
SN Extended Temperate This refrigeration appliance is intended for
use at an ambient temperature ranging
between 10°C and 32°C
N Temperate This refrigeration appliance is intended for
use at an ambient temperature ranging
between 16°C and 32°C
ST Sub Tropical This refrigeration appliance is intended for
use at an ambient temperature ranging
between 16°C and 38°C
T Tropical This refrigeration appliance is intended for
use at an ambient temperature ranging
between 16°C and 43°C

20
Warranty and service
The manufacturer shall not be held liable for any damage caused by
improper use of the product.
• Repairs carried out by unqualified persons may seriously
endanger the appliance user
• Pursuant to Commission Regulation (EU) 2019/2019, The minimum
availability period for spare parts necessary to repair the appliance
is 7 or 10 years depending on the type and purpose of the spare
part
• The list of spare parts and the ordering procedure are available
on the websites of the manufacturer, importer or an authorised
representative
• The minimum warranty period for the appliance oered by the
manufacturer, importer or authorised representative is given in the
warranty card
• The warranty shall be void if you make any independent adapta-
tions or alterations, tamper with seals or other appliance safety
devices or its parts or interfere with the appliance contrary to
operating instructions
For more information about the product, please refer to the EU EPREL
Product Database at https://eprel.ec.europea.eu.
Alternatively you can use your mobile device to scan the QR code on
the energy label or enter the product model listed on the
energy label in the EPREL search engine.
Table of contents
Other CDA Freezer manuals

CDA
CDA FW582 Quick start guide

CDA
CDA FW927 Installation and operating instructions

CDA
CDA FW882 Quick start guide

CDA
CDA FF180 Reference manual

CDA
CDA FW881 Reference manual

CDA
CDA FW284 User guide

CDA
CDA FW880 Reference manual

CDA
CDA PC870BL Service manual

CDA
CDA FF660 Quick start guide

CDA
CDA PC900 Quick start guide
Popular Freezer manuals by other brands

Frigidaire
Frigidaire GLFU2067F Factory parts catalog

montpellier
montpellier MFF148W Installation and operating instructions

Electrolux
Electrolux EU1232I Installation and instruction manual

Tricity Bendix
Tricity Bendix TB 17 TF Operating & installation instructions

Cooler Master
Cooler Master cmp102 installation guide

Mobicool
Mobicool TC25 AC/DC instruction manual