CDA VK903 User guide

VK903
Compact combination microwave oven
Use and maintenance

2| Instruction Manual
Contents
3 Important information
6 Before first use
7 Control panel
8 Using the touch controls
8 Switching the appliance on and o
9 Setting the clock
9 Setting the minute minder
10 Functions
10 Selecting microwave functions
11 Selecting oven functions
11 Pausing and altering functions
11 Stopping functions
12 Auxiliary functions and settings
12 Safety key lock
13 Interior lighting
13 Operating time limiter
14 Semi-automatic cooking
15 Automatic cooking
16 Care and maintenance
18 Cleaning
20 Installation
22 Mains electrical connection

Instruction Manual | 3
Important information
This appliance must only be used for the purpose for which it is
intended, i.e. domestic cooking. Any other use could be dangerous
and may lead to premature failure of the appliance.
The CDA Group Ltd. cannot be held responsible for injuries or
losses caused by incorrect use or installation of this product.
Please note that CDA reserve the right to invalidate the guarantee
supplied with this product following incorrect installation or misuse
of the appliance.
Under no circumstances should any external covers be removed
for servicing or maintenance except by suitably qualified personnel.
User information:
•Ovens become hot during and immediately after use.
• The oven door can become very hot during operation.
• After use, please ensure that the oven is switched ‘O’.
• Keep children away from the appliance when in use, and
immediately after use.
• Keep the oven door closed whilst grilling.
Appliance information:
Please enter the details on the appliance rating plate below for
reference, to assist CDA Customer Care in the event of a fault
with your appliance and to register your appliance for guarantee
purposes.
Appliance Model
Serial Number

4| Instruction Manual
Important information
EU Declarations of Conformity:
This oven has been designed, constructed and marketed in
compliance with safety requirements of EU Directive 2014/35/EU
(LVD) and requirements of EU Directive 2014/30/EU (EMC).
Parts intended to come into contact with food conform to
1935/2004/EC.
IMPORTANT INFORMATION FOR CORRECT DISPOSAL OF THE
PRODUCT IN ACCORDANCE WITH EU DIRECTIVE 2012/19/EU.
At the end of its working life, the product must not be disposed
of as urban waste. It must be taken to a special local authority
dierentiated waste collection centre or to a dealer providing this
service.
Disposing of a household appliance separately avoids possible
negative consequences for the environment and health deriving
from inappropriate disposal and enables the constituent materials
to be recovered to obtain significant savings in energy and
resources. As a reminder of the need to dispose of household
appliances separately, the product is marked with a crossed-out
wheeled dustbin.

Instruction Manual | 5
Important information
•Read the user instructions carefully before using the
oven for the first time.
•Follow the instructions for first use of the oven.
•Clean the oven regularly.
•Remove spills as soon as they occur.
•Always use oven gloves when removing shelves and
trays from the oven.
•Do not allow children near the oven when in use.
•Do not allow fat or oils to build up on the oven
shelves, grill pan or oven base.
•Do not place any cooking utensils or plates directly on
the oven base.
•Always grill with the oven door closed.
•Do not grill food containing fat without using the grill
pan grid.
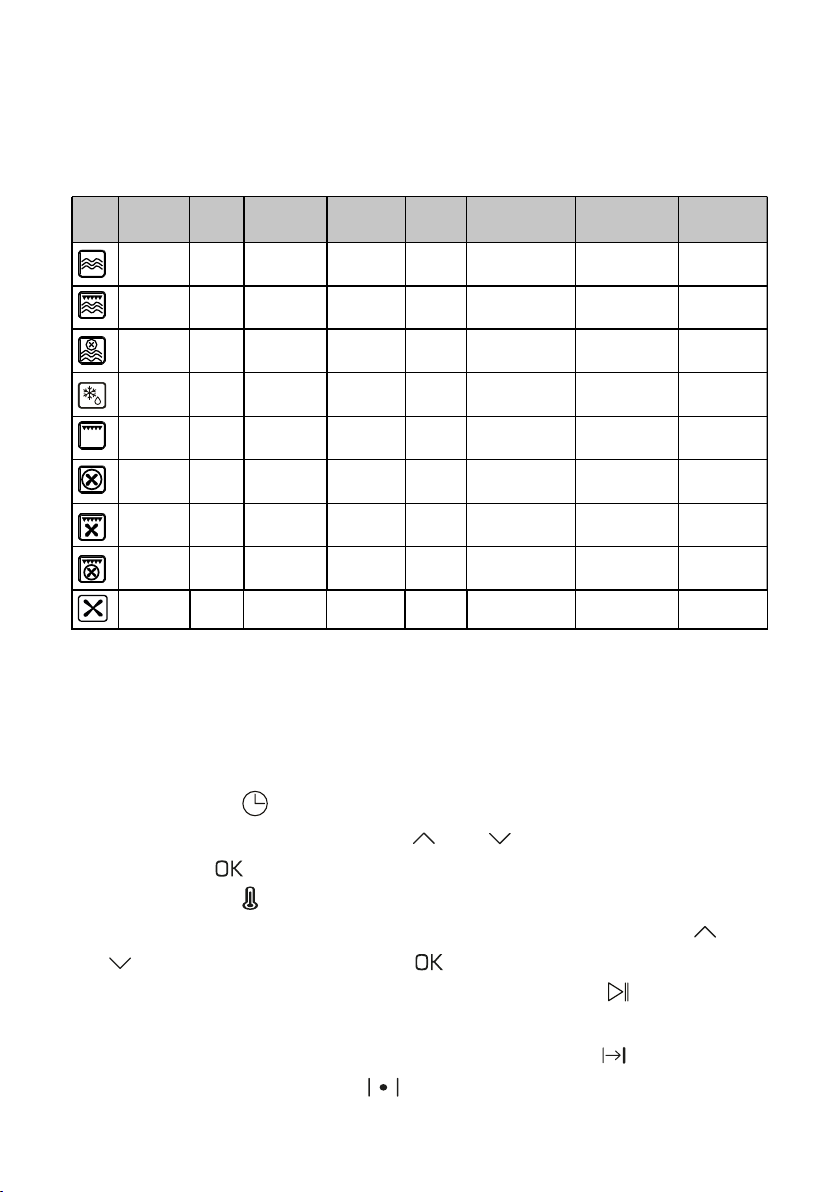
•Do not cover the pans, grids or the oven walls with
aluminium foil.
•Do not use the oven tray for roasting.
•Do not perform maintenance or cleaning of the oven
without first switching o the electricity supply. If the
oven has recently been used, allow to cool.
•Do not place hot enamel parts in water. Leave them to
cool first.
•Do not allow vinegar, coee, milk, saltwater, lemon or
tomato juice to remain in contact with enamel parts.
•Do not use abrasive cleaners or powders that will
scratch the surface of the enamel or stainless steel.
•Do not attempt to repair the internal workings of your
oven.
•Do not cover the oven floor with aluminium foil.

6| Instruction Manual
Before first use
First use
Before using the oven for the first time we recommend that, with
the power supply o, you clean the oven with soapy water. Once
done, rinse carefully, remove all accessories from the appliance
and then heat on the below programme at maximum temperature
for the specified time. A slightly unpleasant smell may be
produced, caused by grease remaining on the oven element from
the production process.
30 minutes full grill with rear element and fan
Please note:
This oven has been fitted with a cooling fan to achieve maximum
eciency and to maintain low surface temperatures. The cooling
fan will switch on automatically when the oven switches on. It is
normal for the cooling fan to run for an hour or more after use,
depending on the duration, temperature and type of cooking
programme used.
• The oven light remains on for every cooking function for 1
minute then will go out. The oven light can be switched on or
o at any time.
• Switching the oven o will result in any semi-automatic or
automatic cooking to be cancelled
• We recommend preheating the grill for 5 minutes before each
use.

Instruction Manual | 7
Control panel
Function Sensors Time/Temperature display Auxiliary Functions
Adjustment Sensors
Function Indicators
On/O sensor Plus sensor
Time sensor Minus sensor
Interior light sensor Confirm sensor
Start/Pause sensor Minute minder indicator
Temperature sensor Duration indicator
Rapid preheating
sensor
End of cooking indicator
Safety key lock indicator
Function active
indicator

8| Instruction Manual
Using the touch controls
The touch controls should be used with the flat of your finger,
rather than the fingertip.
Switching the appliance on and o
To switch the appliance on
Touch and hold the ‘On/O’ sensor for approximately 3 seconds
and until the appliance beeps.
To switch the appliance o
Touch and hold the “On/O” sensor for approximately 3
seconds and until the oven beeps. All displays except for the time
display should extinguish.
Please note: To switch the appliance o completely, i.e. before
cleaning it, you will need to switch it o at the mains isolation
switch.

Instruction Manual | 9
Setting the clock
• In standby mode, press and hold the timer sensor until the
minutes of the display flash.
• Use and to set the minutes. Touch the sensor to
confirm the setting.
• The hours of the display will now be flashing. Use and to
set the hours. Touch the sensor to confirm the setting.
Note: The clock can only be set in 24 hour format
Setting the minute minder
Select a function and touch the sensor until the minute minder
indicator flashes. Then, use the and sensors to set the
desired time. Touch the sensor to confirm the setting or wait 5
seconds and the setting will save automatically and the indicator
will be illuminated on the display.
The minute minder can be set between 1 minute and 24 hours.
Once the duration time has elapsed you will hear beeping and the
display will flash 0:00. Touch the sensor to mute the beeping
and return to standby mode. If no sensor is pressed, the beeping
will stop after 60 seconds but the display will continue to flash.
Please note: The minute minder function is available for cooking
and defrosting functions, not microwave functions.

10 | Instruction Manual
Selecting a function and beginning
cooking (microwave functions)
• Touch a sensor on the control panel to enter that functions
settings. The display will show the functions default time setting
• Pressing the sensor will allow you to change the operating
time for the function. Use the and to adjust the time.
Touch the sensor to confirm the setting
• Pressing the sensor will allow you to change the power level
of the microwave and temperature if applicable. Use the and
to adjust the power. Touch to confirm the setting
• Once you are happy with the settings, press the sensor
to begin cooking. The display will show the duration left on
the cooking function and the Duration indicator and the
Function active indicator will both be illuminated
Icon Function
Preset
( )
Time
(min )
Adjustable
Microwave power
Microwave
1740 W /1100 - 900W
Microwave
1900 W 180 10
1 740 W/
1740 W / 10
Top
grill
1900 W 180
Default
3100 W
1900 W
Defrost
3100 W
Power temperature
Preset
and grill
rear element
Microwave
(W)
800
400
400
/
power
1740 W/
Microwave +
+ fan
Rear
element+fan
fan
Top grill +
rear element
Top grill +
+fan
3100 W
Adjustable
temperature range
/
/
range
200 - 600W
180 10400 200 - 600W
/
/
180 //
180 //
180 / /
Default
Default
Default
Minute minder
YES
YES
YES
YES
NO
NO
NO
° C
Fan defrost
20W //
Default
//YES
110 - 180°C
110 - 200°C
50 - 230°C
50 - 230°C
50 - 230°C
50 - 230°C
NO
Functions
Below is a table of functions for the appliance including any
adjustable settings

Instruction Manual | 11
Selecting a function and beginning
cooking (oven functions)
• Touch a sensor on the control panel to enter that functions
settings. The display will show the default temperature setting
if a cooking function is selected. If a defrost function is selected
the display will show the default time.
• Pressing the sensor will allow you to set the minute minder.
Use the and to adjust the time and touch the sensor to
confirm the setting
• Pressing the sensor will allow you to change the temperature
of the setting. Use the and to adjust the temperature and
touch the sensor to confirm the setting
• Once you are happy with the settings, press the sensor to
begin the function. For a cooking function, the display will show
the current temperature and the Function active indicator
will be lluminated. For a defrost function, the display will show
the current time or the time left on the function, if applicable.
Pausing and altering functions
Simply press the Start/Pause sensor whilst the appliance is
in use. This will allow you to suspend operation temporarily. To
resume the function, simply press the sensor once more. Whilst
the appliance is paused you can adjust the temperature, where
available, without aecting the running time of the function.
Note: Opening the appliance door will also temporarily pause the
function. Closing the door will resume the function automatically.
Stopping a function
Simply press and hold the on/o sensor for approximately 1
seconds.

12 | Instruction Manual
Auxiliary functions
This appliance features a number of preset functions which create
the ideal cooking environment (time, temperature etc.) for certain
dishes. Below is a table of these functions and their adjustable
settings.
Icon Food type Function Power
Preset
tempera-
ture (°C)
Microwave
power (W)
Preset
time
(min)
Adjustable
tempera-
ture range
(°C)
Adjustable
microwave
power
range
Minute
minder
Meat
Fan,
Grill &
Microwave
900W 200 900W 20 180 - 220 400W -
900W NO
Cake
Fan, Rear
Element &
Microwave
900W 160 900W 25 150 - 180 600W -
900W NO
Vegetables Microwave 800W / 800W 3 / 800W -
900W NO
Auxiliary function settings
It is possible to alter the settings of the auxiliary functions to suit
your preferences. To do this simply select the function you require
and press . Press again and the function will pause, whilst
paused you can alter any applicable settings such as temperature,
duration or microwave power by pressing the appropriate sensor
and using the and sensors. When you are ready to resume
the function simply press .
Safety key lock
This appliance is equipped with a safety key lock to prevent
accidental use. The safety key lock can be activated when the
appliance is in standby mode (i.e. just the clock displayed) or whilst
a function is running. To activate the safety key lock, simultaneously
press and hold both the and sensors until the indicator
illuiminates. To deactivate the safety lock simply press and hold
both sensors again and the indicator will go out.

Instruction Manual | 13
Interior lighting
The interior lighting will come on automatically when the oven is in
use and will turn itself o automatically after 1 minute but can be
turned on and o as you wish. The light will also turn on after
opening the oven door. The light can be turned on when the oven
is in standby without a function in operation. Simply press the light
sensor to operate the light as necessary.
If the bulb in your appliance should fail, please contact CDA
Customer Care to arrange a service visit. The bulb and appliance
must not be serviced by anyone except a CDA authorised service
agent.
Operating time limiter
Each temperature, when used outside of semi and automatic
cooking, has an operating time limiter to help to prevent damage to
the internal components of this appliance. After a certain working
time at given temperatures the appliance with switch the function
o automatically. The temperatures and associated maximum
operating times are listed in the table below.
Temperature Maximum operating
hours
20 - 120°C 24
121 - 200°C 6
201 - 230°C 4
Please note: The cooking time can be set between 0 and 10 hours.
The end of cooking time can be set to 10 hours ahead of the cur-
rent time. If an end of cooking time is set, then this will take priority,
for example over the current time, on the time display.

14 | Instruction Manual
Semi automatic cooking
This function allows for a cooking time to be set. When the set time
elapses the oven will switch the set function o and an acoustic
signal will sound to alert the user. The cooking time available
ranges from between 1 minute and 10 hours.
To switch on semi automatic cooking
• First select a heating function and the temperature required
• Press the sensor twice and the indicator will flash on the
display
• Use the and sensors to adjust the duration as needed and
touch to confirm the setting or alternatively wait 5 seconds
and the duration will automatically set
• To clear the duration setting, either cycle down the minutes
using the and sensors until the display shows 0:00 or
touch the sensor and you will return to standby mode and
you can begin the function again
During the cooking process the indicator will be illuminated.
Once the duration time has elapsed you will hear beeping and the
display will flash 0:00. Touch the sensor to mute the beeping
and return to standby mode. If no sensor is pressed, the beeping
will stop after 60 seconds but the display will continue to flash.

Instruction Manual | 15
Automatic cooking
This function allows for a delay to be set for cooking and an
automatic end time. For example, if you set the cooking duration
to 1 hour, and the end time to 15:00, then the oven will activate the
function at 14:00.
Note: Automatic cooking is not available on any functions using the
microwave
To switch on automatic cooking
• First select a heating function and the temperature required
• Press the sensor twice and the indicator will flash on the
display
• Use the and sensors to adjust the duration as needed.
• Press the sensor again and the indicator will flash on the
display and the end time will also be shown
• Use the and sensors to adjust the end time and touch
to confirm the setting
• To clear the duration setting, either cycle down the minutes
using the and sensors until the display shows 0:00 or
touch the sensor and you will return to standby mode and
you can begin the function again.
During the cooking process the indicator will be illuminated.
Once the duration time has elapsed you will hear beeping and the
display will flash 0:00. Touch the sensor to mute the beeping
and return to standby mode. If no sensor is pressed, the beeping
will stop after 60 seconds but the display will continue to flash.

16 | Instruction Manual
Care and maintenance
It is important, before carrying out any cleaning or maintenance,
that you disconnect or switch o the appliance at the power
supply. If the oven has been in use, let the cavity and any
elements cool down suciently before attempting any cleaning
or maintenance.
Removing the appliance door
In order to allow for easier access
into the oven cavity for cleaning,
it is possible to remove the door.
Before removing the door, ensure
that you have an area prepared in
which you can place the removed
door. This area should ideally
be protected by something like
a folded, dirt-free, towel to help
prevent damage to surfaces and
the door.
• Open the door fully
• Lift and tilt the safety catch part of the hinge (Fig .1) so that it is
fully extended and points towards the door.
• Close the door most of the way, lift it slightly and then pull it,
safely but firmly, towards you.
Fig. 1

Instruction Manual | 17
Replacing the appliance door
• Hold the door to the appliance
in the closed position and
manoeuvre the hinges so
that the part of the hinge,
highlighted by the star in fig. 2,
inserts into the hinge slot in the
cavity frame.
• Next, ensure the notch on the
underside of the hinge sits
on the lip of the hinge slot.
Open the door fully. Each
hinge should be seated in the
same way as the hinge in fig.
3. If it is not, follow the steps
for removing the door and try
replacing it again.
• Finally, lift the safety catch part
of the hinges back into place so
that they are lying flat against
the hinges.
Fig. 2
Fig. 3
Please note: If the hinge safety catches are not in the correct
place then the door and/or appliance may receive damage when
attempting to close the door.

18 | Instruction Manual
Cleaning
IMPORTANT
•Before any maintenance is started involving electrical parts,
the appliance must be disconnected from the power supply.
•If the oven has been in use, let the oven cavity and the
heating elements cool down before attempting any
maintenance.
•Steam cleaners must not be used when cleaning this
appliance.
•Once care and maintenance is complete, ensure that all
parts are correctly replaced before using the oven.
•Do not store flammable material in the oven.
•Do not allow grease or food particles to build up around the
door.
The oven exterior
As the oven has a stainless steel or enamel surface, you should
use a nonabrasive cleaner. Any abrasive cleaner (including Cif) will
scratch the surface and could erase the control panel markings.
Inside of oven
It is recommended that the interior of the oven be cleaned after
every use using suitable products, especially if any spillage has
occurred. The shelves can be removed and washed by hand or in
the dishwasher.
Stainless steel
Stainless steel can be eectively cleaned by simply using a dilute
solution of water and mild detergent and drying to a shine with a
clean cloth. Proprietary stainless steel cleaners are available. We
recommend a clean microfibre cloth for cleaning stainless steel
surfaces.

Instruction Manual | 19
Grill
When used regularly, the grill element does not need cleaning as
the intense heat will burn o any splashes. The interior ceiling may
need regular cleaning, which should be done with warm water,
detergent and a sponge. If the grill is not used regularly, it should
be run for 10 minutes every month to burn o any splashes, in
order to reduce the risk of fire.
IMPORTANT:
When correctly installed, your product meets all safety
requirements laid out for this type of product. However, special
care should be taken around the rear or the underneath of
the appliance as these areas are not designed or intended to
be touched and may contain sharp or rough edges that could
cause injury.

20 | Instruction Manual
Installation
The appliance can be installed under a worktop or in a wall unit
(open or closed) with the appropriate dimensions for recessed
installation.
Centre the oven in the unit, ensuring that there is as much of a
gap as possible, for ventilation purposes, between the appliance
and the surrounding unit. The material of the unit supporting the
appliance must be heat resistant (or covered with a heat resistant
material). For greater stability, attach the oven to the unit with four
screws through the holes provided on the side panels.
If the appliance is to be installed under a worktop, ensure the top
rail has been removed to provide free airflow around the product.
Do not use your appliance immediately after moving it from a
cold location, as condensation may cause a malfunction. Wait
approximately 1-2 hours before use.
Installation diagrams are on page 21.
Table of contents
Other CDA Microwave Oven manuals