Cellini CMF75 User manual

ULTRASONIC MIST FAN WITH IONIZER
INSTRUCTION MANUAL
MODEL NO.: CMF75

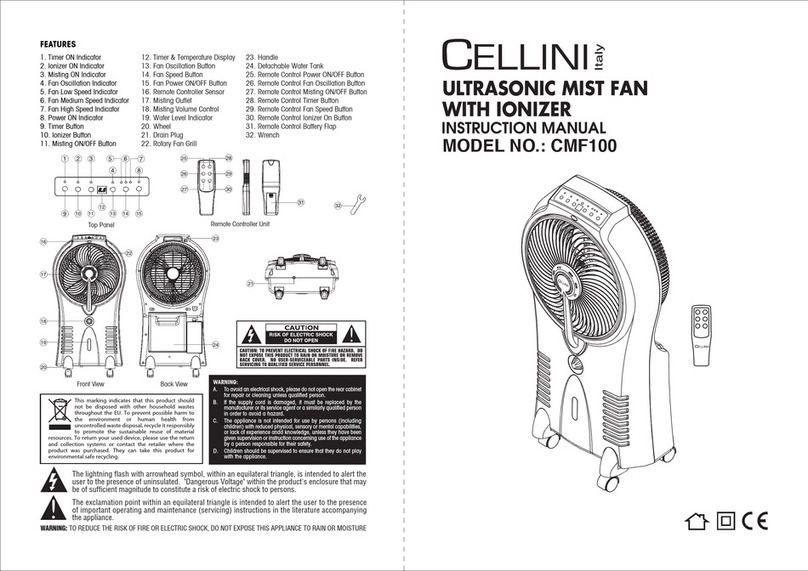
FEATURES
1. Remote Controller Sensor
2. Rotary Fan Grille
3. Misting Outlet
4. Misting Volume Control
5. Water Level Indicator
6. Wheel
7. Timer ON Indicator
8. Ionizer ON Indicator
9. Misting ON Indicator
10. Fan Oscillation Indicator
11. Fan Low Speed Indicator
23. Rear Fan Grille
24. Fan Blade
25. Detachable Water Tank
26. Cord Hook
27. Drain Plug
28. Remote Fan Speed Control Button
29. Remote Timer Button
30. Remote Power ON/OFF Button
31. Remote Misting ON/OFF Button
32. Remote Fan Oscillation Button
33. Remote Battery Flap
The lightning flash with arrowhead symbol, within an equilateral triangle, is intended to alert the
user to the presence of uninsulated. "Dangerous Voltage" within the product's enclosure that may
be of sufficient magnitude to constitute a risk of electric shock to persons.
The exclamation point within an equilateral triangle is intended to alert the user to the presence
of important operating and maintenance (servicing) instructions in the literature accompanying
the appliance.
WARNING: TO REDUCE THE RISK OF FIRE OR ELECTRIC SHOCK, DO NOT EXPOSE THIS APPLIANCE TO RAIN OR MOISTURE.
Remote Control Unit
Control Panel Top View Base View
Front View Back View
78 9 10 11 12 13
21
20
191817161514
28
29
30
31
32
33
1
2
3
4
5
6
12. Fan Medium Speed Indicator
13. Fan High Speed Indicator
14. Timer Button
15. Ionizer Button
16. Misting ON/OFF Button
17. Timer & Temperature Display
18. Fan Oscillation Button
19. Fan Speed Button
20. Fan Power ON/OFF Button
21. Power ON/OFF Indicator
22. Handle
22
23
24
25
27
26

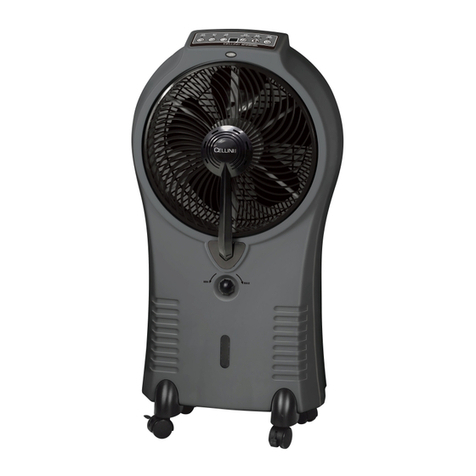
PRODUCT INTRODUCTION
Misting Fan is design with digital control system. It
has device for storing water. It can lower surrounding
temperature, freshen the air with equipped ion humidify
the air through the principle of water evaporation. LED
panel makes it luxurious and easy to use.
IMPORTANT NOTES
Please read the instruction manual carefully before
operating this unit.
1. Make sure that the home power supply consistent
with the product before plug in.
2. Switch off and disconnect from the power outlet
when not in use or before cleaning.
3. Do not expose the unit to rain and keep out of reach
of water on the control panel or LED for proper use.
4. Do not put the fingers or any objects inside the fan
grill during operation.
5. Do not operate the unit if there is any damage to
the power plug or cord - take unit to our after sales
service center for repair, do not attempt to undertake
any required repairs yourself.
6. Wipe clean with damp cloth only - do not use any
abrasive cleaners.
7. This appliance is not intended for use by persons
(including children) with reduced physical, sensory,
or mental capabilities or lack of experience and
knowledge unless then have been given supervision
or instruction concerning use of the appliance by a
person responsible for their safety.
8. Do not use the misting function if unit is to be used
in a damp space.
9. Do not use the misting mode when water tank is
empty; always keep enough water in tank in order
for this function to operate, otherwise may cause
water pump malfunction.
10.If unit is being stored away for a long period of time
without use, empty the water tank before storing or
transporting the unit.
HOW TO ASSEMBLE THE WHEELS (SEE DRAWING 1)
1. Attach the four wheels into the unit.
2. Two of the wheels can be locked in position if
required.
DRAWING 1
DRAWING 2
MISTING FAN OPERATION - REMOTE & CONTROL PANEL
Make sure that the home power supply is consistent
with the product before plug in.
POWER ON/OFF OPERATION
Press the "fan power ON/OFF button"(Feature No. 20)
on the control panel or (Feature No.30) on the remote
controller to start operation, LED light (Feature No.21)
will become illuminated on the control panel. Press
the same button to turn off the function.
FAN SPEED OPERATION
Select the required fan speed to Low/Medium/High
by press the "Fan Speed Button"(Feature No.19) on
the control panel or (Feature No. 28) on the remote
control. LED light above selected speed will become
illuminated on the control panel.
MISTING OPERATION
1. Ensure the unit is placed on a level surface and
unplug from the power and switch off all the function
when refilling water.
2.
Remove the water tank (Feature No.25) and fill water,
but do not fill water over the Marking Line (see
drawing 2 below) to ensure water does not overflow.
1.Remove the
water tank and
fill clean water.
2.Tighten the cover
in clockwise
direction.
4.Put the water tank
back to the unit.
3.Turn the water tank upside down
to make sure no leakage.
3. Misting function will not operate effectively if water
not enough.
Marking
Line

OSCILLATION OPERATION
To start 360° air flow direction, press the "Fan
Oscillation Button" (Feature No. 18) on the control
panel or (Feature No. 32) on the remote controller once;
LED light(Feature No.10) will become illuminated on the
control panel and the rotary fan grille will begin to rotate,
directing air in a full circle. This setting will be memorized
and keep unit next operation. Press the same button to
turn off the function.
IONIZER OPERATION
Press the "Ionizer Button" (Feature No. 15) on the control
panel to release the anions. Illuminated light is on the
control panel will indicate function is currently in operation.
Press the same button to turn the function off.
TIMER OPERATION
1. Press the "Timer Button" (Feature No. 14) on the
control panel or (Feature No. 29) on the remote
controller to set the countdown timer. The unit will
operate with its present settings until the timer
counts down.
2. Timer can be set from 1 to 8 hours.
3. Once set, LED display will show the time set.
4. To switch off the timer function and operate the
unit continuously, press the timer button until LED
display switches off and the LED light on the control
panel above timer button LED will also be off.
REMOTE CONTROLLER
1. Open the remote control battery flap (Feature No.
33) and insert 1 piece 3V "CR2032" of Button battery.
2. Remote controller must be aimed at the sensor
(Feature No.1) on the front of the appliance, distance
within 5 meters, and will not function from beside
or behind the appliance.
CLEANING AND MAINTENANCE (SEE DRAWING 4)
1. Ensure the unit is switched off and disconnected
from a power source before cleaning.
2. Clean outer casing or control panel with a damp
cloth only - do not use any abrasive cleaners or
harsh chemicals, and ensure the control panel or
LED is out of reach of water.
3. Check the condition of misting and water tank before
every use.
4. After long time operation with this appliance, the
unit may become clogged with dust and dirt, which
will greatly affect the performance of the unit.
Sometimes mold and mildew may also occur due
to the water tank not regular cleaned, recommend
to clean once every two weeks.
5. Press the “Fan
power ON/OFF”
button.
6. Select the Fan
Speed to start.
7. Press the “Misting
ON/OFF” to start
misting.
8. Adjust the mist density by
turning the “Misting volume
control” knob.
DRAWING 3
Warning :
1. Low Water Level Alarm: when water level becomes
low, you will hear the “beep” sound and the “Mist
Indicator” will flash for a second. At the same time
the power of the pump inside the unit will be cut off
to protect the life
of the pump.
To stop the alarm,
turn off the unit from
the power outlet.
Fill the tank with
water and turn on
the unit again.
4.
Connect to the power socket, press fan power ON/OFF
button, select the fan speed to start and press
"Misting ON/OFF Button"(Feature No.16) on the
control panel or (Feature No.31) on the remote
controller to switch the misting on or off; illuminated
lights on the control panel will indicate the functions
currently in operation.
5. Adjust the mist density, turn the "misting volume
control"(Feature No.4) clockwise to increase the
mist density or anti-clockwise to decrease the mist
density, then get an optimum mist performance as
required.
6. It may take a minute for a new misting fan to start
the misting, it is normal for air to come out of the
nozzles before water and the mist.
2. DIRECT POUR WATER INTO MIST FAN IS
PROHIBITED.
(SEE DRAWING 3)

TECHNICAL SPECIFICATIONS
Input Voltage ....................... AC220-240V 50/60Hz
Input Power....................................................75W
Operating Temperature.............................. 0ºC-45ºC
Humidity....................................... Lower than 90%
Water Tank Capacity ..................................... 4 Liter
Fan Maximum Air Volume ....... Approx > 300m3/Hour
Fan Maximum Speed.........................Approx 5.5m/s
Evaporative Contant Of Water ........ Approx 300mL/Hr
Timer Control.......................................... 1-8 Hours
Remote Control Distance..................Approx 5 Meters
Ion Density Approx............... Approx 3 x 10⁶Ion/cm3
Product Dimension ....... Approx W40 x D25 x H80.6cm
This marking indicates that this product should
not be disposed with other household wastes
throughout the EU. To prevent possible harm to
the environment or human health from uncon-
trolled waste disposal, recycle it responsibly to
promote the sustainable reuse of material resourc-
es. To return your used device, please use the return and
collection systems or contact the retailer where the product
was purchased. They can take this product for environmental
safe recycling.
WARNING:
A. To avoid an electrical shock, please do not open the
rear cabinet (rechargeable fan) for repair or cleanning
unless qualified person.
B. If the supply cord is damaged, it must be replaced by
the manufacturer or its service agent or a similarly
qualified person in order to avoid a hazard.
C. The appliance is not intended for use by persons
(including children) with reduced physical, sensory
or mental capabilities, or lack of experience andd
knowledge, unless they have been given supervision
or instruction concerning use of the appliance by a
person responsible for their safety.
D. Children should be supervised to ensure that they do
not play with the appliance.
5. Remove the drain plug
(Feature No.21) and allow
the water tank to empty.
6. If the unit is being stored for a long period of time
without use, empty the water tank before storing or
transporting the un it.
DRAWING 4

超聲波冷霧電風扇
帶負離子空氣淨化功能
產品型號: CMF75
使用說明書

78 9 10 11 12 13
21
20
191817161514
28
29
30
31
32
33
1
2
3
4
5
6
功能及名稱簡介 (圖解)
1. 遙控接收器
2. 導風網
3. 霧化器
4. 強弱霧化調節器
5. 水位指示
6. 旋轉滑輪
7. 定時顯示燈
8. 負離子顯示燈
9. 冷霧顯示燈
10. 導風網轉動顯示燈
11. 風扇低速顯示燈
12. 風扇中速顯示燈
13. 風扇高速顯示燈
14. 定時選擇鍵
15. 負離子開關
16. 冷霧開關
17. 定時時間及溫度顯示器
18. 導風網轉動開關
19. 風速選擇鍵
20. 電源開關
21. 電源顯示燈
22. 手柄
23. 導風後網
24. 風扇葉
25. 水箱
26. 電源線收納勾
27. 排水塞
28. 風速遙控
29. 定時遙控
30. 電源遙控
31. 霧化遙控
32. 風向遙控
33. 遙控器電池蓋
正面
控制面板 頂部 底部 遙控器
背面
注意: 為減少觸電危險, 切勿把產品暴露於雨中或潮濕環境中, 亦不要拆去後部
零件
。機身內並無使用者維修的零件, 請將維修工作委托給專業資格人員
。
三角型內有箭頭的閃電符號旨在提醒使用者, 本產品機殼內有未經絕緣的
“危險電壓”其幅度足使人觸電而發生危險!
三角型內加感嘆號旨在提醒用戶, 有重要的操作與保養說明配合本機, 請仔細閱讀
後方可使用!
22
23
24
25
27
26

1
先抽出水箱加水
2
裝滿後扭
緊水箱蓋
3
倒轉水箱, 蓋向下測試
是否已扭緊不會漏水
4
將水箱放回機身
充水完畢後, 請重新接駁電線, 開啟風扇控制
面板上的電源開關, 再選擇適合風速正式啟動
風扇。
4.
按本機控制面板“霧化開關按鈕”(圖解16)
或遙控器上的控制面板(圖解31), 按壓打
開或關閉的噴霧功能; 面板上的燈亮著時,
顯示目前噴霧正在運作。
5. 調節噴霧密度, 旋轉 本機“霧化調節器”(圖
解4), 順時針旋轉增大噴密度、逆時針方
向以降低噴霧密度,可獲得最佳的霧化性
能需求。
6. 每次運行風扇時重啟噴霧功能, 可能要等候
一分鐘時間噴霧功能才運作, 這是正常的。
水位指示線
4. 按本機控制面板“導風網轉動開關”(圖解18)
或遙控器“風向遙控”(圖解32)一次, 導風
網轉動顯示燈(圖解4)亮, 風網開始360°轉
動, 再按一次停止。
霧化操作功能
1. 補充水的時候, 確保本機置於在平面上, 拔
除電源線, 並關閉所有操作功能。
2) 卸下水箱 (圖解25), 注水入水箱, 注水不要
超過(圖示二)的水位指示線, 同時確定水不
會溢出。
3) 如水量不足夠, 噴霧功能將會無法有效操作。
開啟電源開關
5 6 7
再按風速選擇鍵
開啟風扇
按噴霧開關
啟動噴霧
(圖示一)
(圖示二)
風扇操作功能
1. 接通電源,顯示燈(圖解21)亮,蜂嗚器響
一聲,風扇處於待機狀態。
2. 按本機控制面板“電源開關”按鈕(圖解20)或
遙控器“電源遙控”功能(圖解30), 電源顯示
燈(圖解8)亮, 初次開設定為風扇低速, 定時
時間及溫度顯示器(圖解17)顯示當前環境
溫度。
3. 按本機控制面板“風速選擇鍵”(圖解19)或
遙控器“風速遙控”(圖解28)可以選擇風速,
風速分高、中、低三檔, 同時風速指示燈
作相應風速顯示。
產品特點及適用範圍
1. 新概念風扇, 移動方便, 外型美觀;
2. 長壽命低操音電機, 節省用電;
3. 兼具送風、淨化空氣、加濕等功能於一體;
4. 旋轉式導風網,加大吹風面積;
5. 負離子空氣淨化器、除塵、除臭, 有效阻擋
細菌;
6. 超聲波霧化器,提高加濕空氣和降溫功效;
7. 輕觸式按鍵、功能顯示燈及溫度顯示;
8. 適用於家庭使用。
注意事項:
1. 在使用前, 必須詳細閱讀此說明書, 方可開
始接上電源;
2. 本產品的電源性質只能使用
220-240V 50-60Hz;
3. 長時間不使用時, 插頭電源線應從插座中
拔出;
4. 給水箱注水時, 應使用純度高的清水。
水箱中的水要經常添加, 維持充足水量, 更
要定期進行更換和清洗水箱;
5. 清潔外殼污垢時, 請用蘸有稀釋中性洗滌劑
的布輕輕擦去污垢, 然後再用乾布仔細擦拭,
直至光潔。
安裝滑輪:
1. 打開包裝, 取出電風扇, 按(圖示一)所示,
將滑輪裝入機身底部。
2. 如有需要, 可鎖定其中兩個滑輪不讓機器
移動。

(圖示四)
3. 每次使用前請檢查噴霧及水箱的狀態。
4. 本產品長時間操作後, 水箱內部件可能堵
塞灰塵和污垢, 這將極大影響裝置的性能,
建議每兩週清洗一次。
5. 如裝置長時間不使用, 需存儲此裝置, 請先
清空水箱內積水。
6. 按(圖示三)所示卸下排水塞(圖解2 7)可清
放內部積水。
主要技術參數:
1. 電源電壓:
220-240V 50-60Hz
2. 額定輸入功率:
75W
3. 使用環境溫度:
0℃
至
45℃
;
4. 使用周圍空氣相對濕度:小於
90%
5. 最大風量:
>300M3/Hr
6. 最大風速:5.5m/s
7. 水箱裝水量:4L
8. 噴霧量(水蒸發量):約
300ML/Hr
9.
負離子密度:
3 x10⁶ lon/cm3
10.
定時器控制:1-8小時
11.
遙控器電池:
3V“CR2030
”鋰電池 x
1粒
12.
遙控器遙控距離:
約5
米
13.
產品尺寸:約闊
40 x 深25 x 高80.6厘米
14.
淨重:約
5.8公斤
注意:
● 如果電源線損壞,為避免危險,必須由
製造廠或其維修部或類似的專職人員來
更換。
● 本產品不預備給體能弱、反應遲緩或有
精神障礙的人(包括兒童)使用,除非
在對其負有安全責任的人員的指導或幫
助下安全使用;
● 兒童應被監督,以保證他們不玩耍此產
品。
(圖示三)
警告 :
1. 初次啟動時, 由於要先排出噴霧喉管內的空
氣,噴霧將稍後片刻才能開始運作。
2. 注意缺水保護: 當水箱缺水時, 蜂嗚器發出
報警聲響,且噴霧顯示燈閃爍數秒後熄滅,
水泵自動停止工作, 加水後重新開啟可恢復
操作。
3. 切勿將水直接注入風扇
機殼內, 會造成噴霧不良。
(圖示三)
負離子操作
按 本機控制面板“負離子開關按鈕”(圖解15)
按一次以釋放負離子, 顯示燈亮著指示功能正
在運行中, 如停止使用按下同一按鈕來關閉該
功能。
預設時間操作
1. 按定時鍵(圖解14)開啟設置定時功能或遙
控器(圖解29), 面板上的顯示燈亮起。
2. 可任意選擇1-8小時定時設置。
3. 定時時間顯示器(圖解17)顯示定時, 連續
按此鍵, 可調整定時時間。
4. 持續按下計時器按鈕, 直至LED屏幕關閉
和控制面板上的定時LED指示燈熄滅才完
成。
遙控操作
本機也可通過遙控操作, 遙控器按鍵與控制面
板相同 。
1. 打開遙控器背部電池蓋裝上一粒3V “
CR2032
”
鈕扣型鋰電池即可使用。
2. 使用遙控器時應對準風扇遙控接收器(圖解
1), 有效遙控距離為5米。
保養與清潔(圖示四)
1. 請確保機組已關閉並拔掉電源插頭才可進
行清洗, 以免發生危險。
2. 清潔外殼或控制面板時只需用濕布, 不要
使用任何具有研磨作用的清潔劑或刺激性
化學品。
8
調節霧化強弱

Table of contents
Other Cellini Fan manuals
Popular Fan manuals by other brands

Delta Electronics
Delta Electronics Exhaust Fan TFB specification

Westinghouse
Westinghouse ETL-ES-Carolina-R-WH14 owner's manual

Sygonix
Sygonix 1547074 operating instructions

LBC
LBC Savoy House M2024 Series owner's manual

Martec
Martec Governer Series installation manual

Home Decorators Collection
Home Decorators Collection HARRINGTON 59236 Use and care guide

Hunter
Hunter Whittington 51183 installation manual

Helios
Helios VD Series Installation and operating instructions

Vallox
Vallox 90K MC Series Operating, maintenance and technical instructions

aeolus
aeolus M3 1201 installation guide

Minka-Aire
Minka-Aire ARTEMIS instruction manual

Black & Decker
Black & Decker BXEFP50E Original instructions