4 5
Reviewing the Heating Program
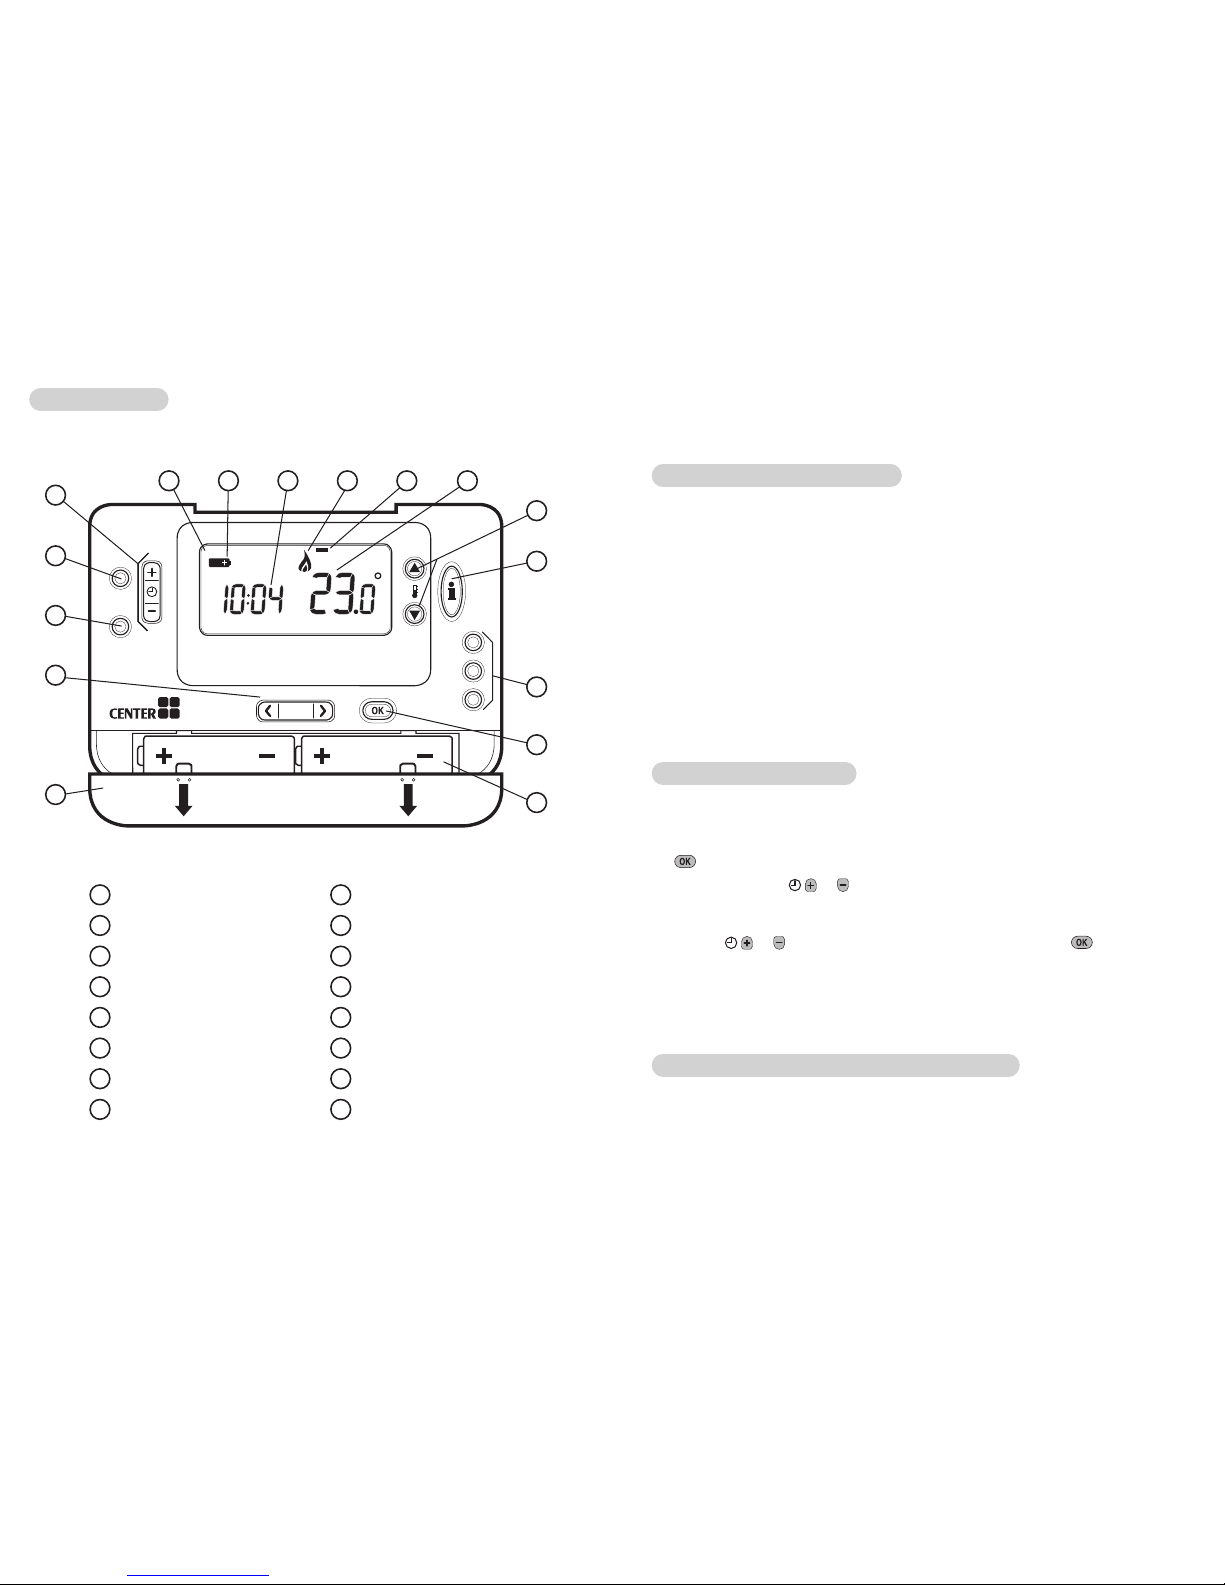
To review or edit the heating program use the PROGRAM or buttons to navigate
between the 4 individual programming periods for that day. Use the DAY button to
step through each day of the week, so the complete 7 day heating program can be
reviewed or edited.
Modifying the Heating Program
To change the heating program:
a. Press either of the PROGRAM or buttons
to enter the programming mode. The time /
temperature settings for period 1on Monday
(Day 1) will be flashing as shown. The active
period is highlighted by a flashing square around
the numbers at the bottom of the screen and the
selected day is shown with the day indicator.
b. To adjust the period start time use the or buttons, the ‘OK?’ indicator will
be displayed to confirm the change. Holding the button down will change the time
quickly.
Note: If you are pressing the or buttons and the display flashes the next
period, it means the next period will be pushed forward.
c. Once the required time is reached press the button to confirm.
Note: If the original time setting did not require adjustment press the button to
move to step ‘d’.
Mon Tue Wed Thu Fri Sat Sun
4321
The Built-in Heating Program
The built-in heating program has 4 temperature level changes per day that can be set
between 3.00am and 2.50am the following day - allowing you to maintain the evening
temperature after midnight. Each temperature level can be set between 5°C and 35°C,
and adjusted in 0.5°C increments. The factory default program for heating is as follows.
Programming the EHE0200361
Period 1 2 3 4
Time 6:30 8:00 18:00 22:30
Temperature 21°C 18°C 21°C 16°C
Period 1 2 3 4
Time 8:00 10:00 18:00 23:00
Temperature 21°C 21°C 21°C 16°C
Monday to Friday
(Day 1 to 5)
Saturday & Sunday
(Day 6 & 7)
Programming the EHE0200361
d. The temperature setting for period 1on Monday (Day 1) will now be flashing. To
adjust this press the or buttons and confirm the setting again by pressing the
button.
e. The next time and temperature period will now be active. Adjust this by repeating
steps b - d above until all 4 periods are set for Monday or press the AUTO button to
run the program as set, at any time.
You now have a choice of how to set the program for the next day:
f. i) Press the COPY DAY button to copy Monday’s program into Tuesday. The display
will go blank apart from the ‘non flashing’ day indicator, which indicates the day
copied and the ‘flashing’ target day to copy the program to. To accept this day
press the button. To select a different target day press the DAY button until the
‘flashing’ day indicator is under the required day, then accept it by pressing the
button. Note: Once the target day is confirmed it becomes the day that is copied if
the COPY DAY button is pressed again.
OR
ii) Press the DAY button to move the day indicator to Tuesday (Day 2). The program
for that day can then be adjusted by following steps b to e. Programs for the
remaining days can be set in the same way, using the DAY button to move to the
next day.
To exit the programming mode select the desired operating mode by pressing the
AUTO, MAN or OFF buttons. Note: To run the adjusted program select the AUTO
mode.
Disabling / Enabling Time Periods
The thermostat has 4 periods each day that can be programmed, but you may not
need all of these switch points for your heating requirements. Therefore, any period
from 2 to 4 can be removed from (or returned to) the heating program profile.
To disable or enable time periods:
a. To disable unwanted periods go to the desired period ( 2to 4) using the
PROGRAM or buttons to navigate, ensure the correct period is highlighted
with the flashing square symbol. Press and hold the button for at least 2 seconds
and the display will indicate the period has been removed from the program.
b. To enable periods again follow the same procedure as above, navigating to the
already disabled period. To enable this period again press and hold the button for
at least 2 seconds.