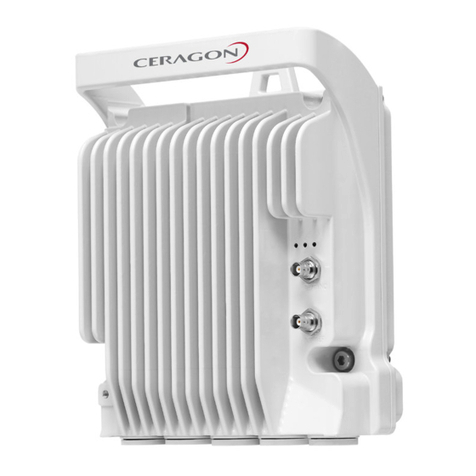
Ceragon FibeAir IP-20V-ESP-38IA User manual

Installation Guide
FibeAir® IP-20V
Part ID: BM-0296-0 | DOC-00042494 Rev A.04
December 2018
© Copyright 2018 by Ceragon Networks Ltd. All rights reserved.

Installation Guide for FibeAir IP-20V
Page 2 of 81
Ceragon Proprietary and Confidential
Notice
This document contains information that is proprietary to Ceragon Networks Ltd. No part of this publication
may be reproduced, modified, or distributed without prior written authorization of Ceragon Networks Ltd.
This document is provided as is, without warranty of any kind.
Trademarks
Ceragon Networks®, FibeAir® and CeraView® are trademarks of Ceragon Networks Ltd., registered in the
United States and other countries.
Ceragon® is a trademark of Ceragon Networks Ltd., registered in various countries.
CeraMap™, PolyView™, EncryptAir™, ConfigAir™, CeraMon™, EtherAir™, CeraBuild™, CeraWeb™, and
QuickAir™, are trademarks of Ceragon Networks Ltd.
Other names mentioned in this publication are owned by their respective holders.
Statement of Conditions
The information contained in this document is subject to change without notice. Ceragon Networks Ltd. shall
not be liable for errors contained herein or for damage in connection with the furnishing, performance, or
use of this document or equipment supplied with it.
Open Source Statement
The Product may use open source software, among them O/S software released under the GPL or GPL alike
license ("Open Source License"). Inasmuch that such software is being used, it is released under the Open
Source License, accordingly. The complete list of the software being used in this product including their
respective license and the aforementioned public available changes is accessible at:
Network element site: ftp://ne-open-source.license-system.com
NMS site: ftp://nms-open-source.license-system.com/
Information to User
Any changes or modifications of equipment not expressly approved by the manufacturer could void the
user’s authority to operate the equipment and the warranty for such equipment.
Intended Use/Limitation
Fixed point-to-point radio links for private networks.
Authorized to Use
Only entities with individual authorization from the National Regulator to operate the mentioned radio
equipment.
The equipment can be used in the following EU countries:
Austria (AT) - Belgium (BE) - Bulgaria (BG) - Switzerland/Liechtenstein (CH) - Cyprus (CY) - Czech Republic
(CZ) - Germany (DE) –Denmark (DK) - Estonia (EE) - Finland (FI) - France (FR) -Greece (GR) - Hungary (HU) -
Ireland (IE) –Iceland (IS) –Italy (IT) –Lithuania (LT) - Luxembourg (LU) –Latvia (LV) - Malta (MT) -
Netherlands (NL) - Norway (NO) - Portugal (PT) - Romania (RO) - Sweden (SE) - Slovenia (SI) - Slovak
Republic (SK) –United Kingdom (UK) –Spain (SP) –Poland (PL)

Installation Guide for FibeAir IP-20V
Page 3 of 81
Ceragon Proprietary and Confidential
Table of Contents
1. Before You Start........................................................................................................ 8
1.1 Important Notes...........................................................................................................................8
1.2 Safety Precautions & Declared Material ......................................................................................8
1.2.1 General Equipment Precautions ..................................................................................................8
1.2.2 Précautions générales relatives à l'équipement ..........................................................................9
1.2.3 Allgemeine Vorsichtsmaßnahmen für die Anlage......................................................................10
1.3 Declaration of Compliance with FCC and Canadian Regulations ...............................................10
1.4 Frequency Restrictions for Canada ............................................................................................11
1.5 Pre-Installation Instructions.......................................................................................................11
1.5.1 Packing .......................................................................................................................................11
1.5.2 Transportation and Storage .......................................................................................................11
1.5.3 Unpacking ..................................................................................................................................11
1.5.4 Inspection ..................................................................................................................................12
2. Product Hardware Description ................................................................................ 13
2.1 IP-20V Hardware Overview........................................................................................................13
2.1.1 IP-20V Interfaces........................................................................................................................14
2.2 PoE Injector................................................................................................................................16
2.2.1 PoE Injector Interfaces...............................................................................................................17
2.3 Powering with External DC ........................................................................................................17
2.4 System Components ..................................................................................................................18
2.5 Adaptors and Installation Kits ....................................................................................................18
2.6 Power Specifications ..................................................................................................................20
2.6.1 Power Input Specifications ........................................................................................................20
2.6.2 Power Consumption Specifications ...........................................................................................20
2.6.3 Power Connection Options ........................................................................................................20
2.6.4 PoE Injector Power Input ...........................................................................................................20
2.6.5 Important Notes! .......................................................................................................................21
2.7 Environmental Specifications.....................................................................................................21
3. Cable Installation and Grounding............................................................................. 22
3.1 Minimum and Maximum Cable Diameter .................................................................................22
3.2 Grounding the Cables ................................................................................................................22
3.3 Grounding the IP-20V Unit.........................................................................................................25
3.4 Power Source .............................................................................................................................26
3.5 Surge Protection ........................................................................................................................26
3.6 Available Cable Options .............................................................................................................27
3.6.1 Fiber Optic Cables –Single Mode ..............................................................................................27
3.6.2 Fiber Optic Cables –Multi Mode ...............................................................................................28
3.6.3 DC Cable and Connector ............................................................................................................29
3.6.4 Ethernet Cable and Specifications .............................................................................................29

Installation Guide for FibeAir IP-20V
Page 4 of 81
Ceragon Proprietary and Confidential
3.6.5 Outdoor Ethernet Cable Specifications......................................................................................31
3.6.6 Outdoor DC Cable Specifications ...............................................................................................32
3.7 Securing the Cables....................................................................................................................32
3.8 Special Instructions for use of Glands........................................................................................33
3.8.1 General Installation Procedure ..................................................................................................34
3.9 Connecting an Optical Fiber Cable and SFP ...............................................................................40
3.9.1 Types of SFPs..............................................................................................................................40
3.9.2 Connecting Optical Fiber to SFPs ...............................................................................................42
3.10 Connecting a DC Power Cable....................................................................................................47
3.11 Connecting the Ethernet Cable ..................................................................................................50
3.11.1 Preparing the Ethernet Cable and Plug-in Field.........................................................................50
3.11.2 Preparing the Ethernet Cable Already Assembled.....................................................................52
3.11.3 Connection of Ethernet Cable to IP-20V ....................................................................................53
4. PoE Injector Installation and Connection ................................................................. 56
4.1 PoE Injector Cable Connection...................................................................................................56
4.2 PoE Injector Grounding..............................................................................................................57
4.3 PoE Injector Wall Mount Installation .........................................................................................57
4.4 PoE Injector Pole Mount Installation .........................................................................................59
4.5 PoE Injector 19” Rack Installation ..............................................................................................60
4.6 PoE Injector ETSI Rack Installation .............................................................................................61
5. Installation Procedure and Antenna Alignment........................................................ 63
5.1 Pole Mount Assembly and Installation ......................................................................................67
5.1.1 Procedure...................................................................................................................................67
5.2 Wall Mount Assembly and Installation ......................................................................................69
5.2.1 Procedure...................................................................................................................................70
5.3 Attaching the IP-20V to the Installation and Alignment Device ................................................71
5.4 Performing Antenna Alignment .................................................................................................72
5.4.1 Adjusting the Antenna Azimuth.................................................................................................72
5.4.2 Adjusting the Antenna Elevation ...............................................................................................78

Installation Guide for FibeAir IP-20V
Page 5 of 81
Ceragon Proprietary and Confidential
List of Figures
Figure 1: IP-20V Rear View (Right) and Front View (Left) ....................................................... 13
Figure 2: Cable Gland Construction ........................................................................................ 13
Figure 3: IP-20V Interfaces ...................................................................................................... 14
Figure 4: RSL Interface............................................................................................................. 15
Figure 5: Grounding Screw...................................................................................................... 15
Figure 6: PoE Injector .............................................................................................................. 16
Figure 7: PoE Injector Ports..................................................................................................... 17
Figure 8: Two-Wire to PoE Port Power Adaptor ..................................................................... 17
Figure 9: IP-20V ....................................................................................................................... 18
Figure 10: PoE Injector ............................................................................................................ 18
Figure 11: Easy-Install Mounting and Alignment Kit............................................................... 18
Figure 12: Cable Grounding Kit ............................................................................................... 22
Figure 13: Cable Design........................................................................................................... 30
Figure 14: Tightening the Front Portion of the Gland............................................................. 38
Figure 15: Tightening the Rear Portion of the Gland .............................................................. 38
Figure 16: Installation and Alignment Device –Azimuth and Elevation Adjustment Tools.... 63
Figure 17: Installation and Alignment Device –Azimuth Range ............................................. 64
Figure 18: Installation and Alignment Device –Extended Azimuth Range............................. 65
Figure 19: Installation and Alignment Device –Delivery Elevation (45° Downward) ............. 65
Figure 20: Installation and Alignment Device –Highest Elevation (45° Upward)................... 66
Figure 21: Horizontal Polarization –Screws and Washers...................................................... 71
Figure 22: Vertical Polarization –Screws and Washers .......................................................... 71
Figure 23: Horizontal Polarization –Radio and Installation and Alignment Kit...................... 71
Figure 24: Horizontal Polarization –Antenna (Front) ............................................................. 71
Figure 25: Vertical Polarization –Radio and Installation and Alignment Kit .......................... 72
Figure 26: Vertical Polarization –Antenna (Front) ................................................................. 72
Figure 27: Azimuth Screws –Top View (Azimuth 45° to the Right) ........................................ 76
Figure 28: Removing the Azimuth Screws (Side View)............................................................ 76
Figure 29: Azimuth Screws in New Placement –Top View (Azimuth 45° to the Right).......... 77
Figure 30: Repositioning the Azimuth Screws (Side View)...................................................... 77

Installation Guide for FibeAir IP-20V
Page 6 of 81
Ceragon Proprietary and Confidential
List of Tables
Table 1: IP-20V Chassis Marketing Models ............................................................................. 14
Table 2: IP-20V Accessories..................................................................................................... 18
Table 3: PoE Injector ............................................................................................................... 19
Table 4: Two-Wire to PoE Port Power Adaptor ...................................................................... 19
Table 5: Power Input Specifications........................................................................................ 20
Table 6: Power Consumption Specifications........................................................................... 20
Table 7: Cable Grounding Kit................................................................................................... 22
Table 8: Ethernet Cable Color Code ........................................................................................ 30
Table 9: Outdoor Ethernet Cable Electrical Requirements..................................................... 31
Table 10: Outdoor Ethernet Cable Mechanical/Environmental Requirements...................... 31
Table 11: Outdoor DC Cable Electrical Requirements ............................................................ 32
Table 12: Outdoor DC Cable Mechanical/Environmental Requirements ............................... 32
Table 13: Cable Clamps ........................................................................................................... 32
Table 14: Glands Kit................................................................................................................. 33
Table 15: Gland Cap ................................................................................................................ 33
Table 16: CSFP –SFP Compatibility Example .......................................................................... 40
Table 17: SFP Module Recommendations .............................................................................. 40
Table 18: CSFP Module Recommendations ............................................................................ 41
Table 19: SFP Module Recommendations for Third Party Equipment ................................... 41
Table 20: Approved 10 GbE SFP+ Modules ............................................................................. 41
Table 21: Materials for Preparing Ethernet Data Cables ........................................................ 50

Installation Guide for FibeAir IP-20V
Page 7 of 81
Ceragon Proprietary and Confidential
About This Guide
This guide describes the FibeAir IP-20V installation procedures and provides additional
information concerning system parts and frequency bands.
What You Should Know
For the warranty to be honored, install the unit in accordance with the instructions in this
manual.
Target Audience
This guide contains technical information about IP-20V installation, and is intended for use
by qualified Ceragon technical personnel at all levels.
Related Documents
•FibeAir IP-20V Technical Description
•FibeAir IP-20C, IP-20S, and IP-20V User Guide
•FibeAir IP-20 Series MIB Reference

Installation Guide for FibeAir IP-20V
Page 8 of 81
Ceragon Proprietary and Confidential
1. Before You Start
1.1 Important Notes
•For the warranty to be honored, install the unit in accordance with the
instructions in this manual.
•Any changes or modifications of equipment not expressly approved by the
manufacturer could void the user’s authority to operate the equipment and
the warranty for such equipment.
•IP-20V is intended for installation in a restricted access location.
•IP-20V must be installed and permanently connected to protective earth by
qualified service personnel in accordance with applicable national electrical
codes.
1.2 Safety Precautions & Declared Material
1.2.1 General Equipment Precautions
To avoid malfunctioning or personnel injuries, equipment or
accessories/kits/plug-in unit installation, requires qualified and trained
personnel. Changes or modifications not expressly approved by Ceragon
Networks could void the user's authority to operate the equipment.
Where special cables, shields, adapters and grounding kits are supplied
or described in this manual, these items must be used, to comply with
the FCC regulations.
Use of controls, adjustments, or performing procedures other than
those specified herein, may result in hazardous radiation exposure.
When working with an IP-20V, note the following risk of electric shock
and energy hazard:
Disconnecting one power supply disconnects only one power supply
module. To isolate the unit completely, disconnect all power supplies.
Machine noise information order - 3. GPSGV, the highest sound pressure
level amounts to 70 dB (A) or less, in accordance with ISO EN 7779.
Machine noise information order - 3. GPSGV, the highest sound pressure
level amounts to 70 dB (A) or less, in accordance with ISO EN 7779.
Make sure to maintain a minimum safe distance of at least 50 cm from
the front of the antenna.

Installation Guide for FibeAir IP-20V
Page 9 of 81
Ceragon Proprietary and Confidential
Static electricity may cause body harm, as well as harm to electronic
components inside the device. Anyone responsible for the installation or
maintenance of the IP-20V must use an ESD Wrist Strap. ESD protection
measures must be observed when touching the unit. To prevent
damage, before touching components inside the device, all electrostatic
must be discharged from both personnel and tools.
In Norway and Sweden:
Equipment connected to the protective earthing of the building
installation through the mains connection or through other equipment
with a connection to protective earthing –and to a cable distribution
system using coaxial cable, may in some circumstances create a fire
hazard. Connection to a cable distribution system has therefore to be
provided through a device providing electrical isolation below a certain
frequency range (galvanic isolator, see EN 60728-11).
Utstyr som er koplet til beskyttelsesjord via nettplugg og/eller via annet
jordtilkoplet utstyr –og er tilkoplet et kabel-TV nett, kan forårsake
brannfare. For å unngå dette skal det ved tilkopling av utstyret til kabel-
TV nettet installeres en galvanisk isolator mellom utstyret og kabel- TV
nettet.
Utrustning som är kopplad till skyddsjord via jordat vägguttag och/eller
via annan utrustning och samtidigt är kopplad till kabel-TV nät kan i vissa
fall medfőra risk főr brand. Főr att undvika detta skall vid anslutning av
utrustningen till kabel-TV nät galvanisk isolator finnas mellan
utrustningen och kabel-TV nätet.
1.2.2 Précautions générales relatives à l'équipement
L’utilisation de commandes ou de réglages ou l'exécution de procédures
autres que celles spécifiées dans les présentes peut engendrer une
exposition dangereuse aux rayonnements.
L’usage de IP-20V s’accompagne du risque suivant d'électrocution et de
danger électrique : le débranchement d'une alimentation électrique ne
déconnecte qu'un module d'alimentation électrique. Pour isoler
complètement l'unité, il faut débrancher toutes les alimentations
électriques.
Bruit de machine d’ordre - 3. GPSGV, le plus haut niveau de pression
sonore s'élève à 70 dB (A) au maximum, dans le respect de la norme ISO
EN 7779.

Installation Guide for FibeAir IP-20V
Page 10 of 81
Ceragon Proprietary and Confidential
1.2.3 Allgemeine Vorsichtsmaßnahmen für die Anlage
Wenn andere Steuerelemente verwendet, Einstellungen vorgenommen
oder Verfahren durchgeführt werden als die hier angegebenen, kann
dies gefährliche Strahlung verursachen.
Beachten Sie beim Arbeiten mit IP-20V das folgende Stromschlag- und
Gefahrenrisiko: Durch Abtrennen einer Stromquelle wird nur ein
Stromversorgungsmodul abgetrennt. Um die Einheit vollständig zu
isolieren, trennen Sie alle Stromversorgungen ab.
Maschinenlärminformations-Verordnung - 3. GPSGV, der höchste
Schalldruckpegel beträgt 70 dB(A) oder weniger gemäß EN ISO 7779.
1.3 Declaration of Compliance with FCC and Canadian Regulations
This device complies with FCC Rules Part 15 and with Industry Canada’s license-
exempt RSSs. Operation is subject to the following two conditions:
(1) This device may not cause harmful interference
(2) this device must accept any interference received including interference that
may cause undesired operation.
Le présent appareil est conforme aux CNR d’Industrie Canada applicables aux
appareils radio exempts de licence. L’exploitation est autorisée aux deux
conditions suivantes :
(1) l’appareil ne doit pas produire de brouillage;
(2) l’utilisateur de l’appareil doit accepter tout brouillage radioélectrique subi,
même si le brouillage est susceptible d’en compromettre le fonctionnement.
This equipment has been tested and found to comply with the limits for a Class B
digital device, pursuant to Part 15 of the FCC Rules. These limits are designed to
provide reasonable protection against harmful interference in a residential
installation. This equipment generates, uses and can radiate radio frequency
energy and, if not installed and used in accordance with the instructions, may
cause harmful interference to radio communications. However, there is no
guarantee that interference will not occur in a particular installation. If this
equipment does cause harmful interference to radio or television reception,
which can be determined by turning the equipment off and on, the user is
encouraged to try to correct the interference by one or more of the following
measures:
•Reorient or relocate the receiving antenna.
•Increase the separation between the equipment and receiver.
•Connect the equipment into an outlet on a circuit different from that to which
the receiver is connected.
•Consult the dealer or an experienced radio/TV technician for help.

Installation Guide for FibeAir IP-20V
Page 11 of 81
Ceragon Proprietary and Confidential
Changes or modifications to this equipment not expressly approved by the party
responsible for compliance (Ceragon Networks Ltd.) could void the user’s
authority to operate the equipment.
This Class B digital apparatus complies with Canadian ICES-003.
Cet appareil numérique de la classe B est conforme a la norme NMB-003 du
Canada.
1.4 Frequency Restrictions for Canada
To meet Canadian regulatory requirements, the following IP-20V marketing model
must be used in Canada. This model supports a frequency range of 57-64 GHz:
IP-20V-C-ESP-38IA
For other locations, the following IP-20V marketing model should be used:. This
model supports a frequency range of 57-66 GHz: IP-20V-ESP-38IA
1.5 Pre-Installation Instructions
1.5.1 Packing
The equipment should be packed and sealed in moisture absorbing bags.
1.5.2 Transportation and Storage
The equipment cases are prepared for shipment by air, truck, railway and sea,
suitable for handling by forklift trucks and slings. The cargo must be kept dry
during transportation, in accordance with ETS 300 019-1-2, Class 2.3. For sea-
transport, deck-side shipment is not permitted. Carrier-owned cargo containers
should be used.
It is recommended that the equipment be transported to the installation site in its
original packing case.
If intermediate storage is required, the packed equipment must be stored in a dry
and cool environment, and out of direct sunlight, in accordance with ETS 300 019-
1-1, Class 1.2.
1.5.3 Unpacking
The equipment is packed in sealed plastic bags and moisture absorbing bags are
inserted. Any separate sensitive product, i.e. printed boards, are packed in anti-
static handling bags. The equipment is further packed in special designed cases.
Marking is done according to standard practice unless otherwise specified by
customers. The following details should be marked:
•Customers address
•Contract No
•Site name (if known)
•Case No

Installation Guide for FibeAir IP-20V
Page 12 of 81
Ceragon Proprietary and Confidential
1.5.4 Inspection
Check the packing lists and ensure that correct parts numbers quantities of goods
have arrived. Inspect for any damage on the cases and equipment. Report any
damage or discrepancy to a Ceragon representative, by e-mail or fax.

Installation Guide for FibeAir IP-20V
Page 13 of 81
Ceragon Proprietary and Confidential
2. Product Hardware Description
2.1 IP-20V Hardware Overview
FibeAir IP-20V is equipped with a 38dBi integrated antenna to minimize its
installation form-fit and enable it to blend into an urban environment.
Note: The equipment is type approved and labelled according to the EU’s
Radio Equipment Directive 2014/53/EU. ‘RED’ replaced the previous
R&TTE Directive 1999/5/EC since 13 June 2017.
Figure 1: IP-20V Rear View (Right) and Front View (Left)
Figure 2: Cable Gland Construction
Note: The Extension port is smaller than the other ports and requires a
special gland.

Installation Guide for FibeAir IP-20V
Page 14 of 81
Ceragon Proprietary and Confidential
2.1.1 IP-20V Interfaces
IP-20V has one electrical Ethernet interface for PoE and management (Port 1), an
optical SFP cage that supports regular and CSFP standards (Port 2), and an optical
SFP cage that can be configured for 1GE or 10GE (Port 3).
The following table provides the marketing models for IP-20V.
Table 1: IP-20V Chassis Marketing Models
Marketing Model
Description
IP-20V-ESP-38IA
IP-20V V-BAND 10GbE ESP - IA 38dBi (57-66GHz)
IP-20V-C-ESP-38IA
IP-20V V-BAND 10GbE ESP - IA 38dBi (57-64GHz)
Figure 3: IP-20V Interfaces
•Port 1 (MGT):
◦Electric: 10/100/1000Base-T RJ-45
◦Management only (no traffic)
◦PoE or external DC support (adapter)
•Port 2
◦SFP cage that supports Regular and CSFP standards
◦Regular SFP provides ETH2
◦CSFP (Dual BiDir SFP) provides ETH2 and ETH3
•Port 3
◦SFP cage that supports SFP+ standard
◦1GE or 10GE Eth traffic (user-configurable)
•Extension Port (Port 4):
◦Direct connection to CPU by technician (see User Guide for details)
•Antenna Port –Ceragon proprietary flange (flange compliant with UG385/U)

Installation Guide for FibeAir IP-20V
Page 15 of 81
Ceragon Proprietary and Confidential
•RSL interface –DVM interface to enable voltage measurement for RSL
indication. The RSL measurement is performed using standard DVM testing
probes. To access the RSL interface, the user must remove the port’s cover
and insert the DVM plugs into the sockets, according to the polarization
markings.
1
Figure 4: RSL Interface
•Grounding screw
Figure 5: Grounding Screw
1
The voltage at the RSL port is 1.XX where XX is the RSL level. For example: 1.45V means an
RSL of -45 dBm. Note that the voltage measured at the RSL port is not accurate and should be
used only as an aid.

Installation Guide for FibeAir IP-20V
Page 16 of 81
Ceragon Proprietary and Confidential
2.2 PoE Injector
The PoE injector is an outdoor unit which can be mounted on a wall, pole, or
indoor rack.
Each PoE Injector kit includes the following items:
•PoE injector
•2 DC power connectors
Figure 6: PoE Injector
Two models of the PoE Injector are available:
•PoE_Inj_AO_2DC_24V_48V –Includes two DC power ports with power input
ranges of ±(18-60)V each.
•PoE_Inj_AO –Includes one DC power port (DC Power Port #1), with a power
input range of ±(40-60)V.
Note: An AC-power PoE Injector option is also available. Contact your
Ceragon representative for details.

Installation Guide for FibeAir IP-20V
Page 17 of 81
Ceragon Proprietary and Confidential
2.2.1 PoE Injector Interfaces
•Power-Over-Ethernet (PoE) Port
•GbE Data Port supporting 10/100/1000Base-T
•DC Power Port 1 ±(18-60)V or ±(40-60)V
•DC Power Port 2 ±(18-60)V (Optional)
•Grounding screw
Figure 7: PoE Injector Ports
2.3 Powering with External DC
For configurations in which power is not provided via PoE, a special adaptor (IP-
20_Mini_Power_Adaptor) is available that enables users to connect a two-wire
power connector to the PoE port. This adaptor is located inside of the gland. In
such configurations, only one electrical GbE interface is available (MGT).
Figure 8: Two-Wire to PoE Port Power Adaptor

Installation Guide for FibeAir IP-20V
Page 18 of 81
Ceragon Proprietary and Confidential
2.4 System Components
The following figures show the main components used in the IP-20V installation
procedures.
Figure 9: IP-20V
Figure 10: PoE Injector
Figure 11: Easy-Install Mounting and Alignment Kit
2.5 Adaptors and Installation Kits
Table 2: IP-20V Accessories
Marketing Model
Description
IP-20E_V_Flat_Ant_Mounting_Kit
IP-20E,IP20V Flat Ant. Mounting Kit

Installation Guide for FibeAir IP-20V
Page 19 of 81
Ceragon Proprietary and Confidential
Table 3: PoE Injector
Marketing Model
Description
PoE_Inj_AO
Includes one DC power port (DC Power Port #1), with a
power input range of ±(40-60)V (default offering).
PoE_Inj_AO_2DC_24V_48V
Includes two DC power ports with power input ranges of
±(18-60)V each.
PoE_Inj_19inch_Rack_Mnt_kit
PoE Injector 19” Rack Mount Kit
PoE_Inj_ETSI_Rack_Mnt_kit
PoE Injector ETSI Rack Mount Kit
Table 4: Two-Wire to PoE Port Power Adaptor
Marketing Model
Description
IP-20_Mini_Power_Adaptor
RJ45 to TB Power Adaptor With Protection

Installation Guide for FibeAir IP-20V
Page 20 of 81
Ceragon Proprietary and Confidential
2.6 Power Specifications
2.6.1 Power Input Specifications
Table 5: Power Input Specifications
Standard Input
-48 VDC nominal
DC Input range
-40.5 to -60 VDC
2.6.2 Power Consumption Specifications
Table 6: Power Consumption Specifications
Channel Bandwidth
Power Consumption
<=250 MHz
33W
500 MHz
37W
2.6.3 Power Connection Options
Power Source and Range
Data Connection Type
Connection Length
DC Cable Type / Gage
Ext DC
-(40.5 ÷ 60)VDC
(Using an RJ-45 to DC cable adaptor)
Optical
≤ 150m
18AWG
Optical
150m ÷ 300m
14AWG
PoE Injector
±(18 ÷ 60)VDC2
Electrical
≤ 100m (328ft)
CAT5e (24AWG)
2.6.4 PoE Injector Power Input
Standard Input
-48 or +24VDC
(Optional)
DC Input range
±(183/40.5 to 60) VDC
2
Optional.
3
+18VDC extended range is supported as part of the nominal +24VDC support.
This manual suits for next models
2
Table of contents
Other Ceragon Switch manuals