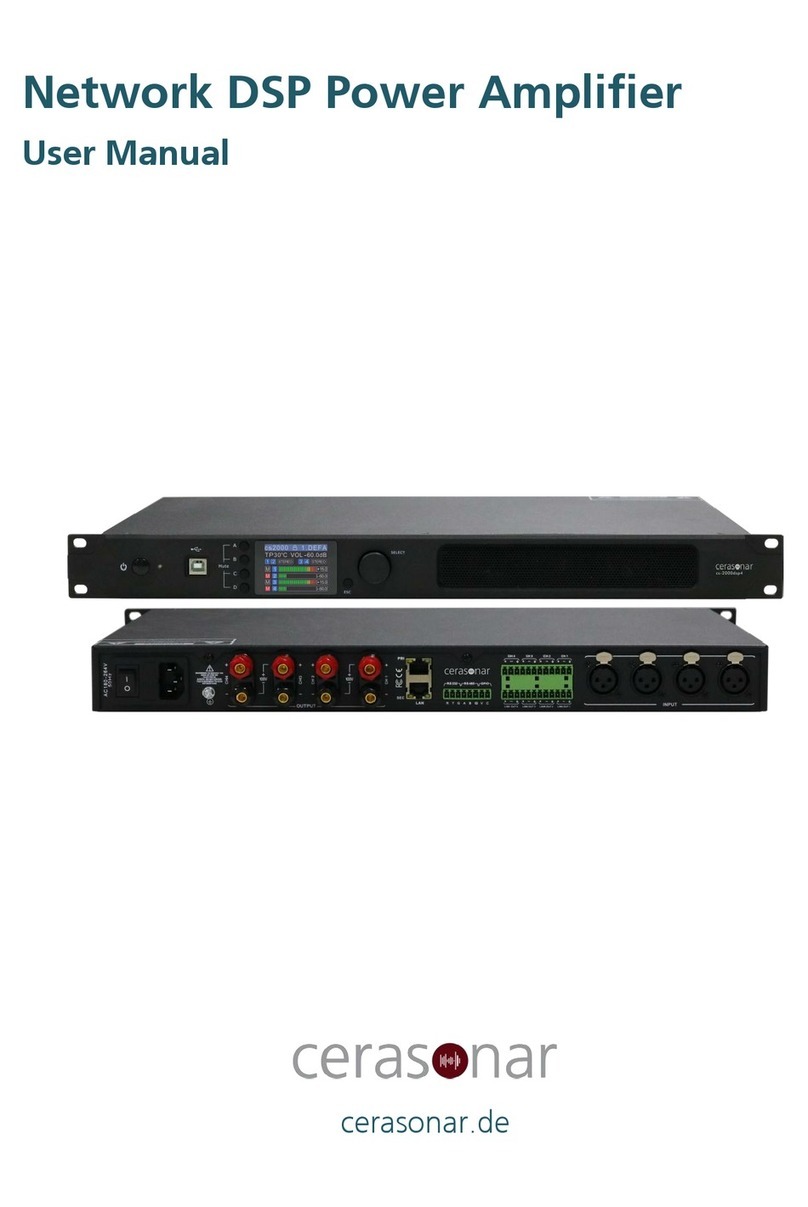
Cerasonar CS-500DSP4 User manual


cerasonar cs-500dsp4
4 channel DSP amplifier
Technical changes and printing errors reserved - Installation Manual V2.1 – Page 2 / 16

Important Safety Instructions
Read these instructions
Keep these instructions
Heed all warnings
Follow all instructions
Do not use this apparatus near water
Clean only with a dry cloth
Do not block any ventilation openings. Install in accordance with the manufacturer’s
instructions
Do not install near any heat sources such as radiators, heat registers, stoves, or other
apparatus (including amplifiers) that produce heat
Protect the power cord from being walked on or pinched particularly at plugs,
convenience receptacles, and the point where they exit from the apparatus
Only use attachments/accessories specified by the manufacturer
Unplug this apparatus during lightning storms or when unused for long periods of time
Refer all servicing to qualified service personnel. Servicing is required when the
apparatus has been damaged in any way, such as power-supply cord or plug is
damaged, liquid has been spilled or objects have fallen into the apparatus, the
apparatus has been exposed to rain or moisture, does not operate normally, or has
been dropped
This apparatus shall not be exposed to dripping or splashing, and no object filled with
liquids, such as vases or glasses, shall be placed on the apparatus
Safety Symbols
Technical changes and printing errors reserved - Installation Manual V2.1 – Page 3 / 16
The lightning flash with arrowhead symbol within an equilateral
triangle is intended to alert the user to the presence of uninsulated
“dangerous voltage” within the product’s enclosure, that may be of
sufficient magnitude to constitute a risk of electric shock to person
s.
The exclamation point within an equilateral triangle is intended to
alert the user of the presence of important operating and
maintenance (servicing) instructions in the literature accompanying
the appliance.

When Installing the Unit
Never plug in nor remove the power supply plug with wet hands, as doing so may cause
electric shock.
When unplugging the power supply cord, be sure to grasp the power supply plug;
never pull on the cord itself. Operating the unit with a damaged power supply cord
may cause a fire or electric shock.
When moving the unit, be sure to remove its power supply cord from the wall outlet.
Moving the unit with the power cord connected to the outlet may cause damage to
the power cord, resulting in fire or electric shock. When removing the power cord, be
sure to hold its plug to pull.
Avoid installing the unit in humid or dusty locations, in locations exposed to the direct
sunlight, near the heaters, or in locations generating sooty smoke or steam as doing
otherwise may result in fire or electric shock.
To avoid electric shocks, be sure to unplug the unit's power supply cord when
connecting speakers.
Be sure to follow the instructions below when rack-mounting the unit. Failure to do so
may cause a fire or personal injury.
o Install the equipment rack on a stable, hard floor. Fix it with anchor bolts or
take other arrangements to prevent it from falling down.
o When connecting the unit's power cord to an AC outlet, use the AC outlet with
current capacity allowable to the unit.
o No rack-mounting screws are supplied with the unit. Separately prepare the
appropriate screws for the rack.
Make sure that the ventilation slots as well as the fan is not blocked by any objects
that may obstruct air flow to prevent that the unit overheats.
Technical changes and printing errors reserved - Installation Manual V2.1 – Page 4 / 16
Caution, to reduce the risk of electric shock, do not remove the
top cover. There are no user-serviceable parts inside. Refer
servicing to qualified personnel.
Recycling notice: If the time comes and this apparatus has
fulfilled its destiny, do not throw it out into the trash. It has to
be carefully recycled for the good of mankind, by a facility
specially equipped for the safe recycling of electronic
apparatus. Please contact your local or state recycling leaders
for assistance in locating a suitable nearby recycling facility. Or,
contact us and we might be able to repair it for you.

When the Unit is Installed
Do not place heavy objects on the unit as this may cause it to fall or break which may
result in personal injury and/or property damage. In addition, the object itself may
fall off and cause injury and/or damage.
Do not operate the unit for an extended period of time with the sound distorting. This
is an indication of a malfunction, which in turn can cause heat to generate and result
in a fire.
If dust accumulates on the power supply plug or in the wall AC outlet, a fire may result.
Clean it periodically. In addition, insert the plug in the wall outlet securely. internal
temperature rise.
Switch off the power, and unplug the power supply plug from the AC outlet for safety
purposes when cleaning or leaving the unit unused for 10 days or more. Doing
otherwise may cause a fire or electric shock.
Maintenance and Repair
WARNING! Advanced technology, e.g., the use of modern materials and powerful
electronics, requires specially adapted maintenance and repair methods. To avoid a
danger of subsequent damage to the apparatus, injuries to persons and/or the
creation of additional safety hazards, all maintenance or repair work on the apparatus
should be performed only by a Cerasonar authorized service partner. Cerasonar is not
responsible for any injury, harm or related damages arising from any failure of the
customer, owner or user of the apparatus to facilitate those repairs.
Delivery Content
The cs-500dsp4 comes with the following content:
Amplifier, cerasonar cs-500dsp4
Removable terminal plug (4P), 2 pcs
Removable terminal plug (5P), input adapter with RCA cable connected, 2 pcs
IEC-type detachable power cord
Installation manual
Adapter rack ear for 19″ rack mounting (1x amplifier 1U)
Adapter rack ear for 19″ rack mounting (1x amplifier 1U)
Adapter amp connector for 19″ rack mounting (1x amplifier 1U)
Save the carton and polystyrene inserts for future safe transport in case the amplifier is moved
or requires shipping for repair.
Technical changes and printing errors reserved - Installation Manual V2.1 – Page 5 / 16

Introduction
Thank you for purchasing the cerasonar cs-500dsp4 which is a 4-channel DSP amplifier that
convinces with its performance and compact dimensions. A preset can be selected for our
cerasonar loudspeakers to ensure optimal sound in any room. The digital overload protection
guarantees operational safety.
The power output is 125 watts per channel into 4 and 8 ohms, furthermore the amplifier can
also be used for 70/100V applications. There are 4 balanced inputs, the RCA adapters included
in the package can be used for up to two stereo RCA inputs. If the default standby automatic
is not desired, the amplifier can also be switched on and off by 12V trigger. Control via
Control4 is possible as well. The amplifier connects to the network via LAN and can be
configured locally from any internet browser, no additional PC software is necessary.
Adapters are included for installation in a 19″ rack. One or two amplifiers per 1U can be
installed. The amplifier is also suitable for stand-alone use, as it is passively cooled and does
not cause any disturbing noise. In the configuration interface the fine tuning of the
loudspeakers can be done (max. power limit, DSP filter, volume) and the input channels can
be assigned to the output channels via matrix.
Functions
(front panel view)
PROTECT/LIMIT LED
Each channel (A, B, C and D) has a protection/clip limiter LED. Whenever this red indicator
lights up, it implies that the internal protections have been triggered to protect the device
against damage. Should this protection turn on, please check if the amplifier is being
overdriven or if there is any short circuit in speaker cables.
Whenever this red indicator is blinking, it implies that the limiter starts clipping. The limiter
only responds to actual clipping, and automatically compensates for load and voltage
variations. Clip limiting is generally recommended, especially to protect high frequency
drivers. It illuminates red whenever the amplifier reaches the selected power limit.
Technical changes and printing errors reserved - Installation Manual V2.1 – Page 6 / 16

SIGNAL LED
Each channel has a signal LED. It illuminates green when a signal is present and beyond a
default input threshold level.
(back panel view)
FACTORY RESET
Please turn to page 14
IEC 4-PIN RECEPTACLE
The cs-500dsp4 amplifier has an auto-switch 115/230VAC power supply that operates on
mains from 100 - 240 V at 50Hz or 60 Hz. The IEC receptacle on the rear panel accepts the
supplied IEC cord which terminates in a connector plug appropriate for the country of sale.
CAUTION: This unit is a Class 1 device. Do not defeat the safety connector or use a power cord
without the safety ground pin.
AC FUSE & HOLDER
The main power supply fuse may be checked or replaced. Make sure that the power cord is
unplugged from the AC mains first. Then use a flat-headed screwdriver to undo the fuse carrier
from the fuse holder. Inspect the fuse and replace with the exact same type indicated on the
unit. The use of any other type of fuse may lead to an unsafe condition. If the fuse blows again
immediately, then unplug the power cord and contact the dealer for service. Do not open the
unit, as there are no user-serviceable parts inside, and dangerous voltages exist.
CAUTION: Only replace with the same type fuse.
BALANCED TERMINAL BLOCK INPUT A, B, C AND D
There are two five‑pin Euro-style connectors labeled CH1 through CH4 providing the audio
inputs to the amplifiers. A single input can be mixed to one or a combination of outputs. You
can use from one to four of the inputs. The inputs are 10 kΩ balanced or unbalanced.
a. Make sure your audio source devices are powered off.
b. The unit comes with two preinstalled RCA to euro style connectors, you can use these for
any RCA sources, e.g. Sonos Connect
c. If you want to build your own cable, follow these steps.
d. Connect the input source wires to the Euro-style connectors, where H(+), C(-), E(GND).
e. The inputs can be routed to different outputs. Be sure that the connections you make here
match the configuration of the amplifier.
f. Plug the Euro-style audio connectors into the appropriate inputs on the rear of the amplifier.
Technical changes and printing errors reserved - Installation Manual V2.1 – Page 7 / 16

INPUT LEVEL POTENTIOMETERS
Use these potentiometers to adjust the gain of input A, B, C and D, respectively.
SPEAKER OUTPUT A, B, C AND D OUTPUT
There are two sets of removable speaker wire terminals, one for two amplifier outs, either
amplifier A and B or amplifier C and D. The terminals accept speaker wires up to 14 AWG in
size. Each terminal has four screw-down connections for speaker wire: One positive (+) and
one negative (-) for each speaker. Unscrew the connection, insert the appropriate bare
speaker wire, then tighten firmly.
Warning: The negative (-) terminal is not Ground. Please do not short the negative (-)
terminals.
NETWORK CONTROL
An RJ45 jack is supplied for connection to an Ethernet network for external control and
monitoring, either by a direct wired connection or via an external WiFi access point. Any
device with a modern web browser can be used. LEDs below the connector indicate valid
network connection (LINK) and network activity (ACT). When several network devices are
connected to a network, a switch with a built-in DHCP server should be used. The cs-500dsp4
is set to DHCP mode on delivery, which means that the network router assigns an IP address
to the device. Please make sure that enough free IP addresses are available. With a suitable
network search/scanner tool you can find the amplifiers that are connected to your network.
If there is no DHCP service available, the IP address of the unit will be 192.168.14.1
After the amp is set up correctly and turned on, you can access the unit via a web browser.
Make sure that both units are connected to the same local network.
Step 1:
Type in the IP address of the amp (use a scanner tool if you don‘t know it), if the ip address
would be: 192.168.1.50, type in this address to your webbrowser:
http://192.168.1.50
Step 2:
Use the following login data to access the amps control panel:
user: “admin”
password: “admin”
Step 3:
You should now be able access the cerasonar cs-500dsp4 web GUI.
Technical changes and printing errors reserved - Installation Manual V2.1 – Page 8 / 16
WARNING!: When the AC power is on, there is a potential of having
dangerous voltage at the output terminals on the back of the
amplifier. Use caution not to touch these contacts. Turn off the AC
Mains disconnect switch prior to making any connections.

Web GUI Controls
START SECTION
The cerasonar cs-500dsp4 is easy and fast to configure due to the sleek and straightforward
GUI design. On the start page you have the input matrix to route the input signal(s) to the
desired output channel(s). In the mixer section, the output channel(s) volume can be adjusted
or the amp channel muted. The level meter shows the input signal/source strength and the
output signal strength, on the top bar the selected preset, the temperatures and the ip
address as well as the system uptime and protection are displayed.
WARNING: If you only want to use the basic functions, please go to the “PRESET SECTION” to
select the appropriate preset for the cerasonar speaker. If the amp is not correctly configured,
this may harm the speakers and/or lead to damage!
DSP SECTION
In this section, some basic DSP functions can be configured. First of all the HPF (highpass filter)
can be individually selected for all channels with the desired frequency. Please make sure to
turn it on by pressing on “HPF” (it will turn to yellowish). With the tone control, the treble and
bass level can be adjusted. The limiter can be used to limit the max. power output.
0 dB = full power, e.g. ~ 125 watts
- 3 dB = half power, e.g. ~ 62,5 watts
- 6 dB = quarter power, e.g. ~ 31,25 watts
- 9 dB = eighth power, e.g. ~ 15,625 watts
Technical changes and printing errors reserved - Installation Manual V2.1 – Page 9 / 16

EQ FILTER SECTION
If required, EQ filters can be used. Three filters are available per channel, the LPF and HPF are
each 12 dB per octave. With a suitable measurement system, the frequency response should
be measured at different points in the room. Afterwards, filters should only be set if a certain
tendency is visible on all measurements. We recommend checking the changes with a known
music song, for this purpose the filters can be switched on and off in real time.
WARNING: Only for qualified users, wrongly set filters can make the speakers sound badly
and might harm them!
Technical changes and printing errors reserved - Installation Manual V2.1 – Page 10 / 16

PRESET SECTION
The amplifier is shipped with presets for various cerasonar products. These can be selected in
this section. The presets can be loaded not only from the amplifier, but also from the data
memory of the individual device. If changes have been made to the settings of the amp, they
can be saved here. We recommend that you also back up the data using the export function.
WARNING: Please double check your selection, since a wrong selection could damage the
speaker.
OUTPUT CONFIGURATION SECTION
The speaker configuration is done on the rear side of the amplifier. For this purpose, the DIP
switches have to be set to the desired configuration.
The following settings are available:
4x 125 watts into 4 ohms
4x 125 watts into 8 ohms
2x 250 watts into 8 ohms* (4 ohms at your own risk)
2x 250 watts at 70 volts
2x 250 watts at 100 volts
* to activate the bridge mode, the DIP switch must be set to "8 Ohm". Furthermore, the switch
in the GUI menu item "Output Configuration" has to be changed from "8 Ohm Stereo" to "8
Ohm Bridged".
WARNING: Please check the displayed information, as an incorrect configuration could
damage the amplifier or speaker.
Technical changes and printing errors reserved - Installation Manual V2.1 – Page 11 / 16

POWER SAVING SECTION
Again, the values set by DIP switches on the rear panel are only displayed. Please make sure
that the configuration is correct so that the energy saving options can be utilised.
NETWORK CONFIGURATION
The set network values are displayed here and can also be changed.
ATTENTION: Please make changes only by qualified users, since the amplifier may not be
visible if it is configured incorrectly.
Technical changes and printing errors reserved - Installation Manual V2.1 – Page 12 / 16

PASSWORD SECTION
The device can be secured by a password in this section.
WARNING: We recommend to keep the password safely!
Technical changes and printing errors reserved - Installation Manual V2.1 – Page 13 / 16

ABOUT SECTION
Here the device name and the software version can be checked.
FACTORY RESET
To perform a factory reset, follow these steps:
1. Remove the audio input adapter(s)
2. Power on the device
3. Use a safety pin to assert the hidden button on the rear panel for less than 2 seconds
4. The device will perform a factory reset and reboot afterwards
Technical changes and printing errors reserved - Installation Manual V2.1 – Page 14 / 16

Technical Specifications
Amplifier channels: 4 channels
Power Output: 125 watts x4 @1KHz/4ohm
125 watts x4 @1KHz/8ohm
250 watts (bridged) x2 @1KHz/8ohm
250 watts (bridged) x2 @1KHz/70V
250 watts (bridged) x2 @1KHz/100V
Signal-to-Noise Ratio: ≥ 96dB (A-weighted) @1KHz/100V
THD+N: <1% @1KHz/rated power
Frequency Response: 20Hz to 20KHz ± 2dB
Crossovers: 12dB/oct
Crosstalk: -80dB (@70V 1KHz Zone 1/Zone 2)
Amplifier gain: selectable
Analog Inputs: Sensitivity Attenuation, 0dBV ~ ∞
Impedance 22K ohms
Type 2x Phoenix 5-pin
Outputs: 2x Phoenix 4-pin
Indicators (LEDs): (Front) Signal, Limit∕Protection ,(Back) CLIP
Power amplifier: class-d amp
DSP: 28-/56-bit, 50 MIPS
HPF
3 PEQs per channel (6 PEQ‘s in bridged mode)
4x4 input matrix mixer
Limiter
Control Interface: 10/100M Ethernet
AC input: 115Vac or 230Vac (Auto-switch mode)
Power Supply Topology: SMPS
Protections: Over power, Over-current, Over-temperature, Soft-start
protections, etc.
Display : None
AC power requirements: Idle: 18W~18.5W
1/8 rated power: 92W
Full power: 750W
Fuse Rating on back panel: T5AH/250V
Dimensions: 215(W) x 44(H) x 240(D) (mm)
Weight: 2.0Kg
Technical changes and printing errors reserved - Installation Manual V2.1 – Page 15 / 16

Table of contents
Other Cerasonar Amplifier manuals
