Certa PowerPlus CT20VNLSGNA User manual

POWERPLUS 20V CORDLESS
NAIL AND STAPLE GUN
(SKIN ONLY)
CT20VNLSGNA


Important Safety Rules
• Read these instructions carefully before use and retain this user guide for future
reference.
• Keep work area clean and well lit. Cluttered and dark areas invite accidents.
• Avoid dangerous environments. Do not operate power tools in explosive
atmospheres, such as in the presence of flammable liquids, gases or dust. Power
tools create sparks which may ignite the dust or fumes.
• Keep children and bystanders away while operating a power tool. Distractions can
cause you to lose control.
• Keep the tool pointed away from yourself and others at all times. Keep hands and
body parts away from nose of the tool to prevent possible injury.
• Always use safety equipment. Wear eye protection and ear protection. Ensure
safety equipment such as dust masks, non-skid safety shoes, hard hat, or hearing
protection is used for appropriate conditions.
• Power tool plugs must match the power outlet. Never modify the plug in any way.
Do not use any adapter plugs with earthed (grounded) power tools. Unmodified
plugs and matching outlets will reduce risk of electric shock.
• Do not keep the trigger or safety contact pin depressed while loading fasteners as
the unintentional firing of a fastener may cause serious injury.
• Disconnect the tool from the power source before making any adjustments,
changing accessories, or storing power tools. Such preventive safety measures
reduce the risk of accidental starting.
• Do not fire if the fasteners are jammed. This will cause damage to the driver blade
and lead to accidents.
• Do not use on hard surfaces such as rock, concrete, masonry, bricks or steel. Doing
so may cause seriously personal injury or damage the power tool.
• Do not fire fasteners close to the edge of the worksurface.
• Never fire a fastener on top of another fastener.
• Only use parts and accessories that have been supplied with this product.
SAFETY & WARNINGS

Battery Tool Use, Charging and Care
• This power tool must only be used with a Certa PowerPlus 20V battery pack and
charger.
• Ensure the switch is in the off position before inserting a battery pack.
• Do not open the battery pack.
• Ensure battery packs are stored away from direct sunlight and other sources of
heat.
• Do not short-circuit the battery.
• Under abusive conditions, battery acid may be ejected from the battery; avoid
contact. If contact accidentally occurs, flush with water. If acid contacts eyes, flush
them with clean water for at least 10 minutes, then seek immediate medical
attention. Battery acid may cause irritation or burns.
• While charging, ensure the charger cord is located so that it will not be stepped on,
tripped over, or otherwise subjected to damage or stress.
• If the tool, charger cord or plug shows any sign of damage. Cease use immediately
and contact help.Kogan.com for support.
• Follow the guidelines set by your local environmental authorities when recycling
and disposing of batteries.
• Always have your power tool serviced by a qualified repair person using only
identical replacement parts. This will ensure that the safety of the power tool is
maintained.
Staple Nail Gun Safety
• This appliance is not intended for use by persons (including children) with reduced
physical, sensory or mental capabilities, or lack of experience and knowledge,
unless they have been given supervision or instruction concerning use of the
appliance by a person responsible for their safety.
• Always assume that the tool contains fasteners. Careless handling of the tool can
result in unexpected firing of fasteners and personal injury.
• Do not point the tool towards yourself or anyone nearby. Unexpected triggering will
discharge the fastener causing an injury.
• Do not press trigger unless the tool is placed firmly against the worksurface. If the
tool is not in contact with the worksurface, the fastener may be deflected away
from your target.
• Disconnect the tool from the power source when the fastener jams in the tool.
• Do not use this tool for fastening electrical cables. It is not designed for electric
cable installation and may damage the insulation of electric cables thereby
causing electric shock or fire hazards.
• Always use both hands to operate the tool. Your secondary hand should be used to
press the back of the tool firmly down onto the surface to be fastened.

OVERVIEW
Cylinder
Tr i g g e r
Battery pack
(not supplied)
LED light switch
Belt clip
Firing mode switch
Cartridge
Indicator
LED light
Safety
contact pin
Depth adjustment
wheel

Fastener
Common Application
Staple
Insulation, upholstery, weather stripping, wall decorations, crafts,
covering cornices, webbing, light fabrics, carpeting, wire mesh, plastic or
canvas coverings, roofing paper, felt.
Nail
Tr i m moulding, panelling, picture frames, model work, any finish nailing
application.
This tool will accept fasteners with the measurements shown below:
FASTENER SELECTION

Intended Use
The tool is intended for tacking of cardboard, insulating material, fabric, foils, leather and
similar materials onto wooden surfaces or materials similar to wood. It is not suitable for use
on hard surfaces (rock, concrete, masonry, bricks or steel).
LED Indicators:
The LED indicators will display the status of the power tool and charger (supplied
separately). Refer to the tables below:
To o l LED Indicator
Status
Solid red
Low battery.
Flashing red
Nails/staples jammed.
Solid green
No nails. Power tool is in dry fire protection mode.
Flashing green
Power tool is in overheat protection mode. Allow the
tool to cool down before returning to use.
Charger LED Indicator
Status
Solid red
Battery is charging.
Solid green
Battery is fully charged.
LED Lighting
The lights on each side of the nail gun of can be turned on to provide additional lighting
during operation.
Te s t i n g the Safety Contact Pin
• Remove all staples or nails from the cartridge.
• Press the safety contact pin and pull the trigger. The safety contact pin and the
trigger should all move freely.
• Reload the staples or nails to the cartridge.
• Do not use the tool if the safety contact pin cannot move freely.
• Place the contact pin against the workpiece and apply pressure to the tool without
pulling the trigger, the machine should not fire. Remove the tool from the
workpiece, the contact pin should spring back automatically.
• Pull the trigger, the tool should not fire.
OPERATION

Loading Staples or Nails into the Cartridge
1. Remove the battery pack from the tool.
2. Press the release button and remove out the cartridge cover.
3. Tilt the tool and place nails/staples into the track of the cartridge channel.
Ensure that the fasteners are loaded correctly:
• Staples should be placed against the profiled side of the rail. The crown
of the staple will be in the uppermost part of the cartridge with the legs
facing away from the body of the tool.
• Nails should be placed against the profiled side of the rail, with the points
of the nails facing downwards.
4. Close the cartridge cover until it engages with the release button.
5. Reattach the battery pack.
Loading staples
Loading nails
Before First Use
Prior to operation ensure the battery pack is fully charged. Check whether the fasteners are
placed in the cartridge correctly.
Note:The number of fasteners left in the cartridge can be checked using the viewing
window.
WARNING: Do not load fasteners of different length. Do not load
staples and nails mixed together.

Single Firing Mode
Step 1:
Select “Single Firing” by sliding the firing mode switch to the left.
Step 2:
Press the safety contact pin against the worksurface.
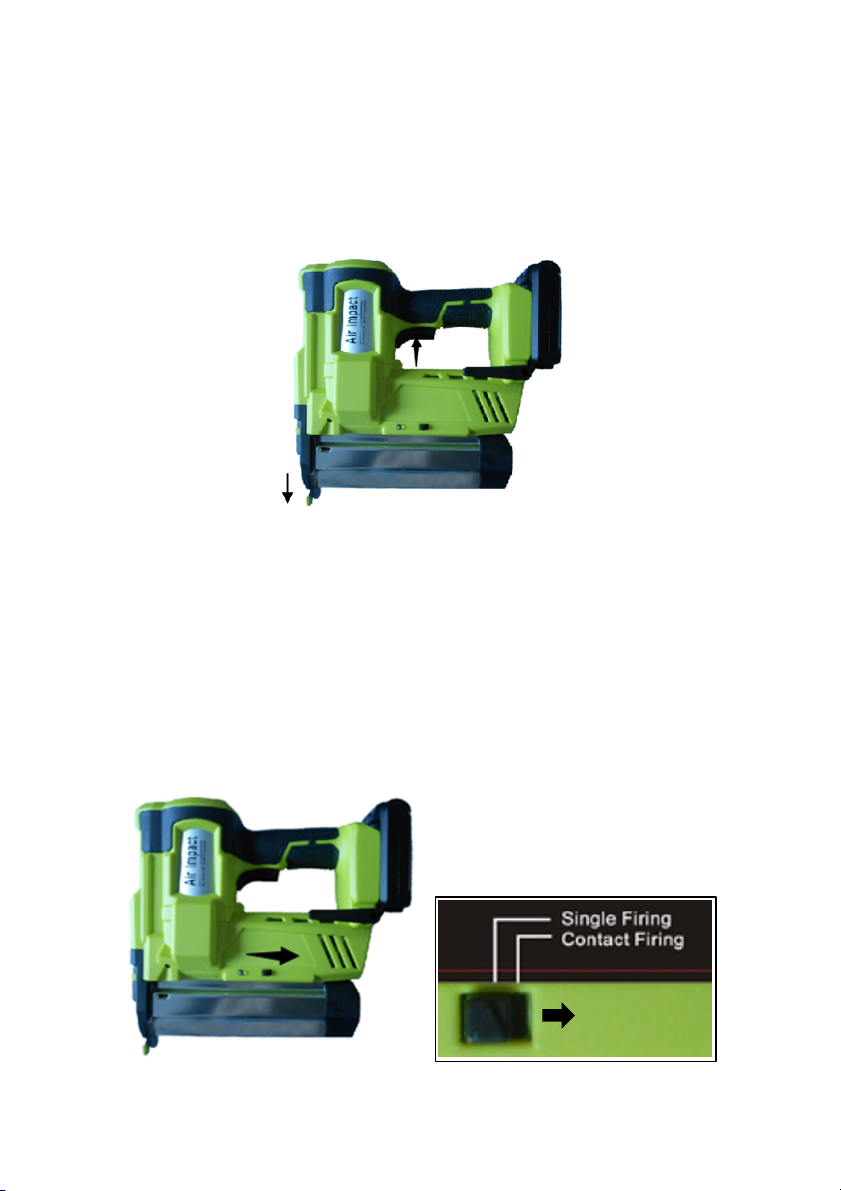
Step 3:
• Squeeze the trigger to fire a staple or nail. Release the trigger and safety contact
pin after firing.
• To f ire the next fastener, repeat steps 2-3.
Note:The safety contact pin must be pressed against the worksurface before the
trigger is squeezed.
Contact Firing Mode
Contact Firing is used for convenient and rapid firing. Contact firing is a two-step process
where a staple or nail will only fire when the trigged is squeezed and the contact safety pin
guard is pushed against the worksurface to be fastened.
Step 1:
Select “Contact Firing” by sliding the firing mode switch to the right.
Step 2:
Squeeze the trigger.
Step 3:
• Press the safety contact pin against the worksurface to fire the fastener.
• Remove the safety contact pin from the worksurface while continuously holding the
trigger.
• To continue firing, press the safety contact pin back into the worksurface.
WARNING: To p r e v e n t accidental firing, do not keep the trigger depressed
when the tool is not in use.

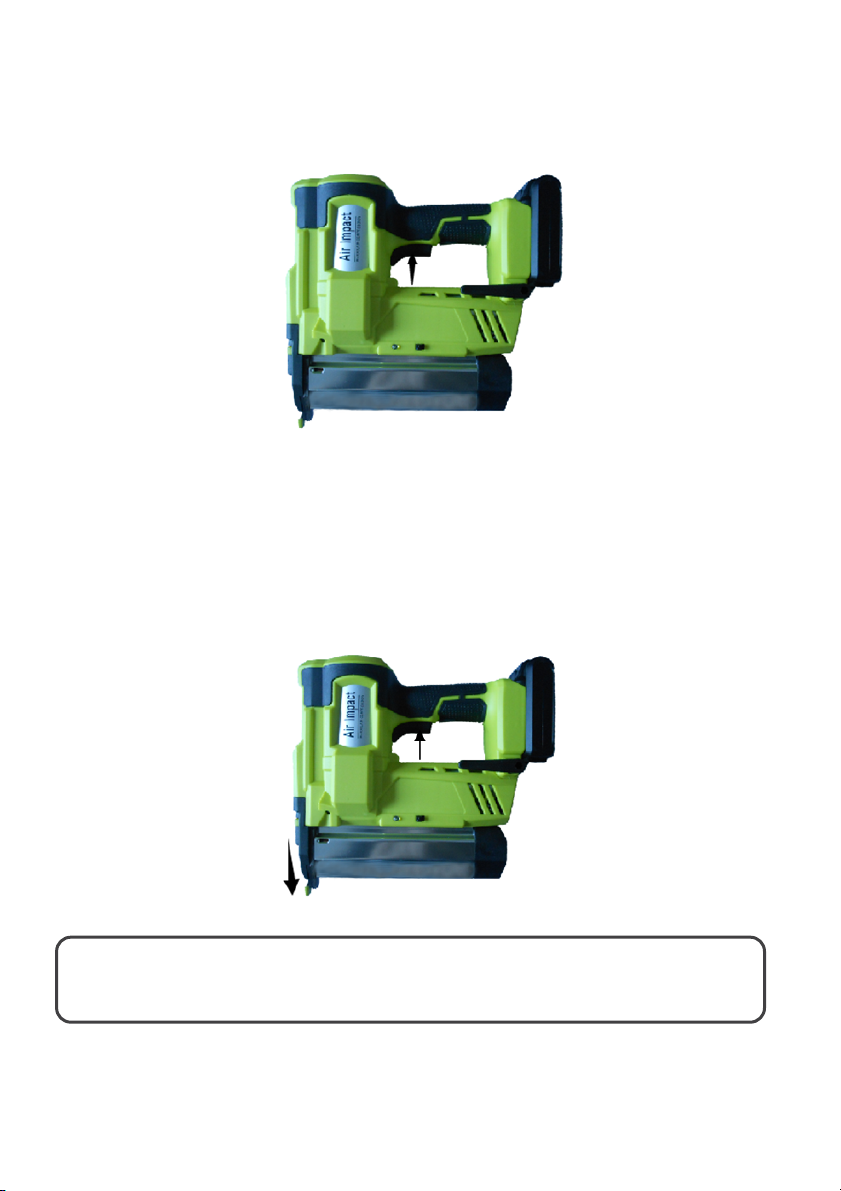
Depth Adjustment Wheel
The depth adjustment helps protect work surface and allows proper setting of nail heads.
Use the wheel to fine tune how deep the fastener is being set into the worksurface.
Note:Te s t f i re o n s c ra p p i ece of wood to get the exact depth of the nail relative to the
worksurface before use.
Removing a Jammed Fastener
A jammed fastener must always be removed before using the tool any further. Otherwise, it
could cause damage to the mechanism.
1. Remove the battery pack from the tool.
2. Open the cartridge, remove the jammed fastener from the channel.
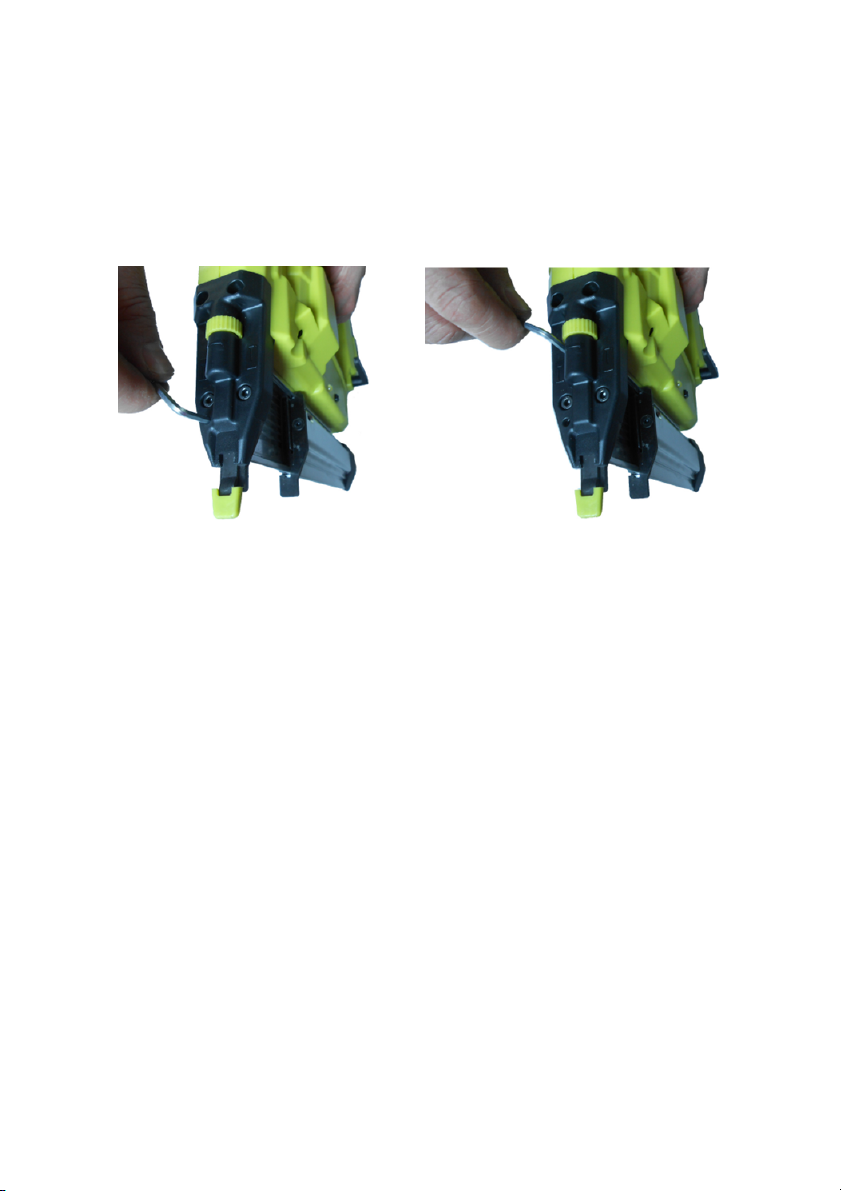
3. If the fasteners cannot be removed from the channel, slightly loosen the 4 hex
screws using supplied Allen key.
4. Remove the jammed fastener using pliers if necessary. After it has been
successfully removed, re-tighten the 4 hex screws securely.
5. Reload the fasteners, close the cartridge and insert the battery pack before
returning to operation.

Battery charger
100-240V, 50/60Hz
Firing speed
Average 60nails/min; Max 100nails/ min
Cartridge capacity
Holds up to 100nails/staples
Max length of nails
50mm 18-gauge Brad nail
Max length of staples
40mm 18-gauge light duty staple
Dimensions:
292 x 259 x 94mm
SPECIFICATIONS

NOTES

Need more information?
We hope that this user guide has given you
the assistance needed for a simple set-up.
For the most up-to-date guide for your product,
as well as any additional assistance you may require,
head online to help.kogan.com.
Table of contents


