CERTIFIED 060-0190-2 User manual

IMPORTANT:
Please readthis manualcarefully before running this jigsaw
andsave it for reference.
INSTRUCTION
MANUAL
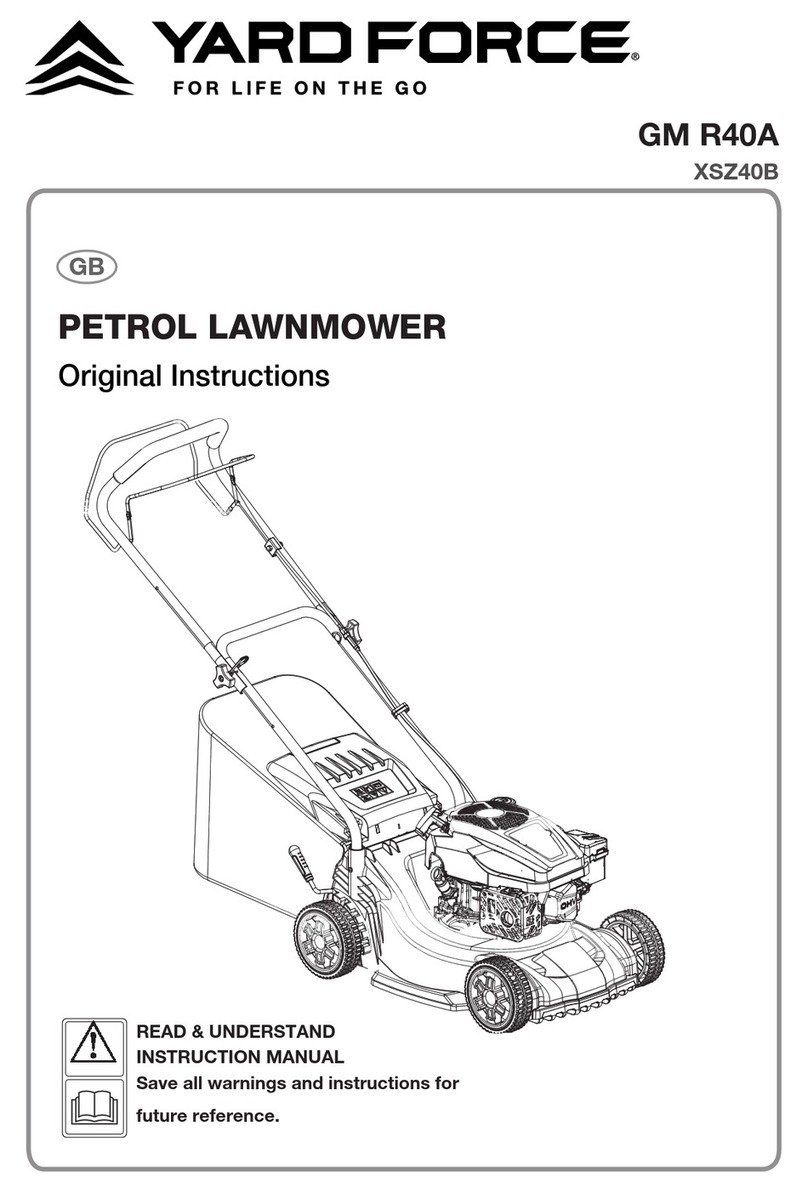
PETROL LAWN MOWER
model number GT5658
GAS-POWERED LAWN MOWER
TONDEUSE À ESSENCE
GUIDE
D’UTILISATION
INSTRUCTION
MANUAL
IMPORTANT:
Please readthis manualcarefully before running this gas-powered lawn
mower andsave it for reference.
model number / numéro de modèle : 060-0190-2
IMPORTANT :
Veuillez lire attentivement ce guide d’utilisation avant d’utiliser cette
tondeuse à essence et le conserver aux fins de consultation ultérieure.
English version... Page 2
French version... Page 32

DD
For problems or questions, DO
NOT RETURN TO STORE. Please
contact one of our Customer
Service Agents who would be
happy to assist you.
En cas de problèmes ou si vous avez des questions, NE
RETOURNEZ PAS L’ARTICLE AU MAGASIN. Contactez
plutôt un de nos agents du service à la clientèle, qui se
fera un plaisir de vous aider.
For Customer Assistance Please Call:
Pour le service à la clientèle, veuillez composer :
CANADA: 1-866-523-5218
1-844-428-7277

model no. GT5658
2
TABLE OF CONTENTS
SAVE THESE INSTRUCTIONS
This manual contains important safety and operating instructions. Read all instructions
and follow them with use of this product.
TABLE OF CONTENTS
Technical Specifications 3
Parts List 4
Intended Use 6
Safety Information 7
Adjustment 17
Operation 18
Troubleshooting 27
Exploded View 29
31
Assembly 11
Storing and Maintenance 22
Warranty
model no. 060-0190-2
I
contact us: 1-844-428-7277
2
TABLE OF CONTENTS
SAVE THESE INSTRUCTIONS
This manual contains important safety and operating instructions. Read all instructions
and follow them with use of this product.

3
TECHNICAL SPECIFICATIONS
Engine type
Engine displacement
Engine max. power
Engine speed
Cutting path
Grass bag capacity
Torque
Height adjustments
Front wheel diameter
Back wheel diameter
Ignition
Fuel tank
Oil tank
Spark plug type
Weight
Single cylinder 4-stroke
140 cc
2.2 kW/3600 RPM
3200 RPM
20" (51 cm)
60 L
4.15-4.97 ft. lb.
1 1/4 to 3 3/4” (3.1 to 9.5 cm)
8” (20 cm)
12” (30 cm)
TCI
0.8 L
0.47 L
QC12YC/CHAMPION
74 lb 8 oz (33.8 kg)
3
TECHNICAL SPECIFICATIONS

model no. 054-8289-8
4
SAFETY INFORMATION
SAFETY GUIDELINES
KNOW YOUR TOOL
To operate this tool, carefully read this
Instruction Manual and all labels affixed to
the Corded Jigsaw before using. Keep this
manual available for future reference.
IMPORTANT
This tool should only be serviced by a
qualified service technician.
GENERAL POWER TOOL SAFETY
WARNINGS
WARNING! Read all safety warnings and all
instructions. Failure to follow the warnings
and instructions may result in electric shock,
fire and/or serious injury.
SAVE ALL WARNINGS AND INSTRUCTIONS
FOR FUTURE REFERENCE.
The term “power tool” in the warnings refers
to your mains-operated (corded) power tool or
battery-operated (cordless) power tool.
WORK AREA SAFETY
• Keep the work area clean and well lit.
Cluttered or dark areas invite accidents.
• Do not operate power tools in
explosive atmospheres, such as in the
presence of flammable liquids, gases
or dust. Power tools create sparks,
which may ignite the dust
or fumes.
• Keep children andbystanders away
while operating a power tool. Distractions
can cause you tolose control.
ELECTRICAL SAFETY
• Power tool plugs must match the
outlet. Never modify the plug in any
way. Do not use any adapter plugs
with earthed (grounded) power tools.
Unmodified plugs and
matching outlets
will reduce risk of electric shock.
• Avoid body contactwith earthed or
grounded surfaces, such as pipes,
radiators, ranges and refrigerators.
There is an increased risk of electric shock
if yourbody is
earthedorgrounded.
• Do not expose power tools to rain or
wet conditions. Water entering a power
tool will
increase the risk of electric
shock.
• Do not abuse the cord. Never use the
cord for carrying, pulling or unplugging
the
power tool. Keep cord away from
heat, oil, sharp edges or moving parts.
Damaged or entangled cords increase the
risk of electric shock.
• When operating a power tool outdoors,
use an extension cord suitable for
outdoor
use. Use of a cord suitable for
outdoor use reduces the risk of electric
shock.
• If operating a power tool in a damp
location is unavoidable, use a ground-
fault circuit interrupter (GFCI)
protected supply. Use of a GFCI reduces
the risk of electric
shock.
WARNING!
• Safety symbols in this instruction manual are used to flag possible dangers. The safety symbols
and their explanations require your full understanding. The safety warnings do not, by themselves,
eliminate any danger, nor are they substitutes for proper accident prevention measures.
• This safety alert symbol indicates caution, warning, or danger. Failure to obey a safety warning
can result in serious injury to yourself or others. To reduce the risk of injury, fire, or electric shock,
always follow the safety precautions.
KNOW YOUR LAWN MOWER
Fig. 1
No. Part No. Part
1 Engine start /stop lever
Upper handle with soft grip
Starter handle
Rope guide
Grass bag
Ejector flap
Rear wheel
Height-adjusting handle
Side discharge chute
Side discharge cover
11
12
13
14
15
16
17
18
19
Front wheel
Decorative panel
Decorative upper panel
Spark plug cover
Fuel tank cap
Engine oil cap
Fixing knob with arc head bolt
Cord clip
Lower handle
2
3
4
5
6
7
8
9
10
13
7
3
4
2
14
15
16
17
18
19
8
9
10 11 12
5
6
1
4
PARTS LIST
model no. 060-0190-2
I
contact us: 1-844-428-7277

5
SAFETY INFORMATION
PERSONAL SAFETY
• Stay alert, watch what you are
doing and use common sense when
operating a power tool. Do not use
a power tool while you are tired or
under the influence of drugs, alcohol
or medication. A moment of inattention
while operating power tools may result in
serious personal injury.
• Use personal protective equipment.
Always wear eye protection. Protective
equipment
such as dust mask, non-
skid safety shoes, hard hat, or hearing
protection used for appropriate
conditions will reduce personal injuries.
• Prevent unintentional starting. Ensure
the switch is in the off-position before
connecting to power source and/or
battery pack, picking up or carrying
the tool.
Carrying power tools with your
finger on the switch or energising power
tools that have
the switch on invites
accidents.
• Remove any adjusting key or wrench
before turning the power tool on.
A wrench or a
key left attached to a
rotating part of the power tool may
result in personal injury.
• Do not overreach. Keep proper footing
and balance at all times. This enables
better
control of the power tool in
unexpected situations.
• Dress properly. Do not wear loose
clothing or jewellery. Keep your hair,
clothing and gloves away from moving
parts. Loose clothes, jewellery or long
hair can be caught in
moving parts.
• If devices are provided for the
connection of dust extraction and
collection facilities,
ensure that these
are connected and properly used. Use
of these devices can reduce
dust-related
hazards.
POWER TOOL USE AND CARE
• Do not force the power tool. Use
the correct power tool for your
application. The
correct power tool will
do the job better and more safely at the
rate for which it was designed.
• Do not use the power tool if the switch
does not turn it on and off. Any power
tool
that cannot be controlled with
the switch is dangerous and must be
repaired.
• Disconnect the plug from the power
source and/or the battery pack from
the power tool before making any
adjustments, changing accessories, or
storing power tools. Such preventive
safety measures reduce the risk of
starting the power tool accidentally.
• Store idle power tools out of the reach
of children and do not allow persons
unfamiliar with the power tool or these
instructions to operate the power
tool. Power tools are dangerous in the
hands of untrained users.
• Maintain power tools. Check for
misalignment or binding of moving
parts, breakage
of parts and any other
condition that may affect the power
tool’s operation. If damaged, have
the power tool repaired before use.
Many accidents are caused by poorly
maintained power tools.
• Keep cutting tools sharp and clean.
Properly maintained cutting tools with
sharp cutting edges are less likely to bind
and are easier to control.
• Use the power tool, accessories, tool
bits, etc. in accordance with these
instructions, taking into account the
working conditions and the work to
be performed. Use of the
power tool for
operations different from those intended
could result in a hazardous situation.
Fig. 2
PARTS LIST
Carefully remove the machine from its packaging and check that the following parts are included:
A. Main mower deck (with upper handle) 1 pc
B. Grass bag assembly
C. Plastic mulching plug 1 pc (inside the mower)
D. Side discharge chute 1 pc
E. Cord clip 1 pc
F. Lower handle 1 pc
G. Fixing knob with arc head bolt M8 4 pcs
H. Rear wheel 2 pcs
I. Socket wrench for spark plug 1 pc
J. Manual 1 pc
WARNING!
• If any parts are damaged or missing, do not operate this tool until the missing parts are replaced.
Failure to heed this warning could result in serious personal injury.
NOTE:
• Always recycle the packaging in accordance with local recycling schemes.
WARNING!
• This item requires a two person lift to remove from the packaging. Make sure that you have sufficient
space to put the lawnmower down. Keep your feet apart so that you have a stable position, bend at
the knees and keep your back straight.
A F
E
C D
J
B HI G
5
PARTS LIST

model no. 054-8289-8
6
SERVICE
• Have your power tool serviced by a
qualified repair person using only
identical
replacement parts. This will
ensure that the safety of the power tool
is maintained
SAFETY INSTRUCTIONS FOR JIGSAW
• Hold power tool by insulated gripping
surfaces when performing an operation
where the tool may contact hidden
wiring or its own cord. Contact with
a “live” wire
may make exposed metal
parts of the power tool “live” and could
give the operator an electric shock.
• Use clamps or another practical way
to support and secure the workpiece
to a stable
platform. Holding the work
by hand or against your body is unstable
and may lead to loss of control.
• Never touch the saw blade
immediately after use. It may be hot
after prolonged use.
• Always wear safety goggles or eye
protection when using this tool. Use
a dust mask or respirator or connect
the tool to an external dust vacuum if
the cutting generates a great amount
of dust.
• Protect your hearing. Wear appropriate
personal hearing protection during
use. Under some conditions noise from
this product may contribute to hearing
loss.
• The label on your tool may include the
following symbols. The symbols and
their
definitions are as follows:
V ......... Volts
A ......... Amperes
Hz ........ Hertz
W ......... Watts
min ...... Minutes
...... Alternating current
... Direct current
n0 ....... No-load speed
.... Class II Construction
…/min ..Revolutions or reciprocations
per minute
.... Grounding terminal
BPM .... Beats per minute
SPM .... Strokes per minute
.... WARNING – To reduce the
risk of injury, user must read
instruction manual.
.... WARNING – To reduce the risk
of injury always wear eye
protection.
.... WARNING – To reduce the
risk of injury always wear ear
protection.
SAFETY INFORMATION
INTENDED USE
This gas-powered lawnmower has been designed for cutting lawn areas in private house and
hobby gardens.
The machine is to be used only for its prescribed purpose. Any other use is deemed to be a case
of misuse. The user/operator and not the manuafacturer will be liable for any damage or injuries
of any kind caused as a result of this.
Please note that our equipment has not been designed for use in commercial, trade or industrial
applications. Our warranty will be voided if the machine is used in commercial, trade or industrial
businesses or for equivalent purposes.
6
INTENDED USE
model no. 060-0190-2
I
contact us: 1-844-428-7277

7
KEY PARTS DIAGRAM
PACKAGE CONTENTS:
Jigsaw, wood-cutting blade, hex key, vacuum adaptor and instruction manual.
KEY PARTS DIAGRAM
1
5
6
7
8
9
10
2
3
4
No. Part No. Part
1 Variable-speed Dial 6 On/Off Trigger Switch
2 Protection Guard 7 Hex Key
3 Blade Clamp 8 Vacuum Adaptor
4 Blade 9 Base Plate
5 Lock-on Button 10 Blade-guide Roller
WARNING!
• Remove the jigsaw from the carton and examine it carefully. Do not discard the carton or any
packaging material until all parts are examined.
• If any part of the jigsaw is missing or damaged, do not attach the jigsaw to a power source until the
damaged part is repaired or replaced.
• Before attempting to use this tool, become familiar with all of its operating features and safety
requirements. For optimum performance and safety, read the following operating instructions
carefully before using.
SAFETY INFORMATION
IMPORTANT
Please read these instructions fully before
assembling and operating.
Description of Symbols
Symbols are used in this manual to attract
your attention to possible risks. The safety
symbols and the explanations which
accompany them must be perfectly
understood. The warnings themselves do not
prevent the risks and cannot be a substitute
for proper methods of avoiding accidents.
Warning Symbols on the Machine
WARNING To reduce the risk of
injury, user must read
instruction manual.
This symbol, before a safety
comment, indicates a
precaution, a warning or a
danger. Ignoring this warning
can lead to an accident for
yourself or for others. To limit
the risk of injury, fire, or
electrocution always apply the
recommendations indicated.
Do not open or remove
safety shields while engine
is running.
Keep bystanders away.
Look behind while backing.
Steep slope hazard.
Severing of toes or fingers –
rotary mower blade.
Thrown or flying objects –
whole body exposure.
Wear ear protection.
Wear eye protection.
.....
....
....
....
....
....
....
.....
.....
.....
7
SAFETY INFORMATION

model no. 054-8289-8
8
ASSEMBLY INSTRUCTIONS
INSTALLING THE SAW BLADE (Fig. 1)
1. Unplug the jigsaw from the power supply.
2. Turn the tool upside down and open the
protection guard by pulling it downward.
3. Loosen the hex screws on the blade clamp
with the hex key, which is stored at the base
of the power cord.
4. Insert the blade into the locating groove in
the blade clamp. The back of the blade must
rest in the groove in the guide roller.
5. Tighten the hex screws to lock the blade. Pull on the blade to check that it is securely
locked in place.
REMOVING THE SAW BLADE (Fig. 1)
1. Unplug the jigsaw from the power supply.
2. Open the protection guard by pulling it downward.
3. Turn the tool upside down and loosen the hex screws on the blade clamp with the hex
key.
4. Remove the blade by pulling it out from the base of the jigsaw.
ASSEMBLY INSTRUCTIONS
Fig. 1
Protection
guard
CAUTION!
• When changing the blade, always wear protective gloves. The sharp edge of the blade can cause
personal injury. The blade can be very hot after working.
• Allow the blade to cool after use. The blade can be dangerously hot.
WARNING!
• Check to see if the blade is correctly fastened. An incorrect or insecurely fastened blade can
become loose during operation and cause a hazard.
• Always ensure that the tool is turned OFF and unplugged from the power supply before making any
adjustments and installing any attachments.
NOTE:
• If the blade cannot rest in the groove of the blade clamp, check the section
ADJUSTING THE BASE PLATE FOR
BEVEL CUTTING below.
• Use only with “T” and “U” shank jigsaw blades.
Safety instructions
Safe Practices for Pedestrian-controlled
Mowers
This cutting machine is capable of amputat-
ing hands and feet and throwing objects.
Failure to observe the following safety
instructions could result in serious injury or
death.
I. GENERAL OPERATION
1. Read, understand, and follow all
instructions on the machine and in the
manual(s) before starting.
2. Do not put hands or feet near or under
the machine. Keep clear of the discharge
opening at all times.
3. Only allow responsible adults who are
familiar with the instructions to operate
this machine.
4. Clear the area of objects such as rocks,
wire, toys, etc., which could be thrown by
the blade. Stay behind the handle when
the engine (motor) is running.
5. Be sure the area is clear of bystanders
before operating. Stop machine if anyone
enters the area.
6. Do not operate machine barefooted or
while wearing sandals. Always wear
substantial footwear.
7. Do not pull machine backward unless
absolutely necessary. Always look down
and behind before and while moving
backward.
8. Never direct discharged material toward
anyone. Avoid discharging material
against a wall or obstruction. Material
may ricochet back toward the operator.
Stop the blade when crossing gravel
surfaces.
9. Do not operate machine without the
entire grass catcher, discharge guard,
rear guard, or other safety protective
devices in place and working.
10. Never leave a running machine unattend-
ed.
11. Stop the engine (motor) and wait until the
blade comes to a complete stop before
cleaning the machine, removing grass
catcher, or unclogging the discharge
guard.
12. Operate machine only in daylight or good
artificial light.
13. Do not operate machine while under the
influence of alcohol or drugs.
14. Never operate mower in wet grass. Always
be sure of your footing; walk, never run.
15. Disengage the drive system, if so
equipped, before starting the engine
(motor).
16. If the machine should start to vibrate
abnormally, stop the engine (motor) and
check for the cause immediately.
Vibration is generally a warning of
trouble.
17. Always wear eye protection when
operating machine.
18. See manufacturer’s instructions for
proper operation and installation of
accessories. Only use accessories
approved by the manufacturer.
II. SLOPE OPERATION
Slopes are a major factor related to slip and
fall accidents, which can result in severe
injury. Operation on all slopes requires extra
caution. If you feel uneasy on a slope, do not
mow it.
1. Mow across the face of slopes; never up
and down. Exercise extreme caution
when changing direction on slopes.
2. Watch for holes, ruts, bumps, rocks, or
other hidden objects. Uneven terrain
could cause a slip and fall accident. Tall
grass can hide obstacles.
3. Do not mow on wet grass or excessively
steep slopes. Poor footing could cause a
slip and fall accident.
4. Do not mow near drop offs, ditches, or
embankments. You could lose your
footing or balance.
III. CHILDREN
Tragic accidents can occur if the operator is
not alert to the presence of children. Children
are often attracted to the machine and the
mowing activity. Never assume that children
will remain where you last saw them.
1. Keep children out of the mowing area and
under the watchful care of a responsible
adult other than the operator.
2. Be alert and turn mower off if a child
enters the area.
3. Never allow children to operate the
machine.
4. Use extra care when approaching blind
corners, shrubs, trees, or other objects
that may block your view of a child.
IV. SERVICE
*SAFE HANDLING OF GASOLINE:
To avoid personal injury or property damage,
use extreme care in handling gasoline.
Gasoline is extremely flammable and the
vapours are explosive.
1. Extinguish all cigarettes, cigars, pipes,
and other sources of ignition.
2. Use only an approved gasoline container.
3. Never remove gas cap or add fuel with
the engine running.
4. Allow engine to cool before refueling.
5. Never refuel the machine indoors.
6. Never store the machine or fuel
container where there is an open flame,
spark, or pilot light such as on a water
heater or on other appliances.
7. Never fill containers inside a vehicle or on
a truck or trailer bed with a plastic liner.
Always place containers on the ground
away from your vehicle before filling.
8. Remove gas powered equipment from the
truck or trailer and refuel it on the
ground. If this is not possible, then refuel
such equipment with a portable
container, rather than from a gasoline
dispenser nozzle.
9. Keep the nozzle in contact with the rim
of the fuel tank or container opening at
all times until fueling is complete. Do not
use a nozzle lock open device.
10. If fuel is spilled on clothing, change
clothing immediately.
11. Never overfill fuel tank. Replace gas cap
and tighten securely.
GENERAL SERVICE
1. *Never operate machine in a closed area.
2. Keep all nuts and bolts tight to be sure
the equipment is in safe working
condition.
3. Never remove or tamper with safety
devices. Check their proper operation
regularly. Never do anything to interfere
with the intended function of a safety
device or to reduce the protection
provided by a safety device.
4. Keep machine free of grass, leaves, or
other debris build up. *Clean up oil or fuel
spillage and remove any fuel-soaked
debris. Allow machine to cool before
storing.
5. If you strike a foreign object, stop and
inspect the machine. Repair, if
necessary, before starting.
6. Never make any adjustments or repairs
with the engine (motor) running.
*Disconnect the spark plug wire and
ground against engine to prevent
unintended starting.
7. Always unplug electric mowers before
adjusting, cleaning, or repairing.
8. Check grass catcher components and
the discharge guard frequently and
replace with manufacturer’s recommend-
ed parts, when necessary.
9. Mower blades are sharp. Wrap the blade
or wear gloves, and use extra caution
when servicing them.
10. *Do not change engine governor setting
or over speed the engine.
11. Maintain or replace safety and instruc-
tion labels, as necessary.
* Asterisked items do not apply to
electric mowers.
Maintenance and storage
1. Keep all nuts, bolts and screws tight to
be sure the equipment is in safe working
condition.
2. Never store the equipment with gas in
the tank inside a building where fumes
can reach an open flame or spark.
3. Allow the engine to cool before storing in
any enclosure.
4. To reduce the fire hazard, keep the
engine, muffler, battery compartment
and gas storage area free of grass,
leaves, or excessive grease.
5. Check the grass catcher frequently for
wear or deterioration.
6. Replace worn or damaged parts for
safety.
7. If the fuel tank has to be drained, this
should be done outdoors.
8
SAFETY INFORMATION
model no. 060-0190-2
I
contact us: 1-844-428-7277

9
ASSEMBLY INSTRUCTIONS
ADJUSTING THE BASE PLATE FOR BEVEL
CUTTING (Fig. 2)
1. Use the hex key to loosen the two hex
screws located on the underside of the tool.
2. Move the base plate back slightly and tilt it
to the desired angle, between 0 and 45° left
or right, referring to the scale marked on the
base bracket.
3. Move the plate or guide roller forward until
the back of the blade rests in the groove of the guide roller.
4. Securely tighten the hex screws.
Accurate work requires a trial cut. Measure the work after cutting and reset the angle
setting until the correct setting is achieved.
DUST EXTRACTION (Fig. 3)
1. Insert the vacuum adaptor tube onto the
groove in the dust port.
2. Rotate the vacuum adaptor tube until the
tube is secured on the tool.
Fig. 2 PlateGuide Roller
Fig. 3
WARNING!
• Always unplug the saw from the power source before making any adjustments or attaching
accessories.
• Do not use a dust extraction system or a vacuum cleaner when cutting metal. Sparks may ignite
residual wood dust.
Safety instructions
Safe Practices for Pedestrian-controlled
Mowers
This cutting machine is capable of amputat-
ing hands and feet and throwing objects.
Failure to observe the following safety
instructions could result in serious injury or
death.
I. GENERAL OPERATION
1. Read, understand, and follow all
instructions on the machine and in the
manual(s) before starting.
2. Do not put hands or feet near or under
the machine. Keep clear of the discharge
opening at all times.
3. Only allow responsible adults who are
familiar with the instructions to operate
this machine.
4. Clear the area of objects such as rocks,
wire, toys, etc., which could be thrown by
the blade. Stay behind the handle when
the engine (motor) is running.
5. Be sure the area is clear of bystanders
before operating. Stop machine if anyone
enters the area.
6. Do not operate machine barefooted or
while wearing sandals. Always wear
substantial footwear.
7. Do not pull machine backward unless
absolutely necessary. Always look down
and behind before and while moving
backward.
8. Never direct discharged material toward
anyone. Avoid discharging material
against a wall or obstruction. Material
may ricochet back toward the operator.
Stop the blade when crossing gravel
surfaces.
9. Do not operate machine without the
entire grass catcher, discharge guard,
rear guard, or other safety protective
devices in place and working.
10. Never leave a running machine unattend-
ed.
11. Stop the engine (motor) and wait until the
blade comes to a complete stop before
cleaning the machine, removing grass
catcher, or unclogging the discharge
guard.
12. Operate machine only in daylight or good
artificial light.
13. Do not operate machine while under the
influence of alcohol or drugs.
14. Never operate mower in wet grass. Always
be sure of your footing; walk, never run.
15. Disengage the drive system, if so
equipped, before starting the engine
(motor).
16. If the machine should start to vibrate
abnormally, stop the engine (motor) and
check for the cause immediately.
Vibration is generally a warning of
trouble.
17. Always wear eye protection when
operating machine.
18. See manufacturer’s instructions for
proper operation and installation of
accessories. Only use accessories
approved by the manufacturer.
II. SLOPE OPERATION
Slopes are a major factor related to slip and
fall accidents, which can result in severe
injury. Operation on all slopes requires extra
caution. If you feel uneasy on a slope, do not
mow it.
1. Mow across the face of slopes; never up
and down. Exercise extreme caution
when changing direction on slopes.
2. Watch for holes, ruts, bumps, rocks, or
other hidden objects. Uneven terrain
could cause a slip and fall accident. Tall
grass can hide obstacles.
3. Do not mow on wet grass or excessively
steep slopes. Poor footing could cause a
slip and fall accident.
4. Do not mow near drop offs, ditches, or
embankments. You could lose your
footing or balance.
III. CHILDREN
Tragic accidents can occur if the operator is
not alert to the presence of children. Children
are often attracted to the machine and the
mowing activity. Never assume that children
will remain where you last saw them.
1. Keep children out of the mowing area and
under the watchful care of a responsible
adult other than the operator.
2. Be alert and turn mower off if a child
enters the area.
3. Never allow children to operate the
machine.
4. Use extra care when approaching blind
corners, shrubs, trees, or other objects
that may block your view of a child.
IV. SERVICE
*SAFE HANDLING OF GASOLINE:
To avoid personal injury or property damage,
use extreme care in handling gasoline.
Gasoline is extremely flammable and the
vapours are explosive.
1. Extinguish all cigarettes, cigars, pipes,
and other sources of ignition.
2. Use only an approved gasoline container.
3. Never remove gas cap or add fuel with
the engine running.
4. Allow engine to cool before refueling.
5. Never refuel the machine indoors.
6. Never store the machine or fuel
container where there is an open flame,
spark, or pilot light such as on a water
heater or on other appliances.
7. Never fill containers inside a vehicle or on
a truck or trailer bed with a plastic liner.
Always place containers on the ground
away from your vehicle before filling.
8. Remove gas powered equipment from the
truck or trailer and refuel it on the
ground. If this is not possible, then refuel
such equipment with a portable
container, rather than from a gasoline
dispenser nozzle.
9. Keep the nozzle in contact with the rim
of the fuel tank or container opening at
all times until fueling is complete. Do not
use a nozzle lock open device.
10. If fuel is spilled on clothing, change
clothing immediately.
11. Never overfill fuel tank. Replace gas cap
and tighten securely.
GENERAL SERVICE
1. *Never operate machine in a closed area.
2. Keep all nuts and bolts tight to be sure
the equipment is in safe working
condition.
3. Never remove or tamper with safety
devices. Check their proper operation
regularly. Never do anything to interfere
with the intended function of a safety
device or to reduce the protection
provided by a safety device.
4. Keep machine free of grass, leaves, or
other debris build up. *Clean up oil or fuel
spillage and remove any fuel-soaked
debris. Allow machine to cool before
storing.
5. If you strike a foreign object, stop and
inspect the machine. Repair, if
necessary, before starting.
6. Never make any adjustments or repairs
with the engine (motor) running.
*Disconnect the spark plug wire and
ground against engine to prevent
unintended starting.
7. Always unplug electric mowers before
adjusting, cleaning, or repairing.
8. Check grass catcher components and
the discharge guard frequently and
replace with manufacturer’s recommend-
ed parts, when necessary.
9. Mower blades are sharp. Wrap the blade
or wear gloves, and use extra caution
when servicing them.
10. *Do not change engine governor setting
or over speed the engine.
11. Maintain or replace safety and instruc-
tion labels, as necessary.
* Asterisked items do not apply to
electric mowers.
Maintenance and storage
1. Keep all nuts, bolts and screws tight to
be sure the equipment is in safe working
condition.
2. Never store the equipment with gas in
the tank inside a building where fumes
can reach an open flame or spark.
3. Allow the engine to cool before storing in
any enclosure.
4. To reduce the fire hazard, keep the
engine, muffler, battery compartment
and gas storage area free of grass,
leaves, or excessive grease.
5. Check the grass catcher frequently for
wear or deterioration.
6. Replace worn or damaged parts for
safety.
7. If the fuel tank has to be drained, this
should be done outdoors.
9
SAFETY INFORMATION

Safety instructions
Safe Practices for Pedestrian-controlled
Mowers
This cutting machine is capable of amputat-
ing hands and feet and throwing objects.
Failure to observe the following safety
instructions could result in serious injury or
death.
I. GENERAL OPERATION
1. Read, understand, and follow all
instructions on the machine and in the
manual(s) before starting.
2. Do not put hands or feet near or under
the machine. Keep clear of the discharge
opening at all times.
3. Only allow responsible adults who are
familiar with the instructions to operate
this machine.
4. Clear the area of objects such as rocks,
wire, toys, etc., which could be thrown by
the blade. Stay behind the handle when
the engine (motor) is running.
5. Be sure the area is clear of bystanders
before operating. Stop machine if anyone
enters the area.
6. Do not operate machine barefooted or
while wearing sandals. Always wear
substantial footwear.
7. Do not pull machine backward unless
absolutely necessary. Always look down
and behind before and while moving
backward.
8. Never direct discharged material toward
anyone. Avoid discharging material
against a wall or obstruction. Material
may ricochet back toward the operator.
Stop the blade when crossing gravel
surfaces.
9. Do not operate machine without the
entire grass catcher, discharge guard,
rear guard, or other safety protective
devices in place and working.
10. Never leave a running machine unattend-
ed.
11. Stop the engine (motor) and wait until the
blade comes to a complete stop before
cleaning the machine, removing grass
catcher, or unclogging the discharge
guard.
12. Operate machine only in daylight or good
artificial light.
13. Do not operate machine while under the
influence of alcohol or drugs.
14. Never operate mower in wet grass. Always
be sure of your footing; walk, never run.
15. Disengage the drive system, if so
equipped, before starting the engine
(motor).
16. If the machine should start to vibrate
abnormally, stop the engine (motor) and
check for the cause immediately.
Vibration is generally a warning of
trouble.
17. Always wear eye protection when
operating machine.
18. See manufacturer’s instructions for
proper operation and installation of
accessories. Only use accessories
approved by the manufacturer.
II. SLOPE OPERATION
Slopes are a major factor related to slip and
fall accidents, which can result in severe
injury. Operation on all slopes requires extra
caution. If you feel uneasy on a slope, do not
mow it.
1. Mow across the face of slopes; never up
and down. Exercise extreme caution
when changing direction on slopes.
2. Watch for holes, ruts, bumps, rocks, or
other hidden objects. Uneven terrain
could cause a slip and fall accident. Tall
grass can hide obstacles.
3. Do not mow on wet grass or excessively
steep slopes. Poor footing could cause a
slip and fall accident.
4. Do not mow near drop offs, ditches, or
embankments. You could lose your
footing or balance.
III. CHILDREN
Tragic accidents can occur if the operator is
not alert to the presence of children. Children
are often attracted to the machine and the
mowing activity. Never assume that children
will remain where you last saw them.
1. Keep children out of the mowing area and
under the watchful care of a responsible
adult other than the operator.
2. Be alert and turn mower off if a child
enters the area.
3. Never allow children to operate the
machine.
4. Use extra care when approaching blind
corners, shrubs, trees, or other objects
that may block your view of a child.
IV. SERVICE
*SAFE HANDLING OF GASOLINE:
To avoid personal injury or property damage,
use extreme care in handling gasoline.
Gasoline is extremely flammable and the
vapours are explosive.
1. Extinguish all cigarettes, cigars, pipes,
and other sources of ignition.
2. Use only an approved gasoline container.
3. Never remove gas cap or add fuel with
the engine running.
4. Allow engine to cool before refueling.
5. Never refuel the machine indoors.
6. Never store the machine or fuel
container where there is an open flame,
spark, or pilot light such as on a water
heater or on other appliances.
7. Never fill containers inside a vehicle or on
a truck or trailer bed with a plastic liner.
Always place containers on the ground
away from your vehicle before filling.
8. Remove gas powered equipment from the
truck or trailer and refuel it on the
ground. If this is not possible, then refuel
such equipment with a portable
container, rather than from a gasoline
dispenser nozzle.
9. Keep the nozzle in contact with the rim
of the fuel tank or container opening at
all times until fueling is complete. Do not
use a nozzle lock open device.
10. If fuel is spilled on clothing, change
clothing immediately.
11. Never overfill fuel tank. Replace gas cap
and tighten securely.
GENERAL SERVICE
1. *Never operate machine in a closed area.
2. Keep all nuts and bolts tight to be sure
the equipment is in safe working
condition.
3. Never remove or tamper with safety
devices. Check their proper operation
regularly. Never do anything to interfere
with the intended function of a safety
device or to reduce the protection
provided by a safety device.
4. Keep machine free of grass, leaves, or
other debris build up. *Clean up oil or fuel
spillage and remove any fuel-soaked
debris. Allow machine to cool before
storing.
5. If you strike a foreign object, stop and
inspect the machine. Repair, if
necessary, before starting.
6. Never make any adjustments or repairs
with the engine (motor) running.
*Disconnect the spark plug wire and
ground against engine to prevent
unintended starting.
7. Always unplug electric mowers before
adjusting, cleaning, or repairing.
8. Check grass catcher components and
the discharge guard frequently and
replace with manufacturer’s recommend-
ed parts, when necessary.
9. Mower blades are sharp. Wrap the blade
or wear gloves, and use extra caution
when servicing them.
10. *Do not change engine governor setting
or over speed the engine.
11. Maintain or replace safety and instruc-
tion labels, as necessary.
* Asterisked items do not apply to
electric mowers.
Maintenance and storage
1. Keep all nuts, bolts and screws tight to
be sure the equipment is in safe working
condition.
2. Never store the equipment with gas in
the tank inside a building where fumes
can reach an open flame or spark.
3. Allow the engine to cool before storing in
any enclosure.
4. To reduce the fire hazard, keep the
engine, muffler, battery compartment
and gas storage area free of grass,
leaves, or excessive grease.
5. Check the grass catcher frequently for
wear or deterioration.
6. Replace worn or damaged parts for
safety.
7. If the fuel tank has to be drained, this
should be done outdoors.
10
SAFETY INFORMATION
model no. 0600190
I
contact us: 1-844-428-7277

Safety instructions
Safe Practices for Pedestrian-controlled
Mowers
This cutting machine is capable of amputat-
ing hands and feet and throwing objects.
Failure to observe the following safety
instructions could result in serious injury or
death.
I. GENERAL OPERATION
1. Read, understand, and follow all
instructions on the machine and in the
manual(s) before starting.
2. Do not put hands or feet near or under
the machine. Keep clear of the discharge
opening at all times.
3. Only allow responsible adults who are
familiar with the instructions to operate
this machine.
4. Clear the area of objects such as rocks,
wire, toys, etc., which could be thrown by
the blade. Stay behind the handle when
the engine (motor) is running.
5. Be sure the area is clear of bystanders
before operating. Stop machine if anyone
enters the area.
6. Do not operate machine barefooted or
while wearing sandals. Always wear
substantial footwear.
7. Do not pull machine backward unless
absolutely necessary. Always look down
and behind before and while moving
backward.
8. Never direct discharged material toward
anyone. Avoid discharging material
against a wall or obstruction. Material
may ricochet back toward the operator.
Stop the blade when crossing gravel
surfaces.
9. Do not operate machine without the
entire grass catcher, discharge guard,
rear guard, or other safety protective
devices in place and working.
10. Never leave a running machine unattend-
ed.
11. Stop the engine (motor) and wait until the
blade comes to a complete stop before
cleaning the machine, removing grass
catcher, or unclogging the discharge
guard.
12. Operate machine only in daylight or good
artificial light.
13. Do not operate machine while under the
influence of alcohol or drugs.
14. Never operate mower in wet grass. Always
be sure of your footing; walk, never run.
15. Disengage the drive system, if so
equipped, before starting the engine
(motor).
16. If the machine should start to vibrate
abnormally, stop the engine (motor) and
check for the cause immediately.
Vibration is generally a warning of
trouble.
17. Always wear eye protection when
operating machine.
18. See manufacturer’s instructions for
proper operation and installation of
accessories. Only use accessories
approved by the manufacturer.
II. SLOPE OPERATION
Slopes are a major factor related to slip and
fall accidents, which can result in severe
injury. Operation on all slopes requires extra
caution. If you feel uneasy on a slope, do not
mow it.
1. Mow across the face of slopes; never up
and down. Exercise extreme caution
when changing direction on slopes.
2. Watch for holes, ruts, bumps, rocks, or
other hidden objects. Uneven terrain
could cause a slip and fall accident. Tall
grass can hide obstacles.
3. Do not mow on wet grass or excessively
steep slopes. Poor footing could cause a
slip and fall accident.
4. Do not mow near drop offs, ditches, or
embankments. You could lose your
footing or balance.
III. CHILDREN
Tragic accidents can occur if the operator is
not alert to the presence of children. Children
are often attracted to the machine and the
mowing activity. Never assume that children
will remain where you last saw them.
1. Keep children out of the mowing area and
under the watchful care of a responsible
adult other than the operator.
2. Be alert and turn mower off if a child
enters the area.
3. Never allow children to operate the
machine.
4. Use extra care when approaching blind
corners, shrubs, trees, or other objects
that may block your view of a child.
IV. SERVICE
*SAFE HANDLING OF GASOLINE:
To avoid personal injury or property damage,
use extreme care in handling gasoline.
Gasoline is extremely flammable and the
vapours are explosive.
1. Extinguish all cigarettes, cigars, pipes,
and other sources of ignition.
2. Use only an approved gasoline container.
3. Never remove gas cap or add fuel with
the engine running.
4. Allow engine to cool before refueling.
5. Never refuel the machine indoors.
6. Never store the machine or fuel
container where there is an open flame,
spark, or pilot light such as on a water
heater or on other appliances.
7. Never fill containers inside a vehicle or on
a truck or trailer bed with a plastic liner.
Always place containers on the ground
away from your vehicle before filling.
8. Remove gas powered equipment from the
truck or trailer and refuel it on the
ground. If this is not possible, then refuel
such equipment with a portable
container, rather than from a gasoline
dispenser nozzle.
9. Keep the nozzle in contact with the rim
of the fuel tank or container opening at
all times until fueling is complete. Do not
use a nozzle lock open device.
10. If fuel is spilled on clothing, change
clothing immediately.
11. Never overfill fuel tank. Replace gas cap
and tighten securely.
GENERAL SERVICE
1. *Never operate machine in a closed area.
2. Keep all nuts and bolts tight to be sure
the equipment is in safe working
condition.
3. Never remove or tamper with safety
devices. Check their proper operation
regularly. Never do anything to interfere
with the intended function of a safety
device or to reduce the protection
provided by a safety device.
4. Keep machine free of grass, leaves, or
other debris build up. *Clean up oil or fuel
spillage and remove any fuel-soaked
debris. Allow machine to cool before
storing.
ASSEMBLY
Assembling the wheels
As shown in Figs. 3 and 4.
1. Loosen the nut and gasket, ensuring the
corrugated gasket be well assembled on the
axle, then install the wheel and fasten the
nut tightly.
2. Install the other wheel in the same way.
Fig. 3
Fig. 4
5. If you strike a foreign object, stop and
inspect the machine. Repair, if
necessary, before starting.
6. Never make any adjustments or repairs
with the engine (motor) running.
*Disconnect the spark plug wire and
ground against engine to prevent
unintended starting.
7. Always unplug electric mowers before
adjusting, cleaning, or repairing.
8. Check grass catcher components and
the discharge guard frequently and
replace with manufacturer’s recommend-
ed parts, when necessary.
9. Mower blades are sharp. Wrap the blade
or wear gloves, and use extra caution
when servicing them.
10. *Do not change engine governor setting
or over speed the engine.
11. Maintain or replace safety and instruc-
tion labels, as necessary.
* Asterisked items do not apply to
electric mowers.
Maintenance and storage
1. Keep all nuts, bolts and screws tight to
be sure the equipment is in safe working
condition.
2. Never store the equipment with gas in
the tank inside a building where fumes
can reach an open flame or spark.
3. Allow the engine to cool before storing in
any enclosure.
4. To reduce the fire hazard, keep the
engine, muffler, battery compartment
and gas storage area free of grass,
leaves, or excessive grease.
5. Check the grass catcher frequently for
wear or deterioration.
6. Replace worn or damaged parts for
safety.
7. If the fuel tank has to be drained, this
should be done outdoors.
11
ASSEMBLY

model no. 054-8289-8
10
OPERATION INSTRUCTIONS
TURNING ON AND OFF (Fig. 4)
1. Connect the power cord of your jigsaw to a
standard household power outlet.
2. To turn the saw ON, depress the on/off
trigger switch.
3. To turn the tool OFF, release the trigger
switch.
4. To lock the on/off trigger switch in the “on”
position, press the trigger switch and hold
it on, then press in the lock-on button. The lock-on button allows the operator to keep
the jigsaw running without squeezing the trigger switch. This feature is convenient for
continuous sawing applications.
5. To release the lock-on button, press and release the trigger switch.
VARIABLE-SPEED DIAL (Fig. 5)
Your jigsaw is equipped with a variable-
speed dial. At the “MIN” position, there is no
blade action. The “MAX” position results in
the highest speed. Select the speed that is
appropriate for the material and the project at
hand.
HOW TO SELECT THE PROPER SPEED
The proper blade speed will differ, depending
on the type and thickness of the
workpiece. As a general rule, slower speeds are best for
denser materials and faster
speeds are best for soft materials.
OPERATION INSTRUCTIONS
On/off Trigger
Switch
Lock-on
Button
Fig. 4
Fig. 5
Variable-speed dial
MAX
MIN
NOTE:
Determine the optimum speed for cutting your workpiece by making a trial cut
in a scrap piece of material.
WARNING!
• Do not use the jigsaw for plunge or pocket cuts. The jigsaw is not designed for these operations.
Such use could result in serious personal injury.
• Make sure that the switch is not locked in the ON position before plugging your jigsaw.
• Allow the blade to come to a complete standstill before setting the jigsaw down.
Safety instructions
Safe Practices for Pedestrian-controlled
Mowers
This cutting machine is capable of amputat-
ing hands and feet and throwing objects.
Failure to observe the following safety
instructions could result in serious injury or
death.
I. GENERAL OPERATION
1. Read, understand, and follow all
instructions on the machine and in the
manual(s) before starting.
2. Do not put hands or feet near or under
the machine. Keep clear of the discharge
opening at all times.
3. Only allow responsible adults who are
familiar with the instructions to operate
this machine.
4. Clear the area of objects such as rocks,
wire, toys, etc., which could be thrown by
the blade. Stay behind the handle when
the engine (motor) is running.
5. Be sure the area is clear of bystanders
before operating. Stop machine if anyone
enters the area.
6. Do not operate machine barefooted or
while wearing sandals. Always wear
substantial footwear.
7. Do not pull machine backward unless
absolutely necessary. Always look down
and behind before and while moving
backward.
8. Never direct discharged material toward
anyone. Avoid discharging material
against a wall or obstruction. Material
may ricochet back toward the operator.
Stop the blade when crossing gravel
surfaces.
9. Do not operate machine without the
entire grass catcher, discharge guard,
rear guard, or other safety protective
devices in place and working.
10. Never leave a running machine unattend-
ed.
11. Stop the engine (motor) and wait until the
blade comes to a complete stop before
cleaning the machine, removing grass
catcher, or unclogging the discharge
guard.
12. Operate machine only in daylight or good
artificial light.
13. Do not operate machine while under the
influence of alcohol or drugs.
14. Never operate mower in wet grass. Always
be sure of your footing; walk, never run.
15. Disengage the drive system, if so
equipped, before starting the engine
(motor).
16. If the machine should start to vibrate
abnormally, stop the engine (motor) and
check for the cause immediately.
Vibration is generally a warning of
trouble.
17. Always wear eye protection when
operating machine.
18. See manufacturer’s instructions for
proper operation and installation of
accessories. Only use accessories
approved by the manufacturer.
II. SLOPE OPERATION
Slopes are a major factor related to slip and
fall accidents, which can result in severe
injury. Operation on all slopes requires extra
caution. If you feel uneasy on a slope, do not
mow it.
1. Mow across the face of slopes; never up
and down. Exercise extreme caution
when changing direction on slopes.
2. Watch for holes, ruts, bumps, rocks, or
other hidden objects. Uneven terrain
could cause a slip and fall accident. Tall
grass can hide obstacles.
3. Do not mow on wet grass or excessively
steep slopes. Poor footing could cause a
slip and fall accident.
4. Do not mow near drop offs, ditches, or
embankments. You could lose your
footing or balance.
III. CHILDREN
Tragic accidents can occur if the operator is
not alert to the presence of children. Children
are often attracted to the machine and the
mowing activity. Never assume that children
will remain where you last saw them.
1. Keep children out of the mowing area and
under the watchful care of a responsible
adult other than the operator.
2. Be alert and turn mower off if a child
enters the area.
3. Never allow children to operate the
machine.
4. Use extra care when approaching blind
corners, shrubs, trees, or other objects
that may block your view of a child.
IV. SERVICE
*SAFE HANDLING OF GASOLINE:
To avoid personal injury or property damage,
use extreme care in handling gasoline.
Gasoline is extremely flammable and the
vapours are explosive.
1. Extinguish all cigarettes, cigars, pipes,
and other sources of ignition.
2. Use only an approved gasoline container.
3. Never remove gas cap or add fuel with
the engine running.
4. Allow engine to cool before refueling.
5. Never refuel the machine indoors.
6. Never store the machine or fuel
container where there is an open flame,
spark, or pilot light such as on a water
heater or on other appliances.
7. Never fill containers inside a vehicle or on
a truck or trailer bed with a plastic liner.
Always place containers on the ground
away from your vehicle before filling.
8. Remove gas powered equipment from the
truck or trailer and refuel it on the
ground. If this is not possible, then refuel
such equipment with a portable
container, rather than from a gasoline
dispenser nozzle.
9. Keep the nozzle in contact with the rim
of the fuel tank or container opening at
all times until fueling is complete. Do not
use a nozzle lock open device.
10. If fuel is spilled on clothing, change
clothing immediately.
11. Never overfill fuel tank. Replace gas cap
and tighten securely.
GENERAL SERVICE
1. *Never operate machine in a closed area.
2. Keep all nuts and bolts tight to be sure
the equipment is in safe working
condition.
3. Never remove or tamper with safety
devices. Check their proper operation
regularly. Never do anything to interfere
with the intended function of a safety
device or to reduce the protection
provided by a safety device.
4. Keep machine free of grass, leaves, or
other debris build up. *Clean up oil or fuel
spillage and remove any fuel-soaked
debris. Allow machine to cool before
storing.
Attaching the grass bag to the mower
As shown in Fig. 8.
1. Lift the ejector flap with one hand
and hook in the grass bag.
2. Release the ejector flap to secure
the grass bag in position.
Assembling the mulching plug
As shown in Fig. 9.
1. Remove the grass bag.
2. Push the plastic mulching plug into the
discharge chute until it is locked in place.
3. Release the flap. It will close back to
cover the mulching plug.
Assembling the side discharge chute
As shown in Fig. 10.
NOTE: When changing to the side
discharge, remove the grass bag and
plug the mulching plug.
1. Lift the side discharge cover with one
hand and hook in the side discharge chute
with the other hand.
2. Release the side discharge cover to
secure the chute in position.
Checking and filling engine oil
As shown in Figs. 11 to 13.
CAUTION! The following procedures and
adjustments must be performed before the
engine is started.
Do not attempt to make any of these
adjustments while the engine is running.
CAUTION! To prevent engine damage the
engine is shipped without oil or gas.
The engine must be filled with the correct
grade of oil and gas before starting the
engine.
NOTE! Running the engine with a low oil level will cause engine damage. It is recommend
that high detergent, premium quality 4-stroke engine oil be used. Using non-detergent oil
can shorten the engine’s service life, and using 2-stroke oil will damage the engine.
CAUTION! Always use high quality detergent oil classified SAE30 oil (or equivalent, such
as SAE 10W/30, often termed as 4-stroke lawnmower oil).
Never use additives with recommended oil.
To prolong the life of your engine it is important that the oil is changed after the first 5
hours of use.
NOTE: To check the engine oil level, stop engine and place the mower on a level surface.
1. Remove the oil filler dipstick and wipe oil
from it with a clean cloth (see Fig. 11).
2. Insert the dipstick into the oil filler neck,
but do not twist it closed (see Fig. 11-1).
3. Remove the dipstick and check the oil
level: the oil level must be between the
Min and Max marks on the dipstick. If near
the lower level, fill to upper lever with
the recommended oil (SAE30 or equivalent).
Do not overfill. Wipe away any spilled oil
(see Fig. 12).
4. Align the ribs of the cap with the groove of
the filler neck, then rotate 1/4 turn to
secure it (see Fig. 13).
Filling with engine fuel
As shown in Fig. 14.
CAUTION! Always use clean, fresh unleaded gas. Purchase fuel in quantities that can be
used within 30 days. Never mix oil with gas.
CAUTION! Do not fill into the base of neck to allow for fuel expansion. Do not overfill the
fuel tank.
CAUTION! WARNING! Gas is highly flammable and extreme caution must be taken when
handling or working with it. Keep out of reach of children.
CAUTION! To prevent engine damage the engine is shipped without oil or gas. The engine
must be filled with the correct grade of oil and gas before starting the engine.
WARNING! Refuel in a well-ventilated area with the engine stopped. Do not smoke or allow
flame or sparks in the area where the engine is refueled or where gas is stored. Avoid
repeated or prolonged contact with skin or inhalation of vapour.
WARNING! Gasoline with up to 10% ethanol (gasohol) is acceptable.
Do not use unapproved gasoline, such as E15 and E85.
1. Clean the area around the gas filler cap
before removing the cap. Remove the
warning tag, and check the fuel level
(see Fig. 14).
2. Refill the tank if the fuel level is low.
3. Refuel carefully to avoid overfilling or
spilling fuel.
There should be no fuel in the filler neck.
4. Clean up any overflow or splashes of gas
before starting the engine.
5. Tighten the filler cap after filling: finger
tight only (see Fig. 14-1).
5. If you strike a foreign object, stop and
inspect the machine. Repair, if
necessary, before starting.
6. Never make any adjustments or repairs
with the engine (motor) running.
*Disconnect the spark plug wire and
ground against engine to prevent
unintended starting.
7. Always unplug electric mowers before
adjusting, cleaning, or repairing.
8. Check grass catcher components and
the discharge guard frequently and
replace with manufacturer’s recommend-
ed parts, when necessary.
9. Mower blades are sharp. Wrap the blade
or wear gloves, and use extra caution
when servicing them.
10. *Do not change engine governor setting
or over speed the engine.
11. Maintain or replace safety and instruc-
tion labels, as necessary.
* Asterisked items do not apply to
electric mowers.
Maintenance and storage
1. Keep all nuts, bolts and screws tight to
be sure the equipment is in safe working
condition.
2. Never store the equipment with gas in
the tank inside a building where fumes
can reach an open flame or spark.
3. Allow the engine to cool before storing in
any enclosure.
4. To reduce the fire hazard, keep the
engine, muffler, battery compartment
and gas storage area free of grass,
leaves, or excessive grease.
5. Check the grass catcher frequently for
wear or deterioration.
Fig. 5
Fig. 6
Fig. 7
fixing knob
rope guide
Fixing Knob
clip
bolt
6. Replace worn or damaged parts for
safety.
7. If the fuel tank has to be drained, this
should be done outdoors.
Assembling the handle
As shown in Figs. 5 and 6.
1. Fasten the lower handle to the device by
using two arc head bolts and two star knobs
on each side.
2. Unfold the upper handle and attach it to
lower handle by using the quick clamps and
the square neck bolts on each side.
Tidy the connection cord
As shown in Fig. 7.
Attach the connection cord to the handle
with the cord clip (supplied).
12
ASSEMBLY
model no. 060-0190-2
I
contact us: 1-844-428-7277

11
OPERATION INSTRUCTIONS
STRAIGHT CUTTING (Fig. 6)
Mark the cut. Position the saw so that the
blade is in line with the desired cut. Mark the
position of the side edge of the saw base and
then clamp the straight edge on the mark,
parallel to the cut. Make the cut from one
direction only. Never cut halfway and then
complete the cut from the opposite end.
GENERAL CUTTING
1. Firmly clamp the workpiece in place.
2. Use the appropriate type and size of blade for the workpiece.
3. Check the clearance behind the workpiece and assure that the blade will not impact
another surface.
4. Clearly mark the line of cut.
5. Hold the saw firmly. Make sure that your hand is on the insulated gripping areas only.
6. Rest the base plate on the workpiece so that the blade is not in contact with the
workpiece
7. Turn on the jigsaw and bring it to the maximum desired cutting speed before applying
the blade to the workpiece.
8. Slowly move the jig saw into the workpiece.
9. Do not force the tool. Keep the base plate flat against the workpiece while cutting. Use
only enough steady pressure on the blade to keep the saw cutting.
10. Reduce pressure as the blade comes to the end of the cut.
11. Allow the saw to come to a complete stop before removing the blade from the workpiece.
12. If sawing fibreglass, plaster, wallboard, or spackling compound, clean the saw motor
vents frequently with a vacuum or compressed air. Always wear safety goggles when
cleaning tools using compressed air. These materials are highly abrasive and may
accelerate the wear on motor bearings and brushes.
Fig. 6
WARNING!
• Before attempting to use this tool, become familiar with all of its operating features and safety
requirements.
• Always securely and support the workpiece. Always maintain proper control of the jigsaw. Failure to
clamp and support the workpiece and loss of control of the saw could result in serious injury.
NOTE:
Always apply a steady, firm, downward pressure on the front of the saw as you cut. This will keep the saw blade from
jumping out of the workpiece.
Safety instructions
Safe Practices for Pedestrian-controlled
Mowers
This cutting machine is capable of amputat-
ing hands and feet and throwing objects.
Failure to observe the following safety
instructions could result in serious injury or
death.
I. GENERAL OPERATION
1. Read, understand, and follow all
instructions on the machine and in the
manual(s) before starting.
2. Do not put hands or feet near or under
the machine. Keep clear of the discharge
opening at all times.
3. Only allow responsible adults who are
familiar with the instructions to operate
this machine.
4. Clear the area of objects such as rocks,
wire, toys, etc., which could be thrown by
the blade. Stay behind the handle when
the engine (motor) is running.
5. Be sure the area is clear of bystanders
before operating. Stop machine if anyone
enters the area.
6. Do not operate machine barefooted or
while wearing sandals. Always wear
substantial footwear.
7. Do not pull machine backward unless
absolutely necessary. Always look down
and behind before and while moving
backward.
8. Never direct discharged material toward
anyone. Avoid discharging material
against a wall or obstruction. Material
may ricochet back toward the operator.
Stop the blade when crossing gravel
surfaces.
9. Do not operate machine without the
entire grass catcher, discharge guard,
rear guard, or other safety protective
devices in place and working.
10. Never leave a running machine unattend-
ed.
11. Stop the engine (motor) and wait until the
blade comes to a complete stop before
cleaning the machine, removing grass
catcher, or unclogging the discharge
guard.
12. Operate machine only in daylight or good
artificial light.
13. Do not operate machine while under the
influence of alcohol or drugs.
14. Never operate mower in wet grass. Always
be sure of your footing; walk, never run.
15. Disengage the drive system, if so
equipped, before starting the engine
(motor).
16. If the machine should start to vibrate
abnormally, stop the engine (motor) and
check for the cause immediately.
Vibration is generally a warning of
trouble.
17. Always wear eye protection when
operating machine.
18. See manufacturer’s instructions for
proper operation and installation of
accessories. Only use accessories
approved by the manufacturer.
II. SLOPE OPERATION
Slopes are a major factor related to slip and
fall accidents, which can result in severe
injury. Operation on all slopes requires extra
caution. If you feel uneasy on a slope, do not
mow it.
1. Mow across the face of slopes; never up
and down. Exercise extreme caution
when changing direction on slopes.
2. Watch for holes, ruts, bumps, rocks, or
other hidden objects. Uneven terrain
could cause a slip and fall accident. Tall
grass can hide obstacles.
3. Do not mow on wet grass or excessively
steep slopes. Poor footing could cause a
slip and fall accident.
4. Do not mow near drop offs, ditches, or
embankments. You could lose your
footing or balance.
III. CHILDREN
Tragic accidents can occur if the operator is
not alert to the presence of children. Children
are often attracted to the machine and the
mowing activity. Never assume that children
will remain where you last saw them.
1. Keep children out of the mowing area and
under the watchful care of a responsible
adult other than the operator.
2. Be alert and turn mower off if a child
enters the area.
3. Never allow children to operate the
machine.
4. Use extra care when approaching blind
corners, shrubs, trees, or other objects
that may block your view of a child.
IV. SERVICE
*SAFE HANDLING OF GASOLINE:
To avoid personal injury or property damage,
use extreme care in handling gasoline.
Gasoline is extremely flammable and the
vapours are explosive.
1. Extinguish all cigarettes, cigars, pipes,
and other sources of ignition.
2. Use only an approved gasoline container.
3. Never remove gas cap or add fuel with
the engine running.
4. Allow engine to cool before refueling.
5. Never refuel the machine indoors.
6. Never store the machine or fuel
container where there is an open flame,
spark, or pilot light such as on a water
heater or on other appliances.
7. Never fill containers inside a vehicle or on
a truck or trailer bed with a plastic liner.
Always place containers on the ground
away from your vehicle before filling.
8. Remove gas powered equipment from the
truck or trailer and refuel it on the
ground. If this is not possible, then refuel
such equipment with a portable
container, rather than from a gasoline
dispenser nozzle.
9. Keep the nozzle in contact with the rim
of the fuel tank or container opening at
all times until fueling is complete. Do not
use a nozzle lock open device.
10. If fuel is spilled on clothing, change
clothing immediately.
11. Never overfill fuel tank. Replace gas cap
and tighten securely.
GENERAL SERVICE
1. *Never operate machine in a closed area.
2. Keep all nuts and bolts tight to be sure
the equipment is in safe working
condition.
3. Never remove or tamper with safety
devices. Check their proper operation
regularly. Never do anything to interfere
with the intended function of a safety
device or to reduce the protection
provided by a safety device.
4. Keep machine free of grass, leaves, or
other debris build up. *Clean up oil or fuel
spillage and remove any fuel-soaked
debris. Allow machine to cool before
storing.
Attaching the grass bag to the mower
As shown in Fig. 8.
1. Lift the ejector flap with one hand
and hook in the grass bag.
2. Release the ejector flap to secure
the grass bag in position.
Assembling the mulching plug
As shown in Fig. 9.
1. Remove the grass bag.
2. Push the plastic mulching plug into the
discharge chute until it is locked in place.
3. Release the flap. It will close back to
cover the mulching plug.
Assembling the side discharge chute
As shown in Fig. 10.
NOTE: When changing to the side
discharge, remove the grass bag and
plug the mulching plug.
1. Lift the side discharge cover with one
hand and hook in the side discharge chute
with the other hand.
2. Release the side discharge cover to
secure the chute in position.
Fig. 8
Fig. 9
Checking and filling engine oil
As shown in Figs. 11 to 13.
CAUTION! The following procedures and
adjustments must be performed before the
engine is started.
Do not attempt to make any of these
adjustments while the engine is running.
CAUTION! To prevent engine damage the
engine is shipped without oil or gas.
The engine must be filled with the correct
grade of oil and gas before starting the
engine.
NOTE! Running the engine with a low oil level will cause engine damage. It is recommend
that high detergent, premium quality 4-stroke engine oil be used. Using non-detergent oil
can shorten the engine’s service life, and using 2-stroke oil will damage the engine.
CAUTION! Always use high quality detergent oil classified SAE30 oil (or equivalent, such
as SAE 10W/30, often termed as 4-stroke lawnmower oil).
Never use additives with recommended oil.
To prolong the life of your engine it is important that the oil is changed after the first 5
hours of use.
NOTE: To check the engine oil level, stop engine and place the mower on a level surface.
1. Remove the oil filler dipstick and wipe oil
from it with a clean cloth (see Fig. 11).
2. Insert the dipstick into the oil filler neck,
but do not twist it closed (see Fig. 11-1).
Fig. 10
3. Remove the dipstick and check the oil
level: the oil level must be between the
Min and Max marks on the dipstick. If near
the lower level, fill to upper lever with
the recommended oil (SAE30 or equivalent).
Do not overfill. Wipe away any spilled oil
(see Fig. 12).
4. Align the ribs of the cap with the groove of
the filler neck, then rotate 1/4 turn to
secure it (see Fig. 13).
Filling with engine fuel
As shown in Fig. 14.
CAUTION! Always use clean, fresh unleaded gas. Purchase fuel in quantities that can be
used within 30 days. Never mix oil with gas.
CAUTION! Do not fill into the base of neck to allow for fuel expansion. Do not overfill the
fuel tank.
CAUTION! WARNING! Gas is highly flammable and extreme caution must be taken when
handling or working with it. Keep out of reach of children.
CAUTION! To prevent engine damage the engine is shipped without oil or gas. The engine
must be filled with the correct grade of oil and gas before starting the engine.
WARNING! Refuel in a well-ventilated area with the engine stopped. Do not smoke or allow
flame or sparks in the area where the engine is refueled or where gas is stored. Avoid
repeated or prolonged contact with skin or inhalation of vapour.
WARNING! Gasoline with up to 10% ethanol (gasohol) is acceptable.
Do not use unapproved gasoline, such as E15 and E85.
1. Clean the area around the gas filler cap
before removing the cap. Remove the
warning tag, and check the fuel level
(see Fig. 14).
2. Refill the tank if the fuel level is low.
3. Refuel carefully to avoid overfilling or
spilling fuel.
There should be no fuel in the filler neck.
4. Clean up any overflow or splashes of gas
before starting the engine.
5. Tighten the filler cap after filling: finger
tight only (see Fig. 14-1).
ejector flap
grass bag
side discharge chute
side discharge cover
mulching plug
5. If you strike a foreign object, stop and
inspect the machine. Repair, if
necessary, before starting.
6. Never make any adjustments or repairs
with the engine (motor) running.
*Disconnect the spark plug wire and
ground against engine to prevent
unintended starting.
7. Always unplug electric mowers before
adjusting, cleaning, or repairing.
8. Check grass catcher components and
the discharge guard frequently and
replace with manufacturer’s recommend-
ed parts, when necessary.
9. Mower blades are sharp. Wrap the blade
or wear gloves, and use extra caution
when servicing them.
10. *Do not change engine governor setting
or over speed the engine.
11. Maintain or replace safety and instruc-
tion labels, as necessary.
* Asterisked items do not apply to
electric mowers.
Maintenance and storage
1. Keep all nuts, bolts and screws tight to
be sure the equipment is in safe working
condition.
2. Never store the equipment with gas in
the tank inside a building where fumes
can reach an open flame or spark.
3. Allow the engine to cool before storing in
any enclosure.
4. To reduce the fire hazard, keep the
engine, muffler, battery compartment
and gas storage area free of grass,
leaves, or excessive grease.
5. Check the grass catcher frequently for
wear or deterioration.
6. Replace worn or damaged parts for
safety.
7. If the fuel tank has to be drained, this
should be done outdoors.
13
ASSEMBLY

model no. 054-8289-8
12
METAL CUTTING
When cutting metal, always clamp down the material. Be careful to move the saw along
slowly. Use lower speeds. Do not twist, bend, or force the blade. If the saw jumps or
bounces, use a blade with finer teeth. If the blade is clogged when cutting soft metal,
use a
blade with coarser teeth.
For easier cutting, lubricate the blade with a stick of cutting wax, if available, or cutting
oil when cutting steel. Never use gasoline. Thin metal should be sandwiched between
two
pieces of wood or tightly clamped onto a single piece of wood (wood on top of the
metal).
Draw the cut lines or design on the top piece of wood.
OPERATION INSTRUCTIONS
Attaching the grass bag to the mower
As shown in Fig. 8.
1. Lift the ejector flap with one hand
and hook in the grass bag.
2. Release the ejector flap to secure
the grass bag in position.
Assembling the mulching plug
As shown in Fig. 9.
1. Remove the grass bag.
2. Push the plastic mulching plug into the
discharge chute until it is locked in place.
3. Release the flap. It will close back to
cover the mulching plug.
Assembling the side discharge chute
As shown in Fig. 10.
NOTE: When changing to the side
discharge, remove the grass bag and
plug the mulching plug.
1. Lift the side discharge cover with one
hand and hook in the side discharge chute
with the other hand.
2. Release the side discharge cover to
secure the chute in position.
Checking and filling engine oil
As shown in Figs. 11 to 13.
CAUTION! The following procedures and
adjustments must be performed before the
engine is started.
Do not attempt to make any of these
adjustments while the engine is running.
CAUTION! To prevent engine damage the
engine is shipped without oil or gas.
The engine must be filled with the correct
grade of oil and gas before starting the
engine.
NOTE! Running the engine with a low oil level will cause engine damage. It is recommend
that high detergent, premium quality 4-stroke engine oil be used. Using non-detergent oil
can shorten the engine’s service life, and using 2-stroke oil will damage the engine.
CAUTION! Always use high quality detergent oil classified SAE30 oil (or equivalent, such
as SAE 10W/30, often termed as 4-stroke lawnmower oil).
Never use additives with recommended oil.
To prolong the life of your engine it is important that the oil is changed after the first 5
hours of use.
NOTE: To check the engine oil level, stop engine and place the mower on a level surface.
1. Remove the oil filler dipstick and wipe oil
from it with a clean cloth (see Fig. 11).
2. Insert the dipstick into the oil filler neck,
but do not twist it closed (see Fig. 11-1).
Fig. 11
3. Remove the dipstick and check the oil
level: the oil level must be between the
Min and Max marks on the dipstick. If near
the lower level, fill to upper lever with
the recommended oil (SAE30 or equivalent).
Do not overfill. Wipe away any spilled oil
(see Fig. 12).
4. Align the ribs of the cap with the groove of
the filler neck, then rotate 1/4 turn to
secure it (see Fig. 13).
Filling with engine fuel
As shown in Fig. 14.
CAUTION! Always use clean, fresh unleaded gas. Purchase fuel in quantities that can be
used within 30 days. Never mix oil with gas.
CAUTION! Do not fill into the base of neck to allow for fuel expansion. Do not overfill the
fuel tank.
CAUTION! WARNING! Gas is highly flammable and extreme caution must be taken when
handling or working with it. Keep out of reach of children.
CAUTION! To prevent engine damage the engine is shipped without oil or gas. The engine
must be filled with the correct grade of oil and gas before starting the engine.
WARNING! Refuel in a well-ventilated area with the engine stopped. Do not smoke or allow
flame or sparks in the area where the engine is refueled or where gas is stored. Avoid
repeated or prolonged contact with skin or inhalation of vapour.
WARNING! Gasoline with up to 10% ethanol (gasohol) is acceptable.
Do not use unapproved gasoline, such as E15 and E85.
1. Clean the area around the gas filler cap
before removing the cap. Remove the
warning tag, and check the fuel level
(see Fig. 14).
2. Refill the tank if the fuel level is low.
3. Refuel carefully to avoid overfilling or
spilling fuel.
There should be no fuel in the filler neck.
4. Clean up any overflow or splashes of gas
before starting the engine.
5. Tighten the filler cap after filling: finger
tight only (see Fig. 14-1).
Engine oil filler neck
Fig. 11-1
14
ASSEMBLY
model no. 060-0190-2
I
contact us: 1-844-428-7277

13
MAINTAINANCE
MAINTAINANCE
BEFORE EACH USE
1. Inspect the jigsaw, the trigger switch, the cord and the accessories for damage.
2. Check for damaged, missing, or worn parts.
3. Check for loose screws, misalignment or binding of moving parts, or any other condition
that may affect the operation.
4. If abnormal vibration or noise occurs, turn off the tool immediately and have the
problem corrected before further use. Unplug the tool from power source before cleaning
or performing any maintenance. Using compressed air may be the most effective
cleaning method. Always wear safety goggles when cleaning tools using compressed air.
WARNING!
• Do not allow brake fluids, gasoline and petroleum-based products, penetrating oil, etc. come into
contact with plastic parts. These substances contain chemicals that can damage, weaken, or
destroy plastic.
• When servicing, use only identical replacement parts. The use of any other parts may create a
hazard or cause damage to the product.
• Use only accessories that are recommended for this jigsaw by the manufacturer. Accessories that
may be suitable for one tool may become hazardous when used with another tool.
• Maintain tools with care. Keep cutting tools sharp and clean. Properly maintained tools with sharp
cutting edges are less likely to bind, and are easier to control.
• To ensure safety and reliability, all repairs should be performed by a qualified service technician.
• If the replacement of the supply cord is necessary, this has to be done by the manufacturer or his
agent in order to avoid a safety hazard.
Attaching the grass bag to the mower
As shown in Fig. 8.
1. Lift the ejector flap with one hand
and hook in the grass bag.
2. Release the ejector flap to secure
the grass bag in position.
Assembling the mulching plug
As shown in Fig. 9.
1. Remove the grass bag.
2. Push the plastic mulching plug into the
discharge chute until it is locked in place.
3. Release the flap. It will close back to
cover the mulching plug.
Assembling the side discharge chute
As shown in Fig. 10.
NOTE: When changing to the side
discharge, remove the grass bag and
plug the mulching plug.
1. Lift the side discharge cover with one
hand and hook in the side discharge chute
with the other hand.
2. Release the side discharge cover to
secure the chute in position.
Checking and filling engine oil
As shown in Figs. 11 to 13.
CAUTION! The following procedures and
adjustments must be performed before the
engine is started.
Do not attempt to make any of these
adjustments while the engine is running.
CAUTION! To prevent engine damage the
engine is shipped without oil or gas.
The engine must be filled with the correct
grade of oil and gas before starting the
engine.
NOTE! Running the engine with a low oil level will cause engine damage. It is recommend
that high detergent, premium quality 4-stroke engine oil be used. Using non-detergent oil
can shorten the engine’s service life, and using 2-stroke oil will damage the engine.
CAUTION! Always use high quality detergent oil classified SAE30 oil (or equivalent, such
as SAE 10W/30, often termed as 4-stroke lawnmower oil).
Never use additives with recommended oil.
To prolong the life of your engine it is important that the oil is changed after the first 5
hours of use.
NOTE: To check the engine oil level, stop engine and place the mower on a level surface.
1. Remove the oil filler dipstick and wipe oil
from it with a clean cloth (see Fig. 11).
2. Insert the dipstick into the oil filler neck,
but do not twist it closed (see Fig. 11-1).
Fig. 12
Fig. 13
3. Remove the dipstick and check the oil
level: the oil level must be between the
Min and Max marks on the dipstick. If near
the lower level, fill to upper lever with
the recommended oil (SAE30 or equivalent).
Do not overfill. Wipe away any spilled oil
(see Fig. 12).
4. Align the ribs of the cap with the groove of
the filler neck, then rotate 1/4 turn to
secure it (see Fig. 13).
Filling with engine fuel
As shown in Fig. 14.
CAUTION! Always use clean, fresh unleaded gas. Purchase fuel in quantities that can be
used within 30 days. Never mix oil with gas.
CAUTION! Do not fill into the base of neck to allow for fuel expansion. Do not overfill the
fuel tank.
CAUTION! WARNING! Gas is highly flammable and extreme caution must be taken when
handling or working with it. Keep out of reach of children.
CAUTION! To prevent engine damage the engine is shipped without oil or gas. The engine
must be filled with the correct grade of oil and gas before starting the engine.
WARNING! Refuel in a well-ventilated area with the engine stopped. Do not smoke or allow
flame or sparks in the area where the engine is refueled or where gas is stored. Avoid
repeated or prolonged contact with skin or inhalation of vapour.
WARNING! Gasoline with up to 10% ethanol (gasohol) is acceptable.
Do not use unapproved gasoline, such as E15 and E85.
1. Clean the area around the gas filler cap
before removing the cap. Remove the
warning tag, and check the fuel level
(see Fig. 14).
2. Refill the tank if the fuel level is low.
3. Refuel carefully to avoid overfilling or
spilling fuel.
There should be no fuel in the filler neck.
4. Clean up any overflow or splashes of gas
before starting the engine.
5. Tighten the filler cap after filling: finger
tight only (see Fig. 14-1).
min max
ribs
groove
15
ASSEMBLY

model no. 054-8289-8
14
TROUBLESHOOTING
Problem Possible Causes Solution
The motor does not start. The tool is not connetced to
a power source.
Connect the tool to a power
source.
Blade cannot be removed. Saw dust in the blade
clamp.
Clean the clamp slot with
a brush.
Cutting is difficult. Saw blade is worn. Replace the saw blade.
TROUBLESHOOTING
Attaching the grass bag to the mower
As shown in Fig. 8.
1. Lift the ejector flap with one hand
and hook in the grass bag.
2. Release the ejector flap to secure
the grass bag in position.
Assembling the mulching plug
As shown in Fig. 9.
1. Remove the grass bag.
2. Push the plastic mulching plug into the
discharge chute until it is locked in place.
3. Release the flap. It will close back to
cover the mulching plug.
Assembling the side discharge chute
As shown in Fig. 10.
NOTE: When changing to the side
discharge, remove the grass bag and
plug the mulching plug.
1. Lift the side discharge cover with one
hand and hook in the side discharge chute
with the other hand.
2. Release the side discharge cover to
secure the chute in position.
Checking and filling engine oil
As shown in Figs. 11 to 13.
CAUTION! The following procedures and
adjustments must be performed before the
engine is started.
Do not attempt to make any of these
adjustments while the engine is running.
CAUTION! To prevent engine damage the
engine is shipped without oil or gas.
The engine must be filled with the correct
grade of oil and gas before starting the
engine.
NOTE! Running the engine with a low oil level will cause engine damage. It is recommend
that high detergent, premium quality 4-stroke engine oil be used. Using non-detergent oil
can shorten the engine’s service life, and using 2-stroke oil will damage the engine.
CAUTION! Always use high quality detergent oil classified SAE30 oil (or equivalent, such
as SAE 10W/30, often termed as 4-stroke lawnmower oil).
Never use additives with recommended oil.
To prolong the life of your engine it is important that the oil is changed after the first 5
hours of use.
NOTE: To check the engine oil level, stop engine and place the mower on a level surface.
1. Remove the oil filler dipstick and wipe oil
from it with a clean cloth (see Fig. 11).
2. Insert the dipstick into the oil filler neck,
but do not twist it closed (see Fig. 11-1).
3. Remove the dipstick and check the oil
level: the oil level must be between the
Min and Max marks on the dipstick. If near
the lower level, fill to upper lever with
the recommended oil (SAE30 or equivalent).
Do not overfill. Wipe away any spilled oil
(see Fig. 12).
4. Align the ribs of the cap with the groove of
the filler neck, then rotate 1/4 turn to
secure it (see Fig. 13).
Filling with engine fuel
As shown in Fig. 14.
CAUTION! Always use clean, fresh unleaded gas. Purchase fuel in quantities that can be
used within 30 days. Never mix oil with gas.
CAUTION! Do not fill into the base of neck to allow for fuel expansion. Do not overfill the
fuel tank.
CAUTION! WARNING! Gas is highly flammable and extreme caution must be taken when
handling or working with it. Keep out of reach of children.
CAUTION! To prevent engine damage the engine is shipped without oil or gas. The engine
must be filled with the correct grade of oil and gas before starting the engine.
WARNING! Refuel in a well-ventilated area with the engine stopped. Do not smoke or allow
flame or sparks in the area where the engine is refueled or where gas is stored. Avoid
repeated or prolonged contact with skin or inhalation of vapour.
WARNING! Gasoline with up to 10% ethanol (gasohol) is acceptable.
Do not use unapproved gasoline, such as E15 and E85.
1. Clean the area around the gas filler cap
before removing the cap. Remove the
warning tag, and check the fuel level
(see Fig. 14).
2. Refill the tank if the fuel level is low.
3. Refuel carefully to avoid overfilling or
spilling fuel.
There should be no fuel in the filler neck.
4. Clean up any overflow or splashes of gas
before starting the engine.
5. Tighten the filler cap after filling: finger
tight only (see Fig. 14-1).
Fig. 14
Fig. 14-1
fuel filler neck
16
ASSEMBLY
model no. 060-0190-2
I
contact us: 1-844-428-7277
Attaching the grass bag to the mower
As shown in Fig. 8.
1. Lift the ejector flap with one hand
and hook in the grass bag.
2. Release the ejector flap to secure
the grass bag in position.
Assembling the mulching plug
As shown in Fig. 9.
1. Remove the grass bag.
2. Push the plastic mulching plug into the
discharge chute until it is locked in place.
3. Release the flap. It will close back to
cover the mulching plug.
Assembling the side discharge chute
As shown in Fig. 10.
NOTE: When changing to the side
discharge, remove the grass bag and
plug the mulching plug.
1. Lift the side discharge cover with one
hand and hook in the side discharge chute
with the other hand.
2. Release the side discharge cover to
secure the chute in position.
Checking and filling engine oil
As shown in Figs. 11 to 13.
CAUTION! The following procedures and
adjustments must be performed before the
engine is started.
Do not attempt to make any of these
adjustments while the engine is running.
CAUTION! To prevent engine damage the
engine is shipped without oil or gas.
The engine must be filled with the correct
grade of oil and gas before starting the
engine.
NOTE! Running the engine with a low oil level will cause engine damage. It is recommend
that high detergent, premium quality 4-stroke engine oil be used. Using non-detergent oil
can shorten the engine’s service life, and using 2-stroke oil will damage the engine.
CAUTION! Always use high quality detergent oil classified SAE30 oil (or equivalent, such
as SAE 10W/30, often termed as 4-stroke lawnmower oil).
Never use additives with recommended oil.
To prolong the life of your engine it is important that the oil is changed after the first 5
hours of use.
NOTE: To check the engine oil level, stop engine and place the mower on a level surface.
1. Remove the oil filler dipstick and wipe oil
from it with a clean cloth (see Fig. 11).
2. Insert the dipstick into the oil filler neck,
but do not twist it closed (see Fig. 11-1).
3. Remove the dipstick and check the oil
level: the oil level must be between the
Min and Max marks on the dipstick. If near
the lower level, fill to upper lever with
the recommended oil (SAE30 or equivalent).
Do not overfill. Wipe away any spilled oil
(see Fig. 12).
4. Align the ribs of the cap with the groove of
the filler neck, then rotate 1/4 turn to
secure it (see Fig. 13).
Filling with engine fuel
As shown in Fig. 14.
CAUTION! Always use clean, fresh unleaded gas. Purchase fuel in quantities that can be
used within 30 days. Never mix oil with gas.
CAUTION! Do not fill into the base of neck to allow for fuel expansion. Do not overfill the
fuel tank.
CAUTION! WARNING! Gas is highly flammable and extreme caution must be taken when
handling or working with it. Keep out of reach of children.
CAUTION! To prevent engine damage the engine is shipped without oil or gas. The engine
must be filled with the correct grade of oil and gas before starting the engine.
WARNING! Refuel in a well-ventilated area with the engine stopped. Do not smoke or allow
flame or sparks in the area where the engine is refueled or where gas is stored. Avoid
repeated or prolonged contact with skin or inhalation of vapour.
WARNING! Gasoline with up to 10% ethanol (gasohol) is acceptable.
Do not use unapproved gasoline, such as E15 and E85.
1. Clean the area around the gas filler cap
before removing the cap. Remove the
warning tag, and check the fuel level
(see Fig. 14).
2. Refill the tank if the fuel level is low.
3. Refuel carefully to avoid overfilling or
spilling fuel.
There should be no fuel in the filler neck.
4. Clean up any overflow or splashes of gas
before starting the engine.
5. Tighten the filler cap after filling: finger
tight only (see Fig. 14-1).
ADJUSTMENT
Setting the cutting height
As shown in Fig. 15.
CAUTION! Adjust the cutting height only
When the engine is switched off and the
spark plug has been pulled.
The cutting height is centrally adjusted with the
cutting height adjusting handle. Different cutting
heights can be selected.
Pull the adjusting handle out and select the
desired cutting height. The handle snaps
into the desired position.
From position 1 to position 7, the cutting heights
range from 1 1/4 to 3 3/4'' (31-95 mm).
Setting required function
NOTE: This lawnmower has three functions. Change functions by changing the installed
accessories as shown in the following chart.
“√”: installed “×” : removed
Fig. 15
To convert mower
For rear bagging
For mulching
For side discharging
mulching plug
×
√
√
grass bag
√
×
×
side discharge chute
×
×
√
2
1
3 3/4'' (95 mm) 1 1/4'' (31 mm)
17
ADJUSTMENT

Fig. 17
OPERATION
Start and stop the engine
WARNING: the blade begins to rotate as soon as the engine is started.
NOTE: do not operate the machine in enclosed or poorly-ventilated areas as the exhaust
gas contains toxic substances.
Keep hands, feet, hair and clothing away from all the moving parts of the machine. The
exhaust and other parts of the machine will become hot during use.
Make sure that the blade is securely fastened before starting the engine.
NOTE: to start the engine, make sure that the spark plug cover is located on the plug and
the machine is filled with sufficient oil and gas.
To start the engine
As shown in Figs. 16 to 18.
1. When starting a cold engine, press down the
primer fully 3-5 times.
WARNING! Too many presses on primer
may cause engine flooding. When starting
a warm engine, the primer does not need
to be used. If the engine stops due to a lack
of gas, refill then press the primer 3-5
times.
2. Stand behind the mower. Pull the engine
start/stop lever toward upper handle
with one hand and place the other hand
on the starter handle (see Fig. 17).
Fig. 16
3. Pull the starter handle out approximately
4 to 6" (10 to 15 cm) until you feel a
resistance and then start the engine
with a sharp pull (see Fig. 17-1).
NOTE: If the engine fails to start after
three pulls, repeat the process.
4. Once the engine is running, put the starter
rope into the rope guide (see Fig. 18).
To stop the engine
As shown in Fig. 19.
Release the engine start/stop lever. It will return
to its initial position and the engine will
automatically switch off.
18
OPERATION
model no. 060-0190-2
I
contact us: 1-844-428-7277

OPERATION
Start and stop the engine
WARNING: the blade begins to rotate as soon as the engine is started.
NOTE: do not operate the machine in enclosed or poorly-ventilated areas as the exhaust
gas contains toxic substances.
Keep hands, feet, hair and clothing away from all the moving parts of the machine. The
exhaust and other parts of the machine will become hot during use.
Make sure that the blade is securely fastened before starting the engine.
NOTE: to start the engine, make sure that the spark plug cover is located on the plug and
the machine is filled with sufficient oil and gas.
To start the engine
As shown in Figs. 16 to 18.
1. When starting a cold engine, press down the
primer fully 3-5 times.
WARNING! Too many presses on primer
may cause engine flooding. When starting
a warm engine, the primer does not need
to be used. If the engine stops due to a lack
of gas, refill then press the primer 3-5
times.
2. Stand behind the mower. Pull the engine
start/stop lever toward upper handle
with one hand and place the other hand
on the starter handle (see Fig. 17).
Fig. 17-1
Fig. 18
Fig. 19
3. Pull the starter handle out approximately
4 to 6" (10 to 15 cm) until you feel a
resistance and then start the engine
with a sharp pull (see Fig. 17-1).
NOTE: If the engine fails to start after
three pulls, repeat the process.
4. Once the engine is running, put the starter
rope into the rope guide (see Fig. 18).
To stop the engine
As shown in Fig. 19.
Release the engine start/stop lever. It will return
to its initial position and the engine will
automatically switch off.
19
OPERATION
Table of contents
Languages:
Other CERTIFIED Lawn Mower manuals

CERTIFIED
CERTIFIED 060-0181-8 User manual

CERTIFIED
CERTIFIED 060-1919-6 User manual

CERTIFIED
CERTIFIED 060-1707-0 User manual

CERTIFIED
CERTIFIED 060-0739-0 Installation manual

CERTIFIED
CERTIFIED 060-0740-4 Installation manual

CERTIFIED
CERTIFIED 060-0750-0 User manual

CERTIFIED
CERTIFIED 060-0753-4 User manual