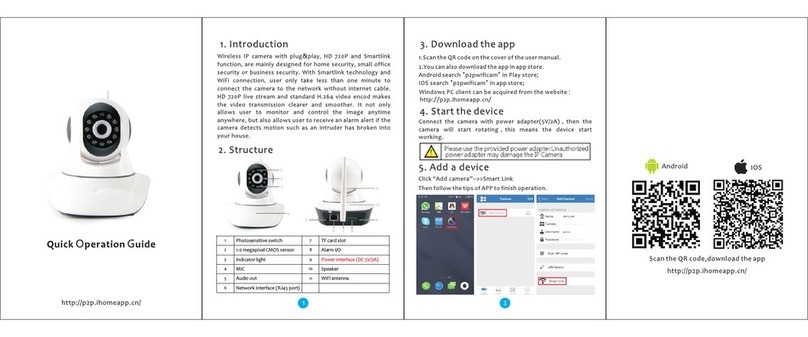
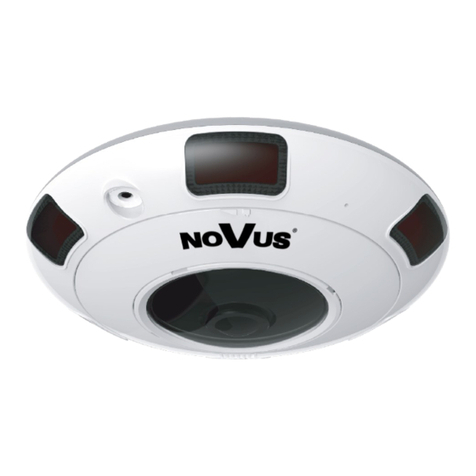
Chal-tec 10027071 User manual

10027071
10027072
Wireless Überwachungssystem
Mit App-Steuerung

Warnung
Zur Reduzierung der Gefahr von Brand, elektrischem Schlag und Beschädigung:
Setzen Sie dieses Gerät nicht dem Regen aus.
Stellen Sie keine mit Flüssigkeiten gefüllten Gefäße, wie Vasen, auf dieses Gerät.
Ausschließlich das empfohlene Zubehör verwenden.
Reparieren Sie dieses Gerät nicht selbst. Wenden Sie sich zur Wartung an qualifiziertes
Kundendienstpersonal.
Lassen Sie keine Gegenstände aus Metall in dieses Gerät fallen.
Stellen Sie keine schweren Gegenstände auf dieses Gerät.
Reinigen Sie das Gerät nur mit einem trockenen Tuch.
Blockieren Sie nicht die Belüftungsöffnungen.
Installieren Sie die Geräte nicht in unmittelbarer Nähe von Hitzequellen wie Heizungen, Herden,
Öfen oder anderen heiß werdenden Geräten (wie z.B. Verstärkern o.a.)
Netzkabel/Netzteil
Zur Reduzierung der Gefahr von Brand, elektrischem Schlag und Beschädigung:
Gewährleisten Sie, dass die Spannung der Stromversorgung dem auf diesem Gerät angegebenen
Wert entspricht.
Stecken Sie den Netzstecker vollständig in die Steckdose ein.
Ziehen Sie nicht am Kabel, knicken Sie es nicht und stellen Sie keine schweren Gegenstände
darauf.
Fassen Sie den Stecker nicht mit nassen Händen an.
Fassen Sie den Stecker beim Herausziehen an seinem Korpus an.
Verwenden Sie keinen beschädigten Netzstecker oder eine beschädigte Steckdose.
Installieren Sie dieses Gerät so, dass das Netzkabel sofort aus der Steckdose gezogen werden
kann, wenn Störungen auftreten.
Netzadapter
Der Netzadapter kann mit Wechselstrom von 220 - 240 V betrieben werden.
Verwenden Sie einen geeigneten Steckeradapter, wenn der Stecker nicht in die Netzsteckdose
passt.
Kleine Objekte/Verpackungsteile (Plastikbeutel, Karton,
etc.)
Bewahren Sie kleine Objekte (z.B. Schrauben und anderes Montagematerial, Speicherkarten) und
Verpackungsteile außerhalb der Reichweite von Kindern auf, damit sie nicht von diesen verschluckt
werden können. Lassen Sie kleine Kinder nicht mit Folie spielen. Es besteht Erstickungsgefahr!
Achtung
Gerät
Stellen Sie keine Quellen offener Flammen, z.B. brennende Kerzen, auf das Gerät.
Aufstellung
1. Stellen Sie das Gerät auf eine trockene, ebene, wasserfeste und hitzebeständige Oberfläche.
2. Suchen Sie einen Aufstellort, an dem Kinder nicht an das Gerät gelangen können.
3. Die Steckdose muss leicht zugänglich sein, um im Notfall das Gerät schnell vom Stromkreis trennen
zu können.

4. Stellen Sie das Gerät nicht auf Verstärker oder andere Geräte, die heiß werden können. Diese Hitze
könnte das Gerät beschädigen.
5. Setzen Sie dieses Gerät keinem direkten Sonnenlicht, hohen Temperaturen, starker Feuchtigkeit
und übermäßigen Erschütterungen aus.
Bestimmungsgemäßer Gebrauch
Dieses Gerät dient zur
Überwachung von Orten.
Dieses Gerät ist nicht dafür bestimmt, durch Personen (einschließlich Kinder) mit eingeschränkten
physischen, sensorischen oder geistigen Fähigkeiten oder mangels Erfahrung und/oder mangels Wissen
benutzt zu werden, es sei denn,sie werden durch eine für ihre Sicherheit zuständige Person beaufsichtigt
oder erhielten von ihr Anweisungen, wie das Gerät zu benutzen ist. Kinder sollten beaufsichtigt werden, um
sicherzustellen, dass sie nicht mit dem Gerät spielen.
Transport des Gerätes
Bitte bewahren Sie die Originalverpackung auf. Um einen ausreichender Schutz beim Transport des Gerätes
zu erreichen, verpacken Sie das Gerät in der Originalverpackung.
Reinigung der äußeren Oberfläche
Verwenden Sie keine flüchtigen Flüssigkeiten, wie Insektensprays. Durch zu starken Druck beim Abwischen
können die Oberflächen beschädigt werden. Gummi- oder Plastikteile sollten nicht über einen längeren
Zeitraum mit dem Gerät in Kontakt sein. Nutzen Sie ein trockenes Tuch.
Übersicht
1. Infrarot-LED
2. Linse
3. CDS
4.Lautsprecher
5. Audio-Eingang
6. Netzwerk-Buchse (RJ45)
7. Micro-SD-Kartenslot
8. Schalter
9. DC-Eingang
10. QR-Code
11. Reset-Schalter

Nutzung
ACHTUNG: Bei der ersten Benutzung muss der Schalter auf der Rückseite des Geräts auf „5.1 P2P“-
Modus stehen, damit die WiFi-Einstellungen editiert werden können.
1. P2P-Modus (Kamera -> Android/iOS-Gerät)
Stellen Sie den kleinen Schalter auf der Rückseite des Geräts auf „AP“
Laden Sie die App „P2PCam Live“, zum Beispiel aus iTunes oder dem Google App Store auf Ihr
Smartphone/Tablet herunter.
Schalten Sie W-Lan auf Ihrem Smartphone/Tablet ein und verbinden Sie es mit der Kamera. Das
Standard-Passwort lautet zunächst „12348765“.
(Ändern Sie das Passwort, um möglichst hohe Sicherheit zu erreichen!)
Starten Sie die App „P2PCam Live“ und klicken Sie auf „click here to add camera“.
Es gibt zwei Arten, die Kamera zu verbinden.
Klicken Sie „Scan“ und scannen Sie den QR-Code auf der Grundplatte der Kamera oder
Gehen Sie auf „Search“ um die Kamera im W-Lan zu suchen.
Das Standard-Passwort lautet zunächst „Admin“.
(Ändern Sie das Passwort, um möglichst hohe Sicherheit zu erreichen!)
Um die Kamera zu konfigurieren, gehen Sie auf „edit camera“ -> „Advanced“.
In diesem Menü haben Sie Zugriff auf die Punkte
oModify Security Code (=Passwort ändern –empfohlen!)
oVideo quality and environment mode setting (Einstellungen der Video-Auflösung und
Weißabgleich)
oWi-Fi Setting (Einstellungen für die Verbindung mit Ihrem LAN/W-LAN-Router)
oEvent Setting (Einstellung der Sensitivität des Bewegungsmelders)
oRecording Setting (Einstellungsoptionen die Aufnahme Betreffend)
2. LAN-Modus
Verbinden Sie die Kamera mit Ihrem Heim-Netzwerk (siehe oben; Sie müssen dazu zunächst die
Kamera im P2P-Modus mit Ihrem Smart-Device verbunden haben).
Stellen Sie dann den Schalter auf der Rückseite der Kamera auf die Stellung „Station“ und starten
Sie die Kamera neu (ziehen Sie das Stromkabel kurz heraus).
Verfahren Sie wie oben (1., Punkt 4).
3. IOT-Modus
Wenn Sie bereits die Schritte 1. und 2. Absolviert haben, sollte Ihr Smartphone/Tablet die Kamera-
Informationen gespeichert haben. Stellen Sie also noch sicher, dass Ihr Router mit dem Inetrnet
verbunden ist, um den IOT-Modus nutzen zu können.
Achtung: Für den IOT-Modus muss der Schalter auf der Rückseite der Kamera auf „Station“ stehen.
Falls die Bildqualität sich verschlechtert, kann dies an der zur Verfügung stehenden Bandbreite liegen.
Versuchen Sie in diesem Fall, die Videoauflösung der Kamera (siehe 1., Punkt 5) zu verringern.
4. PC/Notebook (Windows XP/7, 32/64bit) –PC Netzwerk-Modus
Stellen Sie den Schalter auf der Rückseite der Kamera auf die Stellung „Station“.
Verbinden Sie die Kamera per Netzwerkkabel mit Ihrem Router.
Installieren Sie die Software (Datei „IPCSearch.exe“) von der beiliegenden CD.
Starten Sie IPCSearch. Gehen Sie auf „Suche“, um die Kamera zu verbinden.
Doppelklick auf die Kamera (Listen-Anzeige) sorgt dafür, dass sich Ihr Standard-Browser öffnet (Das
Standard-Passwort lautet „admin“). Ein Dialog wird sie auffordern, ein ocx-Plugin zu installieren.
Bestätigen Sie mit „Ja“.

Sie sollten nun das Kamera-Bild in Ihrem Browser (Chrome, Firefox, Internet Explorer o.ä.) sehen
können.
5. PC/Notebook Netzwerk-Modus (Kamera –Home AP –Windows Rechner)
Wenn Schritt 4. erfolgreich war, klicken Sie in IPCSearch auf „network“ und geben Sie die Netzwerk-
Informationen Ihres Heimnetzwerkes in die Maske ein.
Speichern Sie anschließend.
Entfernen Sie das Netzwerkkabel von der Kamera, starten Sie sie neu (Netzstecker ziehen) und
wiederholen Sie die letzten 3 Schritte unter 4.
6. Nutzung der Kamera als W-LAN-Repeater
Verbinden Sie die Kamera wie in Schritt 4. beschrieben.
Stellen Sie den Schalter auf der Kamera-Rückseite auf „AP“ und starten Sie die Kamera neu, um die
Änderung wirksam zu machen (Stecker ziehen).
Verbinden Sie ihr(e) Smartphone(s)/Tablet(s) mit der Kamera, wie in Schritt 1. beschrieben.
Ihre Smart-Devices haben sollten jetzt mit dem Internet verbunden sein
(Stellen Sie sicher, dass Ihr Router/W-LAN-Router mit dem Internet verbunden ist.
7. Reset / Werkseinstellungen zurücksetzen
Um die Einstellungen zurückzusetzen und den Werkszustand wiederherzustellen, nutzen Sie einen
Kugelschreiber, eine Büroklammer oder ähnliches und drücken Sie den Reset-Knopf auf der
Unterseite der Kamera für 10 Sekunden.
Achtung: Alle Einstellungen (der Kamera) werden hierbei gelöscht.
Der Hersteller dieses Produktes ist die CHAL-TEC Vertriebs- + Handels GmbH, Wallstraße 16, 10179
Berlin.
Konformitätserklärung
Dieses Produkt entspricht den folgenden Europäischen Richtlinien:
1999/5/EG (R&TTE)
2011/65/EG (RoHS)
Elektroaltgeräte
Befindet sich die obige Abbildung (durchgestrichene Mülltonne auf Rädern) auf dem Produkt,
gilt die Europäische Richtlinie 2002/96/EG. Diese Produkte dürfen nicht mit dem normalen
Hausmüll entsorgt werden. Informieren Sie sich über die örtlichen Regelungen zur getrennten
Sammlung elektrischer und elektronischer Gerätschaften. Richten Sie sich nach den örtlichen
Regelungen und entsorgen Sie Altgeräte nicht über den Hausmüll. Durch die regelkonforme
Entsorgung der Altgeräte werden Umwelt und die Gesundheit ihrer Mitmenschen vor möglichen negativen
Konsequenzen geschützt. Materialrecycling hilft, den Verbrauch von Rohstoffen zu verringern.
IMPORTANT SAFETY INSTRUCTIONS

1. Read these instructions.
2. Keep these instructions.
3. Heed all warnings.
4. Follow all instructions.
5. Do not use this aparatus near water.
6. Clean only with dry cloth.
7. Do not block any ventilation openings. Install in accordance with manufacturer's instructions.
8. Do not install near any heat sources such as radiators, heat registers, stoves, or other apparatus
(including amplifiers) that produce heat.
9. This product is equipped with a 3 wire grounding type plug having a third(grounding) pin.
10. Do not defeat the safety purpose of the polarized or grounding-type plug.
11. A polarized plug has two blades with one wider than the other.
12. A grounding type plug has two blades and third grounding prong.
13. The wide blade or the third prong are provided for your safety. If the provided plug
does not fie into your outlet, consult an electrician for replacement of the obsolete outlet.
14. Protect the power cord from being walked on or pinched particularly at plugs, convenience
receptacles, and the point where they exit from the apparatus.
15. Only use attachments/accessories specified by the manufacturer.
16. Use only with the cart, stand, tripod, bracket, or table specified by the manufacturer, or sold with the
apparatus.When a cart is used, use caution when moving the cart/apparatus combination to avoid
injury from tip-over.
17. Unplug this apparatus during lightning storms or when unused for long periods of time.
18. Refer all servicing to qualified service personnel. Servicing is required when the apparatus has been
damaged in anyway, such as power-supply cord or plug is damaged, liquid has been spilled or
objects have fallen into the apparatus, the apparatus has been exposed to rain or moisture, does not
operate normally, or has been dropped.
19. The apparatus shall not be exposed to dripping or splashing and that no objects filled with liquids,
such as vases,shall be placed on the apparatus.
Minimum distances(e.q. 10cm) around the apparatus for sufficient ventillation.
"WARNING - To reduce the risk of fire or electric shock, do not expose the apparatus to rain or
moisture."
The apparatus shall not be exposed to dripping or splashing and no objects filled with liquids, such
as vaces, shall be placed on the apparatus.
20. Do not place this product on an unstable cart, stand or table. The product may fall, causing serious
damage to the product.
21. Slots and openings in the cabinet and the back are provided for ventilation: to ensure reliable
operation of the product, these openings must not be blocked by placing the product on a bed, sofa,
rug or other similar surface. This product should never be placed near or over a heat register. This
product should not be placed in a built-in installation unless proper ventilation is provided.
22. This product should be operated from the type of power source indicated on the marking label. If you
are not sure of the type of power available, consult your dealer or local power company.
This is a safety feature. If you are unable to insert the plug into the outlet, contact your electrician to
replace your obsolete outlet. Do not defeat the purpose of the grounding-type plug.
23. Do not allow anything to rest on the power cord. Do not locate this product where persons will walk
on the cord.
24. If an extension cord is used with this product, make sure that the total of the ampere ratings on the
products plugged into the extension cord do not exceed the extension cord ampere rating. Also,
make sure that the total of all products plugged into the wall outlet does not exceed 10 amperes.
25. Never push objects of any kind into this product through cabinet slots as they may touch dangerous
voltage points or short out parts that could result in a risk of fire or electric shock.
26. Never spill any kind of liquid on the product.
27. Do not attempt to service this product yourself, as opening or removing covers may expose you to
dangerous voltage points or other risks. Refer all servicing to service personnel.
28. Unplug this product from the wall outlet and refer servicing to qualified service personnel under the
following conditions:
● When the power cord or plug is damaged or frayed.
● If liquid has been spilled into the product.
● If the product has been exposed to rain or water.
● If the Product does not operate normally when the operating instructions are followed.
Adjust only those controls that are covered by the operating instructions since improper
adjustment of other controls may result in damage and will often require extensive work by a
qualified technician to restore normal operation.
● If the product has been dropped or the cabinet has been damaged.
● If the product exhibits a distinct change in performance, indicating a need for service.

CAUTIONS
NEVER REMOVE THE BACK COVER
Removal of the back cover should be carried out only by qualified personnel.
DO NOT USE IN HOSTILE ENVIRONMENTS
To prevent shock or fire hazard, do not expose the unit to rain or moisture. This unit is designed to be used
in the office or home. Do not subject the unit to vibrations, dust of corrosive gases.
KEEP IN A WELL VENTILATED PLACE
Ventilation holes are provided on the cabinet to prevent the temperature from rising.
Do not cover the unit or place anything on the top of unit.
AVOID HEAT
Avoid placing the unit in direct sunshine or near a heating appliance.
PRODUCT OVERVIEW

SYSTEM OPERATION
NOTE: For the first use, you need to connect via P2P (see below) and set WiFi settings before you
process with other modes.
1. P2P connection mode
1. On the camera, put the switch to “AP” position.
2. Download the app “P2PCam Live” to your smart device from iTunes or the Google App Store.
3. Turn on WiFi on your smart device and connect to the camera (default password is “12348765”
–it is highly recommended to change the default password).
4. Open the app “P2PCam Live” and choose “click here to add camera”.
There are two possible ways to add the camera:
Click “Scan” to scan the QR code at the bottom of the camera or
Click “Search” to make the software search for the camera in the WiFi network.
5. Click the camera –you will see the camera’s image.
6. To configurate the camera, click “edit camera” -> “Advanced” to gain access to:
Modify security code (recommended!)
Video qualilty and environment mode settings
WiFi setting (for connecting with your home router’s AP)
Event settings
Recording settings
2. Home network mode (camera –home AP –Android/iOS device)
1. Connect the camera to your home network (please refer to 1., step 6 –you need to connect in
P2P mode first).
2. Put the switch on the camera to “Station” position (and restart the camera by pulling out the plug
for a few seconds).
3. Refer to 1., steps 4 to 6.
3. IOT network mode (camera –internet –Android/iOS device)
1. If you have already gone through 1. and 2., your smart device will have saved the camera
information, so you just need to make sure your router is connected to the internet.
Note:
In IOT mode, the camera switch must be in “Station” position. If frame loss occurs, it may be the
result of the network speed. As higher frame rates and higher resolutions need bigger
bandwidths, try to set the recorded image to a smaller rate and resolution (See 1., step 6.)
4. Home PC network mode (camera –router –windows device
1. Put the camera switch to “Station” position
2. Connect the camera to your router via network cable
3. Search the camera by software “IPCSearch.exe” (to be found on included CD).
4. Refresh and double click on the UID of your camera will make your browser pop up.
5. The default password is “admin” – install the plugin according to instructions popping up.- You
should now be able to see the camera’s image in your browserr window.
5. Home PC network mode (camera - home AP - windows device )
1. In 4., after connect successful, click “network”, then input the wireless AP’s information, then
save.
2. Plug off the network cable, plug off then plug in again the power to reboot (switch should be at
„Station” position).
3. Refer to 4., steps 3,4,5
6. Use camera as a wireless repeater
1. Stay connection as 5.4 by network cable to router
2. Put the switcher to “AP” position, plug off then plug in to reboot camera
3. You can use your devices to connect to the camera, refer to 5.1 step3.
4. Now your devices is available to internet
5. Make sure your router is connected to internet
7. Factory reset
1. Use a pen or similar to reach the reset button on the camera’s bottom. Press and hold for 10
sec.

CHAL-TEC Vertriebs- + Handels GmbH, Wallstraße 16, 10179 Berlin.
1999/5/EG (R&TTE)
2011/65/EG (RoHS)
Electric and electronic equipment and included batteries contains materials, componentsans substances that
can be hazardous to your health and the enviroment, if the waste material (discarded electric and electronic
equipment and batteries) is not handled correctly.
Electric and electronic equipment and batteries is marked with the crossed ou trash can symbol,
seen here. This symbol signifies that electric and electronic equipment and batteries should not
be disposed of with other household waste, but should be disposed of separately.
As the end user it is important that you submit your used batteries to the appropriate and
designated facility. In this manner you make sure that the batteries are recycled in accordance with
legislature and will not harm the enviroment.
All cities have established collection points, where electric and electronic equipment and batteries can either
be submitted free of charge at recycling stations and other collection sites, or be collected from the
households. Additional information is available at the technical department of your city.
This manual suits for next models
1
Table of contents
Languages:
