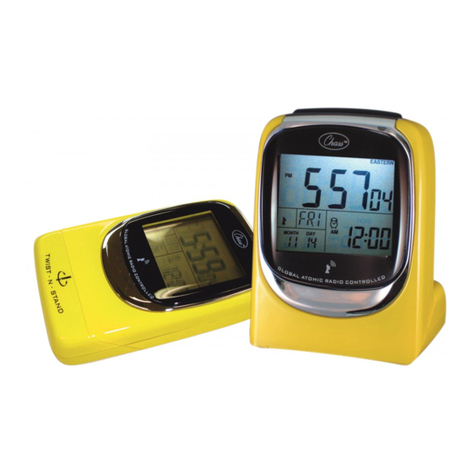
Chass 185 User manual

Item # 00185 - Solar Power LCD Alarm Clock with Smartlite
INSTRUCTION MANUAL
Thank you for your purchase of this quality Hybrid clock. Your clock operates with its advanced Hybrid Power System
automatically switching between solar and battery power depending on the different lighting conditions. The advantage
of using the Hybrid Power System is that it is more environmentally friendly and will extend the battery life.
FEATURES:
•Solar power & battery operated
•Smartlite function with AUTO sensor
•Pre-programmed 7 world time zones with the correct time and date
•User select Calendar / Alarm / 2ND time zone display
•Summer time indicator-DST
•Crescendo Alarm with Snooze
TOP VIEW PICTURE BOTTOM VIEW PICTURE
USA – Continental Time Zones UK EUROPE JAPAN
P = Pacific
GMT
-8 Hour
M = Mountain
GMT
-7 Hour
C = Central
GMT
-6 Hour
E = Eastern
GMT
-5 Hour
GMT GMT
+1 Hour
GMT
+ 8 Hour
TIME ZONE TABLE FOR REFERENCE (GMT=Greenwich Mean Time)
SELECT THE TIME ZONE:
Your new alarm clock is pre- programmed with correct time and date by memory battery pre-installed at the factory.
Just move the TIME ZONE switch to your desired time zone (see time zone table for reference) the display will
automatically show the correct time and date.
OPTIONAL MANUAL TIME SETTING:
If you wish to set the clock slightly ahead or slightly behind or for some reason the real time is incorrect or lost, you may
set the time and date simply by following the MANUAL SETUP procedures as listed below.
TO SET THE ALARM TIME:
1. Slide the DATE / ALARM / LOCK / TIME switch to the “ALARM” position
2. Press and hold the HOUR button to adjust the desired hour. A “PM”indicator will appear on the display for PM time
only
3. Press and hold the MINUTE button to adjust the desired minute
4. Slide the DATE / ALARM / LOCK / TIME switch to the LOCK position to complete the alarm time setting
TO SET THE 2nd TIME: (Slide the DATE / ALARM / LOCK / TIME switch to the TIME position)
Your clock also has the feature of storing a second time zone. It may be a holiday destination, relatives abroad or
business contact. To set this time, press the 2ND TIME button, on bottom of clock, to adjust the hour digit in the second
time zone (DT). Make sure the “PM”indicator will appear on the display for PM time only. Slide the DATE / ALARM /
LOCK / TIME switch to the “LOCK” position to complete the 2nd TIME setting.

ACTIVATING THE ALARM AND SNOOZE:
1. Slide the ALARM ON / OFF switch to “ON” position on the side of the clock. The alarm symbol ( z) will appear on
the display.
2. The alarm will activate at the pre-set time and sound for 60 seconds.
3. When the alarm activates you may press the SNOOZE / LIGHT button and the alarm will stop and activate again
after about five (5) minutes. The alarm symbol ( z) will flash. This snooze feature may be repeated over and over
again.
4. To fully shut off the alarm, slide the ALARM ON / OFF switch to “OFF” position.
TO SET THE DST (DAYLIGHT SAVING TIME):
Press the DST button once to turn ON / OFF the DST (Daylight Saving Time).
The DST symbol (☼) will appear on the display to indicate summer time. Turn this feature ON to adjust the time by one
hour. At the end of DST simply press the button again and the time will move back one hour.
DISPLAY MODES: (Located at the back of the clock)
Press the ALARM, 2ND.TIME, CALENDAR button to select between:
Alarm time display, the word “ALARM”appears on the display.
2nd Time zone display, a “DT” icon will appear on the display.
Calendar display, “M” & “D” icon will appear on the display.
SMARTLITE:
1. To operate the Smartlite, simply slide the SENSOR ON / OFF switch to the “ON” position. The display will stay
illuminated in a dark environment until you slide the SENSOR ON / OFF switch to the “OFF” position.
2. The Smartlite function may be used up to eight (8) hours per day for 365 days .The less the Smartlite function is used
the longer the battery life.
NOTE: TO SAVE THE BATTERY POWER, YOU MUST SLIDE THE SENSOR SWITCH TO THE ”OFF”POSITION
WHEN THE CLOCK COVER IS CLOSED OR IS PLACED IN A SUITCASE OR DRAWER.
BACK LIGHT:
Press the SNOOZE / LIGHT button to light up the display.
NOTE: Frequent use of the back-light will drain the batteries faster.
MANUAL SETUP: (time and date reset)
1. Move the TIME ZONE switch to your desired time zone
2. Slide the DATE / ALARM / LOCK / TIME switch to the DATE position
3 .Press and hold down the YEAR button to adjust the correct year
4. Press and hold down the MONTH button to adjust to the correct month
5. Press and hold down the DATE button to adjust to the correct date
6. Slide the DATE / ALARM / LOCK / TIME switch to the TIME position
7. Press and hold down the HOUR button to adjust to the correct hour, making sure AM / PM is set correctly, the ”PM”
indicator will appear on the display for PM time only
8. Press and hold down the MINUTE button to adjust to the correct minute
9. Slide the DATE / ALARM / LOCK / TIME switch to the “LOCK” position to complete the time and date setting
DUAL POWER OPERATED:
This clock is designed to operate using solar power and LITHIUM Battery .The battery life remains approximately 3-4
years if the clock is used in light at least 200 lux for 10 hours per day. If you are not going to use the alarm clock slide the
TIME ZONE switch to the “DISPLAY OFF” position to save battery life.
CHANGING THE BATTERIES:
Open the BATTERY COVER located at the back of the clock and insert two #2450 3.0V LITHIUM batteries into the
battery compartment as indicated by the polarity markings, then follow the instructions to reset the clock.
MANUAL RESET:
Use a pin through the RESET hole to push in the RESET Button. You will then follow the MANUAL SETUP procedure to
reset the clock.
MAINTENANCE:
A soft cloth may be used to clean your clock. Do not use any corrosive cleaner or chemical solutions on the clock. Keep
the clock clean and try to avoid any problems.
ENVIRONMENTAL PROTECTION:
Disposal of electrical & electronic equipment:
Do not dispose of this product with household waste. For the proper treatment, recovery and recycling, please take this
product to the appropriate collection point. If you are unsure of where this is, contact your local authority; improper
disposal may be harmful to the environment.
Table of contents
Other Chass Alarm Clock manuals
