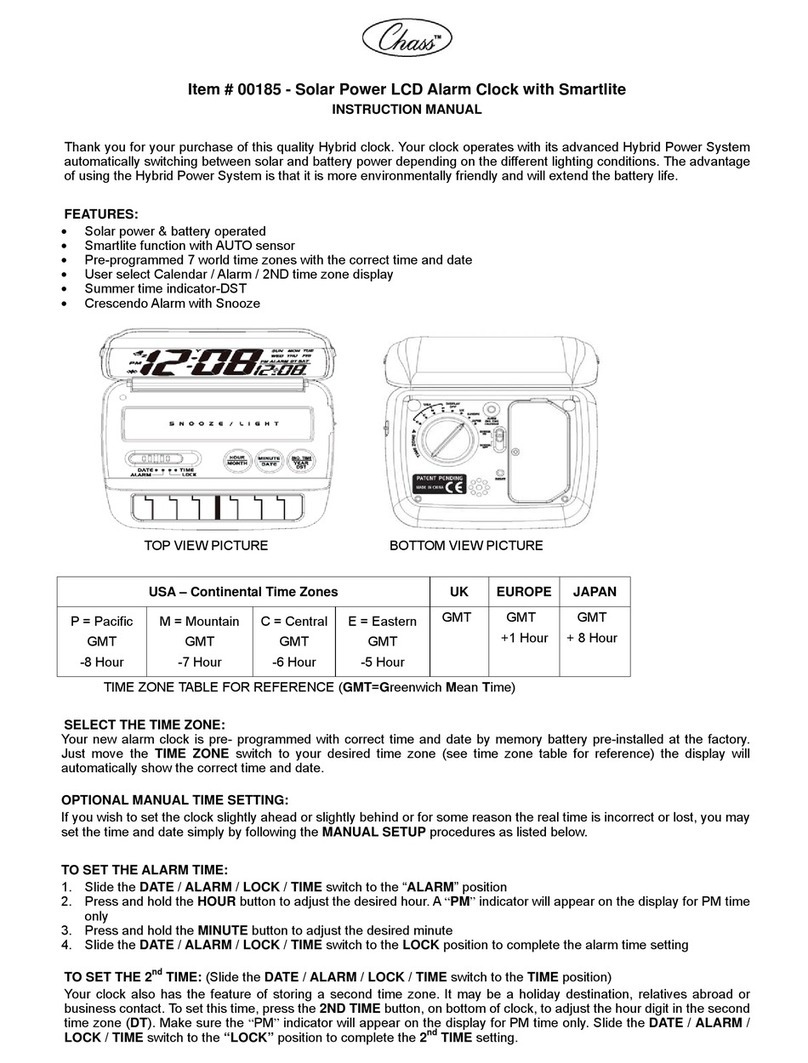
Chass global sync User manual

Quick Start Steps:
- Re-Start your clock in the flat travel position
- Make sure you have the switch on far left on USA
- The bottom switch must be in the LOCK position
- Push the tiny RESET button in with a pen or other pointy object
- Slide the bottom switch one notch to the ZONE/DST position
- Push top left ZONE button marked “12-24H/Month off-set Zone”, until
your time zone appears at top of the clock front
- Push bottom switch back to the LOCK position, for the clock to
operate
It is best to not do anything to the clock, make changes, set other functions,
etc. until the clock has made the initial synchronization. You will know it has
synchronized when you see the correct Day & Date displayed on the clock.

RADIO CONTROL WORLD
TRAVEL ALARM CLOCK
GLOBAL SYNC
“”
for
Instructions
#00190 & #00191
Thank you foryour purchase of another
quality product. Please read the following
background information and follow these
instructions to enjoy the many wonderful
features that theseproducts offer:
Atomic radio control clocks are the most
precise time keepingdevices in theworld. They
keep time to the accuracy of more than 1
second in one million years. Until recently, the
atomic clocks were only found in laboratories
and special institutions and were very large
and expensive. When various governments
began to broadcast atomic, electronically
encoded signals with their own national time,
the accuracy of the atomic radio control clock
became available to the general public. Recent
technology enabled this process to be
miniaturized and to be offered at a reasonable
cost.
The Global Sync takes it onestep further.Until
the development of this clock, atomic clocks
were able toreceive and decode signals from
only one transmitter. Clocks made to receive
signals in Europedid not workin the USAor vice
versa. Adifferent clock was needed for each
time signal. The Global Sync changed it all.
Besides being functional,compact and of sleek
P.1
1. What makes Global Sync unique?
“”
Chass items #00190& #00191
Global Sync
“”
The transmitted signalis picked up by the radio
receiver in your clock and it is decoded with a
split second precision, to synchronize to the
accurate time. At the same time, the radio
signal automatically sets the calendar function
and for countries adopting daylight savings
and standard time, it adjusts automatically.
PACIFIC
Cesium
Atomic Clock
Rugby
Fort Collins
Colorado
Kyushu
Frankfurt
(Fig. 1 Atomicradio controlled time signaltransmitters )
P.2
Fort Collins, Colorado, which covers all 4
zones in theUSA
Rugby, UK, which coversall of UK
Near Frankfurt, Germany, which covers most
of Western and some ofCentral Europe
Kyushu Island, Japan, which covers
a
most
parts of Japanand parts ofKore
design, it isable to receive signals transmitted
by the variousgovernments' locations in: The clock is in a traveling position when it is
removed from the box. By twisting the bottom
section of the clock, a base is formed for
standing use ona desk, night table or any flat
surface.
TIME ZONE
ANTENNA
ICON
DST
ALARM TIME
BOTTOM SWITCH
LIGHT / SNOOZE
RESET
RESET
12-24H/MONTH
OFF-SET
ZONE
HR/DAY
OFF-SET
DST
MIN/YR
OFF-SET CLR
ZONE CLR
DST HOME
ON
AL.SET
ZONE/DST CALENDAR
LOCK
TIME SET
OFF
OFF-SET
JAPAN
USA
UK
EU
SYNC ALARM SWITCH
LEFT SWITCH
UPPER
LEFT
UPPER
MIDDLE UPPER
RIGHT
Fig.2 Front View Fig.2 Back View
(Fig.2 Front view andback view).
The clock uses two CR2450 Lithium button
cells, which are included. To preserve the
battery life during transit and until it reaches
the consumer, the clock is shipped with a
plastic battery savertag. To activate the clock,
remove the plastic battery saver tag and
numbers will appear on the LCD screen. (Note:
the clock is designed to maximize the battery
life. The activation using fresh, new batteries
will create a shadow effect on the LCD screen.
P.3
2.Identifying your clockparts
3. Activation procedure and battery
information
BATTERY DOOR
2 BATTERIES

RESET
12-24H/MONTH
OFF-SET *
ZONE
HR/DAY
OFF-SET *
DST
MIN/YR
OFF-SET CLR
ZONE CLR
DST HOME
ON
AL. SET
ZONE/DST CALENDAR
LOCK
TIME SET
OFF
OFF-SET
JAPAN
USA
UK
EU
SYNC
PRESS RESET TO ACTIVATE
SYNCHRONIZATION
LEFT SWITCH
UPPER LEFT
UPPER
MIDDLE
UPPER
RIGHT
ALARM
SWITCH
BOTTOM
SWITCH
(Fig. 3 CountrySelection)
Select the properCountry or Continent, by
sliding the Switch on theLeft to the correct
position.
When setting or traveling between the
different time zones in theUSA, it is also
necessary to selectthe right timezone.
P.4
This effect is only temporary and the numbers
will become clear in only a few days ). These
batteries will last6 months to1 year (depending
on the frequencyof alarm andbacklight usage).
Please dispose of the used batteries properly,
in accordance tothe environmental lawsin your
area.
4. Setting theClock
Set the Bottom Switch in LOCK position.
Push Reset button to activate the receiver,
using a pointedobject, such asa pen point.
RADIO SIGNAL
P.5
Note: The clock will automatically default
to Mountain Time, when the Reset button
is pushed andthe Switch on the Left is set
for USA.
Toset for yourtime zone, slide the Bottom
Switch to ZONE/DST.
5. Synchronizing theTime
Final Important Step: Slide Bottom Switch,
back to the LOCK position for the clock to
operate.
Push button ZONE( Upper Left Button) to
select from Eastern, Central, Mountain or
Pacific. It will change each time when the
ZONE button ispressed. (If youdo not want
the zone to be displayed on the LCD dial,
push ZONE CLR(Upper Right Button) after
selection.) ( Inorder to allow adjustment of
setting, the OFF-SETtime must beat 00. )
Toimprove initial synchronizationor when the
signal strength fallsto 2 bars or below, signal
may be improvedby twisting the base stand to
the flat position.
The synchronization procedure is automatic
when the abovesteps are followed.To indicate
that the receiver circuit is in operation, the
Antenna Icon onthe LCD blinks ( see Fig.4a ).
Signal
Strength Very
Weak / No
Weak Medium Strong
Fig 4a BlinkingAntenna
Icon(Clock attempting to
sychronize)
Fig 4b Synchronization&
radio Signal strength
indication
The bars facing the Antenna indicate the
strength of the radio signal. No bar means
there is nosignal or only a very weak signal is
being received. One bar indicates a weak
signal and 5bars indicate a very strong signal
(see Fig. 4b). Use this radio signal strength
indicator to find a location with the strongest
reception.
P.6
Strong Signals, are normally found close to a
window. In some areas where the signal is
poor, youmay need to position and rotate the
clock until thebest signal strength is obtained.
Do Not put the clock on a desk or any other
object with ametal top. If the clock is in close
proximity to electrical appliances, such as TV,
mobile phone or a computer, they may cause
interference. Buildings with lots of steel
construction may alsointerfere with the signal.
Keep the clock by
twisting the stand
Fig.5 How toposition the clock for the bestsignal reception
Once you havefound the optimalposition, leave
the clock still,so it can pick up a good signal.
Under normal conditions,it takes theclock only
minutes to synchronize, but under less than
perfect conditions, theclock may needto be left
overnight to successfully receive a
synchronized signal.
When the synchronization is achieved, it is
symbolized by animage of an antenna and a
radiating beacon (Fig.6). A synchronized clock
or manually setclock, attempts to refresh itself
with a radiosignal at least once a day, usually
in the eveningor early morning hours when the
P.7
To force synchronization. Atany time you can
force the clockto attempt synchronization. With
the Bottom Switch at LOCK position and alarm
switch at AL. ON or AL. OFF position, push
Upper Center (DST) and Upper Right (HOME)
buttons simultaneously.

signal is clean and strong. If it fails for more
than 48 hours, the Antenna Icon disappears.
The clock will still function as a quartz clock,
until it getsrefreshed again. In most cases you
will find the clock properly synchronizedwhen
you wake upthe next morning.
Radiating
Beacon
Symbol
(Fig.6 Example of asynchronized clock)
The clock isa radio device and like a cellular
phone or a radio, if you travel to areas not
served by one of the 4 transmitters and at
certain times of the day, especially during day
time, strong radio noise interference makes
synchronization impossible . Under these
conditions, the clock can be set to a manual
setting, as described in Section #6 below and
the clock will work accurately, just as any
quartz clock.
P.8
Once it ismanually set, theclock will attempt to
synchronize regularly for3 days. If all attempts
fail, the receiver is put into sleep mode to
conserve power. The clock will function as a
quartz clock until it is forced to attempt
synchronization again. (See Section 5 ) ( In
order to allowadjustment of setting, the OFF -
SET time must be at00.)
Slide the Bottom Switch to TimeSet .
Press DST/HR/DAY (Upper Middle Button )
until the correcthour is set.
Press HOME/MIN/YR (Upper Right Button)
until the correctminute is set.
Press 12/24H/MONTH (Upper Left Button)
for AM/PMor 24 hourclock read-out
preference.
P.9
Slide the Bottom Switch to CALENDAR.
Press HOME/MIN/YR (Upper Right Button)
until the correctyear is set.
Press 12/24H/MONTH (Upper Left Button)
until the correctmonth is set.
Press DST/HR/DAY ( Upper Middle Button )
until the correctday is set.
To Set Time
To Set Calendar
6. Manual Setting
Slide the Bottom Switch to ZONE / DST
position.
Press DST ( Upper Middle Button ) to
indicate if theclock is inDST time.
Final Important Step:When done, slideBottom
Switch back to theLOCK position, for the clock
to operate and to be able to pick up signals
when in rangeagain.
Slide theAlarm Button (Middle Switch ) to
AL. SET position.
Press the DST/ HR /DAY ( Upper Middle
Button) to setthe Alarmhour.
Press the HOME/ MIN/YEAR (Upper Right
Button) to setthe Alarmminute.
Slide the Alarm Button (Middle Switch ) to
ON Position.
P.10
This function doesnot apply to all countries or
states in the USA. However, for those for
which it applies,follow these instructions to set
this clock toDaylight Savings/Standard Time.
For a five minute snooze , press the
Light / Snooze button on top of the clock.
Slide the Alarm Button (Middle Switch ) to
OFF to permanently turnoff the Alarm.
7. Alarm Setting
To turn off Alarm,
To Set DST (DaylightSavings Time)
SNOOZE - Whenthe alarm sounds, to get a
little extra sleep and to stop the sound
temporarily, without permanently turning off
the alarm, push the LIGHT/SNOOZE Button
on top. The SNOOZE function allows extra
5 minutes ofsleep, before the alarm sounds
off again. This can be repeated 4 times, at 5
minute intervals, before the Alarm function
is turned off.
LIGHT / SNOOZE
BUTTON
Note: Back light operatesonly when the clock
base is twisted to a standing position. This is
a safety feature to prevent from accidentally
depressing the switchand draining the battery
power when traveling.
P.1 1
(Fig.7)
8. Back Lightand Snooze Functions
LIGHT - To see thetime in thedark, push the
LIGHT/SNOOZE button on topto light up the
dial.

When traveling withinthe USA, youcan change
the time zones,as you entereach zone.
When traveling tocountries not covered by the
four radio signals,set the clock manually, as
per instructions in Section 6. To avoid the
chance of receivingan erroneous signal when
clock is set manually, set the left button on a
country as faraway as possible from the area
that you are traveling in. For example: If you
are inAsia, Africa,Australia (other than Japan
and Korea), putthe country selection to UK. If
you are inEurope (not servedby German or UK
signal ), select Japan. If you are in North or
South America ( not served by USA signal ),
select Japan.
P.12
9. Travelingto An Area Without a
Transmitting Signal
If you are traveling to the India Subcontinent
where the local time is half an hour from the
main time zones of the world, you may reset
the clock by removing the batteries and then
manually setting theclock to the local time as
explained above. Hide the US time zone
indicator on the LCD display by pushing
Bottom Switch to ZONE/DST position and
then push ZONECLR ( Upper Right Button ).
(In order toallow adjustment of setting, the OFF
-SET time must be at00.)
Traveling toIndia INCREASE
OFF SET
DECRESE
OFF SET
RESET
12-24H/MONTH
OFF-SET *
ZONE
HR/DAY
OFF-SET *
DST
MIN/YR
OFF-SET CLR
ZONE CLR
DST HOME
ON
AL. SET
ZONE/DST CALENDAR
LOCK
TIME SET
OFF
OFF-SET
JAPAN
USA
UK
EU
SYNC
MODE SWITCH AT OFFSET
PUT MODE SWITCH TO LOCK AFTER OFF SET
RESET
ZERO
ALARM SET
OFF
(Fig.8 To offset time)
P.13
10. Advanced Features
Home and Away Dual Time Feature
You may set another time other than your Home
Time, when you are traveling . This allows for
dual time function.This second time can beset
23 hours back or 23 hours ahead from your
Home Time( or the time displayed on your
clock). You will needto know how many hours
ahead or behind you want the second time to
show in orderto set theclock correctly.
Example: If your home is New York and you
travel to Hawaii, ( where the Atomic Clock
signal does notreach and where it is 5 hours
earlier), you willneed to setyour Away Time 5
hours behind.
Slide Bottom Switch to the right,so that it is
in the OFF-SET position.
P.14
On the bottom right of the clock dial, the
display will show 00 (if not,press the upper
right button toclear the display and bring it
to zero). This feature is also used to clear
the time enteredas OFF-SET time, so that
the clock goesback to displayingthe original
(or Home Time) you started with.
“ ”
As you press either the OFF-SET( ) up or
OFF-SET( ) downbutton, you will see the
time displayed on your dial ascend or
descend. The lower right of your display will
indicate how many hours up or down you
have set theclock.
Once OFF- SET time has been set, the time
displayed will show the time youhave entered
as yourAway Time ( local time ), which is your
OFF-SET time. In order tosee the original time
(or Home Time), press the upper right HOME
button.
The bottom switchshould be put back into the
LOCK position after the OFF- SET time has
been set.
“ ”
Press OFF-SET (upper left button),to set
clock forward, upto 23 hours,or OFF- SET
(upper middle button),to set timebackwards,
up to 23hours.
This warranty covers any defects in materials or
workmanship, for oneyear from timeof purchase,
with the exceptionsstated as follows:
We will repair any defects in materials or
workmanship. In theevent a repairis not possible,
the product willbe replaced bya new unit.
How to obtain service; return this product and
your receipt (as proof of purchase),along with
a brief explanation of the problem, to:
Hinpo-Chass, Inc.
1 - HFrassetto Way
Lincoln Park, NJ07035
USA
Call (973) 709-0555
Between 9:30 and4:30 Eastern Time
or
Damages caused by misuse or useother than as
intended and described in the product instruction
manual and lossor damage toremovable parts.
For trouble shootingor questions, pleasecontact:
WARRANTY
Table of contents
Other Chass Alarm Clock manuals
Popular Alarm Clock manuals by other brands

Oregon Scientific
Oregon Scientific RM913TCN user manual
Bush
Bush CR-338PL instruction manual

LIFETONE
LIFETONE HLAC150 user manual

Scarlett
Scarlett SC-823 instruction manual
Konig
Konig HAV-TR50 - 51 manual

La Crosse Technology
La Crosse Technology RADIO CONTROLLED PROJECTION CLOCK WITH DIGITAL... instruction manual
