ChefGiant 15.3 QT User manual

Say hello to more avor, and less grease!
You’ve purchased just the thing. With your new Air Fryer Oven, get ready to
enjoy easier, healthier and quicker cooking! Your Air Fryer also functions as a
regular oven, so you can cook just about anything in there. Pop your food into
your Air Fryer, and finally enjoy the crispy outside and tender inside without deep
frying. With the dual heat element, you won’t even have to turn or twist the food
while cooking. Get ready for crisp perfection.
Enjoy your guilt-free fryer,
The ChefGiant Team
CHEF’S GUIDE

CHEF’S GUIDE
2 | | 3
GENERAL SAFETY GUIDELINES:
• Keep the wire and all electrical parts away from water
• Do not place abrasive materials into the Air Fryer
• Do not operate this device with an extension cord/external timers/
remote
• Keep your device unplugged while not in use
• Do not use with parts not intended for this device
• Do not use this device outdoors
• Keep out of reach of children under 8 years old
• This device should only be operated by a competent adult with
prior instructions of usage
• Never place anything directly on the heating element
Product of ChefGiant
212-500-1220
ChefGiant.com
Exterior
Housing
Temperature
Control Knob
Timer
Oven
Chamber
Rotisserie
Slot
HandleControl
Panel
Door
OVEN DIAGRAM:

CHEF’S GUIDE
4 | | 5
Rotisserie Tong
Rotisserie Fork
Wire Rack
Mesh Basket
Drip Tray
Rotisserie basket
Tong
Silicone Glove
Pan
Mesh Tray
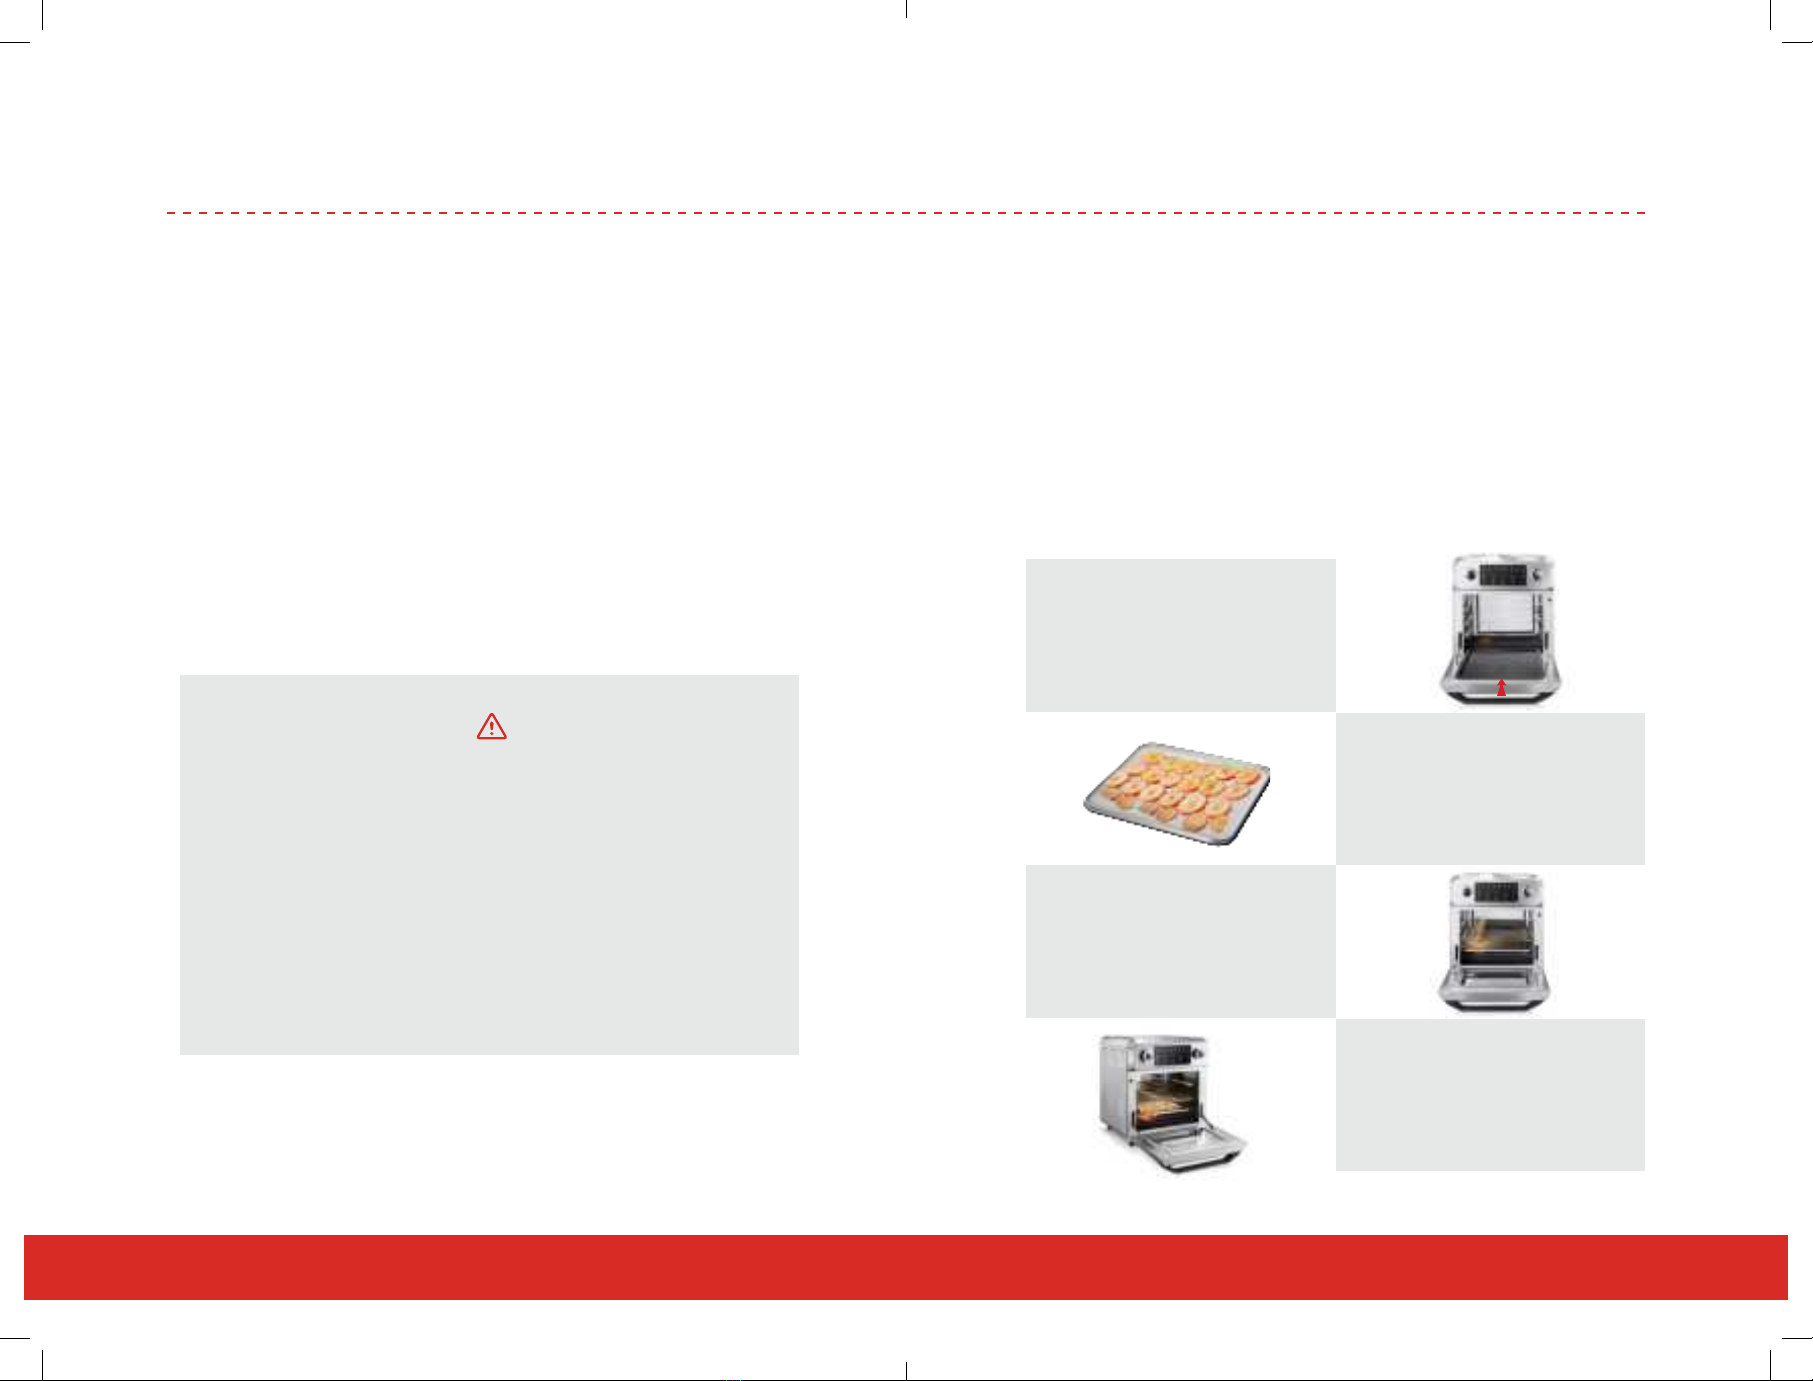
INCLUDED ACCESSORIES:
PART GREAT FOR NOTES
ROTISSERIE FORK Chicken or meat Fits a whole chicken
ROTISSERIE BASKET Wings and fries No need to shake while frying
ROTISSERIE TONG With rotisserie
accessories
Use the tong to remove your
rotisserie parts from the fryer
WIRE RACKS Baking Use with pans/trays
PAN Cooking meats and
contains the juice Use with wire racks
MESH BASKET Nuggets, stir fry
vegetables
MESH TRAY Dehydrating and
burgers
Can also function as another rack
when cooking more than one dish
DRIP TRAY All uses Place at the bottom of the air fryer to
contain all dripping grease and liquid
SILICONE GLOVES Handle hot parts Remove hot trays baskets with your
gloves
TONGS All Food Turn and check food with your tongs
PARTS GUIDE:
Your Air Fryer has innite amount of uses and ways it can be enjoyed.
Below is a quick guide to help you get started if you’re not sure which
part to choose. Experiment in your kitchen and see what packs that
punch for your cooking.
CHEF’S GUIDE
6 | | 7
PREPARING YOUR FRYER:
As soon as you get your package you’re almost ready to start. Here’s
some quick prep before you start using your Air Fryer.
• Simply remove all the stickers and labels from your device.
• Wash down all the accessories with soap and water.
• Wipe down and dry your appliance with a cloth. Expect an odor
during your rst use, this will dissipate with time.
SAFETY GUIDELINES:
• Make sure the voltage of the appliance corresponds to your
outlet.
• Make sure to place your Air Fryer on a sturdy, durable surface.
• Do not use if any part of your product looks damaged.
• Do not place next to ammable materials.
• Place your Air Fryer at least 4 inches away from a wall or any
objects at all sides.
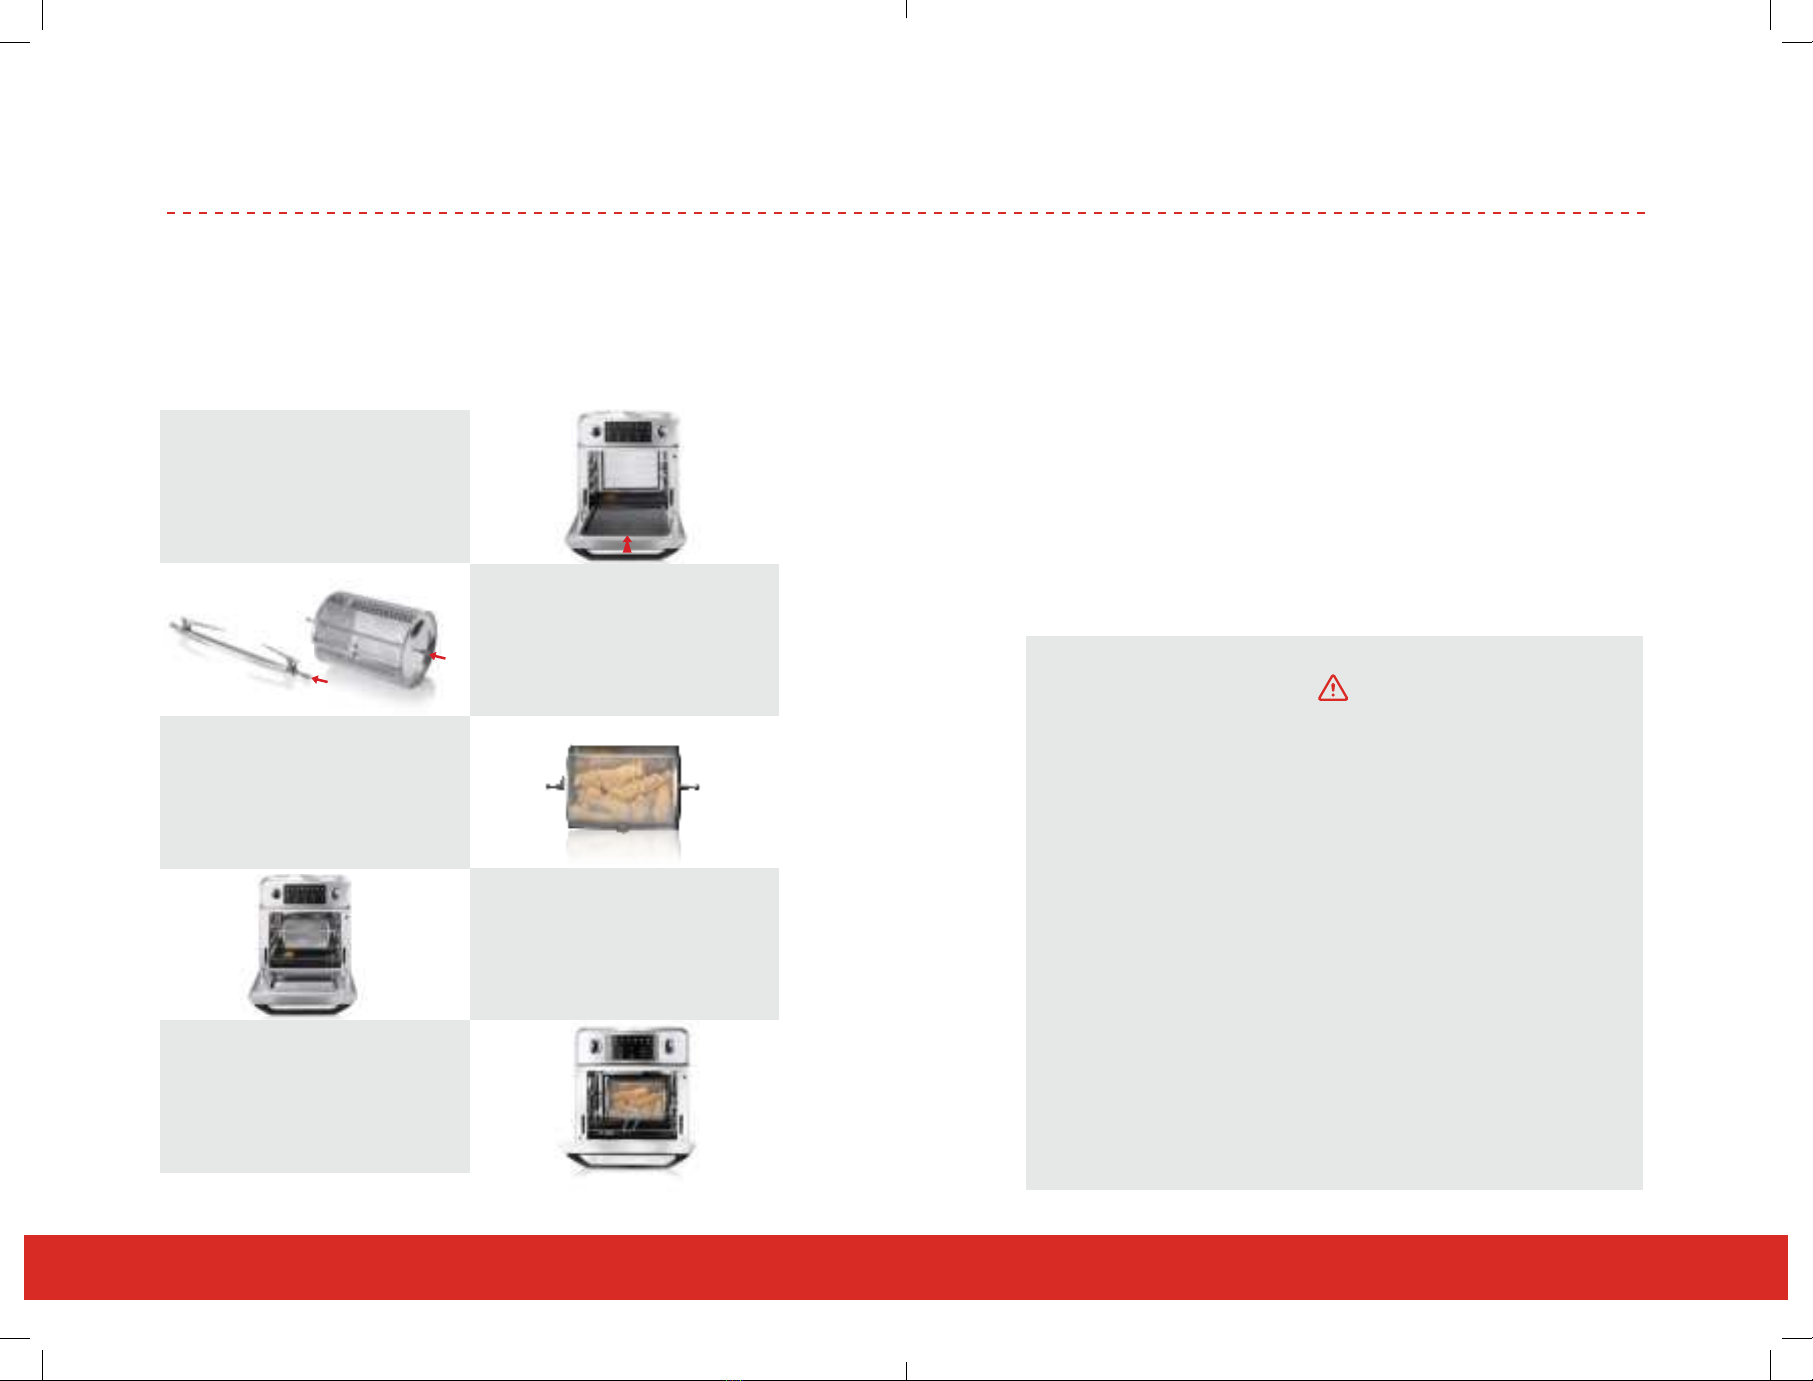
ASSEMBLY:
The rst thing you’ll need to do is decide which accessory will best suit
the items you will be frying, cooking or baking. Once you know which
accessory you’re using you can start to assemble and insert the parts
needed in the proper positions.
NON-ROTATING ACCESSORIES: This includes the wire rack,
mesh tray, mesh basket, and frying pan. (See next page for rotating
accessories)
1
3
2
4
Always start by inserting the drip
tray between the heating element
and oor in the oven chamber.
Slide the accessory of your
choice into the air fryer at the
level of your choice. (Mesh tray
can be used as a second rack
when needed.)
Place food items onto the
accessory of your choice.
Always remove hot items with
your glove.
CHEF’S GUIDE
8 | | 9
ASSEMBLY:
ROTATING ACCESSORIES: This includes the rotisseries fork and
rotisserie basket.
1
3
5
2
4
Always start by inserting the drip
tray between the heating element
and oor in the oven chamber.
Secure food items inside or onto
the accessory of your choice.
Always remove rotating
accessories with your rotisserie
tong.
If using the rotisserie basket/
rotisserie fork, place the rod into
the center of the cage/fork and
secure the to the rod with the
screws.
Place your rotating accessory
into the two grooves in the
interior of your Air Fryer.
OPERATING YOUR FRYER:
Some safety features you should be aware of so you know what’s go-
ing on with your device.
• Your Air Fryer will only operate when the door is shut. If the door
opens, your Air Fryer will pause and resume once the door is
closed. Should the door stay open for more than 10 minutes your
device will automatically power o.
• When you plug in your device and press the power button all the
options illuminate (your device is in standby mode.) Your device will
automatically power o if you make no selection for 60 seconds.
SAFETY GUIDELINES:
• Avoid touching the inside of the oven while it is hot
• Avoid placing plastic or paperware into your Air Fryer
• Avoid covering the air vents while the appliance is in use
• Use heat-resistant accessories to prepare your food
• Do not place anything above your Air Fryer
• Only use it as directed in this manual
• Do not leave your Air Fryer unattended
• Protect yourself from heat escaping through the vents
and while you open the oven door
• The door and outer surface may be hot to touch

CHEF’S GUIDE
10 | | 11
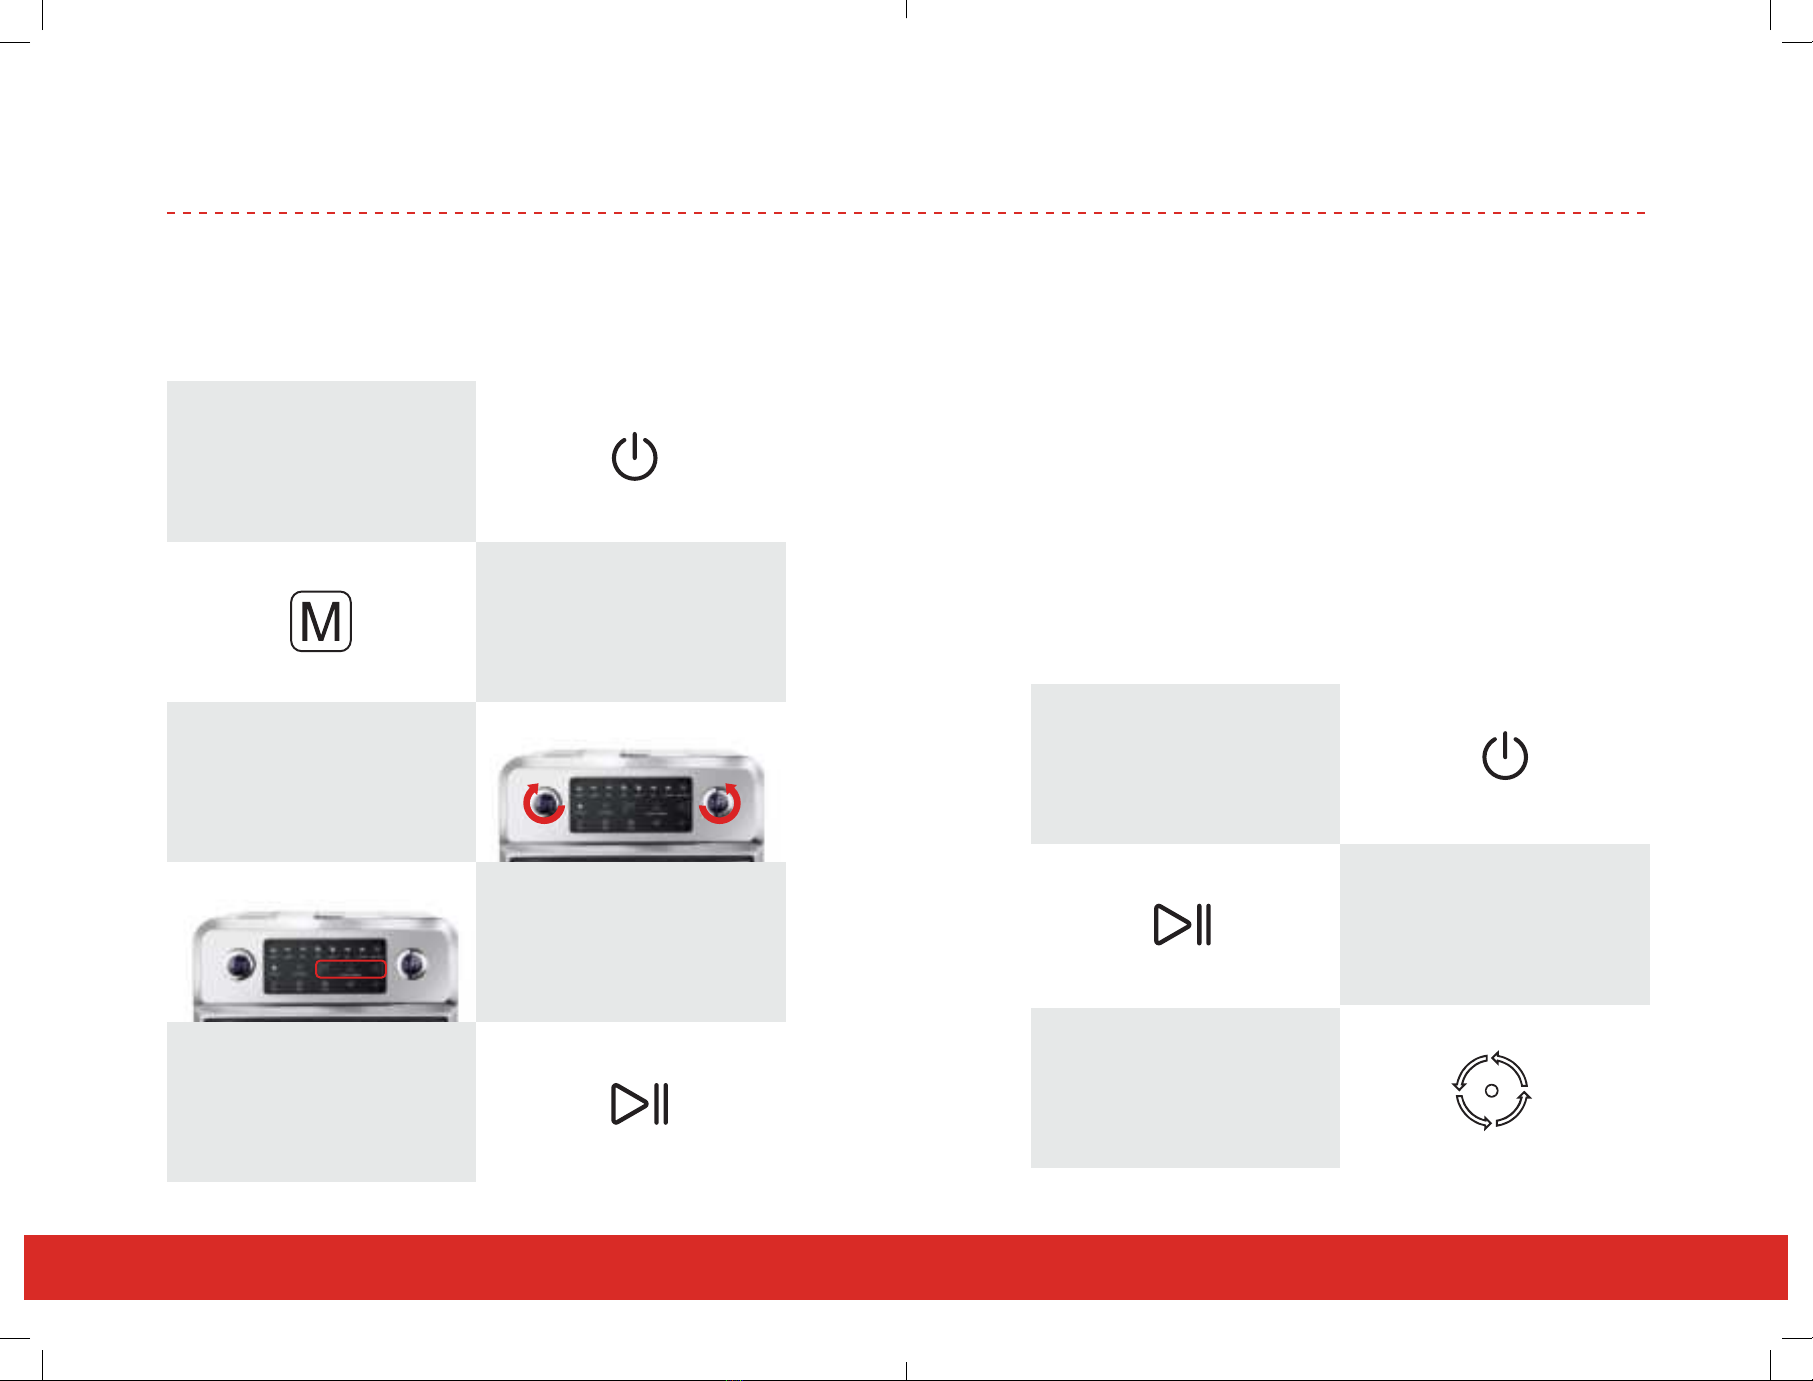
INSTRUCTIONS FOR PRESET USE:
Expect an odor during your rst use. This is a result of production
materials and will diminish with time and use.
1
3
5
4
Once you plug in your device,
press the illuminated power
button on your screen.
Press the start button
once you have made your
selection.
Click on the heating mode
icon to change the heating
mode. (You can choose between
the top, bottom, and both heating
elements as you may prefer)
Turn the knobs to adjust cook
time and temperature.
PRESETS:
Get to know your presets. The preset combinations generally work well
but cooking times and heat will vary based on the size of the food and
your cooking preferences.
• Presets can always be adjusted to your liking.
• Check your food regularly.
• Turn your food over when necessary.
• When you choose the fries or chicken preset, the rotisserie will
activate automatically, you can activate the it manually on all other
settings.
• You can always select pre-heat, then press start, the machine will
beep when its at the correct temperature. Open the door, insert
your dish, and cooking will automatically start once the door is
closed.
MENU DEFAULT
TEMPERATURE
DEFAULT
TIME
TEMPERATURE
SELECTION TIME SELECTION HEATING
MODE
FRIES 430° F 20 min. 120° F - 450° F 1 min. - 120 min.
WINGS 400° F 15 min. 120° F - 450° F 1 min. - 120 min.
GRILL 360° F 12 min. 120° F - 480° F 1 min. - 120 min.
PIZZA 360° F 10 min. 120° F - 450° F 1 min. - 120 min.
TOAST 430° F 6 min. 120° F - 450° F 1 min. - 120 min.
FISH 360° F 15 min. 120° F - 450° F 1 min. - 120 min.
CHICKEN 430° F 30 min. 120° F - 450° F 1 min. - 120 min.
DEHYDRATE 160° F 480 min. 120° F - 160° F 10 min. - 720 min.
Select your preset. 2
CHEF’S GUIDE
12 | | 13
INSTRUCTIONS FOR DIY USE:
Expect an odor during your rst use. This is a result of production
materials and will diminish with time and use.
1
3
5
Once you plug in your device,
press the illuminated power
button on your screen.
Turn the temperature and
time knobs to your liking.
Click the start button.
Press the M button to enter
DIY mode.
Choose a heating element
mode.
INSTRUCTIONS FOR ROTISSERIE USE:
Expect an odor during your rst use. This is a result of production
materials and will diminish with time and use.
Choosing the Rotisseries preset will have your food turn and cook it
evenly throughout.
• Make sure your chicken is under 2.7 lbs. for the rotisserie fork
otherwise it will touch the heating element.
• Larger chickens should be used with the Rotisserie basket.
• Use a needle to poke a few holes in the chicken before cooking.
• Secure the chicken’s legs and wings prior to cooking.
1
3
2
Once you plug in your device,
press the illuminated power
button on your screen.
Press the rotisserie option on
your screen. (optional: add
the light option)
Press the start button once you
have made your selection.
4
2

CHEF’S GUIDE
14 | | 15
CLEANING YOUR DEVICE
• Remove the inner parts and clean with soap and water.
• Wipe the appliance with a soft, damp cloth, without any soap.
• After drying all the parts, assemble and store them for your next use.
SAFETY GUIDELINES:
• Gently unplug your device, allow to cool, then clean your device
• Never immerse your oven, cord or plug in water
AFTER USAGE:
If your food does not look ready, do no hesitate to return it to the Air
Fryer for another few minutes. Once ready, you are ready to enjoy
your food!
1
3
Remove hot items with your
silicone glove.
Place food on a plate.
Remove your rotisserie parts
with the rotisserie tong.
SAFETY GUIDELINES:
• Use heat-resistant accessories to remove hot parts
2

Stay cookin’ with your FREE ChefGiant warranty.
Register your product online to join the CheGiant Club and get exclusive access
to secret sales, product launches—-and our all-inclusive 12-month warranty.
It’s quick and easy to sign up:
Register your product at
chefgiant.com/registerme
or scan the QR code below to get started.
or shoot us a DM on Instagram @chef.giant
we are always happy to help our ChefGiant customers.
Table of contents


