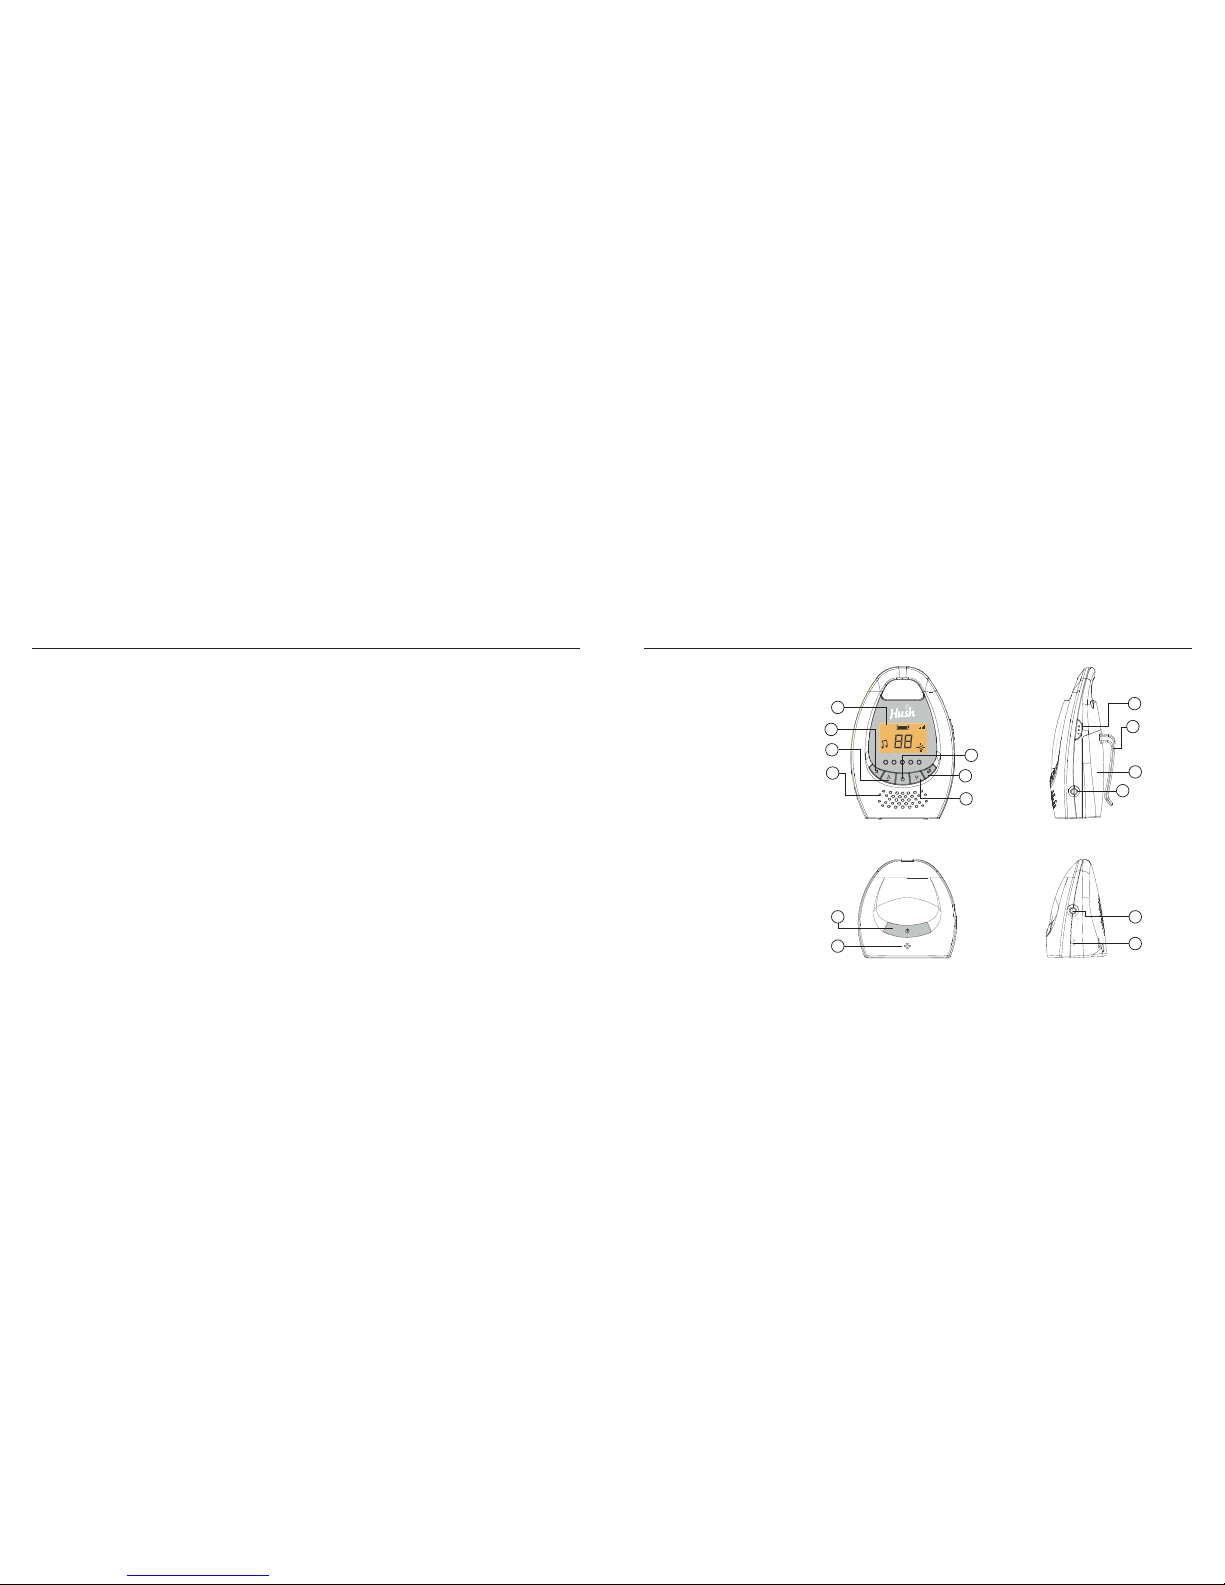
6. Technical Information 7. General Information
6a. Parent Unit (receiver)
Receiver frequency: 2.4G
Frequency: 12 channels (CH1:2413MH, CH2:2418MHZ, CH3:2423MHZ,
CH4:2428MHZ, CH5:2433MHZ, CH6:2438MHZ, CH7:2443MHZ, CH8:2448MHZ,
CH9:2453MHZ, CH10:2458MHZ, CH11:2463MHZ, CH12:2468MHZ)
Power supply: AC110~240V, DC IN: 5V 2W, Current consumption: 550mA
Operating temperature: 0°C~40°C/ 32°F~104°F
Battery life: 12 hours
6b. Baby Unit (transmitter)
Receiver frequency: 2.4G
Frequency: 12 channels (CH1:2413MH, CH2:2418MHZ, CH3:2423MHZ,
CH4:2428MHZ, CH5:2433MHZ, CH6:2438MHZ, CH7:2443MHZ, CH8:2448MHZ,
CH9:2453MHZ, CH10:2458MHZ, CH11:2463MHZ, CH12:2468MHZ)
Power supply: AC110~240V, DC IN: 5V 2W, Current consumption: 550mA
Operating temperature: 0°C~40°C/ 32°F~104°F
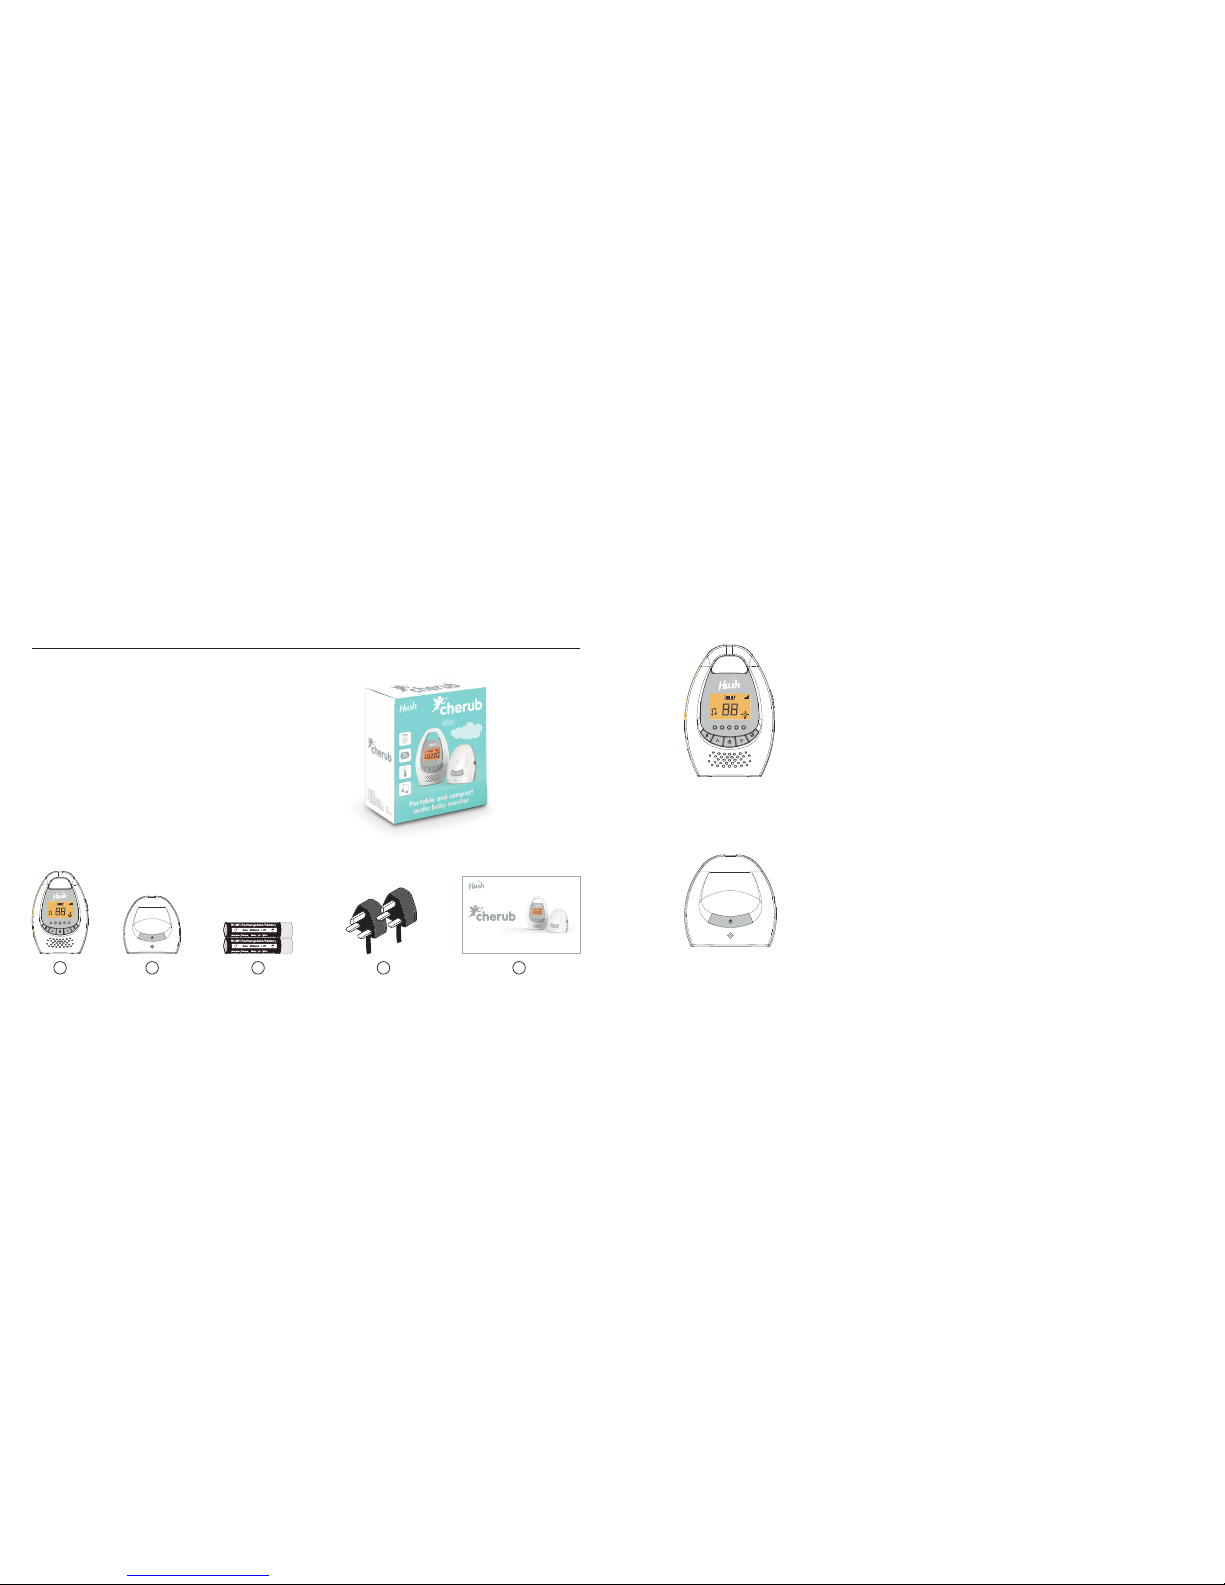
7a. Changing the Parent Unit batteries
The Parent Unit is supplied with 2 x AAA Nickel Metal Hydride Rechargeable
Batteries. To change the batteries please refer to section 3 of this guide.
• Only use recommended batteries or those of an equivalent type.
• Batteries are to be inserted with the correct polarity.
Follow the diagram in the battery compartment.
• DO NOT short circuit the supply terminals.
• Promptly remove exhausted batteries from the Parent and Baby Units
and replace if the operating times have become reduced over time.
• Remove the batteries from the Parent and Baby Units if they will
not be used for an extended period of time.
• DO NOT attempt to recharge non-rechargeable batteries.
• Dispose of dead batteries properly.
• DO NOT mix old and new batteries or batteries of different types
(i.e. alkaline/standard).
• DO NOT incinerate used batteries.
• DO NOT dispose of batteries in a fire, as they may explode or leak.
• DO NOT attempt to open the battery outer casing.
• Batteries are harmful if swallowed, so keep away from young children.
7b. Product guarantee
This product has a warranty of 12 months and is therefore guaranteed to be free
from defects in materials and workmanship during that period. If you experience
a problem within that time, simply call the Hush Helpline on 01937 847 766.
If your problem cannot be solved by our Helpline, you will need to return your
product to the place it was purchased. Please take your receipt as proof of purchase.
This product must have been used only for the intended purpose and not been
subjected to wilful or accidental damage.
This warranty does not cover damage caused by excessive voltage or lightning.
If this product has been tampered with in any way, the warranty shall be considered
null and void.
This guarantee does not affect your statutory rights.
7c. WEEE Directive
WEEE Directive – Directive 2002/96/EC of the European Parliament and Council
of 27th January 2003 on waste electrical and electronic equipment.
At the end of the product’s lifecycle, you should not throw this product into the normal
household waste but take it to a collection point for the recycling of electrical and
electronic equipment.
The ‘WEEE’ symbol, on the product, user manual and packaging indicate this.
Please contact your local authority if you need more information about the collection
points in your area.
For more information telephone Envirowise on 0800 585794.
10 11