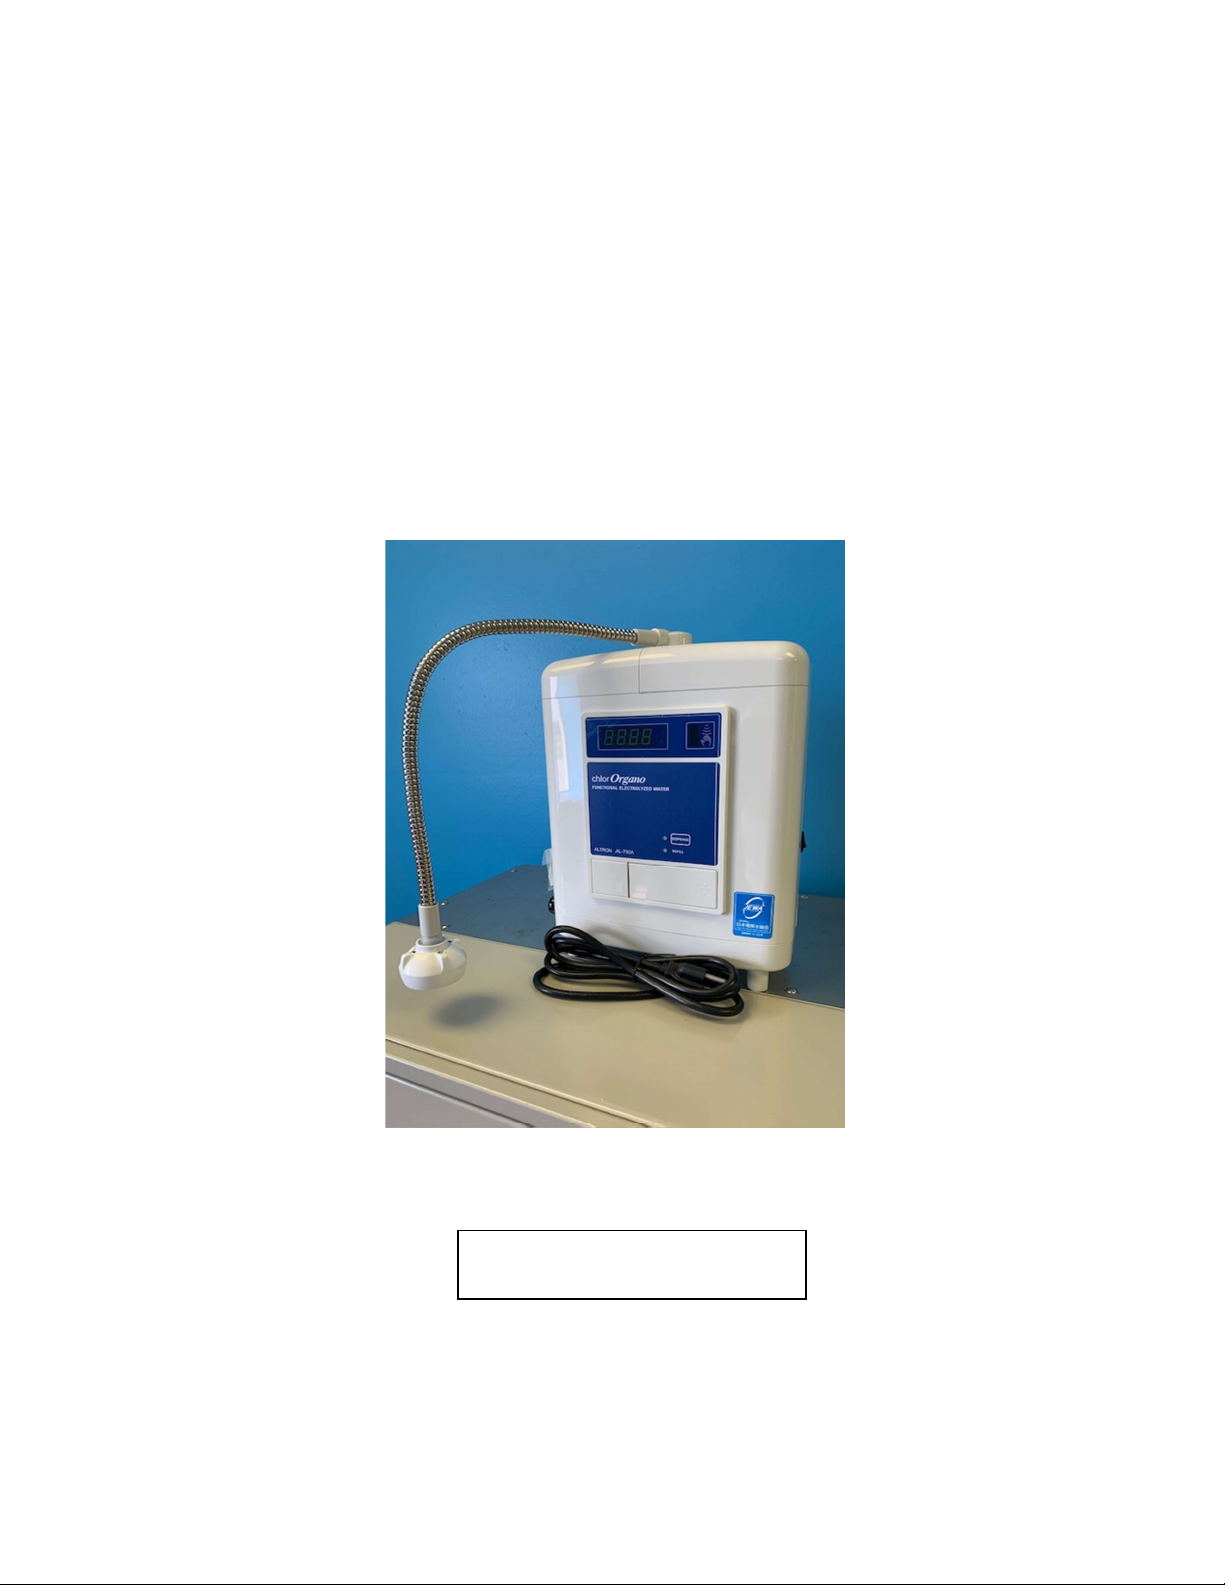
chlorOrgano AL-790A User manual
Version 1.1 | June 2021
Instructions for Use
NaCl Acidulous Generator Model AL-790A
chlorOrgano
Functional Electrolyzed Water

2
Thank you for purchasing our product.
This instruction manual contains important information for using this device safely.
Read it carefully and use the product accordingly.
Read “Safety Precautions” (Pages 4 through 9) before using the device for a safe
operation. Keep this manual in a secure place and continue to refer to it for safe
operation and proper maintenance.
We are not responsible for product failure due to improper installation and/or use.
IMPORTANT – DO NOT DISCARD

3
Table of Contents
Safety Precautions ......................................................................................... 4
Main Features and Accessories ................................................................... 10
Control Panel Features ................................................................................ 12
Setting Panel ................................................................................................ 13
How to Install .............................................................................................. 14
How to Set for Operation ............................................................................ 15
How to Use .................................................................................................. 18
How to Replenish the Auxiliary Solution .................................................... 20
How to Measure the Chlorine Concentration .............................................. 22
How to Clean ............................................................................................... 23
How to Wall Mount ..................................................................................... 24
How to Troubleshoot ................................................................................... 26
Product Specifications ................................................................................. 28
Warranty Card ............................................................................................. 29
4
Safety Precautions (Please be sure to read this section.)
Explanation of Symbols
This instruction manual and the product labels explain how to handle and operate the
product safely in order to prevent harm to the operator and/or damage to property, using
several symbols as follows:
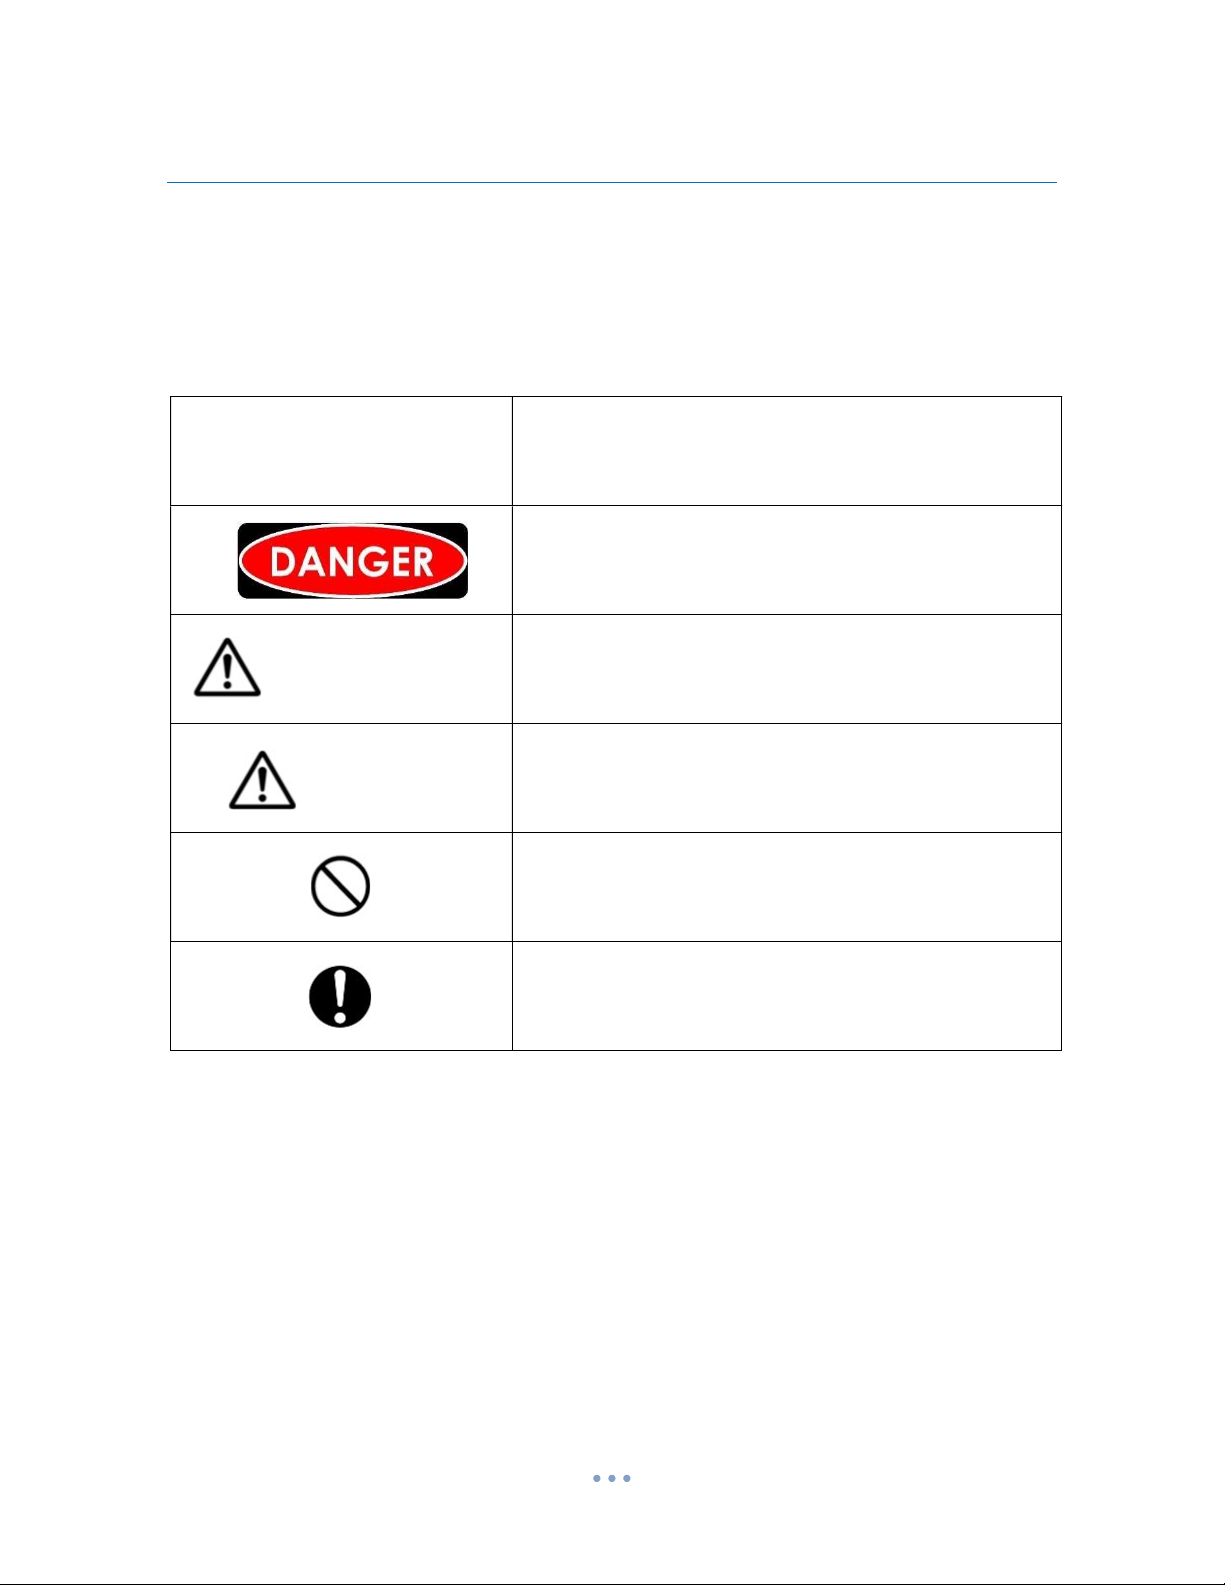
Symbols
Explanation
Not following the content of this label when operating the
device can lead to a possibility of imminent death or
serious injury.
WARNING
Not following the content of this label when operating the
device can lead to a possibility of death, serious injury
and/or damage to the device and property.
NOTE
Not following the content of this label when operating the
device can lead to a possibility of injury and/or damage to
the device and property.
This mark indicates "prohibited" action or use and can
be used in combination with another symbol.
This mark indicates “mandatory” action or use.

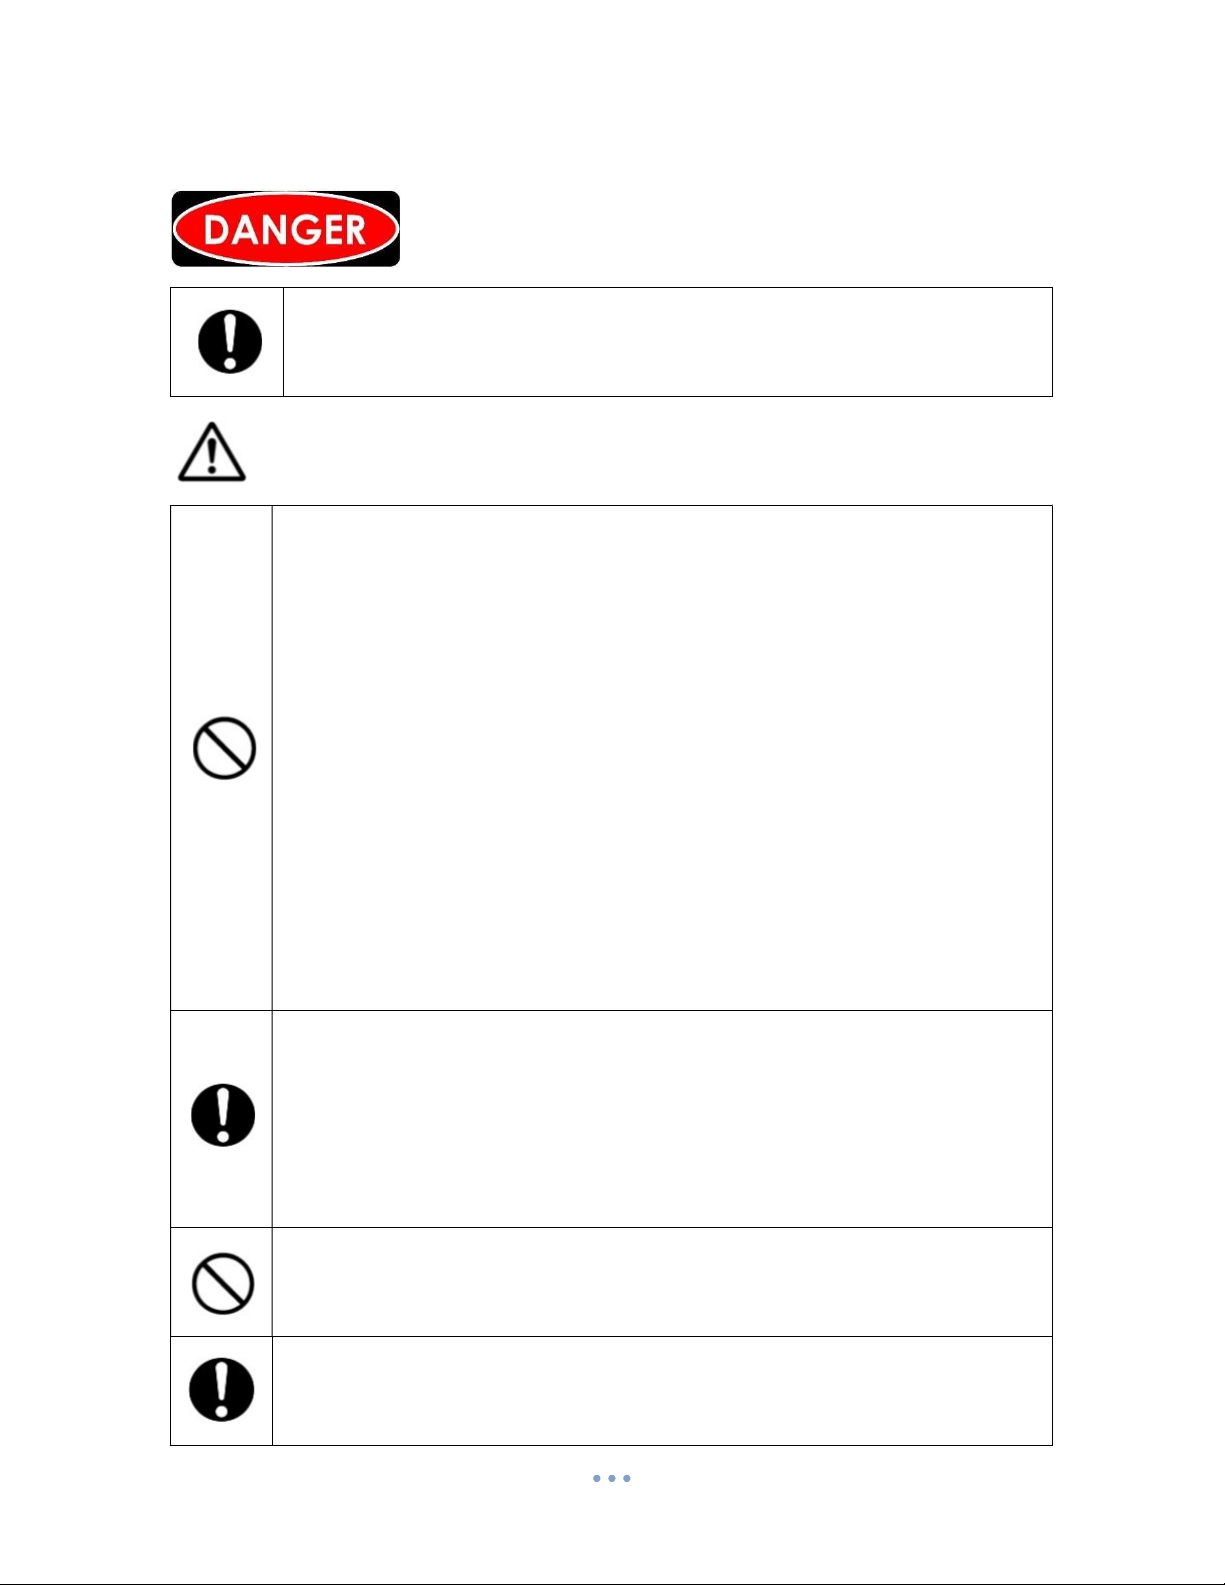
General Precautions
5
DO NOT attempt to modify, disassemble, or repair this device. Such actions
may cause fire or electric shock. Consult your dealer for repair.
DO NOT connect to a power source that is NOT 120 VAC; do not connect to
a DC power source. Do not connect to an overloaded socket; it will overheat
and may cause a fire.
DO NOT damage the power cord and plug; do not forcibly bend, pinch, or
kink the cord; do not stress the cord by putting weight on it or by pulling on
it to unplug from a power outlet. Use of damaged power cord or plug may
cause electric shot and/or fire.
DO NOT remove or insert the power plug with wet hands; it may cause an
electric shock.
Make sure the power plug is fully inserted into the outlet before turning on
the device; incomplete insertion may cause an electric shock or fire. Do not
use a damaged plug or insert into a loose power outlet.
If the device is accidentally dropped into water, unplug if from the power
outlet first and then touch the device; otherwise, it may cause an electric
shock. Consult your dealer for repair.
Remove dust, dirt, or other types of foreign material accumulated in the
power plug regularly; they can cause a fire. Unplug the power plug from the
outlet and wipe it down with a lint-free dry cloth.
If the device is accidentally dropped into water, unplug if from the power
outlet first before touching the device in the water; otherwise, it may cause an
electric shock. Consult your dealer for repair.
DO NOT drink the generated water of this device; ingestion of the generated
water may adversely affect the physical condition.
DO NOT mix the generated water of this device with medicines, pesticides,
detergents, etc. Toxic substances and gases may be generated, which can lead
to gas poisoning.
Precautions for Selecting a Location
6
Install in a well-ventilated place. Traces of gas may be generated during
production of the water.
WARNING
DO NOT install the device in the following areas as doing so may cause
damage to the device:
· Areas that are exposed to outdoor air, wind, or direct sunlight.
· Areas that are near the presence of explosive gas, flammable gas, or
corrosive gas
· Areas that are in direct line of warm or hot air exhaust from heating
appliances, cookware, and other equipment
· Areas that are damp and dusty
· Areas that are humid, such bathrooms and agricultural greenhouses
· Areas whose room temperature is higher than 104°F (40°C)
· Areas that are closed with poor ventilation.
· Areas that are likely to freeze
· Areas where water falls directly on the device.
· Areas where there is a high salt concentration in the air
Place the device on a level surface that is free from vibration and shock.
Ensure that the surface is fixed firmly in place so that it does not fall or tip
over; otherwise, injury and/or damage may result.
If necessary, secure the device on a wall using the wall hook set, sold
separately. Select a wall location with adequate strength to receive fasteners.
securely to hold up the device. Consult a local contractor if required.
DO NOT install the device upside down or sideways; doing so may cause
failure of the device.
Position the dispensing hose head in the sink, as residual generated water will
drip after use.

Precautions about the Water Supply
7
NOTE
Water Quality
Use only tap water conforming to the local water quality standards, suitable
for drinking, cooking, and the flushing of toilets. DO NOT use untreated
well water or industrial water.
Water Pressure
Use tap water with water pressure from 14.5 psi to 101.5 psi (0.1 ~ 0.7MPa).
DO NOT use well water or industrial water. If required to use tap water with
pressure greater than 101.5 psi, install an external pressure reducing valve.
Water Temperature
Use tap water with water temperature between 32°F and 95°F (0 °C to
35 °C). Freezing or hot water may cause deformation or breakage of resin
parts and result in a device failure.
Water Supply Hose or Pipe
A bend, kink, or any other defects in the water supply hose or pipe may cause
a water leak or malfunction; check the water supply hose before turning on
the tap.
Water Supply Control
The tap or faucet of tap water is the mechanism for controlling the water
supply into the device. DO NOT bend the dispensing hose or block the head
during water generation as doing so will cause back pressure, resulting in
leakage or device malfunction. Ensure to close the water tap after use.
In Case of Freeze Warning
and disconnect the device water supply hose from the tap; drain the water
inside from the water supply hose.

8
Use only the NaCl dedicated electrolyte auxiliary solution
DO NOT use any solution other than the NaCl dedicated electrolyte
auxiliary solution as an additive; not doing so can result in production of
toxic and harmful substances and toxic gases that can be life-threatening.
DO NOT mix
Dedicated electrolyte auxiliary solution is an acidic liquid containing NaCl
sodium chloride. Never mix it with any other aqueous solutions.
DO NOT drink
DO NOT drink dedicated electrolyte auxiliary solution. If accidentally
ingested, drink plenty of water.

9
Storage of Generated Water
NOTE
Storage of the generated water
When storing unused generated water in a container, keep the air in the
container to a minimum and keep the container in a cool and dark place.
In addition, it may deteriorate due to long-term storage and the desired
effect may not be obtained. Therefore, be sure to measure and confirm the
effective available free chlorine concentration before use.
10
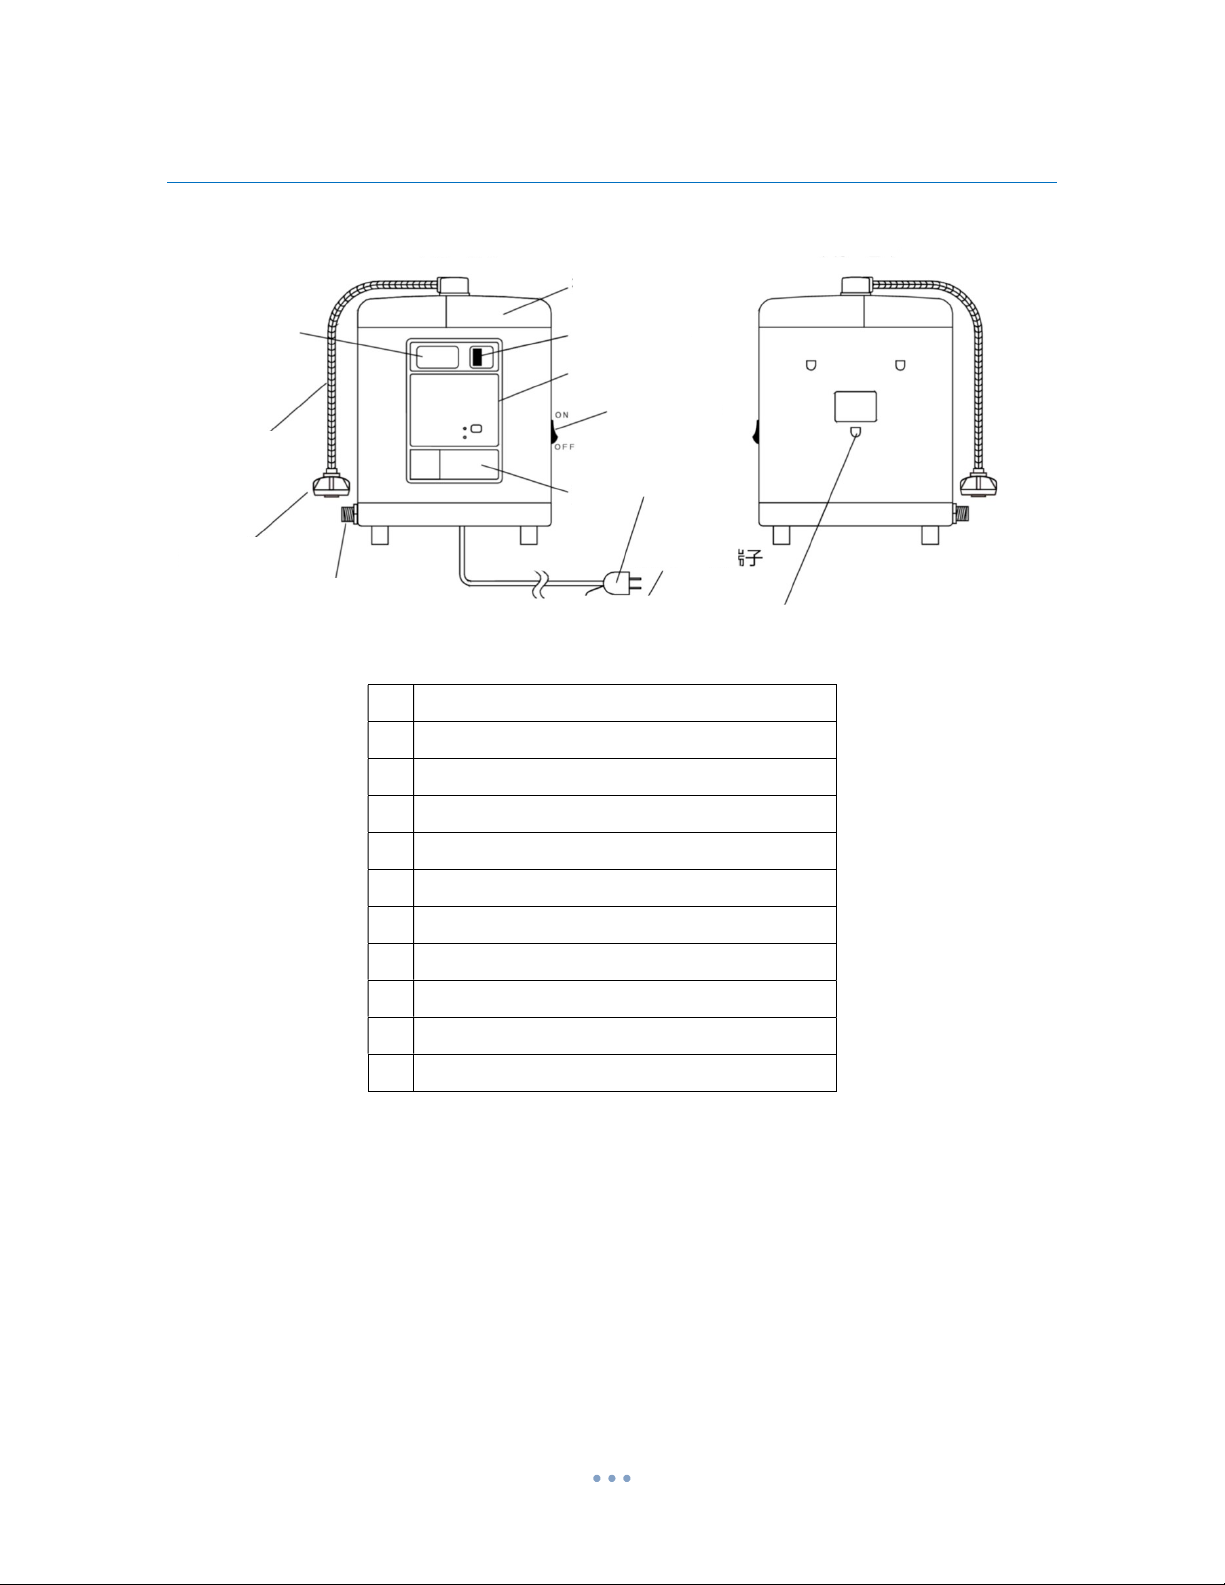
Front
Back
A
K
I
H
G
J
F
C
E
D
B
Main Features and Accessories
A Electrolyte Solution Storage Tank Cover
B Digital Display
C Proximity Sensor
D Dispensing Hose
E Control Panel
F Power Switch
G Setting Panel Cover Door
H Dispensing Hose Head
I Water Inlet
J Electrical Plug (Three-pronged)
K Wall Hook Attachment Hole (3 Places)

11
Accessories (Included)
Water Inlet Strainer
Effective Chlorine
Concentration
Measurement Set
(Disposable)
Dispensing Hose
Set
Instruction for
Use
Accessories (Optional)
Wall Hook Set Dedicated Electrolyte Auxiliary Solution
NOTE
Inlet hose can be obtained separately from a local hardware store. Select a hose that fit the
mating and water supply pressure requirements. The water inlet is G 1/2 male thread.
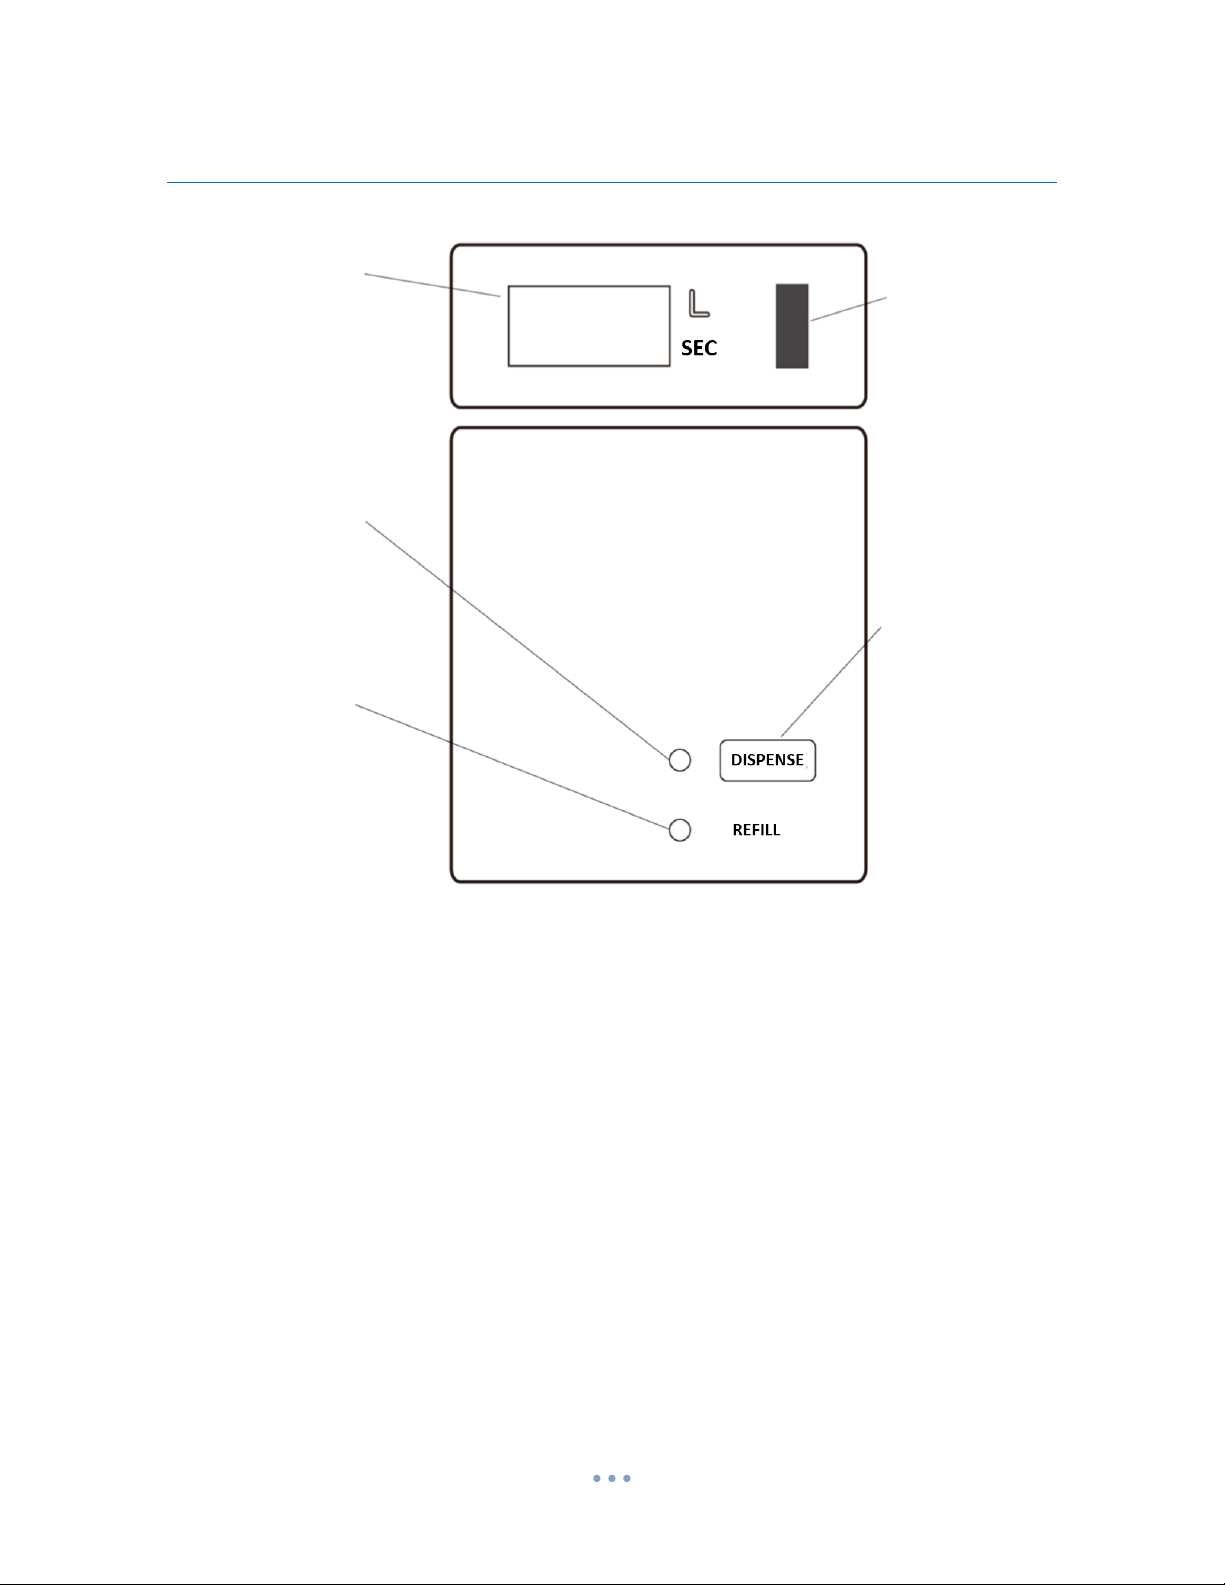
Control Panel Features
12
Digital
Display
Proximity
Sensor
Fixed
Dispensing
Lamp
Fixed
Dispensing
Solution
Refill
Lamp
Button
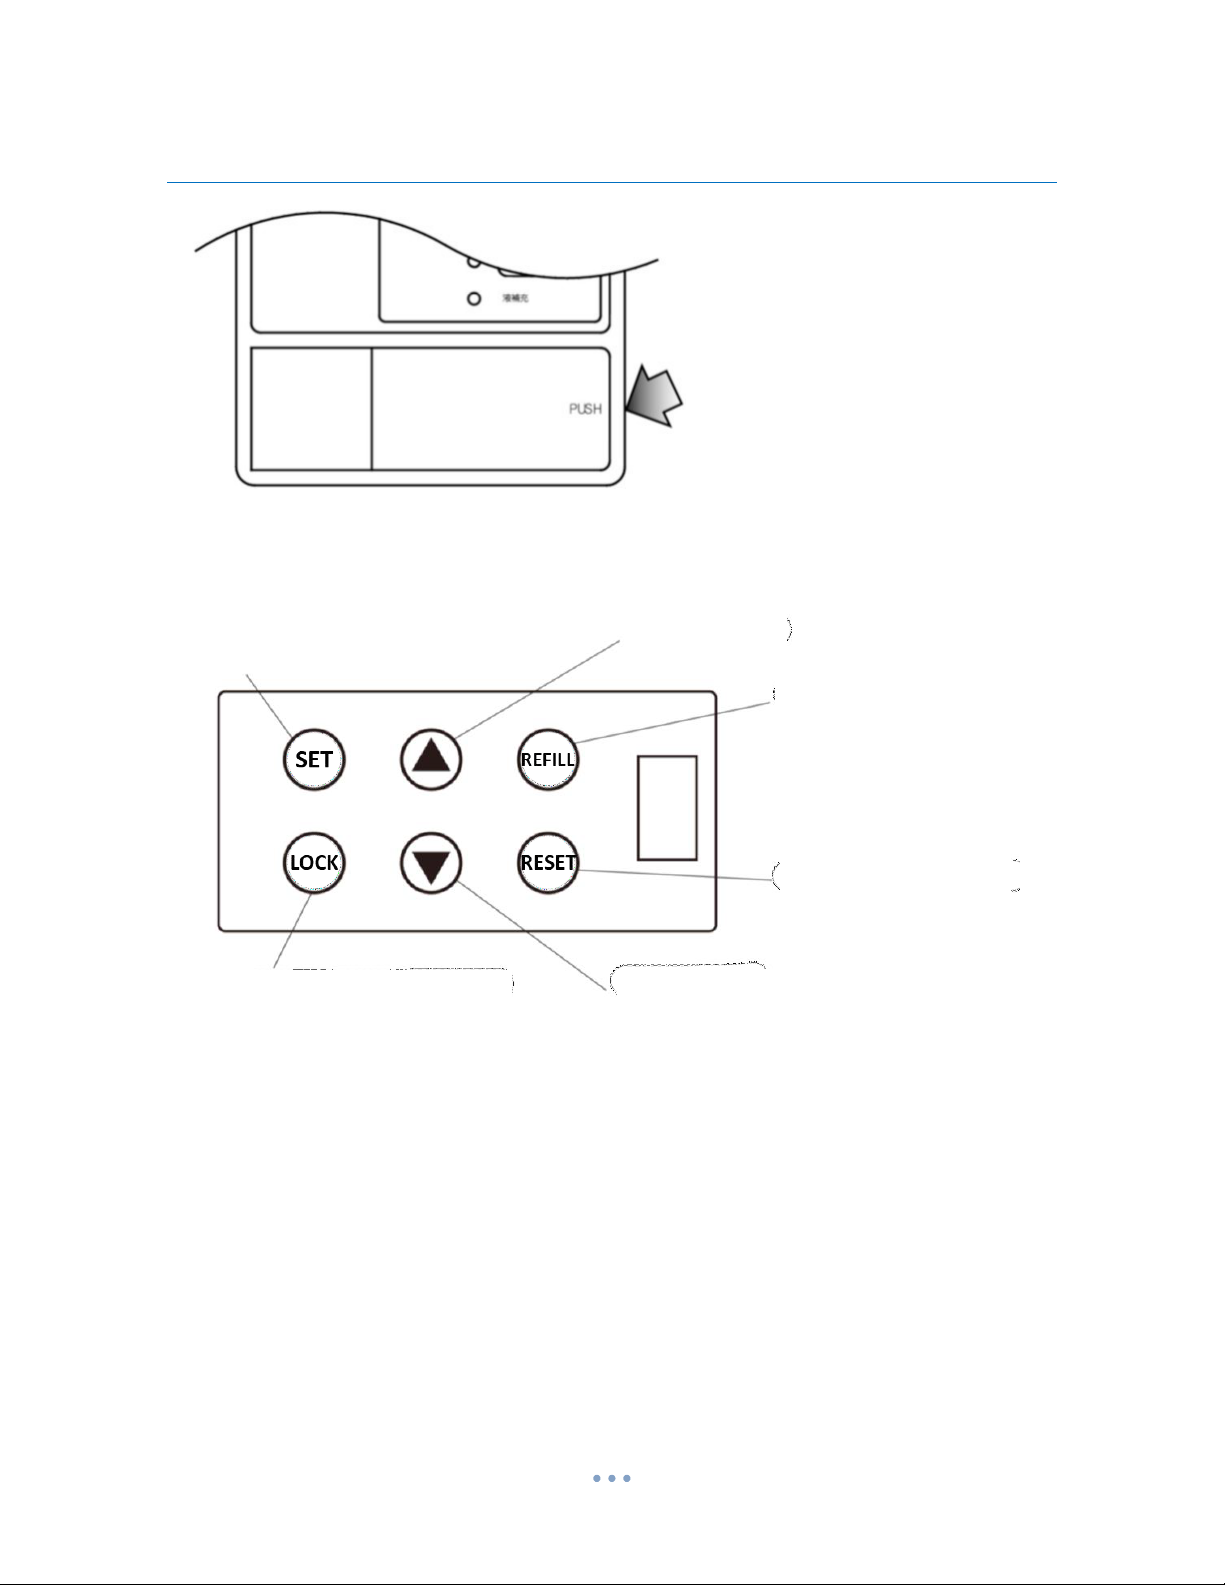
Setting Panel Features
13
Setting
Button
Up
Button
Child
Lock
Button
Down
Button
Error Reset Button
Solution Refill Button
Press "PUSH" on the cover
door to gain access to the
Setting Panel.

How to Install
14
Dispensing
Hose
Mounting
The front two legs can be adjusted in height
by
turning, up
to
approx.
0.4 inch
Shower, Straight
Dispensing Hose
Water Inlet
Strainer
NOTE:
The water inlet is G 1/2 male
thread. Be sure to attach the
included inlet strainer to the
water inlet.
NOTE
Consult your dealer for questions related to installation.
Observe local regulations when disposing of unused accessories, packaging
materials, and products at the end of life.
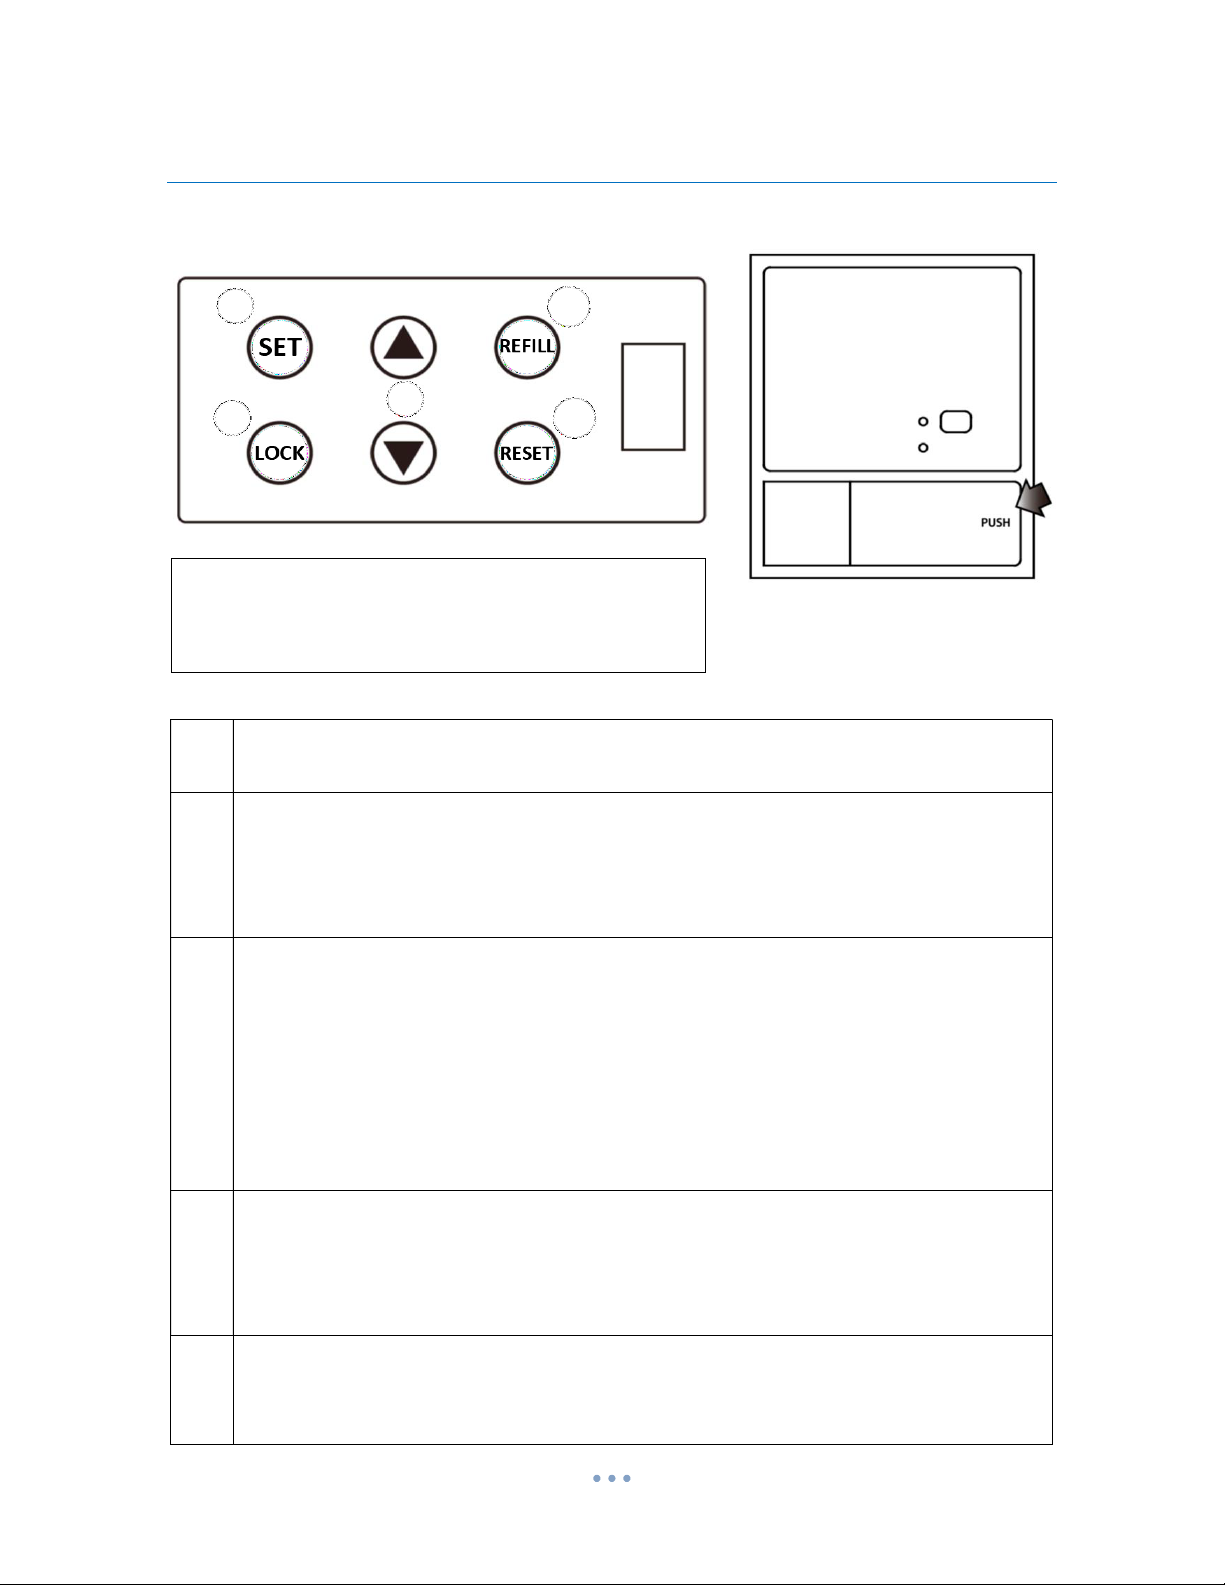
How to Set for Operation
15
A
D
C
B
E
NOTE:
Gain access to the Setting Panel by pressing PUSH on the
setting panel cover door. Connect the power plug to the outlet
and turn on the power switch.
Setting Panel
A Press the SET Button each time to toggle the setting through the dispensing amount
mode, dispensing time mode, generation range, and back to dispensing amount mode.
B
Hold the Child LOCK Button for more than 2 seconds to activate or deactivate the child
lock feature. When the child lock is activated, dispensing time is displayed and only
dispensing by the Proximity Sensor can be performed. The child lock feature is not
activated when shipped from the factory.
C
Operate the ▲ / ▼ Buttons when setting dispensing amount, dispensing time, and
generation range. When setting dispensing amount and dispensing time, press ▲ (up)
each time to increase the level by one, and press ▼ (down) each time to decrease the level
by one. If either button is held for more than 0.5 seconds, it becomes level +10 or level -
10, the maximum levels, respectively. For the concentration range, the range moves up
and down (from 1 to 5) each time it is pressed. Refer to "Estimate of Effective Chlorine
Concentration in Each Range” on Page 17.
D
The Solution REFILL Button blinks when the electrolytic auxiliary solution is depleted
and requires a refill. Press it after replenishing the electrolytic auxiliary solution to stop
the blinking and turn off the button lamp. The button lamp blinks when shipped from the
factory.
E
Error RESET Button comes on when an error occurs; press it to temporarily cancel the
error indication. If the cause of the error is not addressed, the button lamp will come on
again. To eliminate the cause of the error, refer to Troubleshooting starting on Page 28.
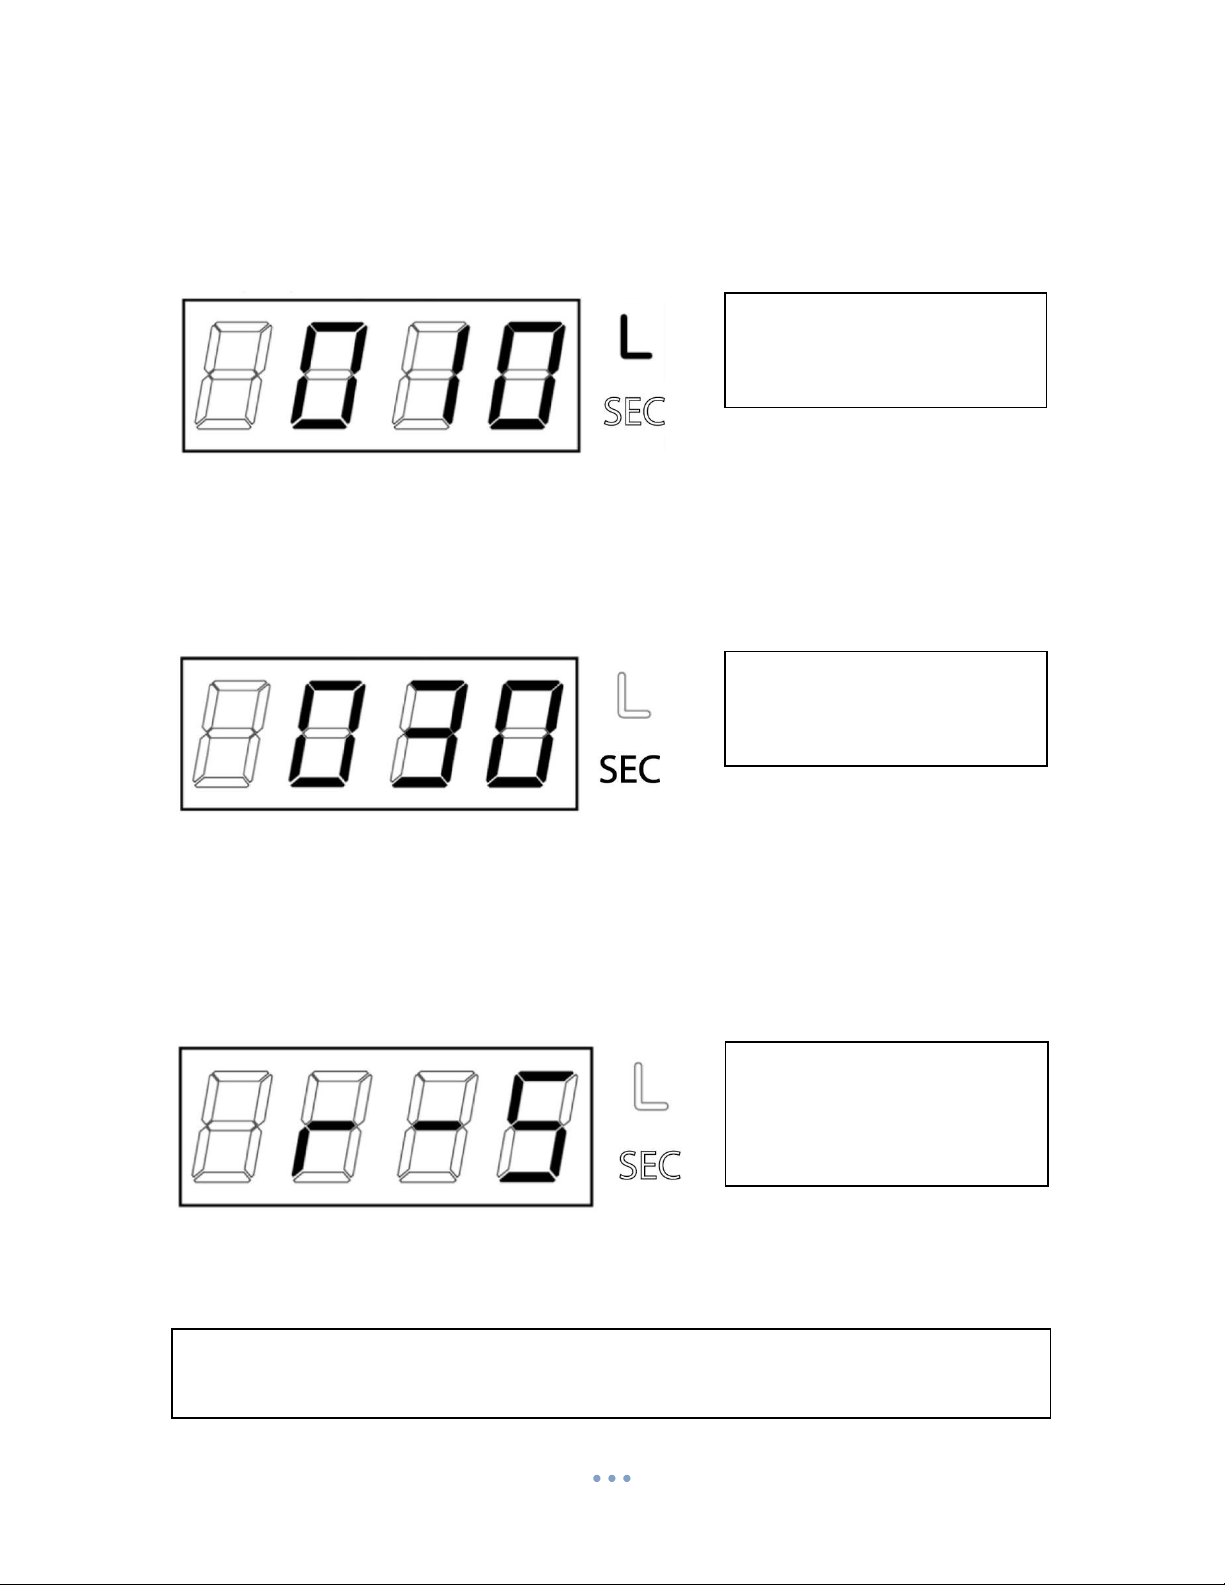
Setting by Dispensing Amount
16
NOTE:
The amount range for dispending is
from 1 to 200 liters (L). The factory
set value is 10 L.
NOTE:
The time range for dispensing is
from 10 to 120 seconds. The factory
set value is 30 seconds
NOTE:
The concentration range for
dispensing is from 30 ppm (r-1) to
50 ppm (r-5). The factory set
value is r-5.
NOTE:
Immediately after powering up, the device is in the fixed dispensing amount mode. Press the SET button
to toggle through different modes of display.
Press the SET button repeatedly until the lamp "L" lights up on the Digital Display. Press
▲ (Up) or ▼ (Down) to set the desired dispensing amount in liters (L).
Setting by Dispensing Time
Press the SET button repeatedly until the lamp “SEC” lights up on the Digital Display.
Press ▲ (Up) or ▼ (Down) to set the desired dispensing time in seconds.
Setting by Concentration Range
Press the SET button repeatedly until both "L" and "seconds" lamps turn off on the Digital
Display. Press ▲ (up) or ▼ (down) to set the desired concentration range, r-1 through r-5.
Estimate of Effective Chlorine Concentration in Each Range
17
NOTE:
The actual effective a va i l a b l e f r e e chlorine concentration levels vary
depending on the tap water used as well as volume of tap water feed.
Generation Range Level Effective Chlorine Concentration
r-1 30 ppm
r-2 35 ppm
r-3 40 ppm
r-4 45 ppm
r-5 50 ppm

18
A
B
D
C
E
F
How to Use
Display and Button Operations
A Digital Display displays the dispensing time, dispensing amount, concentration range,
and error codes. During dispensing, the remaining time or amount is displayed.
B L (liter) lamp turns on while dispensing in fixed dispensing amount mode.
C SEC (second) lamp turns on while dispensing using Proximity Sensor.
D
Hold a hand over the Proximity Sensor to dispense for a preset time (seconds).
While dispensing, hold a hand over the Proximity Sensor again or press the
DISPENSE button to stop dispensing.
E
Press to dispense in the set amount. The DISPENSE lamp blinks during dispensing.
Press again to stop dispensing. Note: When the child lock is activated, the DISPENSE
lamp turns off and the DISPENSE button cannot be operated.
F
Solution REFILL lamp blinks when electrolytic auxiliary solution requires a refill.
It stops blinking and turns off when pressed after electrolytic auxiliary solution is
refilled.

19
CAUTION:
DO NOT move the hand for 0.5 seconds while holding it over the Proximity Sensor;
the sensor will not detect the hand if it is in motion. Avoid touching and contacting.
the sensor surface, as any stains or marks may affect the sensor’s capacity to detect.
To Dispense with Proximity Sensor (Automatic Method)
Simply hold a hand over the Proximity Sensor (D) for 0.5 seconds to start dispensing water
from the dispensing hose. The Digital Display (A) displays the remaining dispensing time
in seconds and stops automatically at 0 seconds.
To stop dispensing manually while dispensing, hold a hand over the Proximity Sensor (D)
again for 0.5 seconds, or press the DISPENSE button (E).
To Dispense with DISPENSE Button (Manual Method)
Press the DISPENSE button (E) to start dispensing water from the dispensing hose. The
Digital Display (A) displays the remaining water amount in liters (L) and stops
automatically at 0 liters (L).
To stop dispensing manually while dispensing, hold a hand over the Proximity Sensor (D)
again for 0.5 seconds, or press the DISPENSE button (E).
NOTE
About water intake
DO NOT over-extend the dispensing hose from the dispensing port; doing so
may cause leakage or malfunction.
· DO NOT pull the dispensing hose forcibly; doing so may cause damage.
· Place the dispensing hose head in a sink after dispensing to let the
residually produced water to drain.

How to Replenish the Auxiliary Solution
20
When replenishing the solution, be sure to use the dedicated NaCl
electrolytic auxiliary solution.
When the solution REFILL lamp turns on, replenish the NaCl electrolytic
auxiliary solution.
1. Slide the auxiliary solution
storage tank cover on the
top of the device, slightly
to the right and then lift it
from the body.
Auxiliary Solution Storage Tank Cover
2. Turn the electrolyte
auxiliary solution storage
tank cap counterclockwise
to remove it.
3. Remove the cap of the
container containing the
NaCl electrolyte
auxiliary solution and
replenish the NaCl
electrolytic auxiliary
solution to the storage
tank. Take precautions not
to spill the auxiliary
solution.
Table of contents


