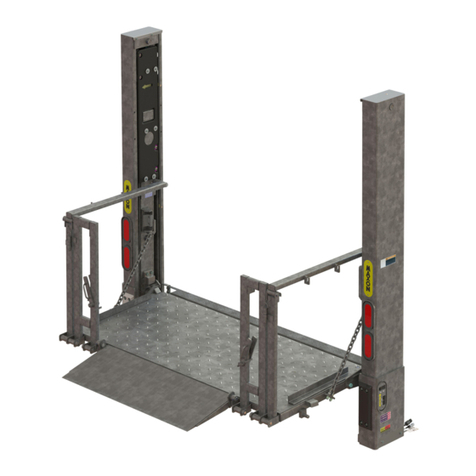
Cibes Lift A4000 Manual

Platform lift
A4000-A5000-A7000
Operating and maintenance instructions
Cibes Lift AB, Utmarksv 13, 802 91 Gävle Tel: +46 26-17 14 00, Fax: +46 26-17 14 02
E-mail: techsupport@cibeslift.com Web: http://www.cibeslift.com
Rev O1112a_GB Copy from original issue EN

Table of contents
1Safety instructions .....................................................................................................4
1.1 General....................................................................................................................6
1.2 Prohibited use..........................................................................................................6
1.3 Safety actions prior to working on the platform lift ..................................................6
1.3.1 Only with work in the lift shaft............................................................................7
1.4 Risk of crushing ......................................................................................................9
1.5 Frequency converter................................................................................................9
1.6 Action to be taken in the event of an electrical accident............................................9
2Operating instructions.............................................................................................10
2.1 Operation of the platform lift.................................................................................10
2.1.1 Control panel ....................................................................................................10
2.2 Emergency situation..............................................................................................11
2.2.1 Emergency signal and telephone .......................................................................11
2.2.2 Manual lowering or raising................................................................................12
2.2.3 Emergency opening of doors from the inside and outside of the lift shaft...........12
3Design and configuration.........................................................................................15
3.1 Configuration ........................................................................................................15
3.2 Platform lift shaft and shaft walls...........................................................................19
3.2.1 Shield wall dismounting and mounting..............................................................20
3.3 Doors and gates .....................................................................................................21
3.3.1 Locking the lift .................................................................................................22
3.3.2 Automatic door power opener ...........................................................................23
3.4 Overload protection...............................................................................................23
3.5 Lighting.................................................................................................................24
3.6 Finish....................................................................................................................24
3.7 Electrical compartment..........................................................................................24
3.8 Control system ......................................................................................................26
4Fault finding.............................................................................................................28
4.1 Indication during normal functioning.....................................................................28
4.2 Fault indications ....................................................................................................29
4.3 Fault finding in the control system.........................................................................30
4.3.1 1.1.1 Checking and adjusting the concealed door circuit ....................................32
5Setting up the nodes.................................................................................................34
5.1 The master node....................................................................................................34
5.1.1 Programming the Master node...........................................................................34
5.1.2 School locking..................................................................................................35
5.1.3 Frequency converter/direct start ........................................................................36
5.1.4 Smart card.........................................................................................................36
5.1.5 Setting of alarm times and school locking..........................................................36
5.2 Setting alarm times and stopping distance..............................................................36
5.2.1 Programming....................................................................................................37
5.3 Setting of door nodes.............................................................................................40
5.3.1 Identity 40
5.3.2 Door opener......................................................................................................40
5.3.3 Slave doors .......................................................................................................41
6Maintenance.............................................................................................................44
6.1 General..................................................................................................................44
6.2 Machinery.............................................................................................................44
6.2.1 Lubrication .......................................................................................................44

3
6.2.2 Visual inspection of drive nut............................................................................45
6.2.3 Drive unit...................................................... Fel! Bokmärket är inte definierat.
6.3 Shaft......................................................................................................................47
6.4 Electrical compartment..........................................................................................49
6.5 Platform lift...........................................................................................................49
7Code compliance......................................................................................................51
7.1 Directive and Standards.........................................................................................51
7.2 Marking.................................................................................................................51
8Technical specification.............................................................................................52
8.1 Platform Lift A 5000 and A 7000...........................................................................52
9Special tools..............................................................................................................53
10 Spare parts...............................................................................................................53

4
Foreword
Your platform lift system has been designed, manufactured and installed to the latest European
Standards.
The purpose of this manual is to:
Give you an insight into how your platform lift and its control system operates.
Outline the included safety features.
Identify what should be done in an emergency.
Identify your responsibilities as the building occupier.
Reliability
Under normal use the platform lift has a life expectancy of 25 years with the proper and regular
mantenance.
Maintenance and Service
It is essential that your platform lift is correctly serviced and maintained at regular intervals.
The type of contract and frequency of visits will depend on the product type and application. For
further details please contact us at the address shown on the cover page. We recommend at least
two maintenance visits per year carried out by a competent engineer.
Breakdowns
Unfortunately, from time to time, platform lifts do break down. Once again, for details, please
contact us at the address shown on the cover page.
PLEASE KEEP THIS MANUAL SAFE.
Responsibilities of the Building Owner
Statutory Requirements
Legislation relating to the use of platform lifts at work is included within:
Health and Safety at Work Act 1974 (HSWA)
Management of Health and Safety at Work Regulations 1992 (MHSWR)
Workplace (Health, Safety and Welfare) Regulations 1992 (WPR)
Provision and Use of Work Equipment Regulations 1998 (PUWER)
Lifting Operations and Lifting Equipment Regulations 1998 (LOLER)
Machinery Directive 98/37/EC
Reporting of Injuries, Diseases and Dangerous Occurrences Regulations 1995 (RIDDOR).
This legislation requires the building owner/occupier to ensure that the premises, including
platform lifts, is safe and without risk to health. To this end he shall ensure that each platform lift
is subject to:
Regular and adequate servicing/maintenance
Statutory periodic thorough examinations by a competent person, and additionally for the
completion of any remedial actions identified therein.
If you have any questions regarding your responsibilities as defined above, please do not hesitate
to contact us.

5
Health and Safety
Introduction
Both the building occupier and lift servicing company have a responsibility under the HSWA to
provide a safe working environment for those using the building for whatever reason. It is essential
that the building occupiers provides a safe means of escape from his property in the event of fire,
and First Aide arrangements.
Refer to Risk Assessment No. Cibes Lift/A5000/01.
Safety Procedures
It is recommended that the building occupier ensures at least two permanently-based members of
staff receive instruction in the correct method of platform lift operation and emergency procedure.
The lift servicing company will normally be pleased to provide the necessary instructions.
Routine Checks
We advise that the building occupier makes at least a monthly check that the emergency audible
alarm is working correctly and that the safety edges are operated to ensure that the platform lift
stops. We further advise that a record be maintained of these monthly checks.
Occupier Maintenance
Because of the obvious dangers involved in maintaining platform lifts, there is very little work that
untrained personnel should undertake.
Switching the Platform Lift Off
Platform lifts normally remain switched on for twenty-four hours each day. If it becomes
necessary to periodically switch a platform lift off, other than in an emergency situation, please
contact the lift servicing company for instructions.
Health and Safety at Work Act
It is essential that all persons who manage the correct functioning of this installation read and
understand this manual. The contents explain how to release trapped passengers safely in the event
of a power cut and how to manually lower the platform lift if the power fails. All other work
should be carried out by a maintenance engineer.
Refer to Risk Assessment No. Cibes Lift/A5000/02.
Maintenance engineers should be properly trained to service the installation and must pay
particular attention to the risk assessment contained within this document. They should have
received and read their employer’s Health and Safety instructions and be equipped with the correct
tools and personal equipment protection and clothing.
Refer to Risk Assessment No. Cibes Lift/A5000/03.
Always, when working on the equipment, ensure that it is stationary and that the power has been
isolated. Appropriate signs must be positioned at each landing advising users that the equipment is
undergoing maintenance. The isolator must be locked in the off position.
Refer to Risk Assessment No. Cibes Lift/A5000/04.

6
1 Safety instructions
1.1 General
Work on the platform lift may only be carried out by trained and competent persons.
1.2 Prohibited use
Never allow children to play with the lift and exercise care if children are playing in the
vicinity of the lift.
Never jump or swing while the lift is in operation.
Watch out for loosely fitted clothes while travelling with the lift.
Do not insert loose objects between the frame and the lift car or inside the frame.
Stop the lift (release the push-button or press in the emergency stop) immediately on the
discovery of any danger.
Do not remove parts of the lift and do not subject the lift to physical force or other damage.
Signs with warning text and safety instructions must not be removed, covered or made
illegible.
Do not spray water on the lift or subject it to other liquid spillage.
Do not use the lift if it is faulty or functions abnormal.
Pay attention to ensure that visible electrical components, for example, pushbuttons, cables,
and the like are not damaged.
The lift must not be used for purposes other than those described in the manual.
Material must not be transported unattended in the lift.
Components higher than 2.2 metres must not be transported in the lift.
Strapping the service hatch:
It is not acceptable to operate the lift with the service hatch strapped during assembly.
1.3 Safety actions prior to working on the platform lift
The lift must always be disconnected from the mains supply using the main power switch before
work or emergency lowering is started. The lift may also need to be disconnected from the mains
supply using an external disconnector when work needs to be carried out on the main power switch
or supply cables (external wiring is not included in the delivery, refer to local regulations).
Switch off the main power switch as follows:
1. Remove the electrical compartment panel situated on the right or left hand side of the
platform lift door, on the bottom landing.
NOTE! The main power switch is behind the panel. The electrical compartment could also
be situated on another floor, or be situated in an external electrical compartment.
2. Switch off the lift unit’s main power switch and place a warning sign prominently at each
platform lift entrance advising of work in progress.
Refer to Risk Assessment No. Cibes Lift/A5000/04.

7
Figure 1 Lower section of electrical compartment, tool attachment
Item Description Item Description
1 Handle to operate the pit prop and
unlocking of the lower door 4 Tool holder
2 Emergency opening tool 5 Emergency lowering crank
3 Dismantling tool for shield wall
Table 1
1.3.1 Only with work in the lift shaft
When working in the lift shaft, the lift must be run up at least one metre from the bottom of the
shaft. The pit prop, Figure 2 item 2, can now be extended using the control handle item 5. Lower
the handle as shown on the sign and the Pit prop is extended, the safety circuit is off and the lower
door is unlocked with the help of lock opening wire item 4.
Refer to Risk Assessment No Cibes Lift/A5000/05.
1
2
3
4
5
Fig. 5000_Op_20.wmf

8
Fig. 5000_Op_02.wmf
3
5
4
1
2
3
Figure 2 Manoeuvring the pit prop
Item Description Item Description
1 Pit prop 's electrical connector
4 Lock opening wire
2 Pit prop 5 Handle to unlock the bottom door
and manoeuvre the pit prop
3 Wire
Table 2

9
1.4 Risk of crushing
WARNING – Risk of crushing
There is a risk of crushing when checking for brakes (section 6.2.3 “Drive unit”). Take great care
whilst working.
Self-sustaining means that the relationship between screw and nut is such that the movement of the
platform will stop if the power to the motor is shut off and the brake is lifted. Nor should the
platform be put into motion from a stationary position if the brake is lifted.
1.5 Frequency converter
WARNING – Highly dangerous voltage
When servicing the frequency converter – motor (extra option) the power must be disconnected for
at least 20 minutes in order for the capacitors to discharge and prevent service personnel from
being injured by live components.
Refer to Risk Assessment No. Cibes Lift/A5000/04.
Warning text placed on the platform’s sensitive edge.
1.6 Action to be taken in the event of an electrical accident
The following action is to be taken in the event of an electrical accident:
1. Switch the power off immediately. Should it not be possible to switch off the power, the
injured person must be released from the live component. A non-conductive material must
be used when removing the injured person, for example, rubber gloves. If possible, the
person performing the freeing action should stand on an isolating surface.
2. If the injured person is not breathing, ensure that the airways are clear and start artificial
respiration. In the event of cardiac arrest, give cardiac massage.
3. If the injured person is breathing, but is unconscious, he/she should be placed in the
recovery position.
4. Summon personnel at the workplace trained in first aid and call an ambulance.
HAZARD OF FALLING INTO THE LIFTWAY
-
MOVE THE
PLATFORM TO THE LANDING LEVEL - IF THIS IS NOT
POSSIBLE, THE RESCUE OPERATION OF PERSONS MUST
BE CARRIED OUT ONLY BY A COMPETENT PERSON

10
2 Operating instructions
2.1 Operation of the platform lift
2.1.1 Control panel
The platform is equipped with a handle and a control panel with large, easy to use control buttons.
On the control panel there is: an alarm button, see Figure 3 item 3, an emergency stop button, item
4, and directional landing buttons, item 1. The lift is controlled via impulses from the external
operating buttons (CALL).
The push button must be kept depressed throughout the travel (continuous pressure device). If
released, the platform lift will stop immediately. When the platform lift reaches the correct
landing, it will stop automatically.
The inside platform push buttons take priority over the outside landing call buttons, i.e. the outside
landing call buttons will not work if someone is travelling at the same time.
In the event of an emergency situation, there is an emergency stop button. This emergency button
cuts off the power to the platform lift, which will stop immediately. After it has been depressed,
the emergency stop button must be turned clockwise to enable the platform lift to operate again.
Always check that the emergency stop button is not depressed if the platform lift is not working.
1
2
Fig. 5000_7000_Op_14.wmf
4343
1
A 5000
2
A7000
Figure 3 Control panel
Item Description Item Description
1 Directional control buttons 3 Emergency signal
2 Lock for service panel 4 Emergency stop device
Table 3

11
2.2 Emergency situation
2.2.1 Emergency signal and telephone
In order for a trapped person to be able to call for help with an operating failure, the lift is
equipped with an emergency signal device. When the alarm button is pressed in the emergency
signal sounds. The emergency signal can be forwarded to an alarm centre or the like via a potential
free contact on the charge alarm card (located in the electrical compartment), see Figure 16 item 1.
Refer to the wiring diagram for more information.
The emergency signal device is powered by the lift's own accumulator (battery) in the event of a
power failure. The lift must always be connected to the telephone network either via the standard
telephone or via the lift telephone, which automatically calls the alarm centre or the like.
Functions
Emergency signal
The emergency signal sounds as long as the emergency signal button is held pressed in. When the
button is kept pressed in for more than 10 seconds, a signal can be forwarded to the alarm centre,
reception or the like via a potential free contact (see wiring diagram).
Wall telephone
The incoming telephone line is connected to terminals 3 and 4 on the charge alarm card.
Moving a jumper on the charge alarm card, Figure 4 item 2, allows you to choose whether the
telephone line should always be open (position A) or if it should be opened when the emergency
signal button is held down for ten seconds (position B). When the jumper is moved this must be
confirmed by pressing in the reset button on the charge alarm card, see Figure 4 item 1.
Auto dialler
The incoming telephone line is connected to terminals 3 and 4 Figure 4 on the charge alarm card.
The jumper on the charge alarm card must always be in position B when the lift is fitted with an
automatic lift telephone.
When the emergency signal button is held down for 10 seconds the lift telephone automatically
calls a pre-programmed number (can be to an alarm centre or caretaker, etc).
In some countries, it is permitted to equip the lift with an intercom with a permanent
connection between the transmitter and receiver.
The line to the emergency telephone/lift telephone automatically resets after 1 hour. Can also be
reset manually with the reset button, which is located on the charge alarm card in the lift's
electrical compartment, see Figure 16 item 2.

12
1
2
Fig 5000_OP_21.ai
Figure 4 Charge alarm card
Item Description Item Description
1 Reset button 2 Jumper in position A or B
Table 4
2.2.2 Manual lowering or raising
If the platform lift should stop and not restart, the platform can be manually lowered or lifted by
using a manual crank. The crank is usually located at the bottom landing inside a locked panel (it
may sometime be situated on another landing). It is easier to lower the platform lift downwards if
it has stopped between two floors. It is possible to move the platform lift upwards but it requires
much greater effort.
The lift is also available as an option with electrical emergency lowering. Electrical emergency
lowering permits emergency lowering with a control on the electrical compartment, see Figure 16
pos 5.
If possible, carry out fault finding according to section 4 before starting emergency lowering.
Warning! Check that no one can be injured during emergency lowering. Inform persons in or in
the vicinity of the lift of the risk for crush injures that can exist when lowering. Be sure to close all
doors to the lift before starting emergency lowering. This is to ensure that no one can fall down
into the shaft if a door remains open.
Move the platform lift manually in the following way:
1. Switch off the main power switch in the electrical compartment see section 1.3.
2. Release the manual crank Figure 1 item 5 from the clamps item 4.
3. Move the platform lift manually to the closest landing (downwards). The direction of
rotation is shown on a sign beside the crank.
2.2.3 Emergency opening of doors from the inside and outside of the lift shaft
The doors can always be emergency opened from the outside using the supplied triangular key. All
doors with landing levels 0 – 2.5 m have a bistable switch Figure 5 item 2 for the emergency
opening mechanism item 1. This means that when the door is emergency opened using the
triangular key the switch is actuated and the lift is deactivated. The lift must be reset from the
electrical compartment, Figure 16 item 9, each time it is emergency opened using the triangular
key. Make sure the key is turned to its end position so that the rear contact in the lock is activated.
It then gives a signal to release all locks on the lift so that the safety circuit makes. The safety
circuit must be made in order for the lift to be reset, see Figure 16 item 9.

13
Fig. 5000_7000_Op_15.wmf
Figure 5 Emergency opening mechanism for opening the lift door
Item
Description Item Description
1 Emergency opening mechanism 2 Bistable switch
Table 5
Emergency opening from the outside
Carry out fault finding in accordance with section 4 and then manual lowering or raising according
to section 2.2.2.
Refer to Risk Assessment No. Cibes Lift/A5000/06.
Emergency release the door according to the following:
1. Switch off the power in accordance with section 1.3.
2. Remove the plastic plug located above the door leaf, see Figure 6 item 1. Place the special
triangular tool, Figure 1 item 2 supplied on delivery, in the hole. Turn to the left or right
(depending on how the door is hung) to lift the latch bolt and the door can then be opened.
Be alert to the risks if the platform is not level with the landing when the door is opened in
an emergency.
3. The emergency opening plug on the plate and half front is positioned to the right
respective left of the door leaf. I.e. the same side as the stop side.
1
2

14
Figure 6 Emergency opening of the lift door
Item Description
1 Plug, emergency opening
Table 6
Emergency opening from inside the shaft enclosure
Do not enter the lift shaft without extending the pit prop.
Refer to Risk Assessment No. Cibes Lift/A5000/06.
1

15
Emergency handle
Should the lift door shut without the pit prop being actuated, the emergency handle, see Figure 7
can be used to open the door. The emergency handle is located on the floor in the lift shaft and is
connected to the latch bolt on the front. Note! Wire for the emergency handle is rest manually.
NOTE!
That the safety support must always be in extended position when working and servicing
underneath the platform.
Refer to Risk Assessment No. Cibes Lift/A5000/06.
Fig. 5000_Op_04.wmf
Figure 7 Emergency handle
3 Design and configuration
3.1 Configuration
The platform lift is accessible in several variations, with up to six landings. The upper landing is
available as normal front or half front. The door openings have through entry or adjacent entry.
The most common variations are shown in Figure 8 till Figure 10.
As an option, the platform lift may be delivered with a frequency converter, 1 phase or 3 phase,
which enables the platform lift to start and stop smoothly.

16
1) 3)
4) 5) 6)
Fig. 5000_Op_05.wmf
2)
Figure 8 Two landings
Item Description Item Description
1 Upper landing gate, through
entry 4 Single entry
2 Through entry 5 Half front, adjacent entry
3 Half front 6 Adjacent entry
Table 7

17
4)3)
2)
1)
Fig. 5000_Op_06.wmf
Figure 9 Three landings
Item Description Item Description
1 Through entry 3 Adjacent, through entry
2 Through entry, 3 floor
passage 4 Adjacent entry, 3 floor
Table 8

18
1) 2)
Fig. 5000_Op_07.wmf
Figure 10 Up to six landings
Item Description
1 1100 mm high gate, upper landing
2 Single entry, 3 landings
Table 9

19
3.2 Platform lift shaft and shaft walls
The shaft is constructed from modular panels, which can be supplied as standard steel panels or
toughened laminated glass. The steel panels offer sound resistance as they are made from steel
faced, cellular plastic. The “tongue and groove” edges ensure a totally smooth surface on the
inside and outside of the shaft enclosure.
1) 2)
4)
3)
Fig. 5000_Op_08.wmf
5)
6)
Figure 11 Shaft with glazed walls
Item Description Item Description
1 Long side, A 4 Standard panel, short side and long side
2 Short side, A 5 Aluminium profiles on shaft wall panels
3 Glazed panel, short side and
long side 6 Aluminium profiles on shield wall
panels
Table 10

20
3.2.1 Shield wall dismounting and mounting
NOTE!
When removing the whole shield wall you should always start from the top to minimise the risk of
a panel sliding down and causing damage.
You must use the shield wall opener in order to dismantle the shield wall, this is supplied with
each lift see Figure 1 item 3.
Place the shield wall opener as shown in Figure 12, and press on the handle until the snap on
profile releases its grip on the shield wall profile. The rest of the snap on profile can then easily be
loosened by hand. Remove the snap on profiles on both sides of the shield wall panel.
Note!
When dismantling the lowest shield wall cassette, the prop must always be folded out as set out in
section 1.3.1. Also unscrew the screws fitted in the cassette.
When mounting, replace the shield wall panels, set the snap on profile in the groove, and press
along the whole of the snap on profile so that a clicking sound can be heard from the profile.
Always check that the snap on the profile is gripping properly after installation.
Check when servicing that the panel positioned 900 mm from the floor is secured to the shield wall
panel by two screws, positioned 60 mm in from the edge.
When the lift has a travel height greater than 6 metres the middle shield wall panel must also be
screwed into position.
Cross Refer to Risk Assessment No. Cibes Lift/A5000/06.
Push
Figure 12 Dismantling of the shield wall
60 mm
This manual suits for next models
2
Table of contents