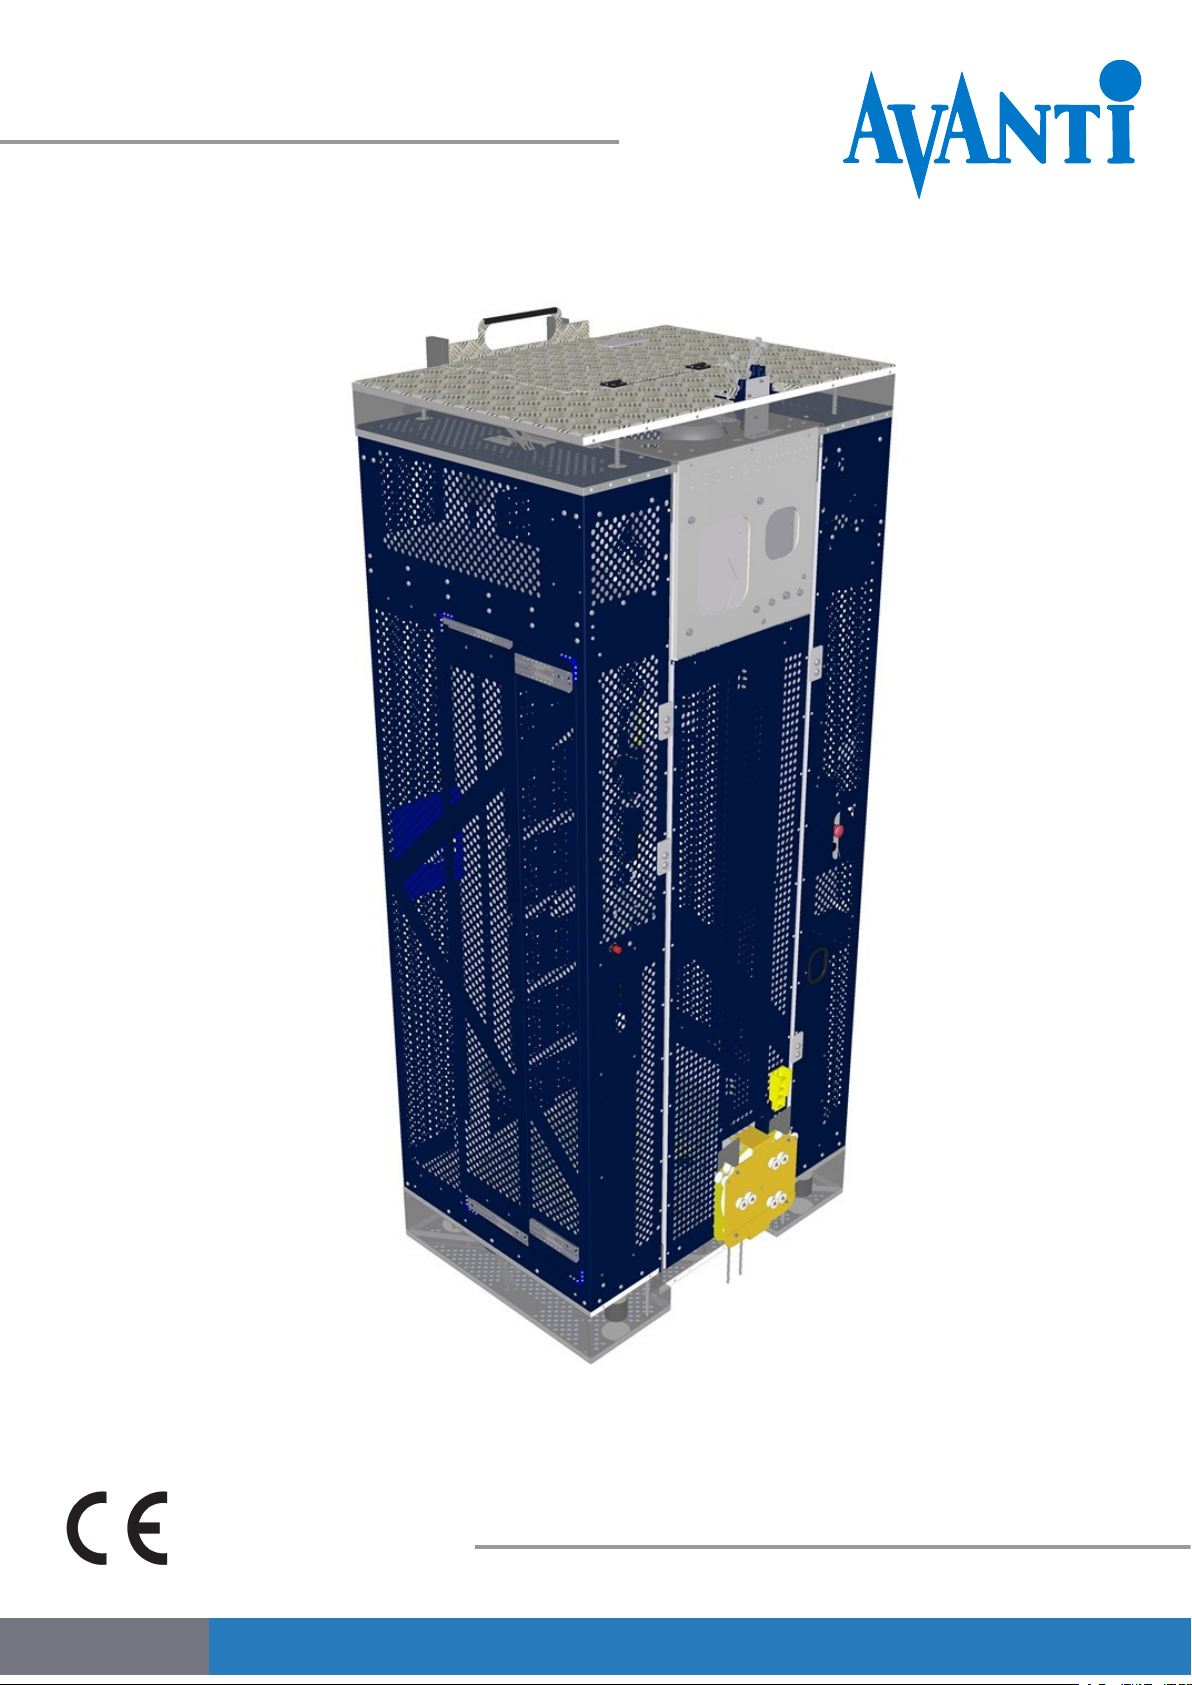
Avanti OCTOPUS XL120 User manual

AVANTI SERVICE LIFT
Model: OCTOPUS XL120 Service Lift
User manual
Original instructions
AT00015389
English (EN)
User Manual – Service Lift Model OCTOPUS XL120
3rd Edition: July 2019 — Revision 1: 30/07/2019


AVANTI SERVICE LIFT
Contact
Limited warranty
Avanti Wind Systems Technology, S.L. guarantees that commencing from the date
of shipment to the Customer and continuing for a period of the longer of 365 days
thereafter, or the period set forth in the standard Avanti warranty, the Product1)
described in this Manual will be free from defects in material and workmanship
under normal use and service when installed and operated in accordance with the
provisions of this Manual.
This warranty is made only to the original user of the Product. The sole and ex-
clusive remedy and the entire liability of Avanti under this limited warranty, shall
be, at the option of Avanti, a replacement of the Product (including incidental and
freight charges paid by the Customer) with a similar new or reconditioned Product
of equivalent value, or a refund of the purchase price if the Product is returned to
Avanti, freight and insurance prepaid. The obligations of Avanti are expressly
conditioned upon return of the Product in strict accordance with the return pro-
cedures of Avanti.
This warranty does not apply if the Product (i) has been altered without the au-
thorization of Avanti or its authorized representative; (ii) has not been installed,
operated, repaired, or maintained in accordance with this Manual or other in-
structions from Avanti; (iii) has been subjected to abuse, neglect, casualty, or
negligence; (iv) has been furnished by Avanti to Customer without charge; or (v)
has been sold on an "AS-IS" basis. Except as specifically set forth in this Limited
Warranty.
ALL EXPRESS OR IMPLIED CONDITIONS, REPRESENTATIONS AND WARRAN-
TIES, INCLUDING, BUT NOT LIMITED TO, ANY IMPLIED WARRANTY OR CON-
DITION OF MERCHANTABILITY, FITNESS FOR A PARTICULAR PURPOSE,
NON-INFRINGEMENT, SATISFACTORY QUALITY, COURSE OF DEALING, LAW,
USAGE OR TRADE PRACTICE ARE HEREBY EXCLUDED TO THE MAXIMUM
EXTENT PERMITTED BY APPLICABLE LAW AND ARE EXPRESSLY DIS-
CLAIMED BY AVANTI. IF, PURSUANT TO ANY APPLICABLE LAW, TO THE EX-
TENT AN IMPLIED WARRANTY CANNOT BE EXCLUDED AS PROVIDED IN THIS
LIMITED WARRANTY, ANY IMPLIED WARRANTY IS LIMITED IN TIME TO THE
SAME DURATION AS THE EXPRESS WARRANTY PERIOD SET FORTH ABOVE.
BECAUSE SOME STATES DO NOT PERMIT LIMITATIONS ON THE DURATION
OF IMPLIED WARRANTIES. THIS MAY NOT APPLY TO A GIVEN CUSTOMER.
THIS LIMITED WARRANTY GIVES CUSTOMER SPECIFIC LEGAL RIGHTS, AND
CUSTOMER MAY HAVE OTHER LEGAL RIGHTS UNDER APPLICABLE LAWS.
This disclaimer shall apply even if the express warranty fails of its essential pur-
pose. In any cases of dispute the English original shall be taken as authoritative.
1)Avanti service lift ("Product")
Avanti Wind Systems Technology, S.L.
Calle Ángeles (Los), Num. 88
Pol. Industrial Centrovía
50198 Muela (La) - (Zaragoza) - Spain
P: +34 976 149524
F: +34 976 149508
www.avanti-online.com

Contents
i
1 Introduction ................................................................................3
1.1 Observations ...........................................................................3
1.2 Symbols .................................................................................3
1.3 Cautions ................................................................................3
1.4 Terms and definitions ..................................................................4
2General information ........................................................................5
2.1 Purpose .................................................................................5
2.2 Scope ...................................................................................5
2.3 Exclusions ..............................................................................5
2.4 Technical especifications ..............................................................6
2.4.1 General specifications ............................................................6
2.4.2 Traction system ...................................................................7
2.4.3 Fall arrest device ..................................................................7
2.4.4 Traction, safety and guiding wire ropes .......................................... 7
2.5 Dimensions .............................................................................8
2.5.1 Octopus XL120 ...................................................... .............8
3Description .................................................................................9
3.1 Service lift overview ....................................................................9
3.1.1 Octopus XL120............................................................ ....... 9
3.2 Cabin ..................................................................................10
3.2.1 Service Lift Doors ................................................................10
3.2.2 Wire inspection cover ........................................................... 10
3.2.3 Interior light ...................................................................... 11
3.2.4 Anchor points .................................................................... 11
3.3 Traction system ....................................................................... 11
3.3.1 Traction hoist M608 ............................................................. 11
3.4 Fall arrest device ......................................................................11
3.4.1 ASL608 Fall arrest device ....................................................... 11
3.5 Controls ............................................................................... 12
3.5.1 Control boxes ................................................................... 12
3.5.2 Platform control boxes .......................................................... 13
3.6 Safety devices ......................................................................... 15
3.6.1 Top obstruction device .......................................................... 15
3.6.2 Emergency top limit switch ...................................................... 15
3.6.3 Bottom obstruction device ...................................................... 15
3.6.5 Warning light .............................. ..................................... 16
3.6.6 Acoustic buzzer ................................................................ 16
3.7 Manual descent system .............................................................. 16
3.8 Guiding system ... ..................................................................... 16
3.2.5 Internal emergency ladder ....................................................... 11
3.2.6 Fasten kit ....... .. .. .. .. ... .. .. .. ... .. .. .. ... .. ... .. .. .. ... .. .. .. .. ... .. . 11
3.5.3 Rescue pendant control .. . .. . . .. . . .. . . .. . . .. . . .. . . .. . . .. . . .. . . .. . . . . 14
3.6.4 Overload detection device ...................................................... 15
3.8.1 Guiding ladder .. ...... ................... ............ ............. ..... ... .... 16

ii
3.11 Information signs and documents .................................................. 17
4 Daily inspection and instructions for use ................................................ 18
4.1 Daily inspection ....................................................................... 18
4.1.1 Overall ........................................................................... 18
4.1.2 Control and safety devices ..... ................................................. 18
4.2 Prohibited uses ....................................................................... 20
4.3 Use of service lift ..................................................................... 20
4.3.1 Entry and exit .................................................................... 20
4.3.5 Operation from inside the cabin (manual) ........................................ 22
4.3.6 Operation from outside the cabin (automatic send configuration) ............... 22
4.3.8 Overload detection device ....................................................... 23
4.3.10 Fall arrest device .............................................................. 24
4.3.9 Manual descent ... .... .......................................................... 24
4.5 Troubleshooting ...................................................................... 26
4.6 Out of service ......................................................................... 29
Appendix: User log sheet .................................... ....... .. ..... ....................... 30
Appendix: Stomp-test Instructions ............................................................... 34
4.4 After use instructions. ................................................................ 25
3.10 Platform fences ...................................................................... 16
3.10.1 Fence door interlock system .................................................. 16
3.9 Cable management ................................................................... 16
3.9.1 Travelling cable .................................................................. 16
4.3.2 Full sliding door ....... .......................................................... 20
4.3.3 Top/Bottom hatches... .......................................................... 21
4.3.4 Stop/Emergency stop.. .......................................................... 21
4.3.7 Operation from platforms (Call or Send and Call function) . . . . . .. . . .. . .. . . .. 23
Changelog ......................... ................... ... ........ .............. .................... 35

1 Introduction
1.1 Observations
This lift must only be used by trained people.
Additional copies are available from the manufacturer upon
request.
This manual must always be available to the personnel
responsible for the installation, maintenance and operation
of the service lift.
This manual, including, but not limited to, measurements,
procedures, components, descriptions, instructions,
recommendations and requirements, is subject to change
without prior notice. Please see the manuals section in the
Avanti Website for the latest revisions of the manuals.
Any additional cost relate to or arising from any changes in
the manuals does not entitle the customer to any form of
compensation or other legal remedies.
NOTICE
The pictures and diagrams in this manual may not
reflect the exact appearance, colors or layout of the
product. This has no impact on its functionality or
safety.
1.2 Symbols
DANGER
Immediate or possibly imminent danger. Risk of injury
if not observed: Death or severe injury.
WARNING
Potentially hazardous situation. Risk of injury if not
observed: Minor injury or material damage.
CAUTION
Hazardous situation which, if not avoided, could result
in minor or moderate injury.
NOTICE
Useful tips for optimum working procedure.
Possible injury if not observed: None.
1.3 Cautions
Personnel must be of legal age. Personnel must be
familiar with the relevant accident prevention instructions
and must have received appropriate occupational heath
and safety training.
The service lift must not be used by persons who are
under the influence of alcohol or drugs and who may
jeopardize working safety.
Personnel must wear PPE (safety helmet, full body
harness, shock absorber, lanyard and slider) at all times
and carry 2 way communication systems depending on
local regulation.
The service lift is designed for a useful life of 20 years with
an approximate use frequency of 12.5 h/year (250 h in
total).
Installation and maintenance of the service lift must only
be performed by certified technicians. The service lift
must be inspected by a certified technician before its first
use.
The service lift must be inspected at least once a year by
a certified technician. In case of high use frequency or
severe use conditions, more frequent inspections are
required.
If more than one person is entrusted with installation,
inspection or maintenance tasks, the employer must
appoint a supervisor in charge of the operation.
Use and daily inspection of the service lift must only be
performed by persons who have received the relevant
training associated with the use and daily inspection of
the Avanti service lift and who are in possession of a valid
(not expired) certificate for the task.
If any damage or faults are found during operation, or if
circumstances arise which may jeopardize safety:
interrupt the work in progress immediately and notify the
supervisor or employer.
The service lift must not be used in the event of a fire in the
tower.
The service lift must only be used when the turbine is not
generating power.
All wind farm regulations must be followed. The service lift
must not be used during severe weather, including wind
speeds over 25 m/s (55.5 mph).
If any supporting parts are repaired or replaced, the
operational safety of the system must be tested and
verified by a certified technician.
All test / repairs of electrical installations must only
be performed by a certified technician.
All repairs to the traction, braking and supporting systems
may only be performed by a certified technician.
3

Only original fault-free parts must be used. Use of
non-original parts renders the manufacturer’s warranty void
and invalidates any type of approval. No
modification, extension or reconstruction of the service
lift is allowed without the manufacturer’s prior written
consent. No warranty is provided against damage
resulting from reconstruction or modification of
equipment or use of non-original parts that are not
approved by the manufacturer.
In case self-locking nuts are used, these nuts must not be
used once it has become possible to loosen by hand and
in no case should they be reused, but must be replaced.
CAUTION
Avoid injury — follow all instructions.
NOTICE
The owner must verify the need for third-party service
lift inspections with the local authority and comply with
specified standards.
1.4 Terms and definitions
Terms Definitions
Certified
technician
Person who has gone through the relevant
training associated with the scheduled task
from Avanti or from a certified trainer and is in
possession of a valid (non expired) certificate
for the task.
User
Person who has gone through the relevant
training associated with the Avanti service lift
use and daily inspection and is in possession
of a valid (non expired) certificate for the task.
(Also manual
no-powerdescent)
Action performed to descend the lift at a
controlled speed without power supply by
manually opening the hoist electromagnetic
brake.
4
Manual descent

2 General information
2.1 Purpose
The purpose of the service lift is to transport persons, their
tools and equipment to the most convenient height for
performing work in the wind turbine (WTG).
Its use is limited to authorized users. Access to the WTG
and consequently to the service lift is controlled and
forbidden to the public.
The service lift is used primarily to transport technicians,
their tools and spare parts from the bottom platform (or
lowest accessible point) to the top platform (or highest
accessible point).
The service lift is also used to access intermediate
platforms for the inspection and maintenance of WTG
connecting bolts and other equipment.
2.2 Scope
The product details are described throughout this manual.
The product consists of:
• A service lift, which is formed by:
– A cabin
– A traction system
– A fall arrest device
– Guiding system.
– Control, safety and power systems (including an
interlock system on platform fence doors).
– A rescue pendant control (only mandatory if
rescue route of service lift can be somehow
blocked and in case of an external call control
box is not installed at the bottom platform).
NOTICE
This manual contains instructions for one version of the
Octopus lift:
Octopus XL120.
NOTICE
An EC type-examination by a Notified Body
according to the Machinery Directive 2006/42/EC was
performed.
2.3 Exclusions
The service lift must not be used outdoor or in potentially
explosive atmospheres. The service lift is not designed to
carry a person on the top.
Unless otherwise agreed with Avanti, the WTG
manufacturer is responsible for integrating the service lift
and ensuring compliance with the essential health and
safety requirements as stated in the 2006/42/EC
Machinery Directive and the applicable harmonized
standards following Avanti recommendations.
This requires the supply of components, including but not
limited to:
• Ladder system.
• Brackets for ladder sections.
• Platform fences with doors.
• Power supply protection.
5

2.4 Technical specifications
2.4.1 General specifications
The WTG manufacturer must also provide
any additional relevant warnings, instructions and / or
training specific to the integration of the service lift
required for its safe and correct installation.
Service lift OCTOPUS XL120
Main door type Full sliding door1)
Service lift speed
18 m/min ± 10 % (50 Hz)
21 m/min ± 10 % (60 Hz)
Rated load 300 Kg
Lift weight (max.) 242 kg. (one SD conf.) / 250 kg. (two SD conf.)
Max. no. of persons 3 persons
Max. traveling height 160 m
Max. noise level 80 dB (A)
Power supply type 400V (50/60Hz) 3 Phase + N + PE
690V (50/60Hz) 3 Phase + PE
(1) Optionally, depending on WTG configuration,
cabin could feature 2 full sliding doors (one on
the left, one on the right).
Operating temperature
-15 ºC - +60 ºC
Survival temperature
-25 ºC - +80 ºC
A low temperature kit is also available.
Operational temperature for low temperature:
-25 ºC - +40 ºC
NOTICE
Depending on national regulations, it may be
necessary for a third party to approve the final
installation.
NOTICE
The tower manufacturer’s risk assessment must
include a service lift integration study.
6
Guiding system Aluminum ladder
Main door interlock system Guard locking

2.4.2 Traction system
Service lift Hoist Lifting
capacity
Wire rope
speed Power Rated
current
Traction wire
rope approx.
Unit weight
Version Traction system Kg (lbs.) m/min kW A mm Kg
Octopus XL120 600 (1320) 18 24.48.4 55
Octopus XL120 600 (1320) 18 22.68.4 55
Octopus XL120 600 (1320) 21 2.4 5.38.4 55
Octopus XL120 600 (1320) 21 2.4 3.18.4 55
M608 /400V 50Hz
M608 / 690V 50Hz
M608 / 400V 60Hz
M608 / 690V 60Hz
2.4.3 Fall arrest device
Service lift Fall arrest device Lifting capacity Triggering speed Ø Safety wire Approx. weight
Version Type Kg (lbs) m/min (ft/min) mm Kg (lbs)
Octopus XL120 ASL 608 600 (1320) 40 (131) 8.4 7 (15.4)
2.4.4 Traction and safety wires ropes
Service lift Wire rope type Wire rope
diameter
Surface
treatment Mark/feature Break
resistance Fastening
Octopus XL120 8.4 mm, 5x19 HDG no 59 kN 2 t shackleM608 / ASL 608
7
Ø
Figure 1 : Traction system Figure 2 : Fall arrest device

2.5 Dimensions
2.5.1 Octopus XL120
Figure 3: Octopus XL120 dimensions
970
1200
2812
2635
8

3.1 Service lift overview
3.1.1 Octopus XL120
Figure 4: Octopus XL120 components
Octopus XL120 components
1
211
3
4
5
Traction system
Fall arrest device
Cabin light
Anchor points (x3)
Wire inspection cover
Main/User control box
Bottom obstruction device
Guide ladder
Guiding rollers
10 Hour counter
Full sliding door (x2)
External controls
Top obstruction device
Safety wire rope
Traction wire rope
Travelling cable pulley
Additional anchor point (bottom hatches use)
Internal emergency ladder
6
7
8
9
13
12
15
14
17
16
3 Description
9
5
1
2
3
4
6
7
8
9
9
10
11
12
13
15 14
16
17
18
18
DANGER
The lower anchor point must only be used for
evacuation/rescue operation.
WARNING
The internal emergency ladder cannot be used as
anchor point for user’s PPE’s

10
3.2 Cabin
3.2.1 Service lift doors
3.2.1.1 Main service lift door
Two configurations are available for the main ingress
and egress of the service lift with the following door
types:
– Full sliding door (on the right or on the left side).
– Optionally two full sliding doors (on the right and on
the left side).
It features a guard locking system that:
• Prevents service lift to travel if the door is open. This
opening condition is monitored by the guard locking
switch (S19.3).
• Permits door to be opened only when service lift is
levelled with a platform. This levelling condition is
monitored by the platform level switch (S18) which is
triggered by the platform level activation plates.
Optionally, this levelling condition could be monitored
by a photoelectric sensor which is activated by
reflective plates or tapes located in each platform level.
Figure 5: Platform level switch
It is possible to manually release guard locking system
in order to open main door between platforms for
maintenance tasks or installation of WTG parts.
External manual release of
guard locking
Internal manual release of
guard locking
Figure 6: Manual release of guard locking system
Related to the optional configuration of 2 sliding doors,
there would be 2 possible scenarios:
–A) The first door (D1) only could be opened
when Platform level detection switch (S18) +
Bottom or Top obstruction device switch (S2 or S1)
are activated, while the second sliding door (D2)
would be locked. The second sliding door (D2)
only could be opened when Platform level
detection switch (S18) is activated, while the first
sliding door (D1) would be locked.
–B) The cabin features 2 platform level
detection switches (S18.1 and S18.2). Depending
on the platform, the platform level activation plate is
located on the right side or on the left side, so only
one of the platform level detection switches
(S18.1 or S18.2) is activated, unlocking just the
related door (D1 or D2).
WARNING
$URINGMAINTENANCETASKSWITHTHECABLEINSPECTION
COVEROPENTHEEMERGENCYSTOPOFTHEUSERCONTROL
BOXMUSTALWAYSBEACTIVATED
3.2.1.2 Bottom hatches
The service lift has two bottom hatches, one on the
floor of the cabin and the other on the bottom full
cover obstruction device. These hatches allow egress
and ingress from below.
The bottom hatches can be opened from both
sides, the bottom cabin hatch opens inwards,
and the bottom obstruction device hatch opens
outwards. Each of them has a safety switch that
interrupts control when hatch is opened.
3.2.1.3 Top hatch
The top hatch is mounted over the top full cover
obstruction device and can be opened from both sides,
thus allowing egress to and ingress from above.
Top hatch opens outwards. It has a safety switch that
interrupts control when hatch is opened.
3.2.2 Wire inspection cover
Wire inspection cover allows safe and fast inspection
of traction and safety wire ropes from inside the cabin
while travelling.
The wire inspection cover must only be used for
inspections and maintenance tasks.

3.2.3 Interior light
3.2.3.1 Service light
The service lift is optionaly equipped with a light
inside the cabin. When service lift is connected to
power supply, this light illuminates at all times.
3.2.3.2 Service light with emergency function
Optionaly the internal light is battery packed in order
to illuminate the inside of the cabin in case of a power
failure. When fully charged, it will last at least for 90
minutes.
3.2.4 Anchor points
The service lift features three anchor points inside the
cabin.
An additional anchor point is available to be used when
the user egress or ingress through bottom hatches.
Figure 7: Anchor points
DANGER
The lower anchor point must only be used for
evacuation/rescue operation.
Fasten kit M16 nut
3.3 Traction system
3.3.1 Traction hoist M608
Avanti M608 traction hoist is installed on the top of the
cabin. It is an electrical powered hoistthat powers the
service lift up and down along a traction wire
rope. It consists of a motor a gearbox and a traction
system.
3.3.1.1 Electromagnetic motor brake
The M608 traction hoist is equipped with an
electromagnetic spring-loaded brake that engages
automatically when releasing the
UP
or
DOWN
control buttons, or following a power failure. Manual
release of this electromagnetic motor brake is allowed in
the M608 traction hoist. Once the electromagnetic
motor brake is released, the motor speed is controlled by a
centrifugal brake installed between the motor shaft
and the gearbox.
3.3.1.2 Overload detection device
An overload detection device is built into the
traction hoist. Incase of an overload, it will prevent the
upward travel of the service lift (by
interrupting control) and a buzzer will sound,
until overload condition is eliminated.
3.4 Fall arrest device
3.4.1 ASL608 Fall arrest device
The service lift is equipped with the ASL608 fall arrest
device which will be triggered in case of an overspeed
condition.
The speed of the safety wire rope passing through the
device is continuously monitored, and the jaws
automatically close in the event of sudden excessive
speed.
This device protects the service lift against traction
wire rope breakages or traction system failures.
The fall arrest device can also be engaged or
disengaged manually by acting directly on the fall
arrest device levers.
3.4.2 Shock absorber
The fall arrest device is equipped with a shock
absorber system.
Its function is to relieve the impact force on the cabin
by means of the shock absorber displacement in case
of the fall arrest device activation.
3.2.5 Internal emergency ladder
The service lift features an internal emergency ladder that
is part of the main frame of the service lift.
In case of emergency, this internal ladder allows users to
reach the top hatch and accesing to ladder and ladder
rail.
NOTICE
Optional feature. 11
3.2.6 Fasten kit
The service lift features as option a special tool, called
Fasten kit, for mechanically blocking the lift in order to
perform installation/maintenance tasks below the
suspended cabin. This kit is located inside the cabin (see
Figure 8). It consists in two M16 screwed rods, that must
be inserted through the holes of the top and bottom rollers
assembly and along rungs of the guiding ladder, and finally
blocked each with a M16 nut.
WARNING
The internal emergency ladder cannot be used as
anchor point for user’s PPE’s
M16 screwed rod
Figure 8: Fasten kit

5
6
7
1
2
3
4
Automatic send configuration
1
2
3
4
5
6
7
8
UP button (internal)
DOWN button (internal)
Ready light (green)
ASL light (red)
Platform indicator light (green)
EMERGENCY STOP button (internal)
Hour counter
Shunt key for bottom obstruction switch
Trapped key switch1)
UP button (external)
EMERGENCY STOP button (external)
DOWN button (external)
Delay and overload buzzer
Manual descent buzzer
3.5.1.1.1b Send/call configuration
Figure 10: Main control box, send / call
configuration
Send/call configuration
12
10
11
12
13
14
9
10
11
12
13
1
2
3
4
5
6
7
8
UP button (internal)
DOWN button (internal)
Ready light (green)
ASL light (red)
Platform indicator light (green)
EMERGENCY STOP button (internal)
Hour counter
Shunt key for bottom obstruction switch
Trapped key switch1)
UP button (external)
EMERGENCY STOP button (external)
DOWN button (external)
Delay and overload buzzer
Manual descent buzzer
9
10
11
12
13
8
8
3.5 Controls
3.5.1 Control boxes
3.5.1.1 Cabin control boxes
3.5.1.1.1 Main control box
3.5.1.1.1a Automatic send configuration
Internal controls are hold to run.
9
14 14
NOTICE
1)In case of installing the optional 2 sliding doors configuration and the trapped key system in fences,
there is an additional trapped key switch with a second trapped key attached to the cabin with a wire
rope or chain.
5
6
7
1
2
3
4
10
11
12
13
14
9
Figure 9: Main control box, automatic
send configuration

5
6
1
2
3
4
2
1
Figure 11: Bottom platform control box,
automatic send configuration with guard locking
Bottom platform control box
1 Main switch
2 Ready light (green)
Figure 12: Bottom platform control box,
automatic send configuration for fences with
trapped key or electrical switch monitoring
system
Bottom platform control box
1 Main switch
13
3.5.2 Platform control boxes
3.5.2.1 Bottom platform control box
There is a control box installed in the bottom platform.
This control box has a main switch. Turn the switch to the
OFF position to disconnect the power to the service
lift. The main switch must be OFF when the lift is not in
use, when leaving the wind turbine and while the wind
turbine is operating. The switch must be OFF before the
generator is turned on.
3.5.2.1.1 Automatic send configuration
3.5.2.1.1a Versions with guard locking
3.5.2.1.1b Versions with trapped key or electrical
switch monitoring system
1
3.5.2.1.2 Send / call configuration
1
6
2
3
4
5
Figure 13: Bottom platform control box, send/
call configuration
Bottom platform control box
1
2
3
4
5
6
Main switch
UP button
Ready light (green)
DOWN button
Platform indicator light (green)
EMERGENCY STOP button
3.5.2.2 Top platform control box
3.5.2.2.1 Send / call configuration
1
2
3
4
5
Figure 14: Top platform control box, send/call
configuration
Top platform control box
1
2
3
4
5
UP button
Ready light (green)
DOWN button
Platform indicator light (green)
EMERGENCY STOP button
All the controls are hold to run.
3.5.1.2 User control box
See section 3.5.1.1.1 Main control box. The User
control box is integrated into the Main control box.

14
3.5.2.3 Intermediate platform control boxes
3.5.2.3.1 Send / call configuration
3.5.2.3.1a Option 1
Figure 15: Intermediate platform control box,
send/call configuration
Top platform control box
1
2
3
4
5
UP button
Ready light (green)
DOWN button
Platform indicator light (green)
EMERGENCY STOP button
3.5.2.3.1b Option 2
There is also an option in the send/call
configuration in which control boxes are mounted
on the top and bottom platforms, and on the
intermediate platforms the boxes only have an
EMERGENCY STOP button.
Figure 16: Emergency Stop box
3.5.3 Rescue pendant control
Rescue pendant control is only mandatory if rescue
route of service lift can be somehow blocked and in
case of an external call control box is not installed at
the bottom platform. A blocked rescue route is an
event where:
• A person is unconscious inside the service lift,
blocking the bottom hatch,
• the rescuer is below service lift, and the service lift is
stopped halfway through a platform hole, blocking
rescue route since platform has no extra hatch.
CAUTION
There shall be one rescue pendant control per WTG;
and it shall be stored in the WTG bottom platform. A
clearly visible sign shall indicate its exact location.
Figure 17: Rescue pendant control
It features three buttons: UP, DOWN and emergency
stop button. When necessary, pendant control is
plugged to cabin bottom socket. It has a 4 m long
cable that permits service lift to be powered up/down
that same distance. When plugged, pendant control
does not override any safety switch. If any of them is
triggered, no running will be possible; including the
obstruction device switches. Therefore, there is no
risk of moving service lift hitting rescuer. Pendant
control overrides cabin control box, and service
control box if installed.
NOTICE
See the Rescue guide placed next to the Rescue
pendant control on the bottom platform fence.
All the controls are hold to run.
1
2
3
4
5

15
3.6 Safety devices
3.6.1 Top obstruction device
The top obstruction device is installed on the top of the
service lift.
The device fully covers top cabin face. The cover is
provided with a hatch in case of evacuation.
When top obstruction device is activated, service lift will
stop ascent as a consequence of one of the top
obstruction device switches triggered, this happens
when the lift encounters an obstacle. Descent will be
possible, for instance to remove the obstacle. The service
lift features three top obstruction device switches in order
to improve its sensitivity.
Optionally, top obstruction device could feature yellow
flexible side covers.
12 2
2
Figure 18: Top obstruction device
Top obstruction device
1
2
Top obstruction device
Top obstruction device switches
3.6.2 Emergency top limit switch
The top limit switch and the emergency top limit switch
are located at the top of the cabin, and triggered by a
plate attached to the traction and safety wire ropes.
1
Figure 19: Top limit and Emergency top limit switches
Top limit and Emergency top limit switches
1Top limit and Emergency top limit switches
3.6.3 Bottom obstruction device
The bottom full plate obstruction device is installed on
the bottom of the service lift.
The device fully covers bottom cabin face. The cover is
provided with a hatch in case of evacuation.
When bottom obstruction device is activated, service lift
will stop descent as a consequence of one of the bottom
obstruction device switches being triggered, this
happens when the lift encounters an obstacle or touches
the ground. Ascent will be possible, for instance, to
remove the obstacle. The service lift features three
bottom obstruction device switches in order to improve
its sensitivity.
In order to put the service lift on the ground, the bottom
obstruction device functionality can be bypassed with the
bottom obstruction override switch in the user control
box. To do so, turn the bottom obstruction override
switch while pressing the DOWN button.
Optionally, bottom obstruction device could feature
yellow flexible side covers.
WARNING
2ELEASE THE $/7. BUTTON AS SOON AS THE RUBBER
BUMPERS HIT THE FLOOR /THERWISE THE LIFT OR THE
INSTALLATIONMAYGETDAMAGED
Bottom obstruction device
1
2
Bottom obstruction device
Bottom obstruction device switches
12 2 2
Figure 20: Bottom obstruction device
3.6.4 Overload detection device
An overload detection device is built into the traction
hoist. In case of an overload, it will prevent up the
movement of the service lift (by interrupting control) and
a buzzer will sound until overload condition is eliminated.
The overload detection device adjustment procedure is
explained in the Installation and Maintenance Manual.

16
3.6.5 Warning light
An optional set of warning lights is mounted on the top and
at the base of the lift. The flashes warn that the lift is
moving.
3.6.6 Acoustic buzzer
An audible signal is installed with a warning function.
If the external buttons of the user control box or platform
control boxes are used, the operation will be delayed and
an acoustic warning emitted. This way, the persons next to
or inside the cabin are alerted of an inminent movement of
the service lift and can act accordingly. This same acoustic
buzzer sounds while the cabin is overloaded.
Manual descent buzzer sounds during all the descent when
user performs a manual descent.
3.7 Manual descent system
The service lift has a manual descent system that
can be used in the event of a power failure
emergency situation.
(See section 4.3.9 in Use of
service lift)
3.8 Guiding system
3.8.1 Guiding ladder
The service lift is guided by ladder. The guiding system
function is to safely guide the service lift along the ladder
stiles.
The guiding system consists of the guiding ladder and 4 sets
of 2 guiding rollers each. The arrangement of the 4 sets is
shown in the following figure.
Each roller is secured to the cabin supporting profiles and
the surface of the rollers is made of a material that ensures
smoothness though providing necessary endurance.
Figure 21: Guiding system
Guiding system
1
2
Guiding ladder
Top guiding rollers
Bottom guiding rollers
3
1
2
3
3.9 Cable management
3.9.1 Travelling cable
Travelling cable is connected from power supply socket
over mid tower´s height platform to service lift socket and it
features a cable stocking on each end. A travelling cable
pulley is suspended on the cable and is guided along the
traction and safety wire ropes.
3.10 Platform fences
The platform holes shall be protected with platform fences.
These platform fences consist of structures of different
geometries depending on the platforms where they are
installed.
The platform fences shall conform to EN 14122-3 and shall
be equipped with a door (sliding and/or swinging)
monitored with a trapped key system. Optionally, and apart
from the trapped key system, the platform fence doors
could feature guard locking switch system, or an electrical
switch monitoring system.
3.10.1 Fence door interlock system
3.10.1.1 Trapped-key system
The platform fence door is equipped with a trapped-key
lock that keeps the door locked while the service lift is not at
the platform. The door can be unlocked using the trapped
key in the cabin and opening the lock. The key will
remain trapped until the door is closed and locked again.
1
2
3 4
Travelling cable
1
2
Travelling cable pulley
Travelling cable
Traction wire rope
Safety wire rope
3
4
Figure 22: Travelling cable

17
2
3
Figure 23: Trapped-key system
Trapped-key system
1 Key
2 Safety lock
3 Actuator
1
3.10.1.2 Guard locking system
The platform fence door could be equipped with an
interlock system that keeps the door locked while the
service lift is not at the platform. The door becomes
unlocked when the service lift is at the platform with the
lift detection switch activated. From the moment the fence
door is open, power is removed so the service lift cannot
move. When the door is closed, the ready light is on.
During emergency use, for example during a power
outage, where evacuation or rescue is necessary, the door
guard locking switch can be unlocked by acting the
mechanical Door Manual Release system from outside the
fence, or from inside the fence.
This system is installed in place of the Trapped-key
system.
NOTICE
Optional function.
NOTICE
A locking system is compulsory for CE versions if
the platform fences have doors.
3.10.1.3 Electrical switch monitoring system
An optional system is the electrical switch
monitoring system. This interlocking mechanism is
comprised of a mechanical locking unit and a switch
unit. When the switch is opened, the power is removed
so the service lift cannot move. This system allows users
to evacuate to the ladder more easily, without having to
jump over the fence. In this case, the fence doors must be
self-closing doors, to avoid any user could fall from a
platform if the fence door is left open.
3.11 Information signs and documents
The following documents, signs and stickers are supplied
with the service lift and must be always available.
Verify the integrity and legibility of all illustrations and
information signs. Replace any illustrations or signs that
are missing or an illegible.
Location Documentation
Cabin
Serial number plate (including CE mark)
Manuals inside blue bag
Quick guide
Evacuation guide
Use of PPE label sign
Max. load / Nº persons label
Non standing on top label
Manual descent label
User/Main
control box
Main door guardlocking labels
Electrical hazard warning label
Wiring diagram inside blue bag
Not anchor point label
Bottom platform
fence
Rescue guide
Rescue pendant control emergency sign
Fasten kit label (if available)
Figure 24: Platform position switch
Table of contents