Cinetron CV-88W Specification sheet

CV-88W
浴の宝
PANTONE 7690C
PANTONE 186C
風速高 換氣 循環 暖氣 負離子 緊急按鈕
風速低 搖擺 涼風 乾衣 自動 感應器
接收器顯示窗口
使 用 / 安 裝 說 明 書

本產品需安裝於能承受本製品重量之地方。
安裝不良會造成噪音、共鳴,請妥善裝配。
為了不使排氣的結露水流入浴室,通往屋外的各排氣管必須保持屋外下斜。
通風口蓋之通風抵抗,是造成風量減少及噪音之主因,請適當的選擇使用。
安裝本機時,外蓋距地面不得低於 2.3 米。
不可裝設於熱水爐正上方或溫度在攝氏 40 度以上之場所。
裝置本機時,請設置入風口以促進對流。
切勿變更產品的額定使用特性。
禁止使用本說明書指定以外的方法安裝本產品。
天花板安裝開口需向下且保證產品水平安裝。
請採取適當措施以防止氣體從一般排氣管或其他燃燒燃料的設備排氣管倒流回室內。
安裝本產品主體前,必須確保已斷開產品電源。
當發生易燃氣體洩露時,禁止開啟或關閉本產品的任何功能。
本產品面板為加熱空氣的進、出口,為避免產品過熱產生危險,請不要在本產品上覆蓋衣
物等任何物品。
本產品不得直接置於電源插座下面,切勿安裝過於接近插座,防止主機電器損壞時,造成
其他電器損壞。
嚴禁利用帶有自動接通電源的程式器、計時器或任何其他裝置來使用本產品,否則會導致
損壞本產品,會有發生火災的可能。
切勿把本產品安裝在靠近窗簾和其它可燃材料的附近,以免發生危險。
安裝和使用時嚴禁拆卸主電路板,否則會導致觸電或起火。
本產品不適合有殘障、智障或精神障礙的人士,或缺乏經驗、常識者(包括兒童)使用,除非
在負責他們安全的人士的看護或指導下使用。在維護產品期間 , 兒童應該
有人進行看護,以防將產品當做玩具。3 歲以下兒童在無成人監管下需遠離。3 歲以上 8 歲
以下的兒童可以在成人的監管或者安全指導,並了解相關危害的情況下,僅可以對正確安
裝和安放的機器進行相關操作。這個年齡段的兒童不可以接電源,調節及清洗機器、維修
機器。
注意——這款產品的某些部件可能會變得非常熱並且可能會引起燃燒。有兒童及弱勢群
體在場時,需特別注意。
如果電源線損壞,為了避免危險,必須由製造商、其維修部或類似部門的專業人員更換。
安裝的時候要確保有一個全極斷開的漏電斷路器,如圖所示:
安裝使用注意事項
本體 黃/綠
配電箱
藍
棕
電源端子座 漏電
斷路器
電源線 ( 現場準備 )
接收器
接地
電源
AC 220-240V~/50Hz
01
◎
◎
◎
◎
◎
◎
◎
◎
◎
◎
◎
◎
◎
◎
◎
◎
◎
◎
◎
◎
◎
◎
配件名稱
02
活性炭過濾網
上面蓋
機體
下面蓋
濾網
1. 機 體
2. 無線遙控器
時間設定 功能區鍵
開關鍵

安裝方法
03
安裝方法
04
A.【天花板固定安裝】
安裝參考圖
排氣管
出風接頭
檢查口
自攻螺絲(4 顆)
Φ4x25 自攻螺絲(3 顆)
220mm
外蓋
5cm 以上
機體
距離牆 50cm 以上
下傾 1o~2o
天花板、
吊桿、窗
戶安裝都
使用 1、2、
3、4 螺絲
孔。
1
2
3
4
1. 安裝於天花板固定框
製作固定框。
請使用能承受機體重量(4.6)kg 的元件材料來固定周邊。
固定框請使用 30*25mm 見方之木條訂製。
框內尺寸:234*234mm 見方。
若無通往室外的排風管。則應先安裝內徑 98.4mm 的硬質排風管。
2. 安裝出風口接頭
出風口螺絲定位,先將安裝板上的螺絲位置板沿虛線剪下,按照圖示方法貼在木框上標
定螺絲孔位置。
用直徑 4*25(3 顆)的自動螺絲將出風接頭固定於天花板上的固定框。
3. 安裝機體
將機體和出風口之導槽對正出風接頭線,再將機體往上推入。
請確認機體和出風口接頭密著後,
再用附屬之自攻螺絲直徑 4*25(4
顆),確實的將機體固定住。
出風接頭
212mm
固定框
B.【吊頂天花板安裝】
將主機固定在吊桿上。(推薦使用吊桿 M6,需用戶另購)
1
2
3
4
5
1. 螺桿
2. 螺母
3. 華司
4. 機台固定孔
5. 帶帽螺母
1. 安裝排氣管
排氣管出風接頭交接處請用膠帶或填補劑密封。
排氣管傾向屋外傾斜 1 度~ 2 度。
2. 外蓋的裝配
向外推開 4 個螺絲蓋,用 4 支螺絲固定外蓋和機體。
依上述方法裝配後,請確認下列檢查要點。
外蓋的安裝是否牢固。
運轉時是否有異常噪音或震動產生。
3. 本產品安裝於天花板時,固定螺桿(M6,另購)的長度應一致,以保持水平。但是如果
螺桿裁切長度不足或天花板高度誤差等因素,而無法保持水平時,可以採用本項安裝方式,
使用 4 個調節螺母作長度調節。
下傾 1o~2o
膠帶或填補劑
塑膠
鋁管
公稱 4"
( 內徑 >100mm)
調節螺母

安裝方法
05
遙控器的安裝
06
C.【窗口式安裝】
面罩尺寸:
280mm x 280mm
窗口尺寸:
234mm x 234mm
機身厚度:160mm
* 注意窗口式必須橫置安裝
D.【掛壁式安裝】
1. 適用於沒有假天花的浴室使用。
2. 先將掛壁支架橫置穩固定在牆上,再嵌入機身的支架上。
3. 再接駁 4”(100mm)直徑排氣管到玻璃窗。
可安裝的牆身尺寸 :
280 x 280mm
機身厚度:160mm
1. 安裝在浴室鋁窗抽氣扇窗口位置,可以取代抽氣扇。
2. 將窗口框用拉釘固定在鋁窗窗框。(需用玻璃膠造好周邊放水)
3. 接駁電源線後,嵌入機身加上螺絲固定。
牆
鋁窗
防水外殼
放水外殼
面罩
鋁窗
螺絲固定孔 機身固定孔 上面蓋下面蓋
此款為無線遙控型,請安裝在適當的位置
1. 遙控器固定架放在所要安裝之位置,依箭頭處做上記號。
2. 依記號處饡孔 1/4(6mm),埋入 2 個塑膠塞。
3. 將遙控器對位嵌入遙控器固定架。
更換乾電池方法
1. 請用壹字螺絲批打開遙控器底部電池蓋。
2. 請把 2 粒乾電池放入。
當沒電時請更換新電池。
請留意正負極方向放入電池。
長時間不用,請取出電池,一般乾電池可使用約為一年。
注意
本遙控器通過防水測試,符合 IPX5 要求,可安裝在浴室的牆壁上,避免在花灑直淋處
開關
負離子
搖 擺
時間設定
換氣延停
15分鐘
風 速
開 關
模 式
自 動
循 環
涼 風
換 氣
暖 氣
乾 燥
123

安裝排風管
07
電器工程 - 電器配線
08
安裝排風管應避免以下情況
1. 太過於彎曲。
2. 彎曲位太多。
3. 排氣管彎頭距離機體太近。
4. 接頭管縮小。
1. 太過彎曲。 2. 彎曲位太多。 3. 排氣管彎頭距離
機體太近。
機體
4. 接頭管縮小。
安裝及佈線必須由合資格電力工程承辦商完成。
請依據產品銘牌指示,在額定電壓及額定頻率下使用本產品。
用戶的固定佈線中,應單獨為本產品配備獨立的空氣開關,並且空氣開關應符合觸電斷開
距離大於 3mm 的全極斷開要求。以便在出現意外時能及時切斷產品的電源。
請確保電源插座具有符合電氣規範要求的良好接地。
安裝時,固定電源線需符合當地安全法規。
金屬網底、鋼絲網底牆壁或金屬表面木造房屋等貫穿後要安裝金屬風管時,注意不可有電
器的接觸。
若電力不足,請與電力公司聯系。
於 開 啟 面 板 前,請 確 保 機 體 電 源 斷 開 。
◎
◎
◎
◎
◎
◎
◎
◎
本產品不得直接置於電源插座下面,切勿安裝過於接近插座,防止主機電器損壞時,造成
其他電器損壞。
◎
負離子
搖 擺時間設定
換氣延停
15分鐘
風 速
開 關
模 式
自 動
循 環
涼 風
換 氣
暖 氣
乾 燥
機體
無線遙控器

2. 換氣功能 VENT :
A)
按“模式 ”鍵切換到換氣功能,“Vent ”指示燈顯示,換氣模式開始運轉,默認風速為“LO
”。按“風速 Speed ”按鍵,可選擇(HI 、LO )風量。
B)定時:預設時間為 2 小時,可通過按“時間設定”上下鍵改變設定時間。可設範圍為 1 小時 -24
小時。時間會依據剩餘啟動時間顯示在雙 8LED 上。下次的啟動會依使用者的習慣,自動記憶前一
次的時間設定。
C)在此模式下設定的時間,HI 、LO 風量的改變,不影響時間的計算。
D)停止:當按“開 / 關 ”鍵或運轉完所設的時間後,LED 指示燈“Vent ”及剩餘
時間會熄滅,本機會自動停止。
A)按“模式 ”鍵切換到涼風功能,“COOL ”指示燈顯示,涼風以“HI ”模式開始運轉,
按“風速 Speed ”按鍵,可選擇(HI 、LO )風量。
B)
定時:預設時間為 4 小時,可通過按“時間設定”上下鍵改變設定時間。可設範圍為 1 小時~ 24 小時。
時間會依據剩餘時顯示在雙 8LED 上。下次的啟動會依據使用者的習慣,自動記憶前一次的時間設定。
C)在此模式下定時的時間,HI 、LO 風量的改變,不影響時間的計算。
D)停止:當按“開 / 關 ”鍵或運轉完所設定的時間後,LED 指示燈“Cool ”及剩餘時間會
熄滅,本機會自動停止。
A)啟動:按“換氣延停 Delay vent ”鍵,“Vent ”指示燈顯示。換氣延停模式開始運轉。
默認 15 分鐘後停止運轉。時間不可調節,也不顯示。
B)停止:當按“開 / 關 ”鍵或運轉完畢,本機會自動停止。
A)按“模式 ”鍵切換到自動功能,顯示板“AUTO ”指示燈顯示,自動模式開始運轉,換氣
風機以“LO ”運轉 20 秒後,根據當前房間溫度選擇運行模式(風機自動設定為 HI ):
1. 房間溫度 >24 度,以“循環 CIR ”模式運行。
2. 房間溫度 <20 度,以“暖氣 Heat ”模式運行。
3. 房間溫度在 20 ~ 24 度間,以“乾燥”Dry Hot ”模式運行。
4. 定時:預設時間為 1 小時,不可更改時間。
B)停止:當按“開 / 關 ”鍵或運轉完所設的時間後,“AUTO ”及剩餘時間會熄滅,
本機會自動停止。
使用功能
09
功能說明
10
功能
自動 自動偵測運行模式
換氣延停 15 分鐘 浴室換氣(排氣 )
負離子 負離子輸出
換氣
( 風速鍵切換高 / 低 ) 浴室換氣(排氣 )
涼風
( 風速鍵切換高 / 低 )
浴室內涼風 ( 夏天 )
衣物乾燥 / 浴室乾燥
暖氣
( 風速鍵切換高 / 低 ) 入浴暖房
乾燥
( 風速鍵切換高 / 低 )
浴室快速烘乾,
衣物乾燥
循環
( 風速鍵切換高 / 低 ) 浴室內循環
搖擺
( 上下自動 ) 出風擺片擺動方向
用途 預設 / 可設
範圍
運轉狀態
風扇 風門 PTC 加熱器
/
低速運轉
開/關
高速 / 低速
運轉
高速 / 低速
運轉
高速 / 低速
運轉
高速 / 低速
運轉
高速 / 低速
運轉
30~60度
來回擺動
/
全開
/
全開
半開
(15 度
左右)
關閉
半開
(15 度
左右)
關閉
/
/
OFF
/
OFF
OFF
ON
ON
OFF
/
1h
15 Min
/
2h (1-24h)
4h (1-24h)
2h (1-24h)
4h (1-24h)
2h (1-24h)
默認 90 度
1. 自動功能 AUTO :
4. 涼風功能 Cool :
3. 換氣延停 DELAY VENT :

7. 循環功能 CIR :
A)按“模式 ”鍵切換到乾燥功能,“DRY ”指示燈顯示,乾燥以“HI ”模式開始運轉。
按“風速 Speed ”按鍵,可選擇(HI 、LO )風量。
B)
定時:預設時間為 4 小時,可通過按”時間設定“上下鍵改變設定時間。可設範圍為 1 小時~ 24 小時。
時間會依據剩餘時間顯示在雙 8LED 上。下次的啟動會依使用者的習慣,自動記憶前一次的時間設定。
C)在此模式下定時的時間,HI 、LO 風量的改變,不影響時間的計算。
D)停止:當按“開 / 關 ”鍵或運轉完所設的時間後,LED 指示燈“DRY ”及剩餘時間
會熄滅。
功能說明
11
功能說明
12
A)按“模式 ”鍵切換到暖氣功,“HEAT ”指示燈顯示,以“LO ”模式開始運轉,按
“風速 Speed ”按鍵,可選擇(HI 、LO )風量。
B)
定時:預設時間為 2 小時,可通過按“時間設定”上下鍵改變設定時間。可設範圍為 1 小時~ 24 小時。
時間會依據剩餘時顯示在雙 8LED 上。下次的啟動會依據使用者的習慣,自動記憶前一次的時間設定。
C)在此模式下定時的時間,HI 、LO 風量的改變,不影響時間的計算。
D)
停止:當按“開 / 關 ”鍵或運轉完所設定的時間後,LED 指示燈“Heat ”及剩餘時間會熄滅。
E)當 PTC 加熱功能停止運轉之後,扇葉仍會運轉約 35 秒,以對 PTC 加熱器進行冷卻。
A)啟動:默認同循環風扇同時做 ON/OFF 運行動作,ON 狀態時,機身 LED 液晶屏幕 標示亮;
OFF 狀態時,機身 LED 液晶屏幕 標示滅。在循環風機 OFF 狀態時,擺風按鍵為無效操作,此時
擺片歸於 0 度位置。
B)啟動 2:當在循環風扇運行時,擺片默認為 90 度。
C)角度擺動:當在循環風扇運行的前提下,按下“擺風按鍵 ”,擺片由 90 度位置轉到以
45~90 度來回擺動狀態;再次按下“擺風按鍵 ”, 擺片馬上停止;再次按下“擺風按鍵 ”,
擺片轉到以 45~90 度來回擺動狀態。
D)停機:在選擇功能關閉或功能定時結束關閉時,擺片擺回 0 度位置(即擺片閉合狀態)下次的
啟動會依使用者的習慣,自動記憶前一次的角度設定。
A)啟動:ON 狀態時,主機機身接收器顯示窗口 標示亮;OFF 狀態時,主機機身接收器顯示窗
口 標示滅。在循環風機 OFF 狀態時,負離子按鍵為無效操作。
B)停止:在運行過程中,按下負離子按鍵,負離子做 OFF 動作,同時主機機身接收器顯示窗口
標示滅;再次按下按鍵,負離子做 ON 動作,同時同時主機機身接收器顯示窗口 標示亮。如此反覆。
A)觸按啟動緊急按鈕以自動模式運行,再次觸按緊急按鈕切換到換氣模式運行,再次觸按緊急按鈕
切換到待機模式。
5. 暖氣功能 HEAT : 8. 擺風功能 OSC :
9. 負離子 ION :
10. 緊急按鈕:
6. 乾燥 Dry Hot :
A)按“模式 ”鍵切換到循環功能,“CIR ”指示燈顯示,循環風以“HI ”模式開始運
轉。按“風速 Speed ”按鍵,可選擇(HI 、LO )風量。
B) 定時:預設時間為 2 小時,可通過按”時間設定“上下鍵改變設定時間。可設範圍為 1 小時~ 24
小時。時間會依據剩餘時間顯示在雙 8LED 上。下次的啟動會依使用者的習慣,自動記憶前一次的
時間設定。
C)在此模式下定時的時間,HI 、LO 風量的改變,不影響時間的計算。
D)
停止:當按“開 / 關 ”鍵或運轉完所設的時間後,LED 指示燈“CIR ”及剩餘時間會熄滅,
本機會自動停止。
第一次開機
重新開機 0度
45~90 度自由擺
緊急按鈕
STOP 關機
45~90 度自由擺
任意角度自由停
自動記憶前一次的角度設定 任意角度自由停
90 度

保養及安全事項
13
規格
維護前請務必關掉電源。
外蓋清理擦拭:
請先以柔軟之擦拭布或軟毛刷,將外蓋髒污之部分清理乾淨。
以乾淨之擦拭布在溶有中性清潔劑之溫水中,潤濕擦乾之後擦拭外蓋,再用清水潤濕之擦拭布擦
拭一遍,表面不可有清潔劑殘留。
過濾網清理:
使用一段時間(約三個月左右)應將過濾網取出,放入清水中,將污垢、毛屑洗清後,晾乾再放
回外蓋中。
運轉中請勿將手指深入外蓋內以免受傷,或遭加熱器燙傷。
機體請勿噴到水,會造成馬達故障,或加熱器漏電造成觸電傷害。
為了使用上的安全,若有以下症狀及其他異常時,為了防止事故發生,請速切斷電源並委託合格
電力工程承辦商修理或檢查。
[ 絕對不要自行修理,以免發生危險 ]
打開電源扇葉不經常運轉。
電源忽開忽關。
運轉中產生異音及不正常震動。
塑膠異味或其它嗅味發生。
◆ 保養
◆ 安全事項
現象
打開電源後不運轉
指示燈不依操作方式顯示
運轉聲音變大
無法遙控
診斷
是否停電
遙控器當機
過濾網阻塞
電池電量過低
遙控器指示燈不亮
對策
待電源接通
請重新對頻
請取下外蓋及過濾網清楚污垢
更換電池
請合格電力工程承辦商修理
◆ 故障處理
功能名稱
暖氣(高速)
暖氣(低速)
乾衣(高速)
乾衣(低速)
換氣(高速)
換氣(低速)
涼風循環(高速)
涼風循環(低速)
換氣延停
出風口尺寸
電源
重量
換氣最大風
(m³/h)
/
/
52.5
48
50.6
46
100.5
90.5
90
4"(98mm)
220~240V 50Hz
4.6kg
循環最大風量
(m³/h)
123
110
102
95
103
92
/
/
/
馬達消耗
(w)
49
40.5
49
40.5
49
40.5
49
40.5
40.5
14
過濾網
外蓋
電熱消耗
(w)
1500
1435
1430
1360
/
/
/
/
/

螺絲明細表
15
五金包
2. 天花式配備
出風接頭 *3,風道固定 *4
SUS 4*25,Φ 9 圓頭
1. 標準配備
3. 壁挂式配備
4. 窗户式配備
用途 品名 規格 數量 圖示
螺絲
固定遙控器
機體固定
機體固定
螺桿調整
安裝壁掛支架
窗台安裝防水箱
塑膠塞
螺絲
調整螺母
固定螺帽
固定螺母
不鏽鋼螺絲
螺絲
塑膠塞 Φ 8*27
M6
Φ 4x25mm
M6
M6
ST 4*25,Φ 9 圓頭
Φ 8*27
SUS 4*25,Φ 9 圓頭
2
2
4
4
4
4
7
2
2
※ 本產品規格及設計如有變更,恕不另行通知。
※ 中英文版本如有出入,一概以中文版為準。
CV-88W
THERMO VENTILATOR
PANTONE 7690C
PANTONE 186C
Hi Speed Vent CIR Heat Ionizer Emergency
Button
Lo Speed OSC Cool Dry Auto Senser
Receiver display window
User manual and installation instruction

Installation and Usage Precaution:
THE HEATER
Yellow/Green
Distribution box
Blue
Brown
Earth leakage
breaker
Power cable(site preparation)
Receiver
Earthing
Power
AC220-240V~/50Hz
01
Name of Parts
02
Carbon Filter
Front cover
Main body
Back cover
Filter
1. Main Body
2. RF Wireless Remote controller
Timer Function key
Power ON/OFF
Power
terminal
block
This product should be installed in the place which can bear the weight of this product.
Incorrect installation may cause noise, resonance. Please assembly properly.
In order not to cause the dew flowing back from exhaust pipe to the bathroom, the exhaust pipe should
be set in downward sloping to the outdoor.
The ventilation resistance of the ventilation flap is the main reason which causes the decrease of air
volume and high noise. Please use this appropriately.
Make sure that the Front Cover shall not be less than 2.3 meters off the ground during installation.
Do not install the product directly above the hot furnace or a place with temperature over 40 ℃ .
Please set airflow intake to promote convection.
Do not change the product’s rated features.
Any other installation method beyond the specified in the manual is prohibited.
The ceiling openings should face down in order to ensure the product installed at horizontal level.
Please take proper measures to prevent gas from the exhaust pipe or other fuel burning equipment
flowing back to the room.
Before installation, please ensure that the power has been cut off.
When the flammable gas leaks, stop using the product, turn it off.
Do not cover the heater, especially the front panel where the air inlet and heating air outlet, to avoid
overheat and danger.
This heater must not be located below a socket outlet, and do not install it tooclose to the socket
outlet, to prevent damage of other electrical appliances, if the heater gets
damaged.
Prohibit using any programs or timer automatically connected to the power or any other devices to
start this product, otherwise it may cause damage to the product or fire.
Do not install this product near curtains and other flammable material to prevent any danger.
During installation and normal usage, do not remove the main circuit board, otherwise it may cause
electric shock or fire.
This product is not suitable for the disabled, mental retarded or mental disorder, or those
who are lack of experience and common sense(including children) unless they are under guidance.
During the period of maintenance, children should be taken special care of and do not let them play
the product as toys.
The children aged less than 3 year-old must stay away from the product, unless continuous
supervision and guidance by any adult. The children aged between 3 and 8 years old, they can only
switch on or off the product, with knowledge of relevant risk during usage and under guidance of
adult , if the product is properly installed and in good condition. But they cannot plug or unplug the
product, do complicate operation or repair it.
Warning— Some components or parts may become quite hot or cause burning.
Particular attention must be given to children or vulnerable people if they are at present.
If the power wire or plug is damaged, do not use this product. The replacement or maintenance on
the appliance must be done by the manufacturer, after-sales service department or other qualified
persons.
To make sure that a switcher is available for completely cutting off the power, diagram below as
reference:
1.
2.
3.
4.
5.
6.
7.
8.
9.
10.
11.
12.
13.
14.
15.
16.
17.
18.
19.
20.
21.
22.
23.

Installation Method
03 04
A.Ceiling fixed frame method
Installation schematic diagram:
Exhaut Pipe
Adaptor
Inspection opening
Self-tapping screws(4pcs)
Φ4x25 Screw(3pcs)
220mm
Front cover
Over 5cm
Main Body
Over 50cm to the wall
Downdip
1o~2o
Downdip
1o~2o
Screw hole 1、2、3、
4 applicable
for ceiling joist
installation,
suspended ceiling
installation and
window installation.
1
2
3
4
1.Install the fixed frame to the ceiling
Make the fixed frame.
Please use the materials that can bear 4.6kg to fix the surrounding part.
Sticks of 30*25mm are to be used for the fixed frame.
Inner size of the fixed frame: 234*234mm.
If there is no exhaust pipe to the outdoors, please install the hard
exhaust pipe sized inner diameter 98.4mm firstly.
2.Install the adaptor
Find out the screw place on the fixed frame, by cutting the paperboard along dash line, according
to below diagram.
Use three self-tapping screws(4*25mm) to fix the adaptor to the ceiling of the
fixed box.
3.Install the main body
Put the main body face the guide slot of the adaptor directly, then push up the main body.
Please make sure that the main body jointed to
the adaptor, then use four tapping
screws(diameter 4*25mm) to fix
the main body.
Adaptor
212mm
Fixed frame
B. Integrated suspended ceiling method
1. Install the main body
Fix the main body to the booms(recommended boom M6, if necessary)
1
2
3
4
5
1.screw
2.nut
3.washer
4.fixed hole for the machine
5.hooded nut
2. Install the exhaust pipe
Use tape or the filling to seal the junction between the exhaust pipe and adaptor.
The exhaust pipe should have the tendency (1 degree to 2 degrees) down towards outside.
3. Install the front cover
a. Open the 4 screw covers, and use 4 screws to fix the front cover and main body. Please check the
following inspection points once above finished:
b. Whether the installation of the front cover is well fixed.
c. Whether any noise or shaken happen during operation.
4.The booms must be in the same level during installation, if there is any difference, please use the
adjustable nuts to do the adjustment.
Tape or fillings
Plastic pipe
Aluminum pipe
Nominal 4”
inner diameter>100mm
Adjustable nut
Installation Method

05
Installation of Remote Controller
06
C. Window type method
Front cover size: 280mmX280mm
Window frame size: 234mmX234mm
Main body thickness: 160mm.
*Remark: Window type installation
must be transverse installation.
D. Wall mounted type method
1. Applicable for the bathroom without ceiling.
2. Fix the wall kit to the wall, then embed the main body on the wall kit.
3. Set the exhaust pipe(4” inner diameter 100mm) to the glass of window, and fix it to the
adaptor with tape or metal clamp.
4. Applicable size of the main body: 280mmX280mm, Thickness of the main body: 160mm.
5.The minimum distance
between the surrounding
structures should be 50 cm.
1.Install at the place of the aluminum framed window or replace the exhaust fan in the bathroom.
2.Fix the window kit to the frame of the aluminum window( waterproof glue must be used for
waterproof).
3.After connecting the power cord, embed the main body into the hole with screws.
wall
aluminum window
waterproof cover
Window kit
front cover
Nails fixed hole Main body fixed screw Front coverBack cover
This is the wireless remote control, please install it to the suitable place with the accessory holder
if necessary
1.Fix the R/C holder to the designated place and make marks according to the arrows.
2.Dig holes 1/4(6mm) according to the marks, and fill in the holes with 2 plastic plugs.
3.Put the remote controller into the holder.
Replacement method of dry battery
1. Please open the bottom of the remote control with a screwdriver.
2. Please put in two pcs dry batteries.
Replace the new battery when there is no electricity.
Please pay attention to the positive and negative poles when placing the batteries.
For a long time no use, please take out the battery, usually a battery can be worked for about one
year.
Attention:
The remote controller has already passed the waterproof test, and met the requirements of IPX5. It
can be installed in the bathroom wall. But it cannot be placed in direct contact with the shower .
ON
OFF
ION
OSC
TIMER
Delay
power off
15 minutes
FAN SPEED
ON/OFF
MODE
AU TO
CI R
DRYCOOL
VENT
HE AT
DRYHOT
123
Installation Method
aluminum window

Installation of Exhaust Pipe
07
Electrical engineering-wiring
08
Please avoid the following situations when installing the exhaust pipe.
1. Over bending.
2. Bending too much.
3. The bend of the pipe comes too close to the main body.
4. The pipe shrinks.
1.Over bending
Main body
Main body
2.Bending too much 3.The bend of the
pipe comes too
close to the main
body
4.The pipe shrinks
Installation and wiring must be done by qualified electrical engineering contractor.
Please use the product under rated voltage and rated frequency in accordance with its rating
label.
Please prepare the unique air switch for this product in the user’s house, and let the air switch
should be consistent with air switch off contact all extremely disconnected requirements of
distance is greater than 3mm, in order to cut off the power of the product immediately in case of
accident.
Must be connected to the ground wire.
During installation, the fixed power wiring must be in accordance with local safety regulations.
For metal net bottom, steel wire net bottom of walls or wooden houses with the metal surface,
etc. when install metal exhaust pipe through, do paying attention that there shall be no electrical
contact.
When the power supply is insufficient, contact with electric power supply company.
Prior to the opening front cover, please make sure that the machine is powered off.
1.
2.
3.
4.
5.
6.
7.
8.
This product shall not be placed directly below the power outlet, do not install too
close to the socket to prevent the host electrical equipment from being damaged
and damage other electrical appliances.
◎
ION
OSCTIMER
Delay
power off
15 minutes
FAN
ON/OFF
MODE
AUTO
CIR
DRY COOL
VENT
HEAT
DRY HOT
RF Wireless
Remote Controller

Start: press "Dry Cool " button to start with a "Hi " mode for operation and indication light gets
on. You can choose "Hi " or "Lo " air volume by continuously press "SPEED " button.
Timer: the default time is 4 hours. By pressing "TIME-UP-DOWN" button to select time duration. The
time can be set form 1 hour to 24 hours. The remaining time will be showed on the LED display. The
time selection will be recorded in memory when it is off, and will resume in your next usage.
Under the mode, the inter-change of air volume between "Hi " and "Lo " will not affect the time
counting.
Stop: press the "ON/OFF " button or pre-set time runs over, "Dry Cool " indication light gets off,
and the time display will disappear, and the machine stops automatically.
Start: press "Delay Vent " button, and the "Delay Vent " indication light gets on, it runs delay
vent mode. It will stop after 15 minutes as default setting. Time could not be selected, and no display.
Stop: press "ON/OFF " button, and the default time run over, the machine will stop automatically.
Start: press the "Vent " button , the “Vent " indication light gets on, air volume will run the
"Lo " mode. Press the "Speed" button to inter-change the "Hi " or "Lo " mode.
Timer: the default setting is 2 hours, By pressing the button "Time-up-down" to select time duration.
The time could be set from 1 hour to 24 hours. The time counter will be showed on the "88" LED
display. The time selection will be recorded in memory when it is off, and will resume in next usage.
Under the mode, the inter-change of air volume between "Hi " and “Lo " will not affect the
time counting.
Stop: press the "ON/OFF " button or pre-set time runs over, "Vent " indication light gets off,
and the time display will disappear, and the machine stops automatically.
Start: press "AUTO " button, the “AUTO " indication light gets on, and the machine starts
to run in automatic mode, and the air volume runs at the mode of "Lo ". After 20 seconds, the
machine will run at different modes according to the room temperature(air volume automatically
at "Hi " mode).
a. Room temperature>24 ℃ degrees, the "CIR " mode.
b. Room temperature<20 ℃ degrees, the "Heat " mode.
c. 20 ℃ degrees<room temperature<24 ℃ degrees, the "Dry Hot " mode.
d. Timer: default setting is 1 hour, it is not changeable.
Stop: press the "ON/OFF " button or pre-set time runs over, "AUTO " indication light gets
off, and the time display will disappear, and the machine stops automatically.
2. Ventilation Function :
Instructions
09
Function Descriptions
10
FUNCTION
AUTO Automatic detection
operation mode
Delay power off
15 minutes Air exhaust
ION ION generation
VENT
(Wind speed switch
key high/low)
Air exhaust
COOL
(Wind speed switch
key high/low)
The bathroom in the
cool wind (Summer)
Clothes dry,
bathroom dry
HEAT
(Wind speed switch
key high/low)
Warm air
DRY
(Wind speed switch
key high/low)
Rapid drying of the
bathroom, laundry
drying
CIR
(High/low
fan speed key switch)
Bathroom cycle
OSC
(up and down
automatic)
Swing direction
of the wind swing
APPLICATION
Pre-set
/
Default
setting
OPERATION STATUS
Circulation Air outlet PTC heater
/
Low
speed
ON/OFF
High/Low
speed
High/Low
speed
High/Low
speed
High/Low
speed
High/Low
speed
30~60
Degree
oscillation
/
ON
/
ON
Half Open
(About 15
degrees)
OFF
Half Open
(About 15
degrees)
OFF
/
/
OFF
/
OFF
OFF
ON
ON
OFF
/
1h
15 Min
/
2h (1-24h)
4h (1-24h)
2h (1-24h)
4h (1-24h)
2h (1-24h)
Default
90 degree
1. AUTO Function :
4.Cool Function :
3. Delay Vent Function :

Start: press "Dry " button to start with a "Lo " mode for operation and indication light gets
on. You can choose "Hi " or "Lo " air volume by continuously press "SPEED " button.
Timer: the default time is 4 hours. By pressing "Time-up-down" button to select time duration. The time
can be set form 1 hour to 24 hours. The remaining time will be showed on the LED display. The time
selection will be recorded in memory when it is off, and will resume in your nextusage.
Under the mode, the inter-change of air volume between "Hi " and "Lo " will not affect the
time counting.
Stop: press the "ON/OFF " button or pre-set time runs over, "Dry " indication light gets off, and
the time display will disappear, and the machine stops automatically.
When the heater stops running, the fan will continuously run for around 35 seconds to cool down the
heater.
Start: press "CIR " button to start with a "Hi " mode for operation and indication light gets on.
You can choose "Hi " or "Lo " air volume by continuously press "SPEED " button.
Timer: the default time is 2 hours. By pressing "Time-up-down" button to select time duration. The time
can be set form 1 hour to 24 hours. The remaining time will be showed on the LED display. The time
selection will be recorded in memory when it is off, and will resume in your next usage.
Under the mode, the inter-change of air volume between "Hi " and "Lo " will not affect the
time counting.
Stop: press the "ON/OFF " button or pre-set time runs over, "CIR " indication light gets off, and
the time display will disappear, and the machine stops automatically.
Start: press "Heat " button to start with a "Lo " mode for operation and indication light gets on.
You can choose "Hi " or "Lo " air volume by continuously press "SPEED " button.
Timer: the default time is 2 hours. By pressing "Time-up-down" button to select time duration. The time
can be set form 1 hour to 24 hours. The remaining time will be showed on the LED display. The time
selection will be recorded in memory when it is off, and will resume in your next usage.
Under the mode, the inter-change of air volume between "Hi " and "Lo " will not affect the time
counting.
Stop: press the "ON/OFF " button or pre-set time runs over, "Heat " indication light gets off,
and the time display will disappear, and the machine stops automatically.
When the heater stops running, the fan will continuously run for around 35 seconds to cool down the
heater.
7.CIR Function :
Function Descriptions
11 12
Boot: ON state, the host machine body receiver display window marked bright.
OFF state, the host machine body receiver display window marked out close.
In the OFF state of the circulating fan, the negative ion key is invalid.
Stop: in the process of running, press the negative ion button, negative ions do OFF action, while
the host receiver display window Marked out close;
once again pressed the button, negative ions do ON action, while the host machine body receiver
display window marked bright. So repeatedly.
Press the start emergency button to automatic mode operation, once again touch the emergency
button to switch to the ventilation mode operation, and touch again the emergency button to switch
to standby mode
5. Heat Function : 8. Auto-swing :
9.Ionizer Function :
10.Emergency Button:
6.Dry Hot Function :
First start
Restart 0
degree
45~90 degree
oscillation
Emergency Button
Stop and
shut off
Stop at any angle
Autimatically memorize
previous setting Stop at any angle
Function Descriptions
90
degree
45~90 degree
oscillation
Start: default running the on and off operation, same with fan. If it is ON, LED " " icon will display,
and " " icon will disappear when it is off. When it is off, the swing function is invalid, and the louver
will resume to 0 degree position.
Start2 : When it is fan mode, the default is 90 degree louver position.
Auto-swing When the fan is running, press the "OSC " button, the louver will turn from 90 degree
position to swing from 45 degree to 90 degree. Press "OSC " button again, auto-swing function will
stop, and if you press it again, it will run auto-swing again.
Stop: When press "Stop " button or pre-set time runs over, the louver will return to 0 degree
position. But then it will resume in next usage, as recorded in memory.

Maintenance and Safety Items
13
Specification
Please make sure that the machine is power off
before maintenance.
Please clean the front cover
a] please use the soft rag or soft brush to clean
the dirty place of the cover.
b] Put a clean rag in the warm water dissolved
with neutral detergent, then use the rag to wipe
the front cover. Use another rag to wipe the
panel then. The surface shall have nodetergent residues.
Filter cleaning:
a] Please take out the filter and put it in water to clean the dust and dirty after around 3 months
usually, then put it back to the cover after the filter is dry.
b] Subject to the frequency of use and environment.
Do not put your hands into the machine when running, to avoid injury or burn by the heater.
Do not spray water into the main body, which may damage the motor, or cause electric shock by
the electricity leakage.
In order to avoid any accident or injury, if any of the following symptoms and abnormal situation
occur, please switch off the electricity and ask qualified electrical engineering contractor for
repairing or checking( self repair by user is strictly prohibited, to avoid danger).
a] Turn on the power, the fan does not work
b] The power suddenly on, then gets off suddenly, and in turn.
c] Abnormal sound and vibration during operation
d] Plastic smell or other abnormal smell occurs.
◆ Maintenance:
◆ Safety Items:
◆ Trouble-shooting guide:
Function
Heater(Hi)
Heater(Lo)
Dry hot(Hi)
Dry hot(Lo)
Vent(Hi)
Vent(Lo)
Dry cool(Hi)
Dry cool(Lo)
Delay power off
Adaptor size
Power
Weight
Max air volume
Ventilation
(m³/h)
4"(98mm)
220~240V 50Hz
4.6kg
Max of
Circulation
(m³/h)
Motor power
consumption
(w)
14
Filter
Front Cover
Heater
(w)
/
/
52.5
48
50.6
46
100.5
90.5
90
123
110
102
95
103
92
/
/
/
49
40.5
49
40.5
49
40.5
49
40.5
40.5
1500
1435
1430
1360
/
/
/
/
/
Phenomenon
Not operate when the power
turning on
The display light does not
display to the function
The sound turns much louder
The remote control does not work
Check
No power supply
The remote control does
not work
Filter blocking
Low battery
The light of the remote
control does not light on
Solution
Switch the power
Please adjust the
frequency
Take out the panel and clean the filter
Change the battery
Ask the qualified engineer
for repair

Screw list
15
※Be aware that any change of the specification and design will not be informed.
※If any item in the English Version is different from Chinese Version, please refer to the Chinese
Version.
2.Ceiling
type
setting
SUS 4*25,Φ 9
Round head
1.Standard
setting
3.Hung-to
-wall type
setting
Hung-to-wall support
installation
Watertight casing on
the window
Stainless
Steel screw
Screw
Φ 4x25mm
2
4
Hardware
packs
Air outlet joint*3,
Air channel fixation*4
Usage Name Specification Amount Picture
Screw
Fixed
Main body fixation
Main body fixation
Screw Adjusting
Plastic plug
Screw
Adjusting nut
Fixed screw
Fixed nut
Plastic plug Φ 8*27
M6
M6
M6
ST 4*25,Φ 9
Round head
Φ 8*27
SUS 4*25,Φ 9
Round head
2
4
4
4
7
2
2
4.Window
type
setting
Table of contents
Popular Fan manuals by other brands
Ellington
Ellington E-DER54ESP5CR installation guide
Honeywell
Honeywell HTF090B user manual

KALE FANS
KALE FANS BOREAS III Quick installation guide
IV Produkt
IV Produkt Envistar Top Series Operation and maintenance
HOMCOM
HOMCOM 824-055V90 Assembly & instruction manual
Heylo
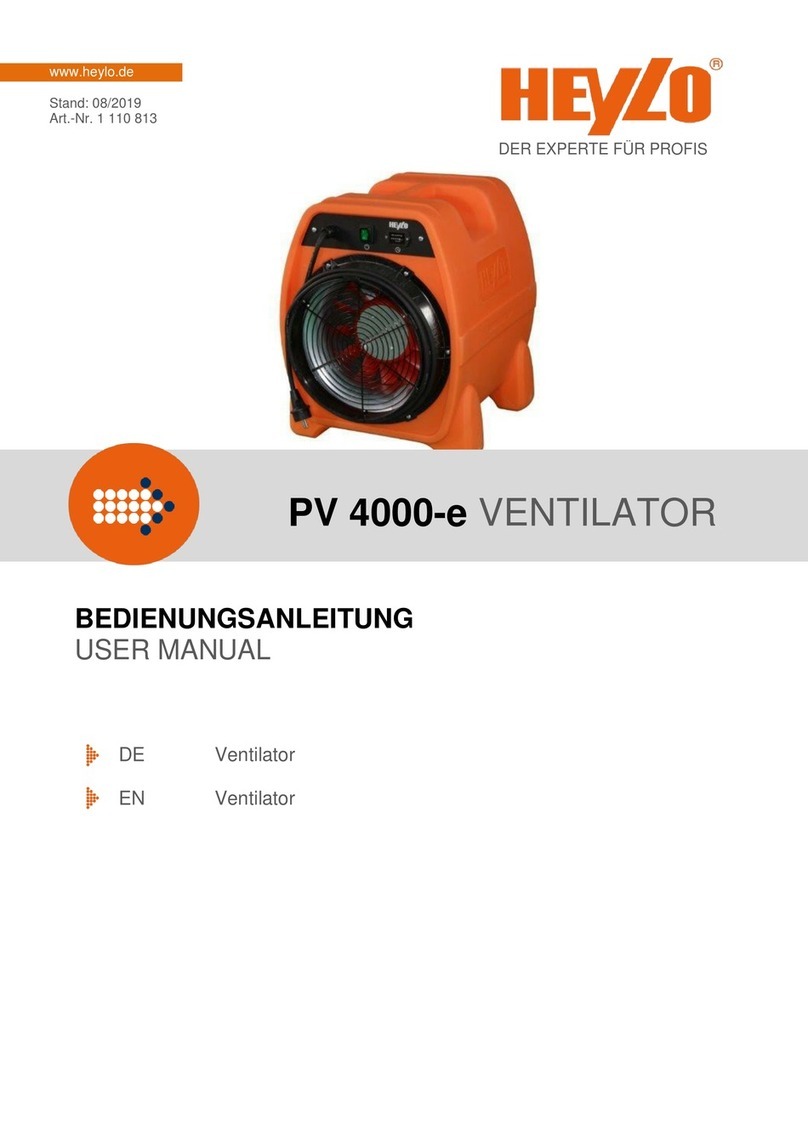
Heylo PowerVent 4000-e user manual
