CINOART PT2 User manual
PT2
PRODUCT MANUAL
AUTOMATIC COFFEE TAMPER
-Precision Tamp 2

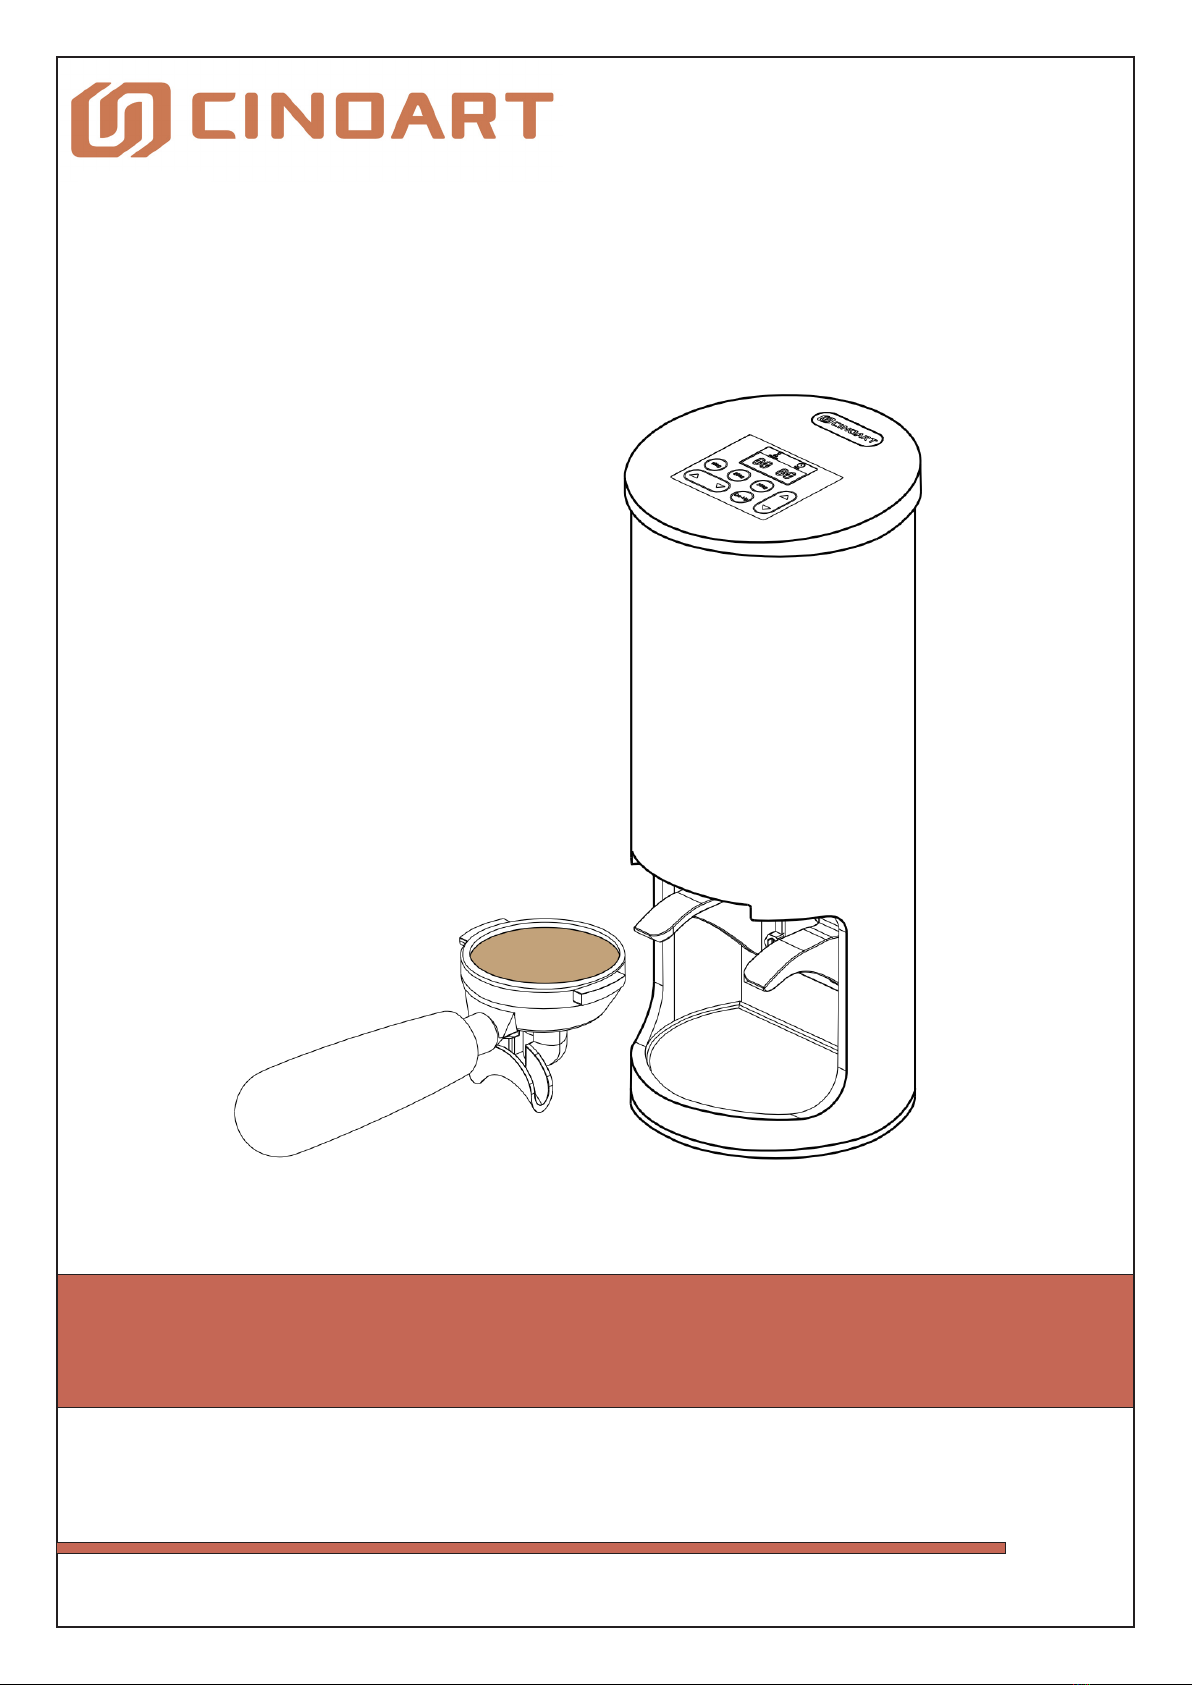
PT2 OVERVIEW
PT2 Precision Tamp
Thank you for choosing the CINOART PT2 (Precision Tamp 2).
Please read the following user guide and instructions carefully to ensure the correct use
and accurate setup of this machine.
The CINOART PT2 Automatic Coee Tamper will greatly assist the professional barista
with workow speeds while maintaining the consistency of espresso preparation.
Using the PT2 Precision Tamper greatly improves the avour yield, consistency, and
overall cup quality of each espresso.
The PT2 is simple and quick to operate. Clear display icons allow easy access into each
of the dierent modes for fast changes to the desired pressure.
If you require more information or have further questions not covered in these
instructions, please contact Shenzhen Meshining Technology Co. Ltd or your local
CINOART distributor.
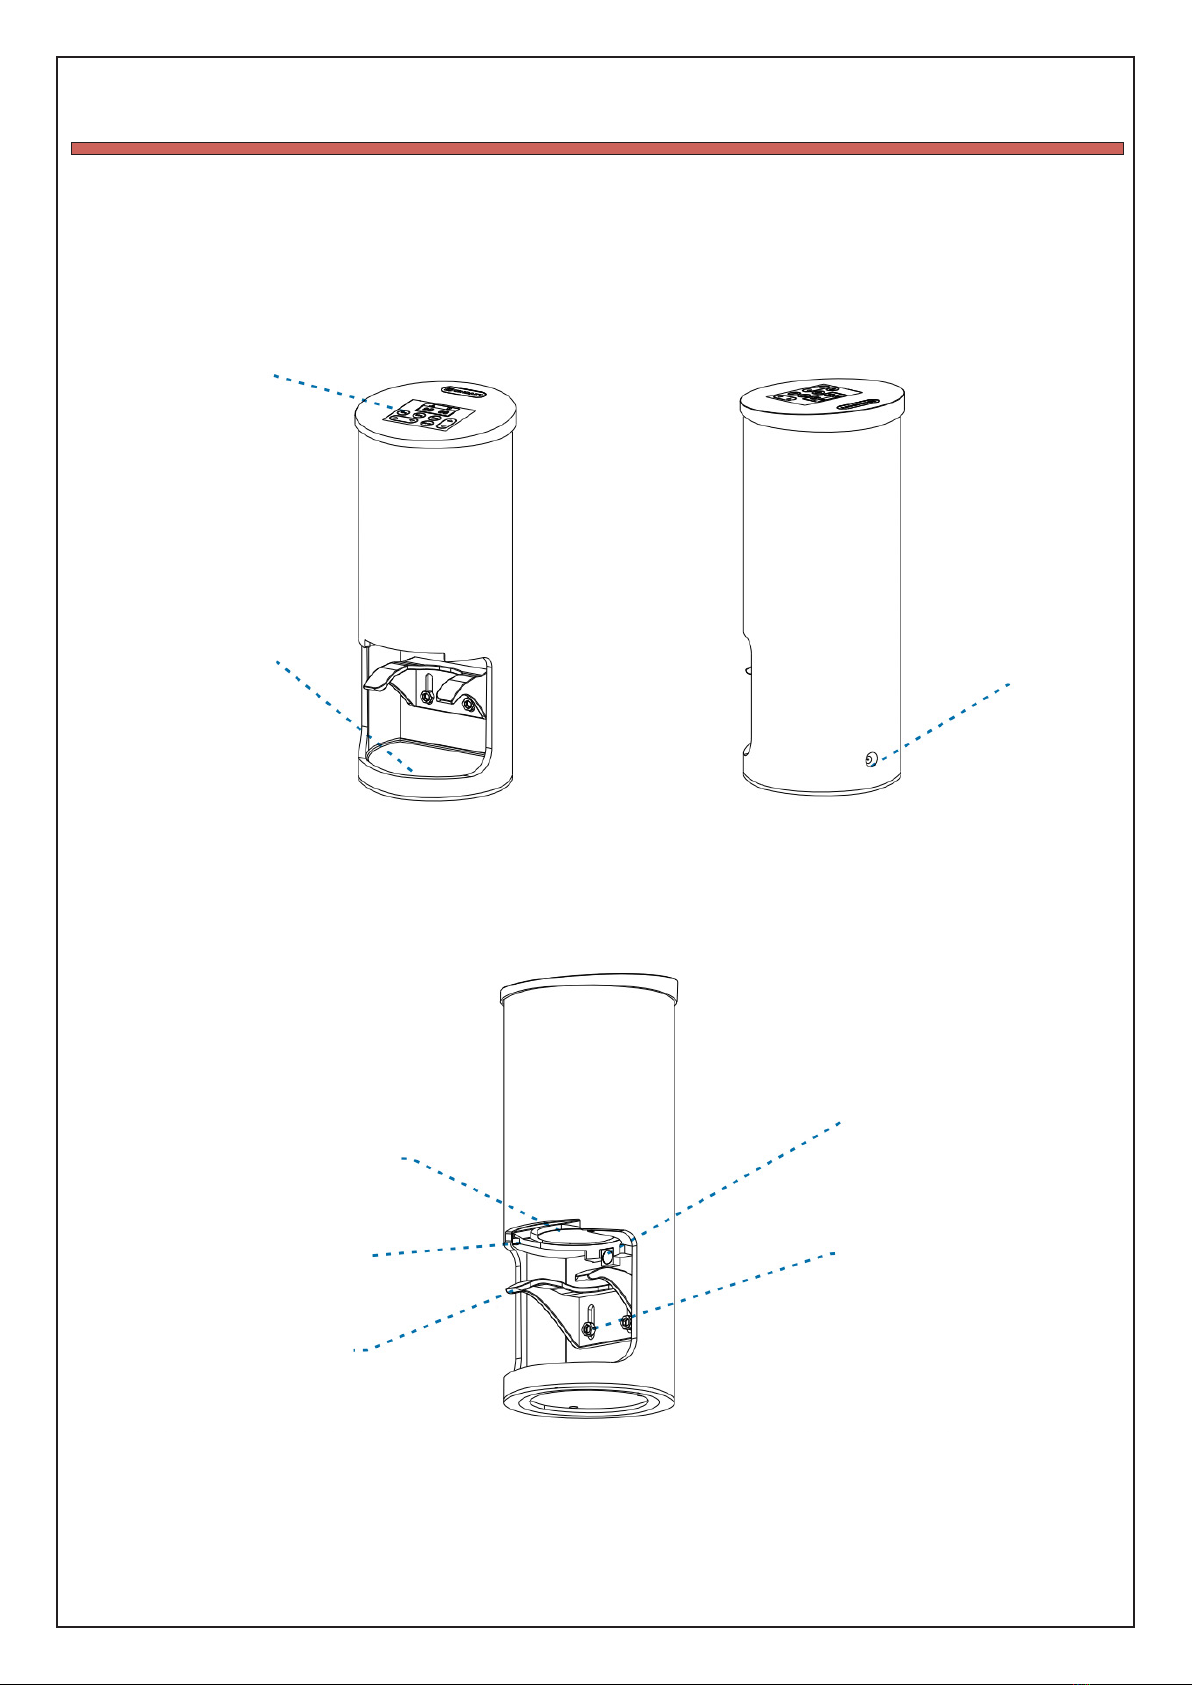
PT2 FEATURES
Touchpad Control Panel
Silicone Grinds Tray
Power Plug
Tamper Disk
Upper Guide
Portalter Support
Sensor
2 x Adjusting Hex
Screws
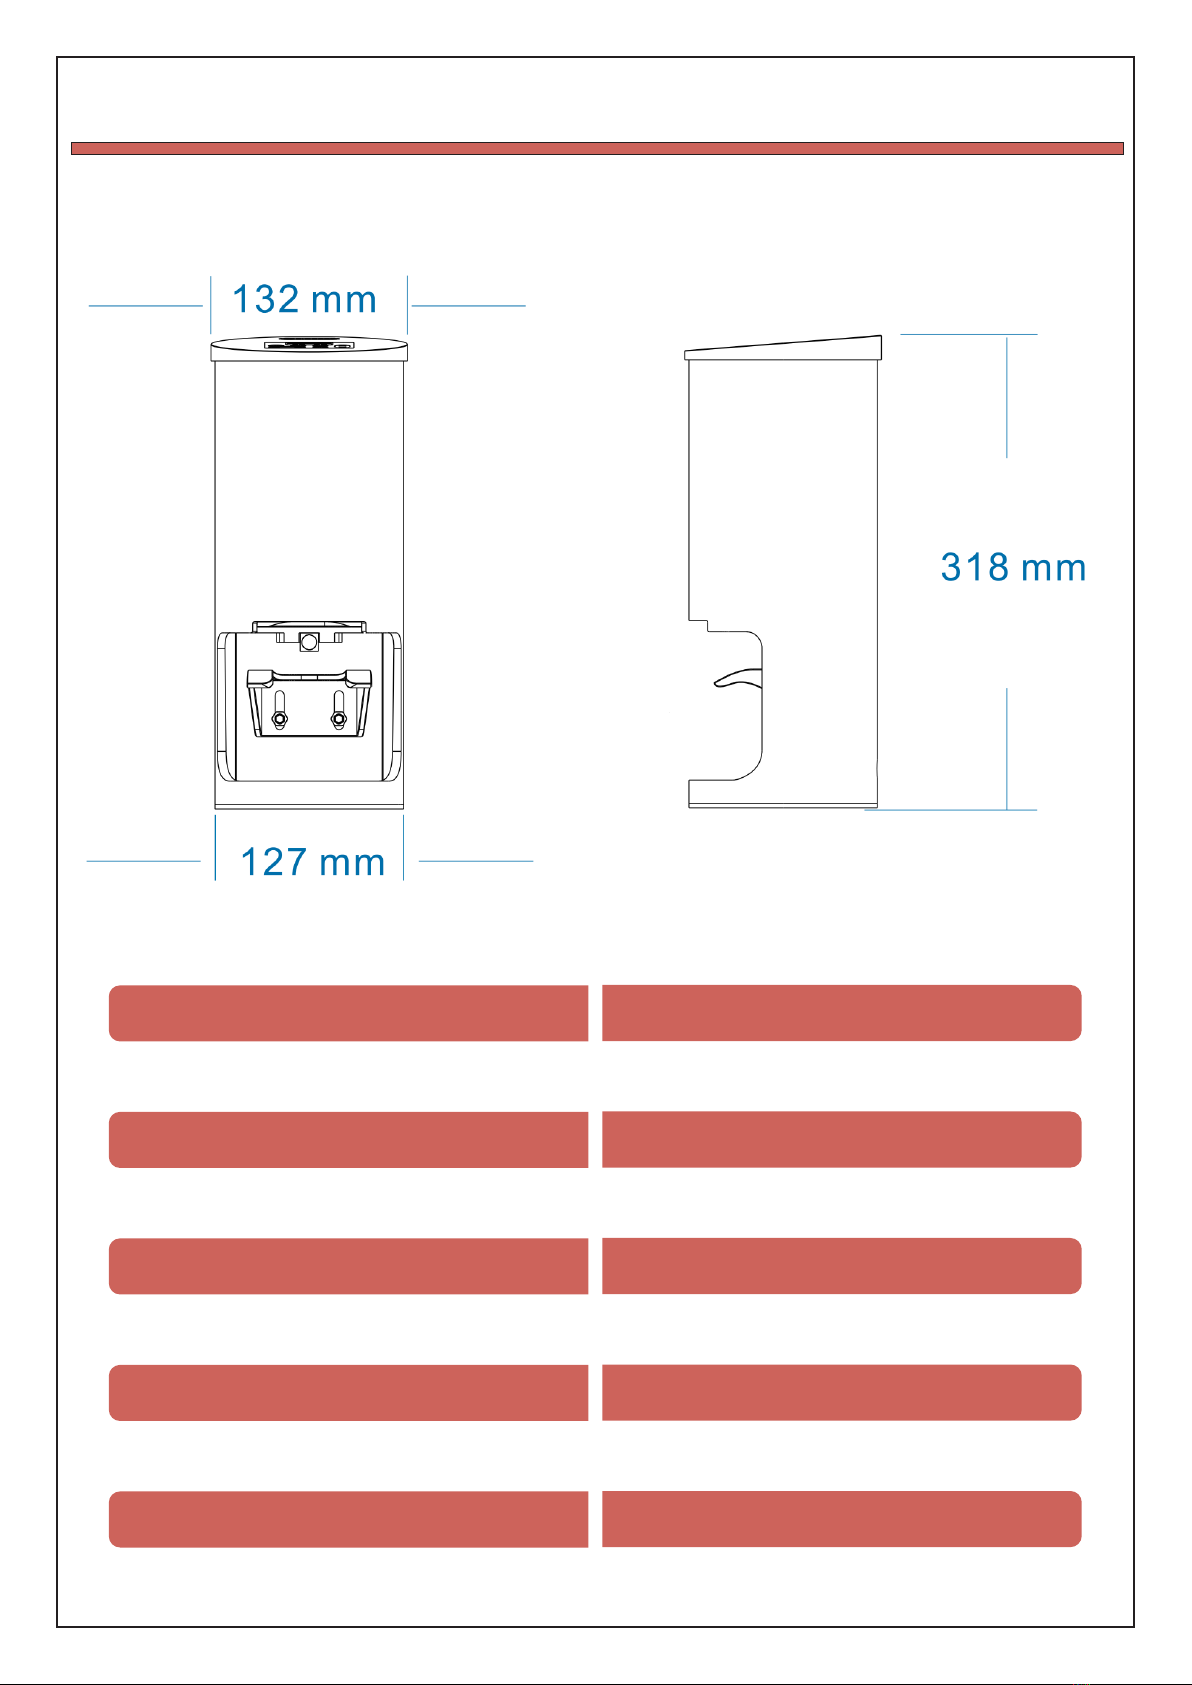
DIMENSIONS AND TECHNICAL SPECS
Product Name Automatic Coee Tamper
Model PT2 - Precision Tamp 2
Voltage In 110~240V 50/60Hz
Voltage Out 12V DC
Weight 3.7kg
Tamper Diameter 58.3mm / Flat Base
Pressure from 2kg to 38kg
Cycle Speed 1.2 Sec
Multi Segment Tamping 1, 2 or 3 times
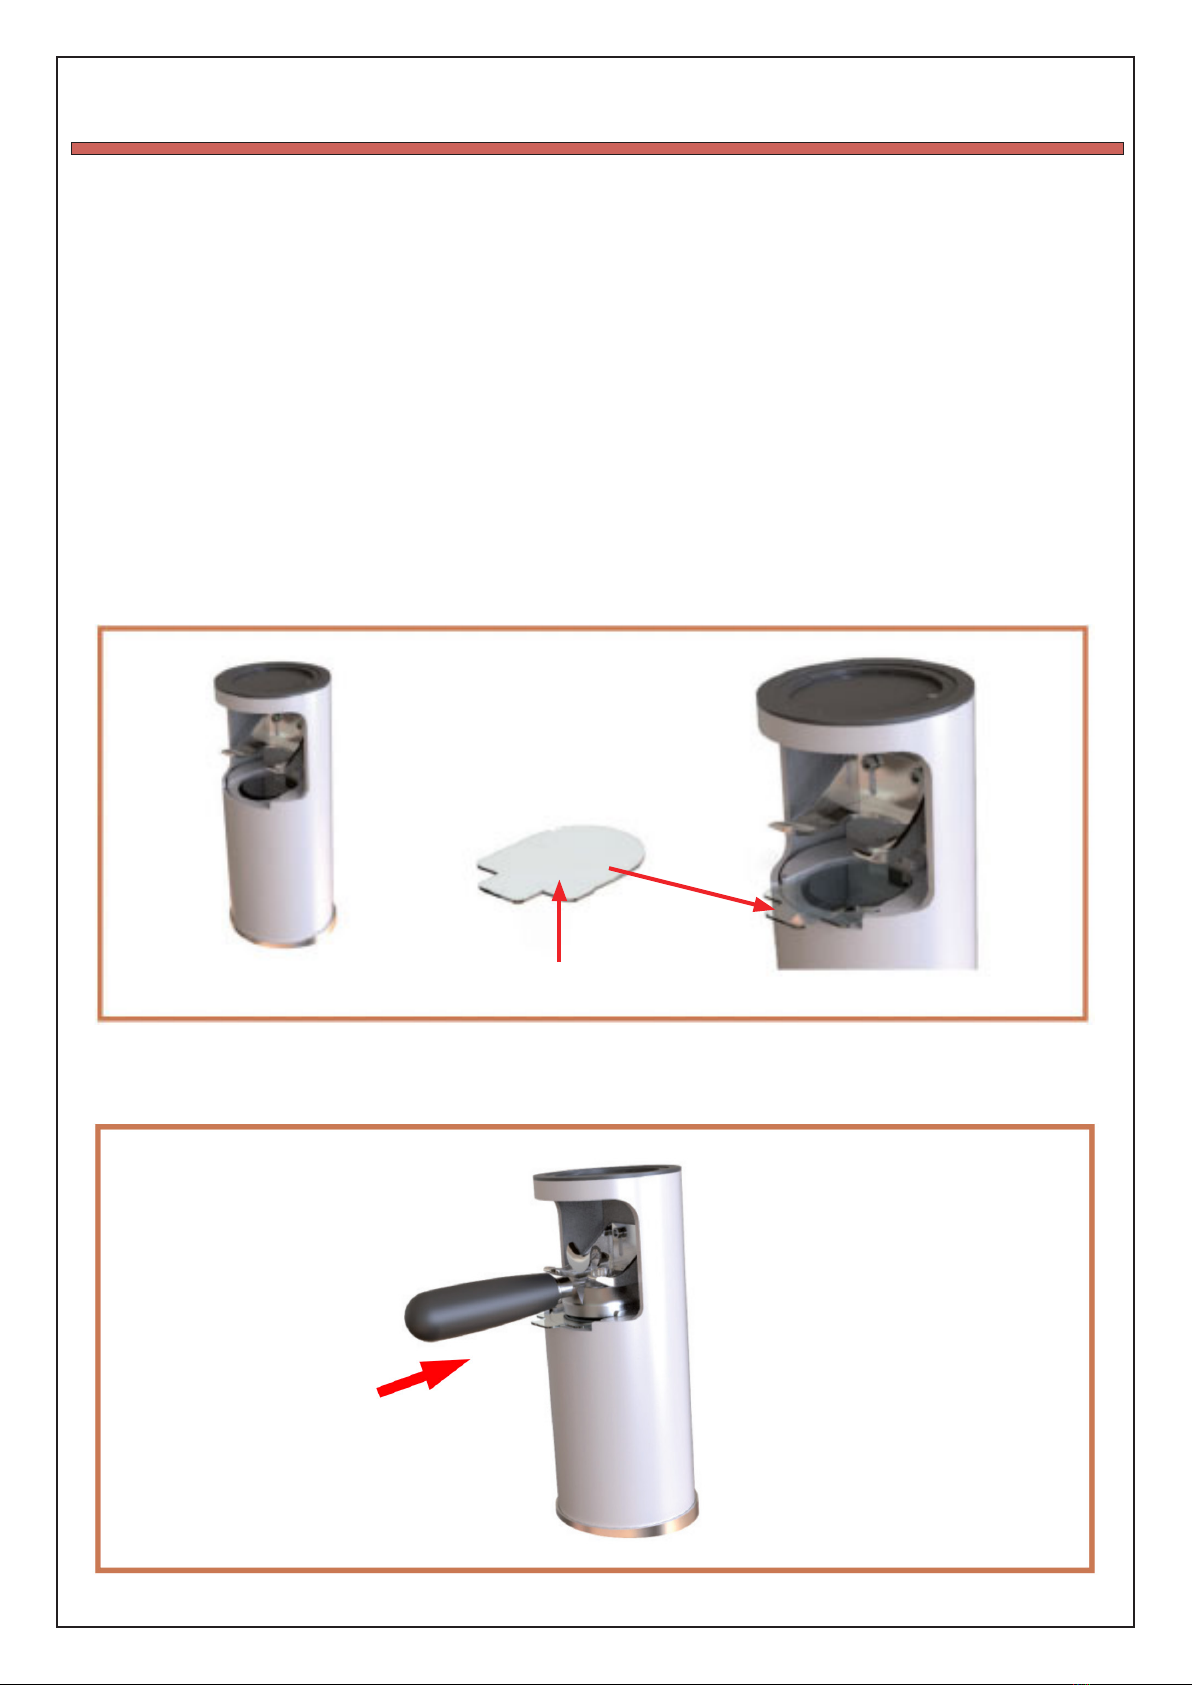
1# SET UP AND PORTAFILTER ADJUSTMENT
The PT2 is designed for easy adjustment to the Portalter / Group Handle
1. Turn o the power by removing the power cord at the rear of the machine.
2. Turn the PT2 upside down on a smooth at nonslip surface.
3. Loosen the 2 Hex Screws with the supplied Allen Key.
4. Place the Portalter Levelling Guide tool on top of the Tamper Disk.
5. Place the Portalter handle upside-down on the Levelling Guide, then adjust the
Supporting fork down onto the underside of Portalter handle.
Portalter Levelling Guide Tool
Images - Step 5.
Images - Step 1, 2, 3, 4

Images - Step 6.
Re-tighten the 2 hex screws ensuring the supporting fork is level with the parallel
indicator markings.
Images - Step 7.
Remove the Levelling Guide Tool and return the PT2 to the upright position and
reconnect the power.
2# ENVIRONMENT
Place the PT2 Automatic Tamper on a at, solid and vibration-free surface.
Do not operate the machine in wet or extreme temperature environments.
3# PLEASE CHECK BEFORE USE
1. Inspect the power cord to ensure there are no signs of damage or poor connection
ttings.
2. Insert the power adaptor cord into the rear of the PT2 and then into the 10amp
PowerPoint.
4# OPERATION
1. Turn power on.
2. Ensure the digital display screen is illuminated and functional.
3. Set and program the desired tamp values via the touchpad.
4. The internal activation sensor will automatically detect the Portalter handle.
5# PRESSURE ADJUSTMENTS
1. Quick access to preset pressures (10kg, 20kg, 30kg)
2. Precise +/- 1kg Up or Down increments to achieve desired pressure.
3. Quick Press and Hold the DN-UP button to save the programmed values.
4. Multi Tamping Feature for 1, 2, 3 cycles
Multi Tamp Display
Multi Tamp Adjustment
Conrm / Save
Pressures & Times
Pressure(kg)
Preset Pressures
1kg +/- Adjustments
6# CLEAN MODE
Performing a clean of the Tamper Disk can be done anytime during service
and should be performed as a daily cleaning routine to brush o the residual
buildup of coee nes and oils to help ensure clean tamping for best avour
and espresso quality.
Follow these steps:
1. Press and hold the Dn-Up button for 5 seconds to access the Cleaning
Mode.
2. Clean the Tamper disk with a brush. Do not clean it with your ngers.
3. Press and hold the Dn-Up button for 5 seconds to return it up into its
original position.
Note *Cleaning Mode also allows the access needed to change the Tamper
Disk to a different diameter to suit other espresso machine brands. Your
local distributor will stock the dierent sizes.
Press and hold to entre Cleaning Mode.
COMMON ERRORS
Issues / Errors Potential Reasons Potential Solution
Coee nes and
oils sticking to the
tamper head
Tamper disk is wet, or has not
been cleaned regularly causing
further buildup
Perform the cleaning mode outlined in
Point 6. In this user guide
Machine not working
/ No illumination of
touchpad icons
Check power cord and power
adaptor
Check connection between wall
PowerPoint and Transformer Adaptor
and check connection from Transformer
Adaptor into the rear of the machine

Coee bed is uneven Portalter support fork is not
level
Perform Portalter Support alignment in
Point 1. In this user guide
Tamper Disk does not
fully extend
Cleaning Mode is on or the
Portalter support is not level
Cancel the Cleaning Mode or perform
Portalter realignment in Point 1. in this
user guide
Note * If issues persist please contact your supplier for after sales service and technical
support.
TECHNICAL SERVICE AND SUPPORT
WARRANTY
SPARE PARTS
• When or if you require after-sales service, please turn the power off, clean the
machine, and call your place of purchase.
• Any service or repair should be carried out by an authorized service dealer.
• Do not attempt to repair it yourself in case of electrical fault.
Please contact your CinoArt supplier / distributor if you require a different diameter
Tamper Disk for your espresso machine brand to the standard 58.3mm Portafilter
basket.
All Spare Parts in general can be ordered from your supplier / distributor.
Do not attempt to repair it yourself in case of electrical fault.
1. The warranty period is for one year from the date of purchase.
2. CinoArt warranties any defective or faulty components within the rst 12 months
from the date of purchase. Fair and reasonable use under normal wear and tear
environment conditions will always be considered.
3. The warranty conditions do not cover damages caused by incorrect installation
improper use, improper cleaning and maintenance.
4. Warranty does not cover damage caused from using non-genuine replacement parts.
5. Warranty does not cover general maintenance and or labor costs associated with
replacement spare parts.

Shenzhen Meshining Technology Co.Ltd
sales@cinoart.com
CN: www.cinoart.com
EN: www.beqsx.com
Room 302, Building 9, Xinwei Industrial Area, Xili, Nanshan, Shenzhen, China.
Table of contents


