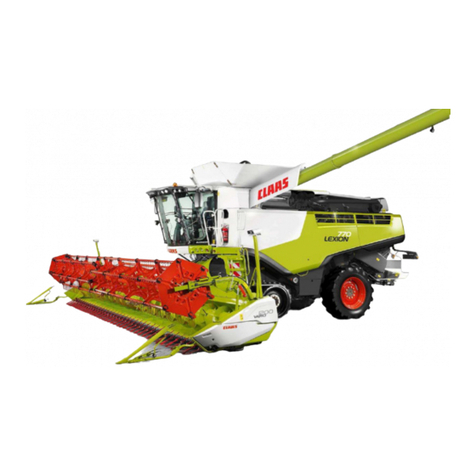
Claas LEXION 460 User manual

OPERATOR’S MANUAL
LEXION 460 / LEXION 450
LEXION 440 / LEXION 430
LEXION 420 / LEXION 410
CEBIS

298 425.0 - BA LEXION 460 - 410 1.1.1
Introduction
INTRODUCTION This manual applies to CLAAS LEXION 460 / LEXION
450 / LEXION 440 / LEXION 430 / LEXION 420 and
LEXION 410 Combine Harvesters.
It is intended to give the machine operator information
on setting, using and servicing the CLAAS Combine
Harvester.
Texts and pictures apply, in general, to all combine
models covered by this manual, and the information
given applies equally, except where reference is made
to a particular model in captions to the pictures or in
the main text.
Operation and maintenance of important ancillary
equipment is also covered by this manual. A separate
Operator's Manual is available for cutterbars.
Please read the instructions which apply to the
appropriate ancillary equipment on your combine.
Provided you follow the advice on the care and
servicing of your machine you will be rewarded with
reliable and long service from your Combine
Harvester.
We recommend that you allow your authorized
CLAAS Dealer to carry out the regular maintenance.
Omissions of parts of the maintenance schedule or
incorrect operation lead to a drop in performance and
cost valuable time. By correct servicing and operation
you can make full use of our sound experience and of
the latest technical knowledge in combine harvesting
with which your combine has been designed and
thereby ensure reliability of your Combine Harvester.
This Operator’s Manual can be ordered from your
CLAAS Dealer as well as the manuals listed below:
•Threshing Instructions for special crops
•Fitting and Operating Instructions for ancillary
equipment
CLAAS Service Department
Introduction
Find manuals at http://best-manuals.com/search?&s=CLA-2984250

298 425.0 - BA LEXION 460 - 410 2.1.1
Contents
CONTENTS
1. Introduction
Introduction ............................................................................ 1.1.1
2. Contents
Contents ................................................................................ 2.1.1
3. General information
Road traffic regulations .......................................................... 3.1.1
Important ................................................................................ 3.2.1
Identification plate / Serial number ......................................... 3.3.1
Identification plate ............................................................ 3.3.2
Combine serial number ................................................... 3.3.2
Engine serial number
CATERPILLAR C9 .......................................................... 3.3.2
Engine serial number
CATERPILLAR 3126 B .................................................... 3.3.3
Straw chopper identification plate .................................... 3.3.3
Cabin serial number ........................................................ 3.3.3
4. Safety rules
Safety rules ............................................................................ 4.1.1
Safety lock ....................................................................... 4.1.5
Fire extinguisher .............................................................. 4.1.5
Battery master switch ...................................................... 4.1.6
Wheel chocks .................................................................. 4.1.6
Positioning the wheel chocks .......................................... 4.1.6
Safety decals with pictorials ................................................... 4.2.1
5. Specifications
Conversion factors ................................................................. 5.1.1
CLAAS LEXION 460 / 450 / 440 ............................................ 5.2.1
CLAAS LEXION 430 / 420 ..................................................... 5.3.1
CLAAS LEXION 410 .............................................................. 5.4.1
Safety features ....................................................................... 5.5.1
Front attachments –weights and dimensions ........................ 5.6.1
6. Prior to operation
Perform the following steps prior to operation ....................... 6.1.1
Cabin ..................................................................................... 6.2.1
Cabin with Climatic .......................................................... 6.2.1
Climatic ............................................................................ 6.2.2
Operating and display elements ...................................... 6.2.2
Putting the Climatic into operation ................................... 6.2.3
Setting the cabin temperature ......................................... 6.2.4
Manually setting the evaporator blower speed ................ 6.2.4
Fully automatic heating .................................................... 6.2.5
Manually setting the heating ............................................ 6.2.6
Floor heating .................................................................... 6.2.6
REHEAT operation
(Dehumidify cab windows) ............................................... 6.2.7
Displaying the outside temperature ................................. 6.2.8
Switching the temperature display to Fahrenheit ............. 6.2.8
Display of malfunction:
error in thermometer F0 (cabin, blue) .............................. 6.2.8
Display of malfunction:
error in thermometer F1 (exhaust, yellow) ....................... 6.2.8
Display of malfunction:
error in thermometer F2 (outside, red) ............................ 6.2.8
Cabin with air conditioner
(Standard version) ........................................................... 6.2.9
Cabin with compressor-type air conditioning system .... 6.2.10
Cabin with heating ......................................................... 6.2.12
Floor heating ................................................................. 6.2.12
Demister System
(Fogged windows) ......................................................... 6.2.12
Problem, possible cause and / or remedy –
Compressor-type air conditioner ................................... 6.2.13
Opening and closing the cabin roof ............................... 6.2.15
Windscreen washer system .......................................... 6.2.15
Operator’s platform ................................................................ 6.3.1
Operator’s platform –Overview ...................................... 6.3.1
Switch console ................................................................ 6.3.2
Monitor
(Vehicle information display) ........................................... 6.3.3
Monitor
(Harvest display) ............................................................. 6.3.4
C-keys ............................................................................. 6.3.7
Rotary switch D ............................................................... 6.3.7
Steering column .............................................................. 6.3.8
Ignition switch (S) ............................................................ 6.3.8
Multi-function switch ........................................................ 6.3.9
Vehicle information unit ................................................. 6.3.10
Multi-function handle ..................................................... 6.3.11
Adjusting the steering column ....................................... 6.3.12
Swinging the steering column at the top ....................... 6.3.12
Steering wheel height adjustment ................................. 6.3.13
Central electrics ............................................................ 6.3.13
Swing grain tank unloading tube out and in .................. 6.3.17
Safety feature ................................................................ 6.3.17
Switching grain tank unloading on and off .................... 6.3.18
Switching threshing mechanism on and off ................... 6.3.18
Operator’s seat .............................................................. 6.3.19
Operator's seat, mechanical .......................................... 6.3.19
Operator's seat with air suspension
(Optional equipment) ..................................................... 6.3.22
Ladders ......................................................................... 6.3.25
Front ladder ................................................................... 6.3.25
Hinged ladder ................................................................ 6.3.25
Access and ladder extension ........................................ 6.3.26
Side position lights in case of excess width .................. 6.3.32
Side lights in case of excess width ................................ 6.3.33
Rear ladder ................................................................... 6.3.34
Other uses of the rear ladder ........................................ 6.3.34
Driving the combine ............................................................... 6.4.1
Engine speed rotary switch ............................................. 6.4.1
Manoeuvring ................................................................... 6.4.1
Starting the engine .......................................................... 6.4.2
Gear ranges .................................................................... 6.4.2
Servo gearshift
(Optional equipment) ....................................................... 6.4.3
Adjusting the binds of the ground speed control lever .... 6.4.3
Stopping .......................................................................... 6.4.4
Driving behaviour ............................................................ 6.4.4
Contents
Find manuals at http://best-manuals.com/search?&s=CLA-2984250

2.1.2 BA LEXION 460 - 410 - 298 425.0
Contents
Steering ........................................................................... 6.4.4
Brakes .............................................................................. 6.4.5
Foot brake ........................................................................ 6.4.5
Parking brake ................................................................... 6.4.6
Stopping the engine ......................................................... 6.4.6
CLAAS Autopilot
(Maize picker head) ......................................................... 6.4.7
CLAAS Autopilot
(Grain cutterbar) .............................................................. 6.4.8
Adjusting the directional stability of the combine ............. 6.4.8
Setting the laser sensor in the field ................................ 6.4.10
Putting the CLAAS Autopilot into operation ................... 6.4.12
Use in rape with left-hand side cutter ............................ 6.4.13
Cutterbar hydraulic cylinders ................................................. 6.5.1
Attaching cutterbar hydraulic cylinders ............................ 6.5.1
Third cutterbar cylinder .................................................... 6.5.1
Rear wheel drive axle ............................................................ 6.6.1
Adjusting rear wheel drive axle from
transport to working position ............................................ 6.6.1
Wheel tread adjustment –Rear wheel drive axle ............ 6.6.4
Adjustable rear axle ......................................................... 6.6.6
Rear axle wheels –steering angle limiter
(Adjustable rear axle) ....................................................... 6.6.8
Side panels ............................................................................ 6.7.1
Opening and closing the side panels and the rear door .. 6.7.1
Adjusting the side panel / rear door locks ........................ 6.7.2
Cabin and lighting .................................................................. 6.8.1
Headlights, worklights and mirrors ................................... 6.8.1
Towing / Crop inspection / Grain tank .................................... 6.9.1
Towing ............................................................................. 6.9.1
Forwards .......................................................................... 6.9.1
Backwards ....................................................................... 6.9.1
Crop inspection ................................................................ 6.9.1
Grain tank ........................................................................ 6.9.2
Closing the grain tank openings ...................................... 6.9.2
Installing dual wheels ........................................................... 6.10.1
Operating the front ladder with dual tyres installed ........ 6.10.5
Additional weights ............................................................... 6.11.1
Liquid filling for rear axle tyres ....................................... 6.11.5
Installing the rear axle weights ...................................... 6.11.5
7. Installing and removing the cutterbar
Installing the cutterbar ............................................................ 7.1.1
Tilting the cutterbar from transport position ..................... 7.1.1
Machines equipped with CLAAS Auto Contour ............... 7.1.2
Adjusting the hydraulic cylinder for
transverse cutterbar control ............................................. 7.1.2
Machines without CLAAS Auto Contour .......................... 7.1.3
Locking cutterbars and maize pickers
(Cutterbars without Auto Contour) ................................... 7.1.5
Connecting the universal drive shafts .............................. 7.1.6
Fitting the stand ............................................................... 7.1.6
Removing the cutterbar .......................................................... 7.2.1
Removing the cutterbar ................................................... 7.2.1
Laying down the cutterbar on the ground ........................ 7.2.1
Placing the cutterbar on the cutterbar trailer .................... 7.2.2
8. Operation CEBIS
9. Operation –basic machine
Feeder housing ...................................................................... 9.1.1
Chains ............................................................................. 9.1.1
Cutterbar reverse drive .................................................... 9.1.2
Cutterbar floatation springs ............................................. 9.1.2
Checking the setting of the cutterbar floatation springs .. 9.1.2
Cutting height indicator .................................................... 9.1.3
Cutterbar spring pressure indicator ................................. 9.1.3
Blocking the cutterbar floatation springs ......................... 9.1.4
Adjusting drop rate of the front attachment ..................... 9.1.4
Cutterbar clutch ............................................................... 9.1.5
Engaging and disengaging the cutterbar ......................... 9.1.5
Threshing mechanism ........................................................... 9.2.1
Stone trap ........................................................................ 9.2.1
Engaging and disengaging the threshing mechanism ..... 9.2.2
Threshing drum ............................................................... 9.2.3
Cleaning the threshing parts ........................................... 9.2.3
Basic concave setting ...................................................... 9.2.4
Learning the limit stops ................................................... 9.2.9
Threshing drum speed .................................................. 9.2.10
Threshing drum drives ................................................... 9.2.10
Threshing drum two-step variable speed drive ............. 9.2.10
Installing and removing preconcave segments ............. 9.2.11
Concave segment ......................................................... 9.2.12
Removing the concave segment ................................... 9.2.12
Installing the concave segment ..................................... 9.2.13
Disawning ...................................................................... 9.2.14
Unslugging the threshing drum ..................................... 9.2.14
Deflector curtain ............................................................ 9.2.15
Straw walkers ........................................................................ 9.3.1
Straw walkers .................................................................. 9.3.1
Intensive separation system ............................................ 9.3.1
Multiple finger separation system .................................... 9.3.2
Cleaning the straw walkers ............................................. 9.3.3
Warning signal ................................................................. 9.3.3
Straw walker risers .......................................................... 9.3.4
Rice risers ....................................................................... 9.3.4
Centre risers .................................................................... 9.3.5
Side risers ....................................................................... 9.3.6
Parallel risers ................................................................... 9.3.7
CCM risers ...................................................................... 9.3.8
Cleaning ................................................................................ 9.4.1
Sieve pan ........................................................................ 9.4.1
Preparation floor .............................................................. 9.4.1
Frogmouth sieves ............................................................ 9.4.2
Electrical sieve adjustment .............................................. 9.4.2
Removing the sieves ....................................................... 9.4.3
Installing the sieves ......................................................... 9.4.6
Tightening torques of axial mountings
for the upper and lower sieves ........................................ 9.4.6
Sieves –Basic setting ..................................................... 9.4.7
Harvesting without finishing sieves ................................. 9.4.7
Cleaning fan .................................................................... 9.4.8
Electric fan speed adjustment ......................................... 9.4.9
Wind-controlled cleaning step
LEXION 460 –420 .......................................................... 9.4.9
Find manuals at http://best-manuals.com/search?&s=CLA-2984250

298 425.0 - BA LEXION 460 - 410 2.1.3
Contents
Adjustment of primary wind duct
LEXION 460 –420 .......................................................... 9.4.9
Wind board
LEXION 460 –420 ........................................................ 9.4.10
Wind boards
LEXION 410 .................................................................. 9.4.10
Fan shutters for combining grass seed
and other special crops
(Extra equipment) .......................................................... 9.4.11
Dynamic sidehill levelling
(3-D cleaning system) .................................................... 9.4.12
Returns .......................................................................... 9.4.12
Combine performance monitor ...................................... 9.4.14
Grain delivery ......................................................................... 9.5.1
Augers and auger troughs ............................................... 9.5.1
Elevators .......................................................................... 9.5.2
Grain tank ........................................................................ 9.5.3
Grain tank extension –electrical
(9300 / 8500 litres grain tank) .......................................... 9.5.3
Grain tank extension –mechanical
(8100 / 7800 / 7300 litres grain tank) ............................... 9.5.4
Unloading the grain tank .................................................. 9.5.5
Grain tank unloading aid
(Extra equipment) ............................................................ 9.5.6
Grain tank unloading tube ............................................... 9.5.6
Swinging the unloading tube out and in ........................... 9.5.6
Inspection doors on the grain tank unloading tube .......... 9.5.8
Shear bolt for grain tank unloading .................................. 9.5.8
Grain tank unloading –engaging and disengaging ......... 9.5.9
Grain tank access ............................................................ 9.5.9
Automatic chain lubrication –grain tank unloading
(Extra equipment) .......................................................... 9.5.10
Straw chopper ........................................................................ 9.6.1
Straw chopper (hydraulic) ................................................ 9.6.1
Before using the straw chopper, check ........................... 9.6.1
Adjusting spreading width ................................................ 9.6.2
Spreader hopper height adjustment ................................ 9.6.2
Electric deflector adjustment ........................................... 9.6.2
Adjusting the length of cut ............................................... 9.6.3
Adjusting cross knife ........................................................ 9.6.3
Putting the straw chopper into operation ......................... 9.6.4
Putting the straw chopper out of operation ...................... 9.6.5
Chopper position for hitching the cutterbar trailer ............ 9.6.5
Reducing the speed of the straw chopper ....................... 9.6.6
Moving the V-belt (12) on the pulley ................................ 9.6.8
Straw chopper ........................................................................ 9.7.1
Straw chopper (rigid straw chopper) ................................ 9.7.1
Before using the straw chopper, check ........................... 9.7.1
Adjusting spreading width ................................................ 9.7.2
Spreader hopper height adjustment ................................ 9.7.2
Electric deflector adjustment ........................................... 9.7.3
Adjusting the length of cut ............................................... 9.7.3
Adjusting cross knife ........................................................ 9.7.4
Putting the straw chopper into operation ......................... 9.7.4
Putting the straw chopper out of operation ...................... 9.7.5
Chopper position for cutterbar trailer hitching .................. 9.7.5
Reducing the chopper speed ........................................... 9.7.5
Chaff spreader / Straw spreader ........................................... 9.8.1
Chaff spreader ................................................................ 9.8.1
Folding the chaff spreader open ..................................... 9.8.2
Straw spreader ................................................................ 9.8.4
Adjusting the spread pattern ........................................... 9.8.4
Sieve chart and suggested combine adjustments ................. 9.9.1
Sieve chart ...................................................................... 9.9.1
Suggested combine adjustments .................................... 9.9.2
Disawner plates ............................................................... 9.9.8
Threshing segment ......................................................... 9.9.8
Problem, cause and / or remedy –Basic machine .............. 9.10.1
10. Maintenance –basic machine
Important maintenance instructions .................................... 10.1.1
Important maintenance instructions
and safety rules ............................................................. 10.1.1
Maintenance schedules and lubricants charts .................... 10.2.1
Maintenance schedules ................................................ 10.2.1
Lubricants charts ........................................................... 10.2.4
Hydraulic system ................................................................. 10.3.1
Hydraulic accumulators ................................................. 10.3.1
Checking the oil level .................................................... 10.3.1
Changing hydraulic oil ................................................... 10.3.2
Changing the hydraulic oil filter ..................................... 10.3.3
Cleaning the coarse filter .............................................. 10.3.3
Refilling the system after a hydraulic oil change
(Sauer 90 R 130 / 90 M 100) ......................................... 10.3.4
Bleeding the hydraulic cylinders for
cutterbar transverse control .......................................... 10.3.5
Transmission / Brakes ......................................................... 10.4.1
Transmission gearbox ................................................... 10.4.1
Checking the oil level .................................................... 10.4.1
Oil change ..................................................................... 10.4.1
Final drives (2-step)
(20 t / 19 t / 20 t HD) ...................................................... 10.4.2
Checking the oil level .................................................... 10.4.2
Oil change ..................................................................... 10.4.2
Final drives
(Planetary gear) ............................................................ 10.4.3
Checking the oil level .................................................... 10.4.3
Oil change ..................................................................... 10.4.3
Threshing drum two-step variable speed drive ............. 10.4.4
Oil change ..................................................................... 10.4.4
Checking the oil level .................................................... 10.4.4
Transfer gearbox ........................................................... 10.4.5
Checking the oil level .................................................... 10.4.5
Oil change ..................................................................... 10.4.5
Grain tank unloading transmission ................................ 10.4.5
Checking the oil level .................................................... 10.4.5
Oil change ..................................................................... 10.4.5
Gear shift control adjustment ........................................ 10.4.5
Foot brake and brake fluid ............................................ 10.4.6
Parking brake ................................................................ 10.4.6
Feeder housing ................................................................... 10.5.1
Tension feeder chains ................................................... 10.5.1
Cleaning the suction blower
(extra equipment) .......................................................... 10.5.1

2.1.4 BA LEXION 460 - 410 - 298 425.0
Contents
Elevator Chains .................................................................... 10.6.1
Tensioning the grain elevator chain
(Combines without yield meter) ..................................... 10.6.1
Tensioning the grain elevator chain
(Combines with yield meter) .......................................... 10.6.2
Tensioning the returns elevator chain ............................ 10.6.2
Drive belts / drive chains –basic machine ........................... 10.7.1
General notes ................................................................ 10.7.1
Drive system diagram, left-hand side ............................ 10.7.2
Drive belts and chains ................................................... 10.7.2
Drive system diagram, right-hand side .......................... 10.7.3
Drive belts ...................................................................... 10.7.3
Removing the cutterbar drive belt (1)
(Cutterbar drive without variable-speed drive) ............... 10.7.4
Installing and adjusting the cutterbar drive belt (1) ........ 10.7.6
Removing the cutterbar drive belt (2)
(Cutterbar drive with variable-speed drive) .................... 10.7.7
Installing and tensioning the cutterbar
drive belt (2) ................................................................... 10.7.8
Removing the cutterbar variable-speed
drive belt (3) ................................................................... 10.7.9
Installing the cutterbar variable-speed
drive belt (3) ................................................................. 10.7.10
Removing the impeller drive belt (4) ............................ 10.7.11
Installing and adjusting the impeller drive belt (4) ........ 10.7.12
Removing the cutterbar intermediate drive belt (5) ...... 10.7.13
Installing and adjusting the cutterbar
intermediate drive belt (5) ............................................ 10.7.14
Removing the hydraulic pump drive belt (6)
for straw spreader / chaff spreader .............................. 10.7.15
Installing and adjusting the hydraulic pump
drive belt (6) for straw spreader / chaff spreader ......... 10.7.15
Removing the main intermediate drive belt (7) ............ 10.7.16
Installing and adjusting the main intermediate
drive belt (7) ................................................................. 10.7.18
Removing the intermediate drive belt for
grain tank unloading (8) ............................................... 10.7.20
Installing and adjusting the intermediate
drive belt for grain tank unloading (8) .......................... 10.7.21
Removing the straw chopper intermediate
drive belt (9) ................................................................. 10.7.22
Installing and adjusting the straw chopper
intermediate drive belt (9) ............................................ 10.7.23
Straw chopper drive adjustment .................................. 10.7.24
Relieving the tension on V-belt (10) at
spring-loaded cylinder (G) and removing the belt ........ 10.7.25
Installing the V-belt (10) and tensioning the belt
by means of spring-loaded cylinder (G) ....................... 10.7.25
Relieving the tension on drive belt (11) at
spring-loaded cylinder (G) and removing the belt ........ 10.7.26
Installing the drive belt (11) and tensioning it
at spring-loaded cylinder (G) ....................................... 10.7.26
Relieving the tension on straw chopper
drive belt (12) and removing the belt
(hydraulic straw chopper) ............................................ 10.7.27
Installing the straw chopper drive belt (12)
and tensioning it at spring-loaded cylinder (F)
(hydraulic straw chopper) ............................................ 10.7.27
Removing the sieve pan intermediate
drive belt (13) .............................................................. 10.7.28
Installing and adjusting the sieve pan
intermediate drive belt (13) .......................................... 10.7.29
Removing the sieve pan intermediate
drive belt (14) .............................................................. 10.7.30
Installing and adjusting the sieve pan
intermediate drive belt (14) .......................................... 10.7.30
Removing the sieve pan drive belt (15) ....................... 10.7.31
Installing and adjusting the sieve pan
drive belt (15) .............................................................. 10.7.33
Removing the fan intermediate drive belt (20) ............ 10.7.34
Installing and adjusting the fan intermediate
drive belt (20) .............................................................. 10.7.35
Removing the fan drive belt (21) ................................. 10.7.36
Installing the fan drive belt (21) ................................... 10.7.36
Removing the threshing mechanism
variable speed drive belt (22) ...................................... 10.7.37
Installing the threshing mechanism
variable speed drive belt (22) ...................................... 10.7.38
Removing the threshing drum drive belt (23) .............. 10.7.39
Installing and adjusting the threshing drum
drive belt (23) .............................................................. 10.7.40
Removing the accelerator drive belt (24) .................... 10.7.41
Installing and adjusting the accelerator
drive belt (24) .............................................................. 10.7.42
Removing the rotary radiator screen suction
drive belt (28) .............................................................. 10.7.43
Installing and adjusting the rotary radiator screen
suction drive belt (28) .................................................. 10.7.44
Tensioning the rotary radiator screen
drive belt (32) .............................................................. 10.7.44
Tensioning the suction blower drive belt (34) .............. 10.7.44
Removing the grain tank unloading
drive chain (17) ............................................................ 10.7.45
Installing and adjusting the grain tank unloading
drive chain (17) ............................................................ 10.7.46
Cabin / Compressor-type air conditioner ............................ 10.8.1
Cabin ............................................................................. 10.8.1
Cleaning the filters ......................................................... 10.8.1
Cleaning the units located in the cabin roof .................. 10.8.1
Compressor-type air conditioning system ..................... 10.8.2
Cleaning the condenser ................................................ 10.8.2
Checking the refrigerant level ........................................ 10.8.3
Replacing the filter receiver-drier .................................. 10.8.3
Required refrigerant charge –refrigerant R 134 a ........ 10.8.3
Compressor oil .............................................................. 10.8.4
Maintenance work before the harvest ........................... 10.8.4
Fire extinguisher .................................................................. 10.9.1
Fire extinguisher ............................................................ 10.9.1
Compressed air system
(Extra equipment) .............................................................. 10.10.1
Compressed air connections ....................................... 10.10.1
Draining the compressed air accumulator ................... 10.10.2
Pressure controller ...................................................... 10.10.2
Straw chopper ................................................................... 10.11.1
Swinging down the straw guide plate .......................... 10.11.1
Replacing the free-swinging knives ............................. 10.11.2

298 425.0 - BA LEXION 460 - 410 2.1.5
Contents
Swinging back the straw guide plate ........................... 10.11.3
Replacing the knives
(rigid straw chopper) .................................................... 10.11.3
Removing the straw guide plate .................................. 10.11.4
Replacing the free-swinging knives ............................. 10.11.5
Installing the straw guide plate .................................... 10.11.6
Replacing the stationary knives ................................... 10.11.7
Spreading unit .................................................................... 10.12.1
Installing and adjusting the toothed belt ...................... 10.12.1
Speed monitoring ............................................................... 10.13.1
Setting the magnetic pick-ups (sensors) ...................... 10.13.1
Winter storage instructions for combines ........................... 10.14.1
11. Maintenance –engine
Important maintenance instructions ..................................... 11.1.1
Important maintenance instructions
and safety rules ............................................................. 11.1.1
Maintenance schedules and lubricants charts ..................... 11.2.1
Maintenance schedule ................................................... 11.2.1
Lubricants chart ............................................................. 11.2.2
Maintenance –engine ......................................................... 11.3.1
Engine overview ............................................................ 11.3.1
Fuel system ................................................................... 11.3.2
Fuel tank ........................................................................ 11.3.2
Fuel tap .......................................................................... 11.3.2
Water separator / fuel pre-filter
(Extra equipment –small version) ................................. 11.3.3
Water separator / Fuel pre-filter
(Extra equipment, replaces fuel pre-filter Fig. 8) ............ 11.3.4
Fuel filter ........................................................................ 11.3.5
Replacing the filter cartridge .......................................... 11.3.5
Bleeding the fuel system ............................................... 11.3.6
Checking engine oil level ............................................... 11.3.6
Engine oil change .......................................................... 11.3.6
Draining the old oil ......................................................... 11.3.7
Oil filter .......................................................................... 11.3.8
Filling in engine oil ......................................................... 11.3.8
Cooling system .................................................................... 11.4.1
Coolant .......................................................................... 11.4.1
Water drain plugs on the engine block .......................... 11.4.1
Water cooler .................................................................. 11.4.2
Filling the cooling system with coolant ........................... 11.4.2
Overpressure ................................................................. 11.4.2
Antifreeze / corrosion protection .................................... 11.4.3
Warning notice ............................................................... 11.4.3
Cooling water temperature ............................................ 11.4.3
Stopping the engine when overheated .......................... 11.4.3
Radiator rotary screen ................................................... 11.4.4
Cleaning the radiator ..................................................... 11.4.5
Dry-type air cleaner .............................................................. 11.5.1
Warning device .............................................................. 11.5.1
Cleaning the air cleaner intake screen .......................... 11.5.1
Cleaning dry-type air cleaner ......................................... 11.5.2
Cleaning the air cleaner ................................................. 11.5.2
Safety filter cartridge ...................................................... 11.5.4
Electrical equipment ............................................................. 11.6.1
Battery ........................................................................... 11.6.1
Alternator ....................................................................... 11.6.2
Engine problems, cause and / or remedy ............................ 11.7.1
Engine winter storage .......................................................... 11.8.1
Engine preservation ...................................................... 11.8.1
12. Lubrication chart
Lubricants and lubrication instructions ................................ 12.1.1
13. Index
Index .................................................................................... 13.1.1

2.1.6 BA LEXION 460 - 410 - 298 425.0
Contents

3
General information


298 425.0 - BA LEXION 460 - 410 3.1.1
General information
ROAD TRAFFIC REGULATIONS
IMPORTANT: Road traffic regulations may vary
between countries. In case of discrepancies
between the instructions provided by the manu-
facturer and the traffic regulations of the relevant
countries, the traffic regulations of the countries
concerned apply.
In addition to his driving licence, the operator must
always carry the copy of the vehicle type approval
registration issued by the Kraftfahrt-Bundesamt
(the Federal Motor Vehicle Executive). A warning
triangle and, on machines over 4 t permissible total
weight, at least one wheel chock must always be
carried on the combine.
When driving on public roads with the combine,
comply with all the requirements stated under
letter C in the copy of the vehicle type approval
registration (§18 Section 5 StVZO) issued by the
Kraftfahrt-Bundesamt (the Federal Motor Vehicle
Executive).
On machines with exceptional width (width over
the tyres), a vehicle type approval registration for
individual vehicles (single expert opinion) and a
special approval in accordance with §70, Section 1,
clauses 1 and 2 of the StVZO must be carried
instead of the machine's General Operating Permit.
Furthermore, all the requirements stated in the
vehicle type approval registration for individual
vehicles and in the special approval must be
observed. The issue of a special approval differs
from country to country. The excess width must be
marked in accordance with the regulations for the
marking of road vehicles with excess width (two
marker boards at the front and back, protective bar,
two amber flashing warning beacons).
If any part(s) of the combine is/are subsequently
modified whose condition is/are prescribed or the
operation of which (after being modified) could
represent a hazard to other road users, then the
vehicle type approval registration shall no longer
be valid and application must be made for a new
vehicle type approval registration. In this case the
machine must be presented to the motor vehicle
safety inspection authority responsible (TÜV) in
order to obtain an expert opinion certificate
(§19 section 2 STVZO).
If you are in any doubt as to whether this situation
applies in your case, please contact us as manu-
facturers.
If a transport vehicle for front end attachments is
towed behind the combine then the cable for the
lighting system must be connected and the good
condition of the lighting system assured.
If the combine is equipped with a maize picker head
or folding cutterbar, the regulations and require-
ments of the machine's General Operating Permit
must be observed, in particular the requirements
concerning ballast weights and tyres.
Registration
As a self-propelled working machine with a maxi-
mum speed of up to 20 kph, the combine is not
subject to the normal registration regulations and
is not required to bear a registration plate. The
machine must, however, be clearly and indelibly
marked on the left-hand side with the Christian
name and surname of the owner and his address.
The towing of trailers in the trailer hitch when driving
on public roads is not permitted.
General information

3.1.2 BA LEXION 460 - 410 - 298 425.0
General information

298 425.0 - BA LEXION 460 - 410 3.2.1
General information
IMPORTANT The instructions contained in this manual
should be carefully read and observed by all
persons who are concerned with the operation,
maintenance and inspection of this machine,
in order to prevent accidents. Especially the
«SAFETY RULES»in this manual should be
read with the utmost care and adhered to.
The use of spare parts, accessories and ancil-
lary equipment, which are not originally manu-
factured by CLAAS, can change the specified
design characteristics of this CLAAS machine
or can detract from its functional performance,
with a possible adverse affect on the active
and/or passive operational safety of the
machine and its occupational safety standards
(accident prevention).
CLAAS are in no way liable for any damage or
personal injury caused through the use of other
than original or approved CLAAS parts, acces-
sories and ancillary equipment.
Technical data, dimensions and weights are
given as an indication only. CLAAS reserve
the right to make changes subsequently as
technical developments continue. Responsi-
bility for errors or omissions not accepted.
IMPORTANT: Front, rear, right and left refer
to the direction of forward travel.
General information

3.2.2 BA LEXION 460 - 410 - 298 425.0
General information
This manual suits for next models
5
Other Claas Utility Vehicle manuals


