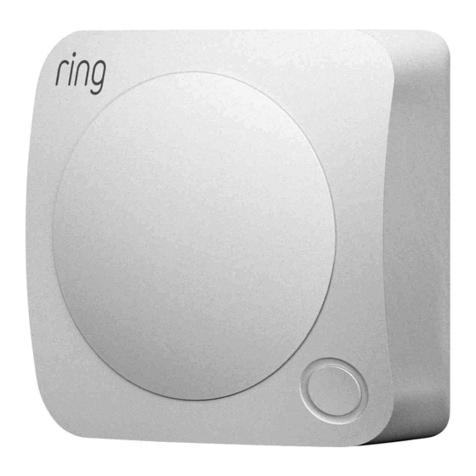
clare ClareOne CLR-C1-CO Assembly instructions

© 28MAY20 Clare Controls, LLC. 1 / 11 DOC ID –1942 • Rev 03
ClareOne Carbon Monoxide Detector
Installation Sheet
Last modified: 05/28/20
Model number: CLR-C1-CO
Description
The ClareOne Carbon Monoxide Detector (CLR-C1- CO) is a
battery powered carbon monoxide detector and alarm device.
This device is designed to protect you and your household
from the dangerous effects of Carbon Monoxide.
To activate/turn on the CO detector:
1. Remove the battery pull tab to engage the batteries.
2. Carefully rotate the CO alarm onto the mounting plate.
This activates the On/Off switch.
The red, yellow, and green LEDs immediately flash in
sequence.
Note: For the display models, the LCD screen displays all
icons).
3. Wait 15 seconds after connecting the power before button
testing.
Notes
•Install a CO alarm in every room that contains a fuel
burning appliance, particularly high occupancy areas e.g.
bedrooms, kitchens etc.
•In rooms with a fuel burning appliance, install (preferably)
on the ceiling, (1 ft (300 mm) from walls) and between 5 ft
to 10 ft horizontally from the appliance. In rooms remote
from the appliance install the detector at ‘head height’,
where the alarm indicators can be seen.
•Test the alarm weekly by pressing the Test/Hush button,
the alarm sounds (at a diminished sound output level
initially and then quickly reach maximum sound output
level).
•Replace alarm after approximately 10 years operation
(see ‘Replace by’ date on side wall label).
•Avoid contamination by waiting until all construction is
completed before fitting the alarm.
•Individuals with health issues may consider warning
devices which provide audible and visual signals for
carbon monoxide concentrations under 30ppm.
Carbon monoxide
Many people are killed each year, and many more suffer ill
health from Carbon Monoxide (CO) poisoning. CO is an
invisible, odorless, tasteless and extremely toxic gas. It is
produced by appliances and vehicles burning fuels, such as
coal, oil, natural gas, propane, kerosene, paraffin, wood,
gasoline, diesel, charcoal, etc. CO is absorbed by red blood
cells in the lungs in preference to oxygen - this results in rapid
damage to the heart and brain from oxygen starvation.
High levels of CO in a house can be caused by:
•Incorrectly or poorly installed fuel-burning appliances.
•Blocked or cracked chimneys/flues.
•Blocked vents or draught-proofing which makes areas with
fuel burning appliances or fireplaces airtight.
•Engines of cars, lawnmowers etc. that are left running in
confined spaces.
•Portable kerosene or propane heaters in poorly ventilated
rooms.
What happens when the CO alarm detects Carbon
Monoxide?
When the alarm detects potentially dangerous levels of CO, it
flashes the red alarm LED immediately and then sounds a loud
alarm if the CO persists. Table 2 shows how the CO alarm
reacts to different levels of CO gas and exposure time. At
higher levels of CO, the alarm sounds sooner. The rate of
flashing of the red LED indicates the level of CO. If your CO
alarm sounds, follow the instructions on page 7, “When the
alarm sounds.”
WARNING: Never ignore the CO alarm.

2 / 11 DOC ID –1942 • Rev 03
Carbon monoxide exposure and symptoms
The following symptoms may be related to Carbon Monoxide
poisoning and should be discussed with all members of the
household:
Mild exposure: Headaches, running nose, sore eyes,
often described as “flu-like” symptoms.
Medium exposure: Dizziness, drowsiness, vomiting.
Extreme Exposure: Unconsciousness, brain damage,
death.
Many cases of reported Carbon Monoxide poisoning indicate
that while victims are aware, they are not well. They become
disoriented and are unable to save themselves by either exiting
the building or calling for assistance.
Table 1: CO Inhalation time (approx.) and symptoms
Concentration of CO
in the air –PPM [1]
Symptoms
35
The maximum allowable concentration for
continuous exposure in any 8-hour period
according to Occupational Safety and Health
Administration (OSHA) [2].
150
Slight headache after 1.5 hours.
200
Slight headache, fatigue, dizziness, nausea
after 2-3 hours.
400
Frontal headaches within 1-2 hours, life
threatening after 3 hours, also maximum
parts per million in flue gas (on free air
basis) according to US Environmental
Protection Agency.
800
Dizziness, nausea and convulsions within 45
minutes. Unconsciousness within 2 hours.
Death within 2-3 hours.
1600
Headache, dizziness and nausea within 20
minutes. Death within 1 hour.
3200
Headache, dizziness and nausea within 5-10
minutes. Death within 25-30 minutes.
6400
Headache, dizziness and nausea within 1-2
minutes. Death within 10-15 minutes.
12800
Death within 1-3 minutes.
[1] PPM –Parts per mission
[2] OSHA –Occupational Safety & Health Association
Table 2: ClareOne CO alarm response
CO gas
level
Red light
Display
icon
(before
sounder)
Display
icon
(after
sounder)
Alarm/
Sounder
≈ 30 ppm
Off
Blank
Blank
Off
≈ 70 ppm
1 flash
every 3
seconds
On within 60
to 240
minutes
(typically 90
mins).
≈ 150 ppm
1 flash
every 2
seconds
On withing
10 to 50
minutes
(typically 30
minutes).
≈ 400 ppm
1 flash
every
second
On within 4
to 15
minutes
(typically 9
minutes).
≈ 750 ppm
1 flash
every
second
On within 3
minutes
(typically 2
minutes).
*Unless it has alarmed previously, ppm values shown in the table are
for example purposes only. See “CO alarm memory”.
Alarm indicators
Co Present: Red LED flash only
Co Alarm: Red LED flash + sounder
Faults: Yellow LED Flash + beeps
CO present (before alarm sounds)
When the alarm detects CO the red LED flashes in accordance
with Table 2. This helps locate CO leaks as the unit gives an
immediate indication. (Without this feature the CO would need
to be present for typically 90 minutes for an alarm sound to be
given).
Note: The red LED flashes may be triggered by CO produced
by gas appliances, from car engines or from nearby
barbecues. This is usually not a concern, unless the red LED
flashes persist until the alarm sounds and the CO source is
unknown.
The display models display CO concentrations greater than
30ppm in accordance with Table 2.
Note: The CO alarm may sound if cigarette smoke is blown
into it or if aerosols are released nearby.
CO alarm memory
The CO alarm memory is an important feature of the CO
alarm. If the house is unoccupied during an alarm condition, it
warns the homeowner that the unit has previously detected CO
gas and been in alarm. The memory feature has two operation
modes:
•Memory indication for 24-hour period after alarm
•Memory recall on demand
24-hour memory indicators: After alarm, the red LED flashes
at different rates every 50 seconds depending on the level of
CO detected - see Table 3.
Memory recall on demand: To review the memory status
after initial 24 hours, press and hold the Test button, the red
LED flashes in accordance to Table 3. Display models show
the peak level of CO measured.
Reset Memory: Hold down the Test button until the red LED
stops and the green LED starts flashing. Cover the Alarm with
a cloth to muffle the sounder during this time.
Note: The memory is reset when the unit is switched off.

DOC ID - 1942 • Rev 03 3 / 11
Table 3: CO alarm memory indicators
CO gas level
Red light response
24-hours
On demand
(button press)
≈ 70 ppm
1 flash every 50 seconds
1 flash
≈ 150 ppm
2 flashes every 50 seconds
2 flashes
≈ 400 ppm
4 flashes every 50 seconds
4 flashes
≈ 750 ppm
4 flashes every 50 seconds
4 flashes
CO alarm location
NATIONAL FIRE PROTECTION ASSOCIATION REQUIRED
PROTECTION
For your information the National Fire Protection Association’s
Standard 720 advises as follows:
Carbon Monoxide Alarms shall be installed as follows:
1. Outside of each separate dwelling unit sleeping area in the
immediate vicinity of the bedroom.
2. On every occupiable level of a dwelling unit, including
basements but excluding attics and crawl spaces.
3. Other locations where required by applicable laws, codes,
or standards.
The equipment should be installed using wiring methods in
accordance with the National Fire Protection Association’s
Standard 72, 720. (National Fire Protection Association,
Batterymarch Park, Quincy, MA 02269).
Note: Specific requirements for Carbon Monoxide alarm
installation vary from state to state and from region to region.
Check with your local Fire Department for current requirements
in your area.
Recommended installation location
•Every room containing a fuel burning appliance, and
remote rooms where occupants spend a considerable
amount of time
•In every bedroom. If the number of Carbon Monoxide
alarms to be fitted is limited, the following points should be
considered when deciding where best to fit the alarm(s)
oPlace a CO alarm in the room if there is an
appliance where people sleep.
oPlace a CO alarm in a room containing a flueless
or open-flued appliance.
oPlace an alarm in a room where the occupant(s)
spend most of their time (e.g. family room).
•In a studio apartment, the CO alarm should be placed as
far away from the cooking appliance as possible, but near
where the person sleeps.
•If the appliance is in a room not normally used, such as a
furnace room, the CO alarm should be placed immediately
outside the room so that the alarm is heard more easily.
Figure 1: Location of CO alarm in a room with a fuel burning
appliance
Figure 2: CO alarm in a room with sloped ceilings
Note: The CO Alarm should be located at the high side of the room.
Figure 3: CO alarm in bedrooms and other rooms away from
appliances (i.e. at breathing level)

4 / 11 DOC ID –1942 • Rev 03
Poor installation placement
Do not place the CO alarm in any of the following areas.
•In the immediate vicinity of a cooking appliance (keep it at
least 3 ft (1 m) horizontally from it)
•Outside the building
•In an enclosed space (e.g. in or below a cupboard)
•In a damp or humid area
•Directly above a sink, stovetop, or oven
•Next to a door, window, air vent or anywhere that it could
be affected by draughts
•Next to a ceiling or exhaust fan or air conditioning vents
•Above heat sources such as radiators or heating vents
•Where it would be obstructed, e.g. by curtains or furniture
•In an area where the temperature could drop below 40°F
(4.4°C) or rise above 100°F (37.8°C)
•Where dirt or dust could block the sensor
•Where it could be easily knocked/damaged, or where it
could be accidentally turned off /removed
•In a bathroom or other areas where the CO Alarm may be
exposed to water splashes, dripping or condensation
•Near paint, thinners, solvent fumes, or air fresheners
Using the CO alarm in a room with a fuel burning
appliance
Note: See Figure 1 for a visual representation on CO alarm
placement.
•If it is mounted on a wall, it should be located at a height
greater than the height of any door or window but still be
at least 0.5 ft (150 mm) from the ceiling.
•If it is mounted on the ceiling it should be at least 1 ft
(300 mm) from any wall or light fixture.
•The CO alarm should be a horizontal distance of between
5 ft to 10 ft (1.5 m and 3 m) from the potential CO source.
•If there is a partition in the room, the CO alarm should be
located on the same side of the partition as the potential
source of carbon monoxide.
•In rooms with sloped ceilings and fuel burning appliances,
the CO alarm should be located at the high side of the
room, see Figure 2.
oIf locating the CO alarm in a bedroom or in
rooms remote from a fuel burning appliance,
see Figure 3.
•Mount the CO alarm relatively close to the breathing zone
of the occupants.
•Whatever position is selected make sure it is possible to
view the three LED indicators when in the vicinity of the
Alarm.
WARNING: A CO Alarm should not be used as a substitute for
proper installation, use and maintenance of fuel-burning
appliances, including appropriate ventilation and exhaust
systems.
WARNING: Your CO alarm is intended for use in ordinary
indoor locations of family units. It is not designed to measure
compliance with OSHA commercial or industrial standards.
Programming
To add the sensor to your panel and for detailed programming
instructions, refer to the ClareOne Wireless Security and Smart
Home Panel User Manual (DOC ID 1871).
To add the alarm:
1. Put the ClareOne panel in “add mode” and follow the
displayed instructions for adding the sensor.
2. Press the Test button.
–Or –
Twist the alarm’s body away from the base.
3. Exit “add mode.”
Installation
WARNING: The Installation of this apparatus should not be
used as a substitute for proper installation, use and
maintenance of fuel burning appliances including appropriate
ventilation and exhaust systems.
To install the CO alarm:
1. Select a location, see CO alarm location on page 3.
2. Remove the mounting plate from the packaging.
3. Place the mounting plate on the ceiling/wall in the desired
mount position.
4. Use a pencil and mark the location of the two screw holes.
5. Taking care to avoid any electrical wiring in the ceiling, drill
holes using a 13/64 in (5.0 mm) drill bit through the center
of the marked locations.
6. Push the plastic screw anchors provided into the drilled
holes, and then screw the mounting plate to the ceiling/
wall.
–Or –
If desired, the CO alarm sets atop flat surfaces with the
mounting plate attached.
7. Carefully align the alarm with the base, gently pressing it
into place, twisting it on the plate, connecting the batteries.
The red, yellow, and green LEDs immediately flash in
sequence to show the alarm is powered correctly. In
addition, the icons on the LCD display on the display
models also become visible.

DOC ID - 1942 • Rev 03 5 / 11
8. Wait 15 seconds, and then press the Test button.
9. Install other alarms similarly.
To tamperproof the alarm:
1. Break off the small pillar on the base.
2. To remove the alarm once installed, it is now necessary to
use a small screwdriver, to release the catch (push catch
towards the ceiling) and then twist off the alarm.
3. If necessary it is possible to further secure or tamperproof
the alarm by using a No.2 or No.4 3/32 to 7/64 in (2 to 3
mm) diameter - not supplied self-tapping screw 1/4 to 5/16
in (6 to 8 mm) long to firmly lock the alarm and its
mounting plate together.
Testing the CO detector
Test the system frequently to ensure its continued and safe
operation.
To test the detector: Press and hold the Test button.
The green LED flashes and the sounder ramps up to full
sound, indicating that the detector is operating correctly.
Testing recommendations
•Immediately after the system is installed or upgraded
•Once weekly thereafter
•After prolonged absence from the dwelling (e.g. after
extended vacation)
•After any significant home repairs or remodeling work
Silencing (Hush)
When the alarm sounds, after sensing CO, pressing the
Test/Hush button immediately silences the alarm (the red LED
continues to flash). If CO is still present the red LED and
sounder activate again after 4 minutes. The alarm can only be
silenced once during a CO incident. At levels > 250 ppm CO
the alarm cannot be silenced.
CO detector monitoring
The CO alarm self-checks (monitors) itself and give a status
update every 50 seconds if there are any problems.
The status of the alarm can also be checked on demand by
using the test button. Table 4 shows the status response to
both the self-check and on demand testing.
Note: If the alarms indicate a fault, pressing the Test button
silences the beeps for a 24-hour period. This is for your
convenience and can only be done once.

6 / 11 DOC ID –1942 • Rev 03
Table 4: ClareOne CO monitoring summary
Red
LED
Yellow
LED
(fault)
Green
LED
(power)
Sounder
LCD display
Action
Standby - No visual or audible indication if unit is ok.
Unit OK (button test)
Off
Off
On
Ramp up
to full
sound
Low battery
Off
1 flash
Off
1 beep
Replace
batteries
Sensor fault
Off
2
flashes
Off
2 beeps
Replace
unit
End of life (EOL)
Off
3
flashes
Off
3 beeps
Replace
unit
CO detector maintenance
Clean the outside housing by occasionally wiping with a clean
damp cloth. Do not use any cleaning agents, bleaches,
detergents, or polishes including those in aerosol cans. Avoid
spraying air fresheners, hair spray, paint, or other aerosols
near the CO alarm. Do not place air fresheners near the unit.
Use the narrow nozzle of a vacuum cleaner to remove dust
and other contamination from the cover slots and gas entry
holes.
CAUTION: Do not paint the CO alarm.
Remove the CO alarm when decorating. Do not allow water or
dust to contaminate the alarm.
WARNING: Do not open or tamper with the CO alarm. There
are no user serviceable parts inside, and this can damage the
alarm.
Battery replacement
If the alarm indicates a yellow flash with a single beep or the
low battery icon is displayed on the LCD display, the battery
needs attention.
To replace the battery:
1. Remove the alarm from the mounting plate.
2. Remove the battery cover, and then remove the current
batteries. Note the battery polarity.
3. Insert new batteries, noting the polarity.
Note: Use only Duracell Alkaline MN2400BK AAA size
batteries (from a local retailer).
4. Replace the battery cover.
5. Carefully align the alarm on the base, and then gently
press and twist on. This connects the batteries.
The red, yellow, and green LEDs immediately flash in
sequence to show the batteries are connected properly. In
addition, the icons on the LCD display on the display
models light up.
6. Wait 15 seconds, and then press the Test button to
ensure that the alarm works.
Notes
•If the alarm still indicates a yellow flash with a single beep
or the low battery icon is displayed on display alarms the
batteries may be depleted. Replace them with fresh
batteries.
•If the red, yellow, and green LEDs do not flash in
sequence and there is no display on the LCD display
units, the batteries may be installed incorrectly (reverse
polarity). Remove the Alarm from the mounting bracket,
remove the battery cover and check if the batteries are
installed correctly. If the batteries were connected
incorrectly and after correcting the polarity of the batteries,
for the first hour the alarm may indicate CO is present by a
flashing red LED for non-display alarms; for display
models the alarm may indicate CO level readings and/or
random icons. Please note that during this period the
alarm activates as required during an actual CO event.
WARNING: Constant exposures to high/low temperatures or
high humidity reduces battery life. Use only batteries specified
in marking. Use of a different battery may have a detrimental
effect on alarm operation.
For environmentally sound disposal, remove the alarm from its
mounting plate models, open the battery door and remove the
batteries) and dispose in accordance with best practice and
guidance on WEEE disposal and recycling.
Functional gas test
The Carbon Monoxide alarm checks for CO gas every 4
seconds. When exposed to the CO gas, the red LED flashes
(as per Table 2) to confirm that it is detecting the CO gas. Solo
C6 brand canned CO testing agent may be used to verify the
alarm’s ability to sense CO.
To gas test the CO detector: Spray canned CO within .25 in
of the gas entry holes for 3 seconds.
Within seconds, the red LED begins to flash (as per Table 2)
confirming that the alarm has detected the CO.

DOC ID - 1942 • Rev 03 7 / 11
To enter accelerated functional gas test mode: Press the
Test button momentarily (approximately 1 second) while the
alarm is indicating CO presence.
The alarm will sound 2 x 4 temporal tone patterns to indicate
an alarm condition.
To return the unit to standby:
Place the alarm in clean air for a few minutes until the red LED
is no longer flashing.
When the alarm sounds
WARNING: Actuation of your CO alarm indicates the presence
of carbon monoxide (CO) which can cause death.
Act immediately when the CO detector alarms.
When the alarm sounds:
1. Press Reset/Silence button (only operational at
concentrations < 250ppm).
2. Call your local Fire Department or 911.
3. Immediately move to fresh air –outdoors or by an open
door/window. Do a head count to ensure that all persons
are accounted for. DO NOT re-enter the premises until the
first responders have arrived, the premises have been
aired out, and your alarm returns to its normal condition.
4. After following steps 1-3, if your alarm reactivates within a
24-hour period, repeat steps 1-3 and call a qualified
appliance technician to investigate for sources of CO from
fuel burning equipment/appliances and inspect for proper
operation of this equipment.
If problems are identified during this inspection have the
equipment serviced immediately. Note any combustion
equipment not inspected by the technician and consult the
manufactures’ instructions, or contact the manufacturers
directly, for more information about CO safety and this
equipment. Make sure that motor vehicles are not, and
have not been, operating in an attached garage or
adjacent to the residence.
Note: When ventilation is provided by leaving the window
and doors open, the CO build up may have dissipated by
the time help arrives and the alarm may have stopped
sounding. Although your problem may appear temporarily
solved it is crucial that the source of the CO is determined,
and appropriate repairs made.
Protecting your family
Follow these guidelines to reduce the risk of Carbon Monoxide
poisoning.
•Know and look out for warning signs that Carbon
Monoxide may be present. These include:
oThe CO alarm warning of abnormal levels
oStaining, soot marks or discoloration on or around
appliances
oA pilot light frequently going out
oA strange smell when an appliance is operating
oA gas flame which is yellow or orange, instead of the
normal blue
oFamily members (including pets) exhibiting the “flu-
like” symptoms of CO poisoning as described above.
If any of these signs are present, get the appliance
serviced before further use. If feeling ill, get
immediate medical help.
•Choose all appliances and vehicles which burn fossil fuels
such as coal, oil, natural gas, propane, kerosene, wood,
gasoline, diesel, charcoal, etc. with care and have them
professionally installed and regularly maintained.
•These appliances must “breathe in” air to burn the fuel
properly. Know where the air comes from and ensure
vents remain unobstructed (particularly after any
construction or remodeling work).
•The appliances must also “breathe out” waste gases
(including the CO) –usually through a flue or chimney.
Ensure chimneys and flues are not blocked or leaking and
get them checked every year. Check for excessive rust or
cracks on appliances and pipe work.
•Never leave your car, motor bike or lawnmower engine
running in the garage with the garage door closed. Never
leave the door from the house to the garage open if the
car is running.
•Never adjust your own gas pilot lights.
•Never use a gas stove, cooktop or a barbecue grill for
home heating.
•Children should be warned of the dangers of CO
poisoning and instructed never to touch or interfere with
CO alarms. Do not allow small children to press the Test/
Hush button as they could be subjected to excessive noise
when the alarm sounds.
•Leaving windows or doors slightly open (even a few
inches) significantly reduces the risk of high levels of CO
occurring. The high levels of draught-proofing in modern
houses reduces ventilation and can allow dangerous
gases to build up.
•Install CO alarms in all the areas recommended in this
booklet.
•Recognize that CO poisoning may be the cause when
family members suffer from “flu-like” symptoms when at
home but feel better when they are away for extended
periods.

8 / 11 DOC ID –1942 • Rev 03
Specifications
Compatible panel
ClareOne (CLR-C1-PNL1)
Transmitter frequency
433 MHz
Encrypted
Yes
Visual indicators
Low battery, sensor fault, end of life
Audible indicators
Low battery, sensor fault, end of life
Test/Hush button
Checks the electronics, sounder, sensor, and
batteries
Audible alarm
85 dB at 3 meters
CO alarm memory
Indicates if the unit was previously in alarm
Battery type
(2x) AAA (Alkaline)
Battery life
Should be changed annually (extreme
temperatures affect battery life)
Expected life span
10 years
Operating environment
Temperature
Humidity range
40 to 100°F (4.5 to 38°C)
15 to 95% R.H. noncondensing
Dimensions
(W × H × D)
4.72 × 4.13 × 1.77 in. (120 × 105 × 40 mm)
Certifications
FCC: 15.109 Class B 15.231, Industry
Canada: ICES-003, RSS-210, conforms to
UL-2034, CSA Std 6.19-01
Servicing the CO detector
If your CO alarm fails to work after you have carefully read all
the instructions, verified that the unit has been installed
correctly, and ensured that it has good batteries connected,
return it for repair or replacement from the original purchasing
location.
Some states or jurisdictions do not allow the limitation or
exclusion of incidental or consequential damages, or limitations
on how long an implied warranty last so the above limitation
may not apply to you.
Do not interfere with the alarm or attempt to tamper with it. This
will invalidate the guarantee, but more importantly may expose
the user to shock or fire hazards. This guarantee is in addition
to your statutory rights as a consumer.
CO detector limitations
The CO alarm will not work without good batteries or if the
batteries are placed in reverse polarity. If the batteries have
been drained the alarm will not give protection. Button test the
alarm weekly and on return from vacations or other long
absences.
Carbon Monoxide must enter the unit for it to be detected.
There may be Carbon Monoxide in other areas of the house
(e.g. downstairs, in a closed room, etc.) but not in the vicinity of
the CO alarm. Doors, air drafts and obstructions can prevent
CO from reaching the alarm. For these reasons we
recommend CO alarms are installed both near and in
bedrooms, particularly if bedroom doors are closed at night.
Additionally, install detectors in rooms where members of the
household spend much of their time, and in rooms with
potential sources of CO gas.
The CO alarm may not be heard. The sound output is loud but
it may not be heard behind a closed door or if it is too far away.
The alarm may not wake up someone who is impaired by
alcohol or medications. The alarm sound may be masked by
other sounds such as T.V., stereo, traffic noise etc. Installing
CO alarms on either side of closed doors will improve their
chance of being heard. This CO alarm is not designed for
people with impaired hearing.
CO alarms don’t last indefinitely. CO alarms are sophisticated
electronic devices with many parts. Although CO alarms and
their component parts have undergone stringent testing, and
are designed to be very reliable, it is possible that parts can
fail. Therefore, you should test your CO alarms weekly. CO
Alarms must be replaced after 10 years of operation.
CO alarms are not a substitute for life insurance. Householders
are responsible for their own insurance. CO alarms warn of
increasing CO levels, but we do not guarantee that this will
protect everyone from CO poisoning.
CO alarms are not suitable as early warning smoke alarms.
Some fires produce Carbon Monoxide, but the response
characteristics of these CO alarms are such that they would
not give sufficient warning of fire. Smoke alarms must be fitted
to give early warning of fire.
CO alarms do not detect the presence of natural gas
(methane), propane, butane, or other combustible gases.
Install combustible gas alarms to detect such gases.
Note: Carbon Monoxide alarms, with electrochemical sensors
have a cross sensitivity to hydrogen. This means that they can
alarm due to sensing hydrogen produced by batteries which
are incorrectly charged, such as on boats or with battery back-
up systems such as those used with alternative energy
systems. The unit will alarm with 500ppm H2 after between 10-
and 40-minutes exposure.
This CO alarm is intended for residential use. It is not intended
for the use in industrial applications where OSHA requirements
for carbon monoxide detectors must be met.
This carbon monoxide alarming device is designed to detect
carbon monoxide gas from any source of combustion. It is not
designed to detect smoke, fire, or any other gases.
WARNING: THIS CO ALARM IS DESIGNED TO PROTECT
INDIVIDUALS FROM THE ACUTE EFFECTS OF CARBON
MONOXIDE EXPOSURE. IT WILL NOT FULLY SAFEGUARD
INDIVIDUALS WITH SPECIFIC MEDICAL CONDITIONS. IF
IN DOUBT CONSULT A MEDICAL PRACTITIONER.
Troubleshooting
The alarm does not work with the test button
1. Wait 15 seconds after connecting the power before button
testing.
2. Hold button down firmly for at least 5 seconds.

DOC ID - 1942 • Rev 03 9 / 11
3. Check the alarm is secured correctly on the mounting
plate.
4. Check if batteries are inserted in the correct polarity.
5. Replace batteries.
Alarm sounds for no reason
See When the alarm sounds on page 7.
If there are still problems:
1. Ensure there are no fuel burning appliances in the vicinity
which could be leaking CO gas (e.g. even from next door).
2. Ensure there are no fumes in the area (e.g. paint, thinners,
hair spray, chemical cleaners aerosol sprays, damp
proofing done with and aqueous emulsion such as amino
functional siloxane and alkylalkoxysilane.
3. Ensure there is no outdoor source of CO in the vicinity
(e.g. a car with engine running, heavy traffic, heavy air
pollution, barbecue fumes, etc.).
4. Ensure there is no source of hydrogen such as batteries
being charged (e.g. on boats or in Uninterruptable Power
Supplies (UPS)).
5. Ensure there is not excessive smoke or fumes from
devices such as Egyptian shisha or hookah pipes,
especially those that use coal or charcoal to heat the
tobacco.
6. If the alarm is installed with an RF Module, ensure that
there are no problems with the other RF interconnected
devices.
7. Press the Test/Hush button to silence the alarm.
If the unit continues to sound it is possibly defective and should
be replaced.
Display and indicator summary
Sensor Fault
Evacuation Status
Table 5: ClareOne CO indicator summary
Operation/mode
Red
LEDs
Yellow
LEDs
Green LEDs
Sounder
Normal operation
Power up
1 flash
1 flash
1 flash
Off
Standby
Off
Off
Off
Off
Button test
(weekly)
Off
Off
Flashing
(every
second)
Temporal
full sound
Unit sensing CO
has itself
Flashing
(as per
table 2)
Off
Off
Temporal
full sound
Sensing CO
through RF
interconnect
Off
Off
Off
Temporal
full sound
Fault mode
Low battery
condition
Off
1 flash
(every50
seconds)
Off
1 beep
with flash
Sensor fault
condition
Off
2 flashes
(every 50
seconds)
Off
2 beeps
with flash
End of life
condition
Off
3 flashes
(every 50
seconds)
Off
3 beeps
with flash
Table 6: ClareOne CO service diagnostics
Diagnostic
modes
Action
Red
LED
Yellow
LED
Sounder
Action
Fault checks
Low battery
Press
and hold
button
1 flash
1 flash
Off
Faulty
sensors
Press
and hold
button
Off
Off
Off
End of Life
Press
and hold
button
Off
Off
Temporal
full
sound
Alarm
memory
Action
Red LED
Green
LED
Sounder
LCD
display
24 hours
after event
Flashers
per
table 3
Off
Off
Off
Long term
memory
Press
and hold
button
Flashers
per
table 3
Off
Temporal
full
sound
CO ppm
Memory
erase
Keep
button
pressed
after
long
term
test
Flashers
per
table 3
Wait for
green light
then
release
button
Temporal
full
sound
CO ppm

10 / 11 DOC ID –1942 • Rev 03
Regulatory information
Manufacturer
Clare Controls, LLC.
7519 Pennsylvania Ave, Suite 104
Sarasota, FL 34243
North American
standards
Conforms to UL-2034, CSA Std 6.19-01
FCC compliance
This equipment has been tested and found to
comply with the limits for a Class B digital device,
pursuant to Part 15 of the FCC Rules. These
limits are designed to provide reasonable
protection against harmful interference in a
residential installation.
This equipment generates, uses and can radiate
radio frequency energy and, if not installed and
used in accordance with the instructions, may
cause harmful interference to radio
communications. However, there is no guarantee
that interference will not occur in a particular
installation.
If this equipment does cause harmful interference
to radio or television reception, which can be
determined by turning the equipment off and on,
the user is encouraged to try to correct the
interference by one or more of the following
measures:
•Reorient or relocate the receiving antenna.
•Increase the separation between the
equipment and receiver.
•Connect the equipment into an outlet on a
circuit different from that to which the receiver is
connected.
•Consult the dealer or an experienced
radio/TV technician for help.
This device complies with Industry Canada
license-exempt RSS standard(s). Operation is
subject to the following two conditions: (1) this
device may not cause interference, and (2) this
device must accept any interference, including
interference that may cause undesired operation
of the device.
Cet appareil est conforme avec Industrie Canada
exempts de licence standard RSS
(s). Son fonctionnement est soumis aux deux
conditions suivantes: (1) cet appareil ne doit pas
provoquer d'interférences et (2) cet appareil doit
accepter toute interférence, y compris celles
pouvant causer un mauvais fonctionnement de
l'appareil.
In accordance with FCC requirements of human
exposure to radio frequency fields, the radiating
element shall be installed such that a minimum
separation distance of 20 cm is maintained from
the general population.
FCC: 2ABBZ-RF-UTCO-433 IC: 11817A-
RFUTCO433
This Class B digital apparatus complies with
Canadian ICES-3B.
Cet appareil numérique de la classe B est
conforme à la norme NMB-003 du Canada.
MANUFACTURER HEREBY DISCLAIMS ALL
WARRANTIES AND REPRESENTATIONS,
WHETHER EXPRESS, IMPLIED, STATUTORY
OR OTHERWISE INCLUDING (BUT NOT
LIMITED TO) ANY WARRANTIES OF
MERCHANTABILITY OR FITNESS FOR A
PARTICULAR PURPOSE WITH RESPECT TO
THESE PRODUCTS AND ANY RELATED
SOFTWARE. MANUFACTURER FURTHER
DISCLAIMS ANY OTHER IMPLIED WARRANTY
UNDER THE UNIFORM COMPUTER
INFORMATION TRANSACTIONS ACT OR
SIMILAR LAW AS ENACTED BY ANY STATE.
(USA only) SOME STATES DO NOT ALLOW
THE EXCLUSION OF IMPLIED WARRANTIES,
SO THE ABOVE EXCLUSION MAY NOT APPLY
TO YOU. THIS
WARRANTY GIVES YOU SPECIFIC LEGAL
RIGHTS AND YOU MAY ALSO HAVE OTHER
LEGAL RIGHTS THAT VARY FROM STATE TO
STATE. MANUFACTURER MAKES NO
REPRESENTATION, WARRANTY, COVENANT
OR PROMISE THAT ITS ALARM PRODUCTS
AND/OR RELATED SOFTWARE (I) WILL NOT
BE HACKED, COMPROMISED AND/OR
CIRCUMVENTED; (II) WILL PREVENT, OR
PROVIDE ADEQUATE WARNING OR
PROTECTION FROM, BREAK-INS,
BURGLARY, ROBBERY, FIRE; OR (III) WILL
WORK PROPERLY IN ALL.
Environmental
class
UL: Indoor dry
IEC: 3K5
EU compliance
EN 54
EN 54-00:0000
European Union
directives
1999/5/EC (R&TTE directive): Hereby, Clare
Controls declares that this device is in
compliance with the essential requirements and
other relevant provisions of Directive 1999/5/EC.
2002/96/EC (WEEE directive): Products marked
with this symbol cannot be disposed of as
unsorted municipal waste in the European Union.
For proper recycling, return this product to your
local supplier upon the purchase of equivalent
new equipment, or dispose of it at designated
collection points. For more information see:
www.recyclethis.info.
2006/66/EC (battery directive): This product
contains a battery that cannot be disposed of as
unsorted municipal waste in the European Union.
See the product documentation for specific
battery information. The battery is marked with
this symbol, which may include lettering to
indicate cadmium (Cd), lead (Pb), or mercury
(Hg). For proper recycling, return the battery to
your supplier or to a designated collection point.
For more information see: www.recyclethis.info.

DOC ID - 1942 • Rev 03 11 / 11
Warranty information
Clare Controls offers a two (2) year limited warranty on original
Clare Controls components, from the date of shipment from
Clare Controls.
Contact information
Clare Controls, LLC.
7519 Pennsylvania Ave, Suite 104
Sarasota, FL 34243
General: 941.328.3991
Fax: 941.870.9646
www.clarecontrols.com
Integrator/Dealer Support: 941.404.1072
Homeowner Support (ClareCare): 941.315.2273 (CARE)
Table of contents
Other clare Security Sensor manuals