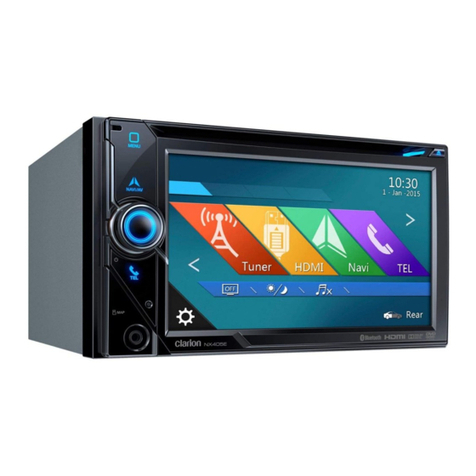
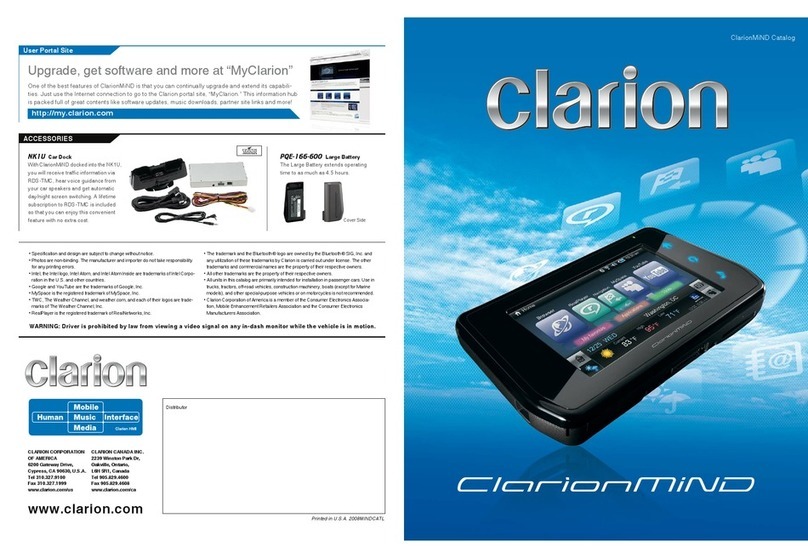
Clarion NX605 User manual

Owner’s manual
DVD MULTIMEDIA STATION WITH BUILT-IN NAVIGATION & 6.2-INCH TOUCH PANEL CONTROL
NX605

Thank you for purchasing the Clarion NX605.
●Please read this owner’s manual thoroughly before operating this equipment.
●After reading this manual, be sure to keep it on hand for future reference.
●Check the contents of the enclosed warranty card and keep it carefully with this manual.
●The provided disc (CD-ROM manual) cannot be played back on this unit.
In particular, read the descriptions in “To Ensure Safe Use”. This describes cautions
to ensure safe use of the unit without inflicting harm or damage on yourself or
others. P. 3
●The content of this manual may differ in part with that of the actual product due to
modifications, etc. to the specifications.
●The content of this manual may be changed in part without notice.
When transferring or reselling the unit or disposing of it, delete (initialize) all data
saved on it to protect your personal information and copyright protection.
Meanings of Symbols Used in This Manual
WARNING Preparations
This indicates the possibility that failure to
follow this instruction might lead to death
or serious injury.
This explains what must be done
beforehand to operate the product.
CAUTION Notice
This explains things that may cause injury
if instructions are not followed.
This explains limitations related to
operations.
Attention MEMO:
Though this does not fall under the
category of “WARNING” or “CAUTION”,
this indicates that there is the danger of
money or time being lost.
This explains supplementary information
for mastering use of the unit.
CLARION PRODUCT REGISTRATION INFORMATION
For USA and Canada only
www.clarion.com
Dear Customer:
Congratulations on your purchase of a Clarion mobile electronic product. We are
confident that you’ll enjoy your Clarion experience.
There are many benefits to registering your product. We invite you to visit our website at
www.clarion.com to register your Clarion product.
We have made product registration simple with our easy to use website. The registration
form is short and easy to complete. Once you’re registered, we can keep you informed of
important product information.
Register at www.clarion.com - it’s easy to keep your Clarion product up to date.
INFORMATIONS DE L’ENREGISTREMENT DE PRODUITS CLARION
Pour les Étas Unis et le Canada seulement
www.clarion.com
Cher client:
Nous vous remercions d’avoir acheté ce produit électronique mobile Clarion. Nous sommes
confiants que vous apprécierez votre expérience Clarion.
Il y a beaucoup d’avantage à enregistrer votre produits. Nous vous invitons à visiter notre site
Web www.clarion.com pour enregistrer votre produit Clarion.
Nous avons facilité la tache d’enregistrement de produit simple et facile grâce à notre site Web.
Le formulaire d’enregistrement est court et facile à compléter. Lorsque vous êtes enregistrer,
nous pouvons vous tenir informé des informations important de produits.
Enregistrer à www.clarion.com - c’est facile de mettre à jour votre produit Clarion.
INFORMACIÓN DEL REGISTRO DE PRODUCTO DE CLARION
Para USA y Canada nomas
www.clarion.com
Querido Cliente:
Felicitaciones por su compra de producto electrónico móvil de Clarion. Estamos seguros que
usted gozará de su experiencia con el producto de Clarion.
Hay muchas ventajas al registrar su producto. Le invitamos a que visite nuestro sitio en internet
www.clarion.com para registrar su producto de Clarion.
Hemos hecho el registro de producto fácil en nuestro sitio. La forma de registro es corta y fácil
de completar. Una vez que lo registre, podremos proporcionarle la información de su producto.
Registrese en www.clarion.com - es fácil mantener su producto de Clarion actualizado.

NX605 1
English
Hard buttons and touch keys
The operation descriptions in this manual, hard buttons on the main unit are indicated by
dotted frames as the example shown below.
Example: MENU
The unit uses a touch panel system that you can operate simply by touching the screen with
your fingertip.
In this manual, operations performed by touching keys on screen are indicated by the
grayed out keys as the example shown below.
Example: Tuner
Hard button
Touch key
To Ensure Safe Use�������� 3
Symbols relating to safety������ 3
WARNING������������� 3
CAUTION ������������� 4
Request and Notice �������� 4
Before Starting Operations ���� 5
Features available on the unit ���� 5
Expanding Systems ��������� 5
PRECAUTIONS ���������� 6
Operation Panel/Generalities ����� 6
Names and functions of parts ��� 7
Basic method of use ������� 8
Turning the power on �������� 8
How to use menus ��������� 8
Using the shortcut menu ������ 8
How to enter text ��������� 8
Operating lists ����������� 8
Moving between pages in a list ���� 8
Using the index to select a list ����� 8
Adjusting numerical values ������ 9
Inserting and removing discs ���� 9
How to insert discs���������� 9
How to remove discs ��������� 9
Inserting and removing the microSD card
���������������� 9
How to insert the microSD card ���� 9
How to remove the microSD card ��� 9
Adjusting the audio volume ����� 9
Switching the display screen ���� 9
Switching to the audio screen ����� 9
Switching to the map screen ����� 9
Displaying the AV control bar ��� 10
Turning off the screen������� 10
Listening to the radio ������� 10
Setting the unit to receive HD Radio
broadcasts ���������� 10
Receiving radio broadcasts ���� 10
Switching between AM and FM radio�� 10
Automatically selecting a station ���� 10
Manually selecting a station ������ 10
Selecting stations from the list����� 10
Receiving multicast channels ��� 10
Using the radio preset channel list � 11
What is a “preset channel”? ������ 11
Using reception bands �������� 11
Automatically registering to lists (auto store)
����������������� 11
Manually registering to lists ������ 11
Using bookmarks �������� 11
Registering a bookmark ������� 11
Selecting a bookmark �������� 12
Deleting a bookmark ��������� 12
Listening to SiriusXM Satellite Radio
��������������� 12
Displaying the SiriusXM Radio ID�� 12
Receiving SiriusXM Satellite Radio � 12
Selecting channels �������� 13
Selecting channels from preset channels
����������������� 13
Selecting from the category list ���� 13
Selecting channels from channel lists�� 13
Entering a channel number to select it � 13
Registering preset channels ���� 13
Using Parental Control ������ 13
Locking a channel ���������� 13
Changing passwords ��������� 14
SiriusXM Satellite Radio Advisory Messages
����������������� 14
iTunes Tagging���������� 14
Tagging music ���������� 14
Downloading tags to your iPod �� 15
Viewing DVDs ���������� 15
Playing DVDs ���������� 15
Stopping playback ���������� 15
Pausing��������������� 15
Playing the previous or next chapter �� 15
Rewinding/fast forwarding ������ 15
Contents

2 NX605
English
Slow play �������������� 15
Repeat play ������������ 15
Playing from menus ��������� 16
Entering a title or chapter number to play a
title or chapter ���������� 16
Setting DVDs ���������� 16
Switching the audio language/
subtitle language/angle ������ 16
Adjusting image quality �������� 16
Switching the screen size ������� 16
Setting the monitor size ������� 17
Setting priority language ������� 17
Setting the parental level ������� 18
Setting the country code ������� 18
Listening to music on CDs or discs
(MP3/WMA) ���������� 18
Playing discs ���������� 18
Playing CDs ������������� 19
Playing MP3/WMA discs ������� 19
Rewinding/fast forwarding ������ 19
Playing the previous/next track ���� 19
Playing the previous/next folder
(only when playing MP3/WMA) ��� 19
Playing from the folder list/track list �� 19
Repeat/shuffle play ��������� 19
Scan play �������������� 19
Viewing DivX content ������ 20
Viewing DivX content ������� 20
Playing DivX content ������� 20
Listening to microSD card/
USB memory files ������� 20
Playing microSD card/USB memory
��������������� 20
Playing microSD card or USB memory � 20
Rewinding/fast forwarding ������ 21
Playing the previous/next track ���� 21
Playing from the folder list/track list �� 21
Playing the previous/next folder ���� 21
Repeat/shuffle play ��������� 21
Scan play �������������� 21
Listening to iPod/viewing iPod video
��������������� 22
Compatible iPod models ����� 22
Playing iPod models ������� 22
Listening to iPod models ������� 23
Watching iPod video ��������� 23
Rewinding/fast forwarding ������ 23
Playing the previous/next track/chapter� 23
Repeat/shuffle play ��������� 23
Playing under specified conditions ��� 24
Setting iPod (video only) ����� 24
Adjusting the image quality of iPod video
����������������� 24
Listening to Bluetooth audio ��� 24
To listen to Bluetooth audio ���� 24
Playing Bluetooth audio������ 25
Playing Bluetooth audio ������� 25
Rewinding/fast forwarding ������ 25
Playing the previous/next track ���� 25
Playing from the track list ������� 25
Playing under specified conditions ��� 25
Repeat/shuffle play ��������� 25
Viewing connected external devices
(AUX) ������������� 26
Connecting external devices���� 26
Listening to audio from external devices
��������������� 26
Watching video from external devices
��������������� 26
Setting external device listening �� 26
Compensating for volume differences � 26
Adjusting image quality �������� 27
Switching the screen size ������� 27
Listening to Pandora internet radio
��������������� 27
How to listen to Pandora internet radio
��������������� 27
Playing stations ��������� 28
Pausing play ���������� 28
Skipping the track being played �� 28
Rating the track currently being played
��������������� 28
Bookmarking ���������� 28
Making stations ��������� 28
Deleting stations ��������� 28
Registering Bluetooth-compatible
devices ������������ 29
What is “Bluetooth”? ������� 29
Registering Bluetooth-compatible
devices (pairing) �������� 29
Switching the connected Bluetooth-
compatible device ������� 30
Deleting registered Bluetooth-compatible
devices ����������� 30
Using cellphones��������� 30
Screen during a telephone call��� 30
Entering a number to make a call � 31
Making calls from the
outgoing/incoming call log ��� 31
Deleting the incoming/outgoing call log
��������������� 32
Registering a phonebook ����� 32
Making calls from the phonebook � 32
Deleting phonebook data ����� 32
Downloading a phonebook automatically
��������������� 32
Receiving telephone calls ����� 33
Setting the call volume ������ 33
Using Smart Access ������� 33
What is Smartphone linking? ��� 33
Linking-compatible applications ���� 34
Procedure up to Smartphone linking �� 34
Starting up applications������ 34
Adjusting the screen size
(Android smartphones only)��� 35
Correcting the touch position on screen
(Android smartphones only)��� 35
Ending Smartphone linking ���� 35
Using Intelligent VOICE ������ 35
Searching for a destination by using
Intelligent VOICE ��������� 36
Using a remote control (sold separately)
��������������� 36
Cautions during remote control
operations ���������� 36
Battery related precautions ���� 37
Replacing the battery ������� 37
How to use the remote control��� 37
Names and functions of remote control
parts������������� 37
Using the rear camera ������ 38
Image in the rear camera ����� 38
Displaying the image in the rear camera
��������������� 38
Adjusting the image quality of the
monitor (rear camera) ����� 39
Displaying guidelines ������� 39
Adjusting the guidelines������ 39
Displaying the quasi bumper line �� 40
Adjusting the quasi bumper line �� 40
Using the rear seat monitor ���� 40
Video images displayable on the rear
seat monitor ��������� 40
Various settings ��������� 40
Making general settings for the unit
��������������� 40
Setting the Shortcut Menu ���� 41
Setting the illumination display color on
the control panel ������� 41
Setting the illumination color ����� 41
Setting the password for antitheft
activation����������� 41
Updating the program of the unit�� 42
Adjusting Bluetooth settings���� 42
Renaming devices and changing the PIN
����������������� 42
Setting sound quality ������� 42
Adjusting speaker volume balance ��� 42
NX605 3
English
Adjusting the vocal volume balance and the
surround sound ���������� 42
Selecting and setting sound quality effects
memory ������������� 43
Setting preferred sound quality effects � 43
Adjusting the Volume Smoother ���� 43
Using Intelligent Tune��������� 43
Adjusting the filter ���������� 43
Resetting the audio settings to factory
settings ������������� 43
Setting screens ��������� 44
Other settings ���������� 44
Troubleshooting ��������� 44
Navigation ����������� 44
Audio�������������� 44
Smartphone linking�������� 46
Rear camera����������� 47
Others ������������� 47
Compatible discs �������� 48
Compatible CDs ��������� 48
Incompatible CDs �������� 48
Compatible DVDs �������� 48
Note on region numbers of DVD video discs
����������������� 48
DVD Video Features ��������� 48
Incompatible DVDs�������� 49
Compatible microSD cards/
USB memory ��������� 49
microSD card handling precautions
��������������� 49
Compatible audio files ������ 49
MP3 files ������������ 50
WMA files ������������ 50
Folder structure of discs ����� 50
Folder structure of microSD card/
USB memory ��������� 51
Notes for playing back MP3 and WMA
on the unit ���������� 51
Compatible video files ������ 51
Country code ���������� 52
Daily care and handling ������ 52
Daily care and handling of main unit� 52
Warranty and customer support �� 52
Specifications ���������� 52
Trademarks ����������� 53
About Total Traffic & Weather Network
��������������� 54
Disposal, transfer and resale of this
product ������������ 54
Deletion of data from the unit ��� 54
To protect your privacy... ������� 54
To protect copyright... �������� 54
Deleting data (initializing) ����� 55
Bluetooth connection method and
function compatibility table �� 55
INSTALLATION AND WIRE
CONNECTION MANUAL ���� 56
1. SAFETY PRECAUTIONS ����� 56
Symbol Identification ��������� 56
Before Use ������������� 56
Installation Precautions �������� 56
Installation Notes ���������� 56
Connection Notes ���������� 56
2. PACKAGE CONTENTS ������ 57
3. GENERAL CAUTIONS ������ 57
4. CAUTIONS ON INSTALLATION ����57
5. INSTALLING THE MAIN UNIT ��� 57
Installing the Main Unit in a NISSAN Vehicle
����������������� 58
Installing the Main Unit in a TOYOTA Vehicle
����������������� 58
Vehicles other than NISSAN and TOYOTA
����������������� 59
6. REMOVING THE MAIN UNIT���� 59
7. CAUTIONS ON WIRING ������ 59
8. INSTALLING THE GPS ANTENNA � 59
9. INSTALLING THE MICROPHONE�� 60
10. WIRE CONNECTION������� 61
Connecting the Accessories������ 62
Index �������������� 63
To Ensure Safe Use
Symbols relating to safety
The “possibility of the driver or other people
being injured” is indicated as follows, and
the following describes these dangers and
how to avoid them. Be sure to read these
important warnings.
WARNING
This indicates the
possibility that
failure to follow this
instruction might lead
to death or serious
injury.
CAUTION
This explains things
that may cause injury
if instructions are not
followed.
WARNING
❏Do not use the product’s
guidance information for
finding emergency facilities.
This product does not contain information
on all hospitals, fire stations, police stations,
etc. Also, this information may differ from
actual information, so there is the possibility
that you might not reach these facilities
within the expected time.
❏Always disconnect the negative
terminal of the battery before
doing any work.
Failure to do so might cause electric shock,
injury or device malfunction.
❏The driver must not operate or
stare at the unit while driving.
The driver may be distracted and cause
a traffic accident. Always stop in a safe
location.
❏Follow all applicable traffic
regulations.
Information such as maps, one-way traffic
signs, traffic regulation marks and signs,
etc., or route advice (recommended routes
and voice guidance), etc. displayed on
navigation screens may differ from actual
road conditions. Be sure to follow actual
road signs and traffic conditions when
driving. Failure to do so might cause traffic
accidents.
❏Do not disassemble or modify
the product.
Do not open the case to oil parts or cut
through the insulation on wires to supply
power to other devices. Doing so might
cause accidents, fire, electric shock, or
malfunction.
❏Ask a professional engineer to
replace any fuses and use only
fuses with the rated capacity.
Use of fuses exceeding the rated capacity
might cause fire or malfunctions.

4 NX605
English
❏Do not use the product if it
has malfunctioned or is not
operating properly.
Stop using the product immediately if there
is no image or audio, if any foreign objects
get inside it, if it gets wet, if it emits smoke,
strange noises, or strange smells. Failure to
do so might cause fire or electric shock.
❏Do not use benzene or paint
thinner, car cleaner, polish
spray, or similar fluids.
Use of these fluids inside the vehicle will, for
example, cause inflammable gas to ignite
and cause fire.
Also, use of these for daily care of this
product will deform material or cause paint
to peel off.
❏Do not leave microSD memory
cards within the reach of
children.
They might swallow them by mistake. Seek
medical treatment immediately if anyone
swallows a microSD memory card.
CAUTION
❏Ask a professional engineer
to install, remove, change
installation or wire the unit.
Installation and wiring must be done
correctly. If it is installed or wired incorrectly,
it may interfere with driving and cause an
accident or malfunction.
❏Do not use the main unit
except in a vehicle.
Doing so may cause injury or electric shock.
❏Set the volume during driving
to a level that allows you
to hear sounds outside the
vehicle.
Driving without being able to hear sounds
outside the vehicle might cause an accident.
❏Do not place objects on the
control panel or subject it to
strong impact.
Doing so might cause the control panel or
LCD to malfunction, break or be deformed.
●Do not place objects on it.
●Do not press strongly with your hand.
●Do not hit it with hard objects such as
the tip of a pen, pin or fingernails.
●Do not splash it with water, juice or other
liquids.
Request and Notice
LCD display
●Small black spots or bright spots
may appear on the screen, this is a
phenomenon unique to LCD monitors,
and is not a malfunction.
●Do not stick protective sheets, etc.
on the touch panel. This might cause
malfunctions or reduce response time.
When the LCD panel becomes dirty, refer
to “Daily care and handling of main unit”.
P.52
Operating environment
●To prevent the battery from going flat,
operate the unit with the engine running.
●The unit has a high-speed CPU, which
means that the case may get hot. Pay
particular attention to handling the unit
during use or immediately after turning
the engine off.
●On vehicles with a keyless entry system,
the unit may stop operating if you bring
the key close to it. Also, skipping might
occur if you bring the key close to the
unit or Bluetooth audio device. If this
happens, move the key away.
●There may be static or the screen may
be distorted if electrical components that
generate strong electrical noise are used
near the unit. If this happens, either move
the electrical component considered the
cause of the electrical noise away from
the unit or stop using it.
Routes
●When the position of a facility displayed
from the search function is set as it is as
a destination, you may be guided to an
inappropriate location such as the back
of the facility or on to an expressway.
Please understand this and check the
route near the destination.
●Names may be difficult to understand,
depending on the audio data.
●When a route cannot be calculated,
move the destination to a main road
nearby and try calculating again. Routes
sometimes cannot be calculated
depending on conditions such as
distance to the destination.
Cautions about the Warranty within
the warranty period
●Contact your retailer about using the
warranty for repairs.
●You may need to return accessories
when you use the warranty for repairs.
●Data that could not be saved due to
the unit malfunctioning and data that
has disappeared is not covered by the
Warranty.
●The Warranty is not applied in the
following cases even within the warranty
period:
•Careless handling (inappropriate
operations not described in the User’s
Manual, dropping, impact, splashing
with water, etc.)
•Malfunction and damage caused by
improper repair, modification and
disassembly
•Malfunction and damage caused
by fire, salt damage, gas damage,
earthquakes, storm and flood damage,
lightning strikes, abnormal voltage,
and other natural disasters
•Scratching, discoloring and dirt
resulting from use or damages from
improper storage
Copyright
●Software and data whose copyright
is owned by third parties licensed to
Clarion in accordance with a licensing
agreement is recorded on the unit.
Excluding instances that are clearly
indicated as being permitted in
descriptions in the User’s Manual,
removing, reproducing, or modifying the
software in the unit (including updates
and data) is strictly forbidden by law.

NX605 5
English
Before Starting Operations
The following describes information you should know before you start using the unit.
Features available on the unit
●Cloud-based Speech Recognition and Destination Search
●Latest Map Guarantee
●Advanced Sound Tuning and 4V/6ch RCA Output
❏Expanding Systems
microSD memory card
External Amplifier
Rear Vision
Camera
Bluetooth Telephone
AUX etc.
USB Memory
Rear Monitor
Expanding audio features
iPod®/iPhone®
Expanding visual features
SiriusXM-ConnectTM Vehicle
Tuner (sold separately)
✽The items listed outside of the frames are the commercial products generally sold.

6 NX605
English
PRECAUTIONS
WARNING
• For your safety, the driver should not
watch the DVD video/movie data or
operate the controls while driving.
Please note that watching and
operating the DVD video/movie data
while driving are prohibited by law in
some countries. Also, while driving,
keep the volume to a level at which
external sounds can be heard.
1. When the inside of the car is very
cold and the player is used soon after
switching on the heater, moisture may
form on the disc (DVD/CD) or the optical
parts of the player and proper playback
may not be possible. If moisture forms on
the disc (DVD/CD), wipe it off with a soft
cloth. If moisture forms on the optical
parts of the player, do not use the player
for about one hour. The condensation
will disappear naturally allowing normal
operation.
2. Driving on extremely bumpy roads which
cause severe vibration may cause the
sound to skip.
3. This unit uses a precision mechanism.
Even in the event that trouble arises,
never open the case, disassemble the
unit, or lubricate the rotating parts.
4. Insert and remove the microSD card after
turning off the unit, because the microSD
card might get damage.
5. This equipment complies with FCC/
IC radiation exposure limits set forth
for an uncontrolled environment and
meets the FCC radio frequency (RF)
Exposure Guidelines and RSS-102 of
the IC radio frequency (RF) Exposure
rules. This equipment has very low levels
of RF energy that it deemed to comply
without maximum permissive exposure
evaluation (MPE). But it is desirable that it
should be installed and operated keeping
the radiator at least 20cm or more away
from person’s body.
6. This transmitter must not be co-located
or operated in conjunction with any other
antenna or transmitter.
FCC CAUTION
Changes or modifications not expressly
approved by the party responsible
for compliance could void the user’s
authority to operate the equipment.
❏Operation Panel/Generalities
For a longer service life, be sure to read the
following cautions.
●Do not allow any liquids on the set from
drinks, umbrellas, etc. Doing so may
damage the internal circuitry.
●Do not disassemble or modify the set
in any way. Doing so may result in
damage. Also, subjecting the operation
panel to shocks may result in breakage,
deformation, or other damage.
●Do not let cigarettes burn the display.
Doing so may damage or deform the
cabinet.
●If a problem should occur, have the set
inspected at your store of purchase.
●The optional remote control unit may
not work if the remote control sensor is
exposed to direct sunlight.
●In extremely cold weather, the display
movement may slow down and the
display may darken, but this is not
a malfunction. The display will work
normally when the temperature
increases.
●Small black and shiny spots inside the
operation panel are normal for LCD
products.
●The touchkeys on the display operate
when slightly touched. Do not press the
touchkey screen with much force.
●Do not push the case surrounding
the touchkey panel with much force.
This may cause malfunctioning of the
touchkeys.

NX605 7
English
Names and functions of parts
The following describes the button names on the operation panel of the unit and their
functions.
1
2
3
4
5
6
✽4
✽7
✽3
✽5
✽6
✽1
✽2
Insert and remove the microSD card after turning off
the unit, because the microSD card might get damage.
✽1 This is the built-in microphone. This is used as the microphone for the hands free function and
the Intelligent VOICE function.
✽2 This is the remote control sensor. This receives the signal from the remote control (sold
separately).
✽3 This is the AUX terminal. Audio and video from external devices connected to this terminal can
be played when the audio mode is switched to AUX. P.26
✽4 This is the Antitheft Indicator. This light blinks when the Antitheft Activation setting is set to “ON”
to indicate that the antitheft function is activated. P.41
✽5 This is where the microSD card is inserted to enjoy data in microSD cards. P. 9
✽6 The map microSD is housed in here. To update the map, open this cover, and remove and
insert the card.
Do not open the cover for other operations.
✽7 This is where DVD video, CD, MP3, WMA, and DivX discs are inserted. P. 9
This document uses the following inline graphics and conventions to indicate operations
using the buttons on the operation panel.
Number Inline graphic Description of operation
1
MENU Short press This displays the main menu screen.
2
NAVI AV Short press
This switches between the current position map
screen and currently selected audio screen.
3
—Turn This is the rotary volume knob.
Use this to adjust the volume of the audio-
visual function, the route voice guidance, and
Intelligent VOICE etc.
Short press This turns off the screen and stops audio
output.
4
Smart Access Short press This starts up Intelligent VOICE. P.35
Long press This starts up Smart Access.
5
Short press This ejects the disc inserted in the unit.
6
— Touch This is the monitor and touch panel. This
functions as a touch panel by touching the
screen when it is displayed.

8 NX605
English
Basic method of use
Turning the power on
1Turn the engine key to the “ACC”
or “ON” position.
The unit turns on.
After the opening screen is displayed,
touch OK . The current position
map screen or the audio screen is
displayed.
When the engine key is turned to the
“OFF” position, the unit is turned off.
MEMO:
•WhentheAntitheftActivationfunction
isset,thepasswordentryscreenis
displayed.P.41
How to use menus
The unit has a main menu for using all
functions and a shortcut menu that groups
together frequently used functions. Use of
the shortcut menu allows you to quickly
access frequently used functions.
1MENU
The main menu screen is displayed.
Touching the main menu screen and
quickly sliding your finger up or down
then removing it, moves you to the
previous or next page. This operation
is called flicking.
Screens can be changed by slowly
sliding your finger across the screen.
:
Touch these to move to the
previous or next menu screen.
Smart Access :
This displays the Smart Access
mode. P.33
DVD/CD :
This displays the DVD, CD or DivX
modes. P.15,P.18,P.20
Tuner :
This displays the radio mode.
P.10
SiriusXM :
This displays the SiriusXM Satellite
Radio mode. P.12
Navigation :
This displays the navigation mode.
“Owner’s Manual - Navigation”
USB / iPod :
This displays the USB audio mode
or iPod audio/iPod video mode.
P.20, P.22
Phone :
This displays the telephone mode.
P.30
SD :
This displays the SD audio mode.
P.20
BT Audio :
This displays the Bluetooth audio
mode. P.24
Pandora Radio :
This displays the Pandora Radio
mode. P.27
AUX1 :
This displays the AUX1 mode.
P.26
AUX2 :
This displays the AUX2 mode.
P.26
(Settings) :
This displays the various setting
screens. P.40
Using the shortcut menu
You can open a shortcut menu by touching
in the top screen of a function selected
from the main menu screen.
Up to five frequently used functions can be
registered to the shortcut menu. P.41
Touching returns the screen to the
previous screen.
How to enter text
In the text entry screen, letters and numbers
can be entered by touching the keypad.
This switches to the alphabet/number
entry mode.
This applies the character string you
entered.
This deletes one character. Continuously
touching this deletes all characters.
This switches between uppercase
and lowercase.
Operating lists
When a list contains many items, the list is
displayed over two or more pages.
❏Moving between pages in a list
1or
You can also scroll through pages in
a list by flicking.
❏Using the index to select a list
When alphabet keys are displayed on the
left side of the screen, items beginning with
the letter of the alphabet that was touched
can be displayed as a list. The following
example explains how to select items
beginning with the letter “B” from the list.
1B
Items beginning with “B” are
displayed.

NX605 9
English
Inserting and removing the
microSD card
To enjoy the data in microSD cards, the
microSD card must be loaded into the unit.
Attention
•InsertandremovethemicroSDcardafter
turningofftheunit,becausethemicroSD
cardmightgetdamage.
•ThemapmicroSDcardisalreadyinserted
intothemicroSDcardloadingslotunder
theslotcover.
IfthemapmicroSDcardisremoved,the
unitdoesnotfunction.Donotremoveor
insertthemapmicroSDcardexceptto
updatemapinformation.
•Donottouchtheterminalsurfaceof
microSDcards.
❏How to insert the microSD card
1Insert the microSD card into the
loading slot with its label surface
face up.
Firmly insert the microSD card as far
as it can go.
❏How to remove the microSD
card
1Grip the microSD card with your
fingers and pull it out.
To remove the microSD card, grip it
with your fingers and pull it out.
Adjusting the audio volume
1Turn the rotary volume knob.
Switching the display screen
The audio screen and map screen are
switched by the following operation.
❏Switching to the audio screen
1In the map screen NAVI AV
The audio screen of the selected
source is displayed.
❏Switching to the map screen
1In the audio screen NAVI AV
The map screen is displayed.
2Select the relevant item from the
list.
If all indexes are not displayed, either
touch or or flick to move to
the next page.
❏Adjusting numerical values
When and are displayed, numerical
values, volume, etc. can be adjusted.
Inserting and removing discs
To enjoy data in CD, MP3/WMA or DVD
discs, the disc must be loaded into the unit.
Attention
•Donotleavediscsprotrudingfromthe
loadingslot.Eitherinsertthemcompletely
orremovethem.
•Donottouchtherecordingsurface(shiny
side)ofthedisc.
•Donotinserttwodiscsatthesametime.
❏How to insert discs
1Insert the disc into the loading
slot with its label surface face
up.
The disc is drawn in. After a while, the
disc starts playing.
When the disc is inserted a short way,
it is automatically drawn in. If the disc
is not drawn in, this means that a disc
is already loaded.
Do not exert unnecessary force when
inserting discs. First remove the disc
that is already loaded, and then load
the new disc.
❏How to remove discs
1
The disc is ejected.
2Remove the disc.
MEMO:
•Ifadiscisnotremovedimmediately,after
awhileitisautomaticallydrawninagain.

10 NX605
English
Displaying the AV control bar
The AV control bar for quickly accessing
audio-visual functions can be displayed.
Display content differs according to the
currently selected audio-visual type.
1AV control bar display key
The AV control bar of the currently
selected audio-visual is displayed. To
hide the AV control bar, touch the bar
display key.
Turning off the screen
Notice
•Whilethescreenisoff,thevoiceguidance
ofthenavigationdoesnotwork.
1Press the rotary volume knob.
The screen turns off.
Press the rotary volume knob again to
display the screen as before.
When the audio screen is previously
displayed, the audio main menu
screen of the selected source is
displayed.
MEMO:
•Thescreentemporarilyturnsonwhenyou
receiveacallorusethecamera.
Listening to the radio
You can enjoy both AM and FM radio on the
unit.
You can also listen to CD-quality digital
HD RadioTM broadcasts from your local AM
and FM radio stations.
You can receive HD Radio digital broadcasts
automatically by tuning to an HD Radio
station.
Notice
•TolistentoHDRadiodigitalbroadcasts,
setthe“HDRadio”settingontheradio
settingsscreentoON.
•NotallFMorAMstationsofferHDRadio
digitalbroadcasts.Youcanreceiveboth
analoganddigitalstationswiththeunit.
Setting the unit to receive
HD Radio broadcasts
1MENU
Tuner
2
3ON or OFF on [HD Radio].
ON:
This receives HD Radio digital
broadcasts and analog broadcasts.
(Default)
OFF:
This receives analog broadcasts.
Receiving radio broadcasts
❏Switching between AM and FM
radio
1MENU
Tuner
Radio broadcasts are received.
2FM1 , FM2 , FM3 , AM
Switches to the band you touch.
❏Automatically selecting a
station
Notice
•Thisoperationisavailableonlyforanalog
stations.Digitalstationsarenotdetected.
1MENU Tuner
2or
(Long press within 1.5 seconds)
When a receivable station is detected,
the station is automatically received.
If or is long pressed for at
least 1.5 seconds, the frequency
switches continuously while the
key is touched. When you release
your finger from the key, receivable
broadcast stations are automatically
detected and received.
❏Manually selecting a station
1MENU Tuner
2or
Each touch switches the frequency.
❏Selecting stations from the list
Select a registered station from the list.
1MENU Tuner
2Select the desired station.
The selected station is received.
Receiving multicast channels
HD Radio broadcasts can include
multiple channels on the same frequency
(multicasting). When a digital FM broadcast
that has multicast channels is being
received, you can receive up to eight
additional channels in total.
Preparations
●Set “HD Radio” on the radio settings
screen to ON. P.10
1MENU Tuner
2Select a multicast channel.

NX605 11
English
Using the radio preset
channel list
❏What is a “preset channel”?
You can register (preset) the frequency of
a station that can be received in the area
you are driving. You can receive any desired
station at the touch of a button without
having to adjust the frequency.
There are four preset channel lists: FM1,
FM2, FM3, and AM. Up to six stations can
be registered in each list.
There are two ways of registering to preset
channel lists, manual and automatic.
When receiving digital FM broadcasting is being
received (“HD Radio” setting is set to ON)
Preset channel list
(Station list)
The status of the signal being received (preset
channel number, frequency, name of artist and
song currently playing, and images related to
the song and other information) is displayed.
The information differs depending on the station
being received.
When receiving the analog FM broadcasting
(“HD Radio” setting is set to OFF)
Preset channel list (Station list)
The status of the signal being received
(preset channel number, frequency, and name
of broadcasting station) is displayed. The
information differs depending on the station
being received.
Touch it to display a description of the
broadcast that is currently being received.
(Only when FM broadcasting is being
received)
MEMO:
•WhenaRDSchannelisbeingreceived,
theprograminformationandbroadcast
contentaredisplayedastext.(Whenan
FMbroadcastisbeingreceived)
❏Using reception bands
When the station differs according to region,
reception bands can be switched and used
at the touch of a button by setting preset
channels in that area to each of FM1, FM2,
FM3, and AM.
1MENU Tuner
2FM1 , FM2 , FM3 , AM
The preset channel list display is
switched.
❏Automatically registering to
lists (auto store)
Notice
•Stationscannotbeselectedduringthis
operation.Waitfortheoperationtoend.
•Autostorecanbedoneonlyforanalog
stations.Itisnotavailablefordigital
stations.
1MENU Tuner
2FM1 , FM2 , FM3 , AM
3Start on [Auto Store]
4OK
Receivable stations are overwritten to
and registered to the current preset
channel.
To cancel auto store, touch Cancel .
MEMO:
•Whenautostoreisstoppedmidway,
stationsreceivedsofararenotregistered.
❏Manually registering to lists
1MENU Tuner
2Receive the station you want to
register.
3Long press the channel to be
overwritten in the preset channel
list until you hear a sound.
The station currently being received is
overwritten to and registered to that
channel.
Using bookmarks
❏Registering a bookmark
You can register the information for the song
currently being broadcast as an HD Radio
bookmark. (Up to 50 bookmarks)
Preparations
●Set “HD Radio” on the radio settings
screen to ON. P.10
1while receiving digital
broadcasts.
The information about the song
being broadcast is registered as a
bookmark.
Notice
•Abookmarkforasongbeingbroadcast
canbecreatedifoneofthefollowing
itemscanbereceived.
Thenameofthesong,artist,oralbum,
informationrelatedtotheURL,orimage
information

12 NX605
English
❏Selecting a bookmark
1MENU Tuner
2
The bookmark list is displayed.
3Select the items that you want to
display.
The bookmark information screen is
displayed.
❏Deleting a bookmark
1MENU Tuner
2
The bookmark list is displayed.
3Delete Bookmark
4Select the items that you want to
delete.
Delete All:
This deletes all bookmarks.
5OK
HD Radio broadcasting delivers CD-like
digital sound quality.
Program Service Data that appears on your
radio display. For example the song title and
name of the Artist.
Extra FM channels adjacent to those
you have always listened to are enabled.
Thousands of HD2/HD3 channels are
playing nationwide today.
Enables you to tag a song that you discover
while listening to HD Radio broadcasts. The
songs you tag will appear on your personal
iTunes account so that you can elect to buy
them.
You’ll see cool images on your radio like
photos of artists in studios, DJs doing their
shows and album cover art.*
✽Not available in all markets.
Listening to SiriusXM
Satellite Radio
Only SiriusXM®brings you more of what
you love to listen to, all in one place. Get
over 140 channels, including commercial-
free music plus the best sports, news, talk,
comedy and entertainment. Welcome to the
world of satellite radio. A SiriusXM Vehicle
Tuner and Subscription are required. For
more information, visit www.siriusxm.com
In the USA, you can activate online or by
calling SiriusXM Listener care:
●Visit www.siriusxm.com/activatenow
●Call SiriusXM Listener Care at 1-866-
635-2349
For Canadian Subscriptions, please contact:
●Visit www.siriusxm.ca/activatexm
●Call XM customer Care at 1-877-438-
9677
Preparations
●To subscriber to SiriusXM service, a
SiriusXM Vehicle Connect Tuner is
required which is sold separately.
A SiriusXM Radio ID number is also
required to subscribe.
Displaying the SiriusXM
Radio ID
The SiriusXM Radio ID is used, for
example, for registering your membership
or transactions with SiriusXM customer
support.
1MENU SiriusXM
2
SiriusXM Radio ID is displayed.
The SiriusXM Radio ID can also be
found by tuning to Channel 0. In
addition, the Radio ID is located on
the bottom of the SiriusXM Connect
Vehicle Tuner.
Please note that the SiriusXM Radio
ID does not include the letters I, O, S
or F.
Receiving SiriusXM Satellite
Radio
1MENU SiriusXM
2or
Seek Mode key
Touching this displays the
currently selected Content Info.
The preset number, channel number,
channel name, category name, song
title currently being played, and artist
name are displayed.

NX605 13
English
There are three modes to access
SiriusXM channels. (Default: All
Channels)
Presets:
In this mode, the channels
registered to the preset channels
are selected.
Categories:
In this mode, the channels
belonging to the category currently
being received are selected.
All Channels:
In this mode, all channels currently
being received are selected.
Each touch of the Seek Mode Key
switches the mode in the following
order:
All Channels
Presets
Categories
All Channels�
Touching or switches the
channel in the currently selected
mode.
Continuously touching or
switches the channel while that key
is held down. When you release
your finger, the selected channel is
received.
Notice
•Channelswhichparentallockisset
arenotincludedintuningwhenAll
ChannelsorCategoriesisselected
forSeekMode.
Selecting channels
❏Selecting channels from preset
channels
Frequently used channels can be selected
and received from preset channel lists you
have registered in advance.
Preparations
●To select a preset channel, the channel
must first be registered. P.13
1MENU
SiriusXM
2
3
4Select the desired channel.
❏Selecting from the category list
1MENU SiriusXM
2
3
4Select the desired category.
5Select the desired channel.
❏Selecting channels from
channel lists
1MENU SiriusXM
2
3
4Select the desired channel.
❏Entering a channel number to
select it
1MENU SiriusXM
2
3
4Enter the channel number
5OK
Registering preset channels
Up to 30 channels can be registered to
preset channels.
1MENU SiriusXM
2Receive the channel you want to
register.
3
4
5Long press the channel to be
overwritten in the preset channel
list until you hear a sound.
The channel currently being received
is overwritten to and registered to
that channel.
Using Parental Control
The Parental Control feature allows you
to limit access to any SiriusXM channels,
including those with mature content.
Channels can be locked by setting
passwords for particular channels. (Default:
0000)
When a locked channel is selected, the
password entry screen is displayed.
The channel can be accessed and switched
to by entering the correct password. From
here onwards, the password does not need
to be entered until the engine key is turned
off.
Notice
•Thisoperationisnotpossiblewhileyou
aredriving.
❏Locking a channel
1MENU SiriusXM
2
3Set at [Channel Lock]
4Enter the 4-digit password
OK
The channel list is displayed.

14 NX605
English
iTunes Tagging
iTunes tagging allows you to “Tag” songs
playing on HD Radio or SiriusXM Satellite
Radio stations for purchase later through
iTunes.
The tagged song information can be
transferred to your iPod when connected to
the unit.
Your iPod might not operate correctly if the
model is incompatible with the unit.
Tagging music
To tag a song, tune to an HD Radio station
or a SiriusXM Satellite Radio station.
Preparations
●To use the HD Radio, set “HD Radio” on
the radio settings screen to ON. P.10
Notice
•Thetaggingfunctiongreatlydependson
thereceptionoftheradiostation.
Thenameoftheartistandthesongthatis
beingbroadcastmustbereceivedtotag
thesong.
1while receiving digital
broadcasts.
The song information is saved to the
unit. (Up to 50 songs for each source)
MEMO:
•IfasongistaggedwhiletheiPodis
connectedtotheunit,thetaginformation
istransferredautomaticallytotheiPod.
5Touch the channel you want to
lock.
The password is set for the selected
channel.
6Close
MEMO:
•Thelocksettingofeachchannelisheldin
memoryeveniftheenginekeyisturned
off.
•Thepasswordiscanceledbytouchingthe
channelagaininstep5.
❏Changing passwords
1MENU SiriusXM
2
3Set at [Channel Lock Password]
4Enter the password OK
5Enter the new password OK
6Enter the password again for
confirmation OK
This completes changing of the
password.
❏SiriusXM Satellite Radio Advisory Messages
Message Description
Check Tuner. Check the SiriusXM tuner connection on the back of the unit
to ensure that it’s correctly connected.
Check Antenna. Ensure the SiriusXM antenna cable is connected to the
SiriusXM tuner correctly.
Check the SiriusXM antenna wire for breaks or sharp bends.
Replace the antenna if necessary.
No Signal. The vehicle must be outside, and the antenna must have a
clear view of the southern sky.
Channel * not
Subscribed.
Call SiriusXM to
subscribe.
This channel is not included in your SiriusXM subscription
plan. Call 1.866.635.2349 or visit www.siriusxm.com/
activatenow.
Channel * Not
Available.
This channel is not a valid SiriusXM channel.
The channel number has been entered incorrectly, or the
channel was removed from the SiriusXM channel lineup.
Ch Locked.
Lock Code?
The selected channel has been locked by the parental
controls.
A prompt to enter the unlock code will appear. P.13
Subscription updated.
Press OK to continue.
An update to your SiriusXM subscription has been received
by the SiriusXM tuner. Press any button to continue.

NX605 15
English
Viewing DVDs
Playing DVDs
WARNING
• If the driver wants to view video on
a DVD, he or she should always stop
at a safe place before doing so.
Notice
•Forsafety’ssake,viewvideoonaDVD
onlywhenthevehiclehasstopped.While
youaredriving,youcanenjoyonlyaudio.
1Load the DVD, or
MENU DVD/CD
The DVD loaded in the unit is played.
Menu keys are displayed by touching
the screen.
The screen size and play status are
displayed.
If five seconds passes with no
operations, the keys displayed on
screen are hidden.
To manually hide the keys,
touch Back .
Downloading tags to your iPod
To download tags to your iPod, connect
the iPod to the unit. All existing tags are
automatically transferred to the iPod and
deleted from the unit.
MEMO:
•WhentransferringtagstotheiPod,the
radiomodedoesnotneedtobeselected.
❏Stopping playback
1Touch the screen while playing
DVD video is hidden and playing
stops. (resume stop)
If is touched during a resume stop,
play is resumed from the place where
it was stopped.
If is touched during a resume stop,
play is completely stopped. (complete
stop) When play is next started, the
disc is played from the beginning.
❏Pausing
Notice
•InthecaseofDVDvideo,keyoperations
suchaspauseorstartsometimesarenot
possibleinsomemenus.Ifthishappens,
touchTop Menu orMenu usethe
operationkeysintheDVDmenu.
1Touch the screen while playing
Play pauses while the DVD image is
displayed. If is touched during a
pause, play is resumed from the place
where it was stopped.
❏Playing the previous or next
chapter
1or
Touching returns you to the start
of the chapter, and each additional
touch of moves you to previous
chapters.
❏Rewinding/fast forwarding
1While playing, (rewind) or
(fast forward) (long press)
If you release your finger from
, , normal play resumes.
❏Slow play
1Touch the screen while playing
(long press)
If you release your finger from ,
normal play resumes.
MEMO:
•Duringslowplay,“SlowPlay”isdisplayed
intheAudiostatusdisplayarea.
❏Repeat play
This function is for repeatedly playing the
chapter currently being played.
1MENU DVD/CD
2Touch the screen touch Trick
Play key.
Trick Play key
3
Touch to resume normal play.
4Touch the Trick Play key.
The screen returns to the previous
screen.

16 NX605
English
Setting DVDs
❏Switching the audio language/
subtitle language/angle
Notice
•Thisfunctionisenabledonlywhen
subtitles,multipleaudio,andanglesare
recordedtoDVDs.
•Theavailablelanguagesdifferaccording
tothedisc.
1MENU DVD/CD
2Touch the screen.
3
4Select at [Audio/Subtitle/Angle]
5Angle , Audio Language ,
Subtitle Language
Each touch of this switches the
settings of each item.
Subtitles can be hidden by setting
“OFF”.
MEMO:
•“Others”isdisplayedwhena
languageotherthanthatcanbe
setat“Settingprioritylanguage”is
recorded.P.17
6Back
❏Adjusting image quality
1MENU DVD/CD
2Touch the screen.
3
4Setup at [Display Adjustment]
5or of item to adjust
Adjust the image quality while viewing
the video image on screen.
6Back
This sets the newly adjusted image
setting.
MEMO:
•Imagequalityadjustmentscanbesetfor
boththedayandnightscreens.
❏Switching the screen size
1MENU DVD/CD
2Touch the screen.
3
4[Display Mode] settings key
(default: Full)
❏Entering a title or chapter
number to play a title or
chapter
1MENU DVD/CD
2Touch the screen.
3
4Select
at [10Key Search]
5Title or Chapter
6Enter the number.
7OK
The entered title or chapter is played.
❏Playing from menus
DVD video discs are recorded with a DVD
menu (disc menu) unique to that disc. The
disc menu can be used to quickly play video
you want to watch, such as the main title or
bonus content.
Displayed menus and operation methods
differ according to each disc.
1MENU DVD/CD
2Touch the screen.
3Top Menu or Menu
MEMO:
•When“Theoperationisnot
available.”isdisplayed,thismeans
thatthemenuisnotsettotheDVD
videodiscitself.
4Direct touch the menu item to
select it.
Move:
This moves the operation key to
the left and right of the screen.
5To use an operation key to select
a menu item .
6Select the menu by , ,
, OK
The selected menu item is played.

NX605 17
English
5Select the screen size.
Normal:
Video is displayed in the center of
the screen with its aspect ratio held
intact. When the size of the video
and screen differ, excess parts of
the screen are displayed in black.
Full:
The video is displayed to fit the
entire screen. When the size of the
video and screen differ, the aspect
ratio of the video is displayed
altered.
Cinema:
This is used when displaying
cinema scope size or vista size
video. When the size of the video
and screen differ, the horizontal
size of the video is displayed to
match the horizontal and vertical
size of the screen. Unused parts at
the top and bottom are displayed
in black.
6Close
7Back
❏Setting the monitor size
Notice
•Therecordedmonitorsizediffers
accordingtoeachdisc.Evenifthe
monitorsizeissetto“PanScan”or“Letter
Box”,videoisautomaticallyplayedat
eitherofthesesettingsdependingonthe
disc.
1MENU DVD/CD
2Touch the screen.
3
4[Sizing Monitor] settings key
(default: WIDE)
5Select the monitor size.
WIDE:
Video is displayed to fit in the entire
screen. When the video and screen
aspect ratios are different, video is
reshaped and displayed. No parts
of the video are clipped.
Pan Scan:
The video is displayed with its
height aligned in the vertical
direction of the screen. When the
video and screen aspect ratios are
different, video is displayed with its
left and right sides clipped.
Letter Box:
The video is displayed with its
width aligned in the horizontal
direction of the screen. When the
video and screen aspect ratios
are different, black bands are
displayed at the top and bottom of
the screen.
6Close
7Back
❏Setting priority language
You can set the menu language, audio
language, and subtitle language that are
given priority when something is playing.
Notice
•Theavailablelanguagesdifferaccording
tothedisc.
Thissettingisforthelanguagetobe
givenprioritywhileplayingDVDs.Videois
notnecessarilyplayedwiththeselected
language.
1MENU
DVD/CD
2Touch the screen.
3
4[Default Menu Language] ,
[Default Audio Language], and
[Default Subtitle Language]
settings keys (default: English)
Touch any key to open the list of
languages and you can select the
language to give priority to while the
video is playing.
You can select English, French or
Spanish as the language. At Default
Subtitle Language, you can select
“OFF” to hide subtitles.
5Select the language.
6Close
7Back

18 NX605
English
❏Setting the country code
The country code is the code for identifying
countries. The parental level differs
according to country. To use the parental
level correctly on the unit, the country code
of the DVD must be set. P.52
1MENU
DVD/CD
2Touch the screen.
3
4[Country Code] settings key
(default: 8583 (United States))
5Enter the country recorded on
the DVD or the country code of
the region.
6OK
Listening to music on CDs
or discs (MP3/WMA)
On the unit, you can enjoy discs containing
MP3/WMA format music data in addition to
regular music CDs.
Playing discs
Notice
•Whileyouaredriving,availableitemsare
limited.
When the following discs are played, the
artist name, track title and other information
is displayed.
●Discs containing CD-TEXT
●Discs containing ID3 tags and WMA tags
When discs other than the above are
played, only a number such as “Track01” is
displayed.
MEMO:
•Whenanon-stopCD(CDcomprising
tracksjoinedtogether)isplayed,asilent
periodofafewsecondsoccursbetween
tracks.
❏Setting the parental level
What are parental levels?
The parental level setting is for applying
restrictions to children viewing DVDs.
Some DVD videos have parental level
settings. There are eight levels 1 through
8, with stricter viewing restrictions being
applied as the number becomes smaller.
Discs set with viewing restrictions
sometimes cannot be played depending on
the parental level setting made on the unit.
Example: When the viewing restriction of
the DVD is parental level 3
The DVD can be played only when the
parental level set on the unit is level 3 to 8.
If an attempt is made to play a DVD when
the parental level set on the unit is level 1 to
2, then a warning message “Please change
the parental level.” will be displayed.
The default parental level is “OFF” which
means that no viewing restrictions are
applied to any DVD videos.
Notice
•Apasswordisrequiredtosettheparental
level.Viewingrestrictionssometimesdo
notfunctionsuccessfullyifthecountry
codeisnotsetsinceparentalleveldiffers
accordingtocountry.P.52
•TheparentalleveliswrittenontheDVD
package,forexample.Viewingrestrictions
arenotappliedtodiscswhosepackage
doesnotindicateanyparentallevelevenif
parentallevelisset.
•Thissettingisnotrequiredifviewing
restrictionsarenottobeapplied.
Setting and changing passwords
Setting or changing the password is
required for setting viewing restrictions.
1MENU DVD/CD
2Touch the screen.
3
4Change at [Parental Control
Password]
5Enter the password OK
“••••”isdisplayedfortheentered
password. (Default: 0000)
6Enter the new password OK
7Enter the same password again
OK
The new password is set.
Setting the parental level
1MENU DVD/CD
2Touch the screen.
3
4[Parental Level] settings key
(default: OFF)
5Enter the password OK
6Select the parental level Set
The parental level is set.
Viewing restrictions on all parental
levels for DVD video are canceled by
touching OFF .
Other manuals for NX605
1
Table of contents
Other Clarion GPS manuals

Clarion
Clarion MAP560 User manual

Clarion
Clarion ClarionMind NR1UB Manual

Clarion
Clarion MAP560 User manual

Clarion
Clarion N.I.C.E. User manual

Clarion
Clarion NX405E User manual

Clarion
Clarion MAP360 Mounting instructions

Clarion
Clarion EZD580 User manual

Clarion
Clarion NP509 User manual

Clarion
Clarion ClarionMind NR1UB User manual

Clarion
Clarion NZ503 User manual