Clarrke CNG1C Installation and operation manual
OPERATING & MAINTENANCE
INSTRUCTIONS
AIR NAIL GUN
MODEL: CNG1C
Part No. 3110390
OPERATING & MAINTENANCE
INSTRUCTIONS

2
SPECIFICATIONS
Min. Hose Size (ID) ........................................................................ 6mm (1/4”)
Air Inlet Connector ....................................................................... 10mm Quick Fit
Ave. Air Consumption .................................................................. 0.47 cfm
Operating Pressure ....................................................................... 4 - 7bar (60-100psi)
Air Pressure Max ............................................................................ 8bar (116psi)
Nail Size .......................................................................................... 18gauge/15-50mm
Magazine Capacity ..................................................................... 100
Drive Speed ................................................................................... 200Shots/min
Sound Power Level ....................................................................... 101dBLWA
Weight ............................................................................................ 1.4kg
Dimensions LxWxH ........................................................................ 255x54.5x249
Part No ........................................................................................... 3110390
Please note that the details and specifications contained herein, are correct at the time of going to print. However
CLARKE International reserve the right to change specifications at any time without prior notice. Always consult the
machine’s data plate
RESTRICTIONS OF USE
This Nail Gun is suitable for use on materials such as:
• Soft wood, Hardwood • MDF • Plywood • Hardboard • Fibreboard
• Corkboard • Flexible Plastics • Leather, Fabrics • PVC, Polythene sheet
• Foam Rubber
This Nail Gun is NOT suitable for use on materials such as:
• Hard Laminates • Brittle Plastics • Metals (other than light foils)

Please read these instructions carefully before operating the tool
Thank you for purchasing this CLARKE Air Nail Gun
Before using the device, please read this leaflet thoroughly and carefully follow
the instructions given. In doing so you will ensure the safety of yourself and that of
others around you, and you can also look forward it giving long and satisfactory
service.
GUARANTEE
This CLARKE product is guaranteed against faulty manufacture for a period of 12
months from the date of purchase. Please keep your receipt as proof of purchase.
This guarantee is invalid if the product is found to have been abused or tampered
with in any way, or not used for the purpose for which it was intended.
Faulty goods should be returned to their place of purchase, no product can be
returned to us without prior permission.
This guarantee does not effect your statutory rights.
3

SAFETY PRECAUTIONS
IMPORTANT
Failure to follow these precautions could result in personal injury, and/or
damage to property.
1. When operating this tool, ALWAYS wear:
a. approved impact resistant SAFETY GOGGLES. (Eye glasses are NOT safety
glasses)
b. EAR DEFENDERS
c. a good pair of INDUSTRIAL GLOVES
2. ALWAYS disconnect the tool from the air supply when not in use, and before
carrying out any maintenance
3. ALWAYS keep a safe distance between yourself and others when using the
tool.
4. ALWAYS Maintain the tool with care. Keep it clean for best/safest performance.
5. NEVER wear ill fitting clothing, remove watches and rings.
6. NEVER overreach. Keep your proper footing and balance at all times.
7. NEVER force or misuse the tool. It will do a better and safer job at the rate for
which it was designed.
8. NEVER abuse hoses or connectors. NEVER carry a tool by the hose, or yank it
to disconnect from the air supply. Keep hoses away from heat, oil and sharp
edges. Check hoses for leaks or worn condition before use, and ensure that
all connections are secure.
9. NEVER use with an air supply greater than 8bar (110 PSI), at the tool.
10. NEVER modify the tool in any way.
11. NEVER remove any labels. Damaged labels should be replaced.
12. NEVER point the tool at anyone.
13. NEVER carry the tool with your finger on the trigger.
14. NEVER use any other type of gas to operate this tool. Use compressed air ONLY.
15. NEVER load the tool with Nails BEFORE connecting to an air supply.
16. NEVER load the tool with the trigger depressed
17. NEVER use this tool if any part is damaged. Have it inspected and repaired
by a competent technician
18. NEVER modify this tool in any way. Use it ONLY for the purpose for which it is
designed.
19, NEVER fire tool at an incline.. it must be perpendicular to the work surface.
20. NEVER drive in Nails at the edge of a work surface, as the edge could fail
and fly off, endangering yourself or others in the vicinity.
4
AIR SUPPLY
WARNING!
Compressed air can be dangerous. Ensure that you are thoroughly familiar with
all precautions relating to the use of compressors and compressed air supply.
Tools of this type, operate on a wide range of air pressures. It is recommended that air
pressure be set to between 60 and 100psi. at the tool when running.
Higher pressure and unclean air will shorten the tools’ life and could be a safety hazard.
Water in the air line will cause damage to the tool, ensure it is properly maintained at all times.
The recommended procedure to connect this tool to an air supply, is shown on page 11.
The air inlet used for connecting air supply, is a 10mm Quick Fit type.
Line pressure, or hose ID., should be increased to compensate for unusually long air hoses
(over 10M). Minimum hose dia. should be 6mm (1/4”) ID., and fittings should have the same
inside dimensions.
CSG2K
CSG3K
OPERATION
Ensure the tool is not loaded, then, with the
air supply turned OFF, connect the air line
to the Nailer at the Quick Fit coupling.
With your fingers well away from the trigger,
and the tool pointed away from you, and
anyone in the vicinity, depress the magazine
catch, pull out the magazine and load with
appropriate nails or staples...as shown,
Push the magazine back until it locks in
position, - Your Nailer/Stapler is now ready for
use.
Turn ON the air supply, and check for air
leaks. If any are apparent, rectify before proceeding. Ensure the operating pressure is set
to between 4-7bar (60-100psi), depending upon the size of nail used and type of material
being worked. The harder the material, and bigger the nail, the higher the pressure.
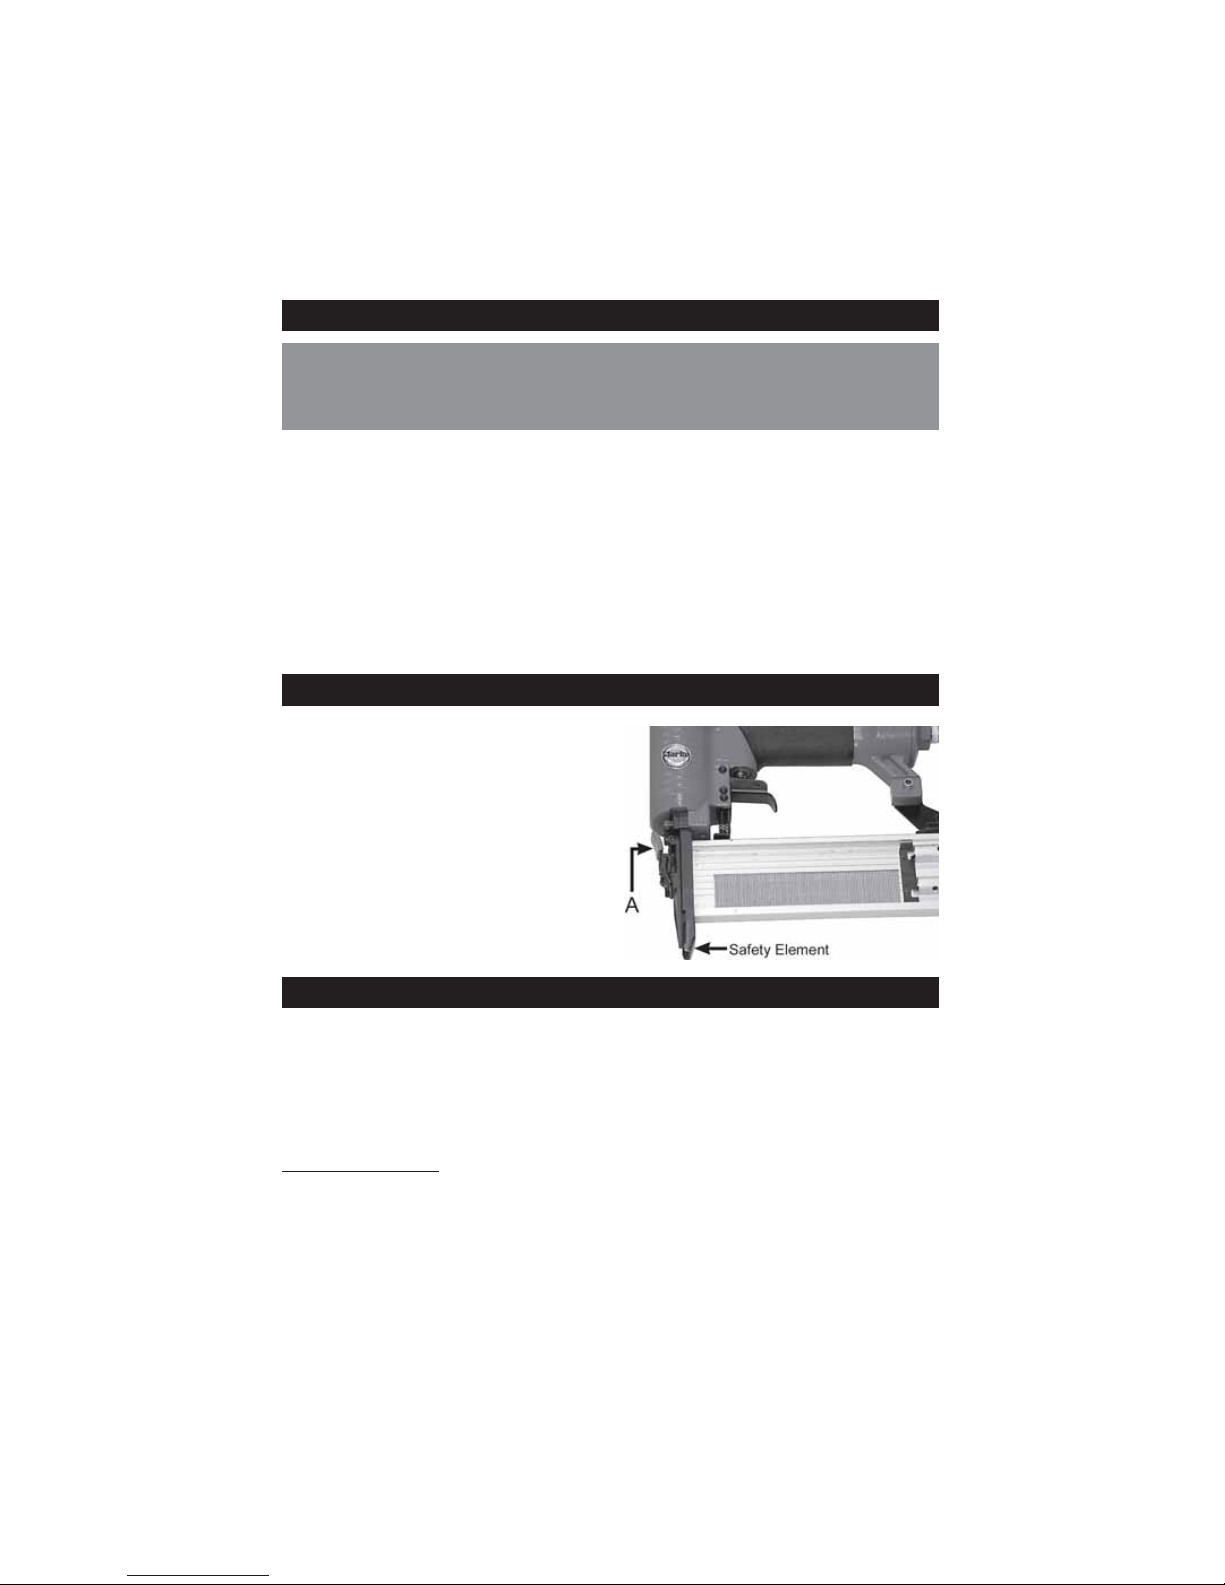
Hold the tool so that it is at right angles to the work. Lower it so that the Safety Element
contacts the work surface, and is forced upwards. This movement releases the Trigger,
which may now be pulled, driving in the nail.
CLEARING A JAM
Should the gun jam, turn OFF the air supply and pull the trigger in order to ensure the
airline is not under pressure. Release the nose catch (A Fig. 1), and clear the jammed nail
from the within the nose. Secure the nose with the catch, turn ON the air supply and
proceed to use the Nailer.
ASSEMBLY
Nails

MAINTENANCE
Daily before use.
1. Drain water from compressor air tank, and air line.
2. Check and clean, if fitted, the air inlet gauze filter.
3. A bottle of CLARKE Air Line Oil** is supplied with the kit. Squirt a few drops of oil
(approx. 3cc), into the air inlet.
This should be carried out regardless of whether or not an air line lubricator is
used.
During Use.
For lubricating the internal components when in operation, an air line lubricator
should be used, with Clarke Air Line Oil**, adjusted to 2 drops per minute. (see
p.11)
If an Air line lubricator is NOT used, this procedure should be repeated after every
two to three hours of use.
Storage.
If the Nailer is to be stored, or is idle for longer than 24 hours, run a few drops of
Clarke Air Line Oil** into the air inlet before storing.
Notes
Be aware that factors other than the tool may effect its operation and efficiency
such as reduced compressor output, excessive drain on the airline, moisture or
restrictions in the line, or the use of connectors of improper size or poor condition
which will reduce air supply.
Grit or gum deposits in the tool may also reduce efficiency. This condition can be
corrected by cleaning the air strainer, if fitted, and flushing out the tool with gum
solvent oil, or failing this, the tool should be disassembled, thoroughly cleaned,
dried and reassembled.
If the tool runs erratically or becomes inefficient, and the air supply is sound,
dismantle the piston assembly and replace worn or damaged parts, or take the
tool to your CLARKE dealer.
**Clarke Air Line Oil is available from your CLARKE dealer part no. 3050825.
IMPORTANT:
The use of parts other than CLARKE replacement parts may result in safely
hazards, decreased tool performance and will invalidate your warranty.
6
7
ACCESSORIES
A wide range of Airline accessories is available, including Filter/Regulators. Lubricators, High
Pressure Hoses from 5 to 100 Metres, Whip hose etc. Contact your CLARKE dealer for further
information, or CLARKE International Sales Department on 01992 565333
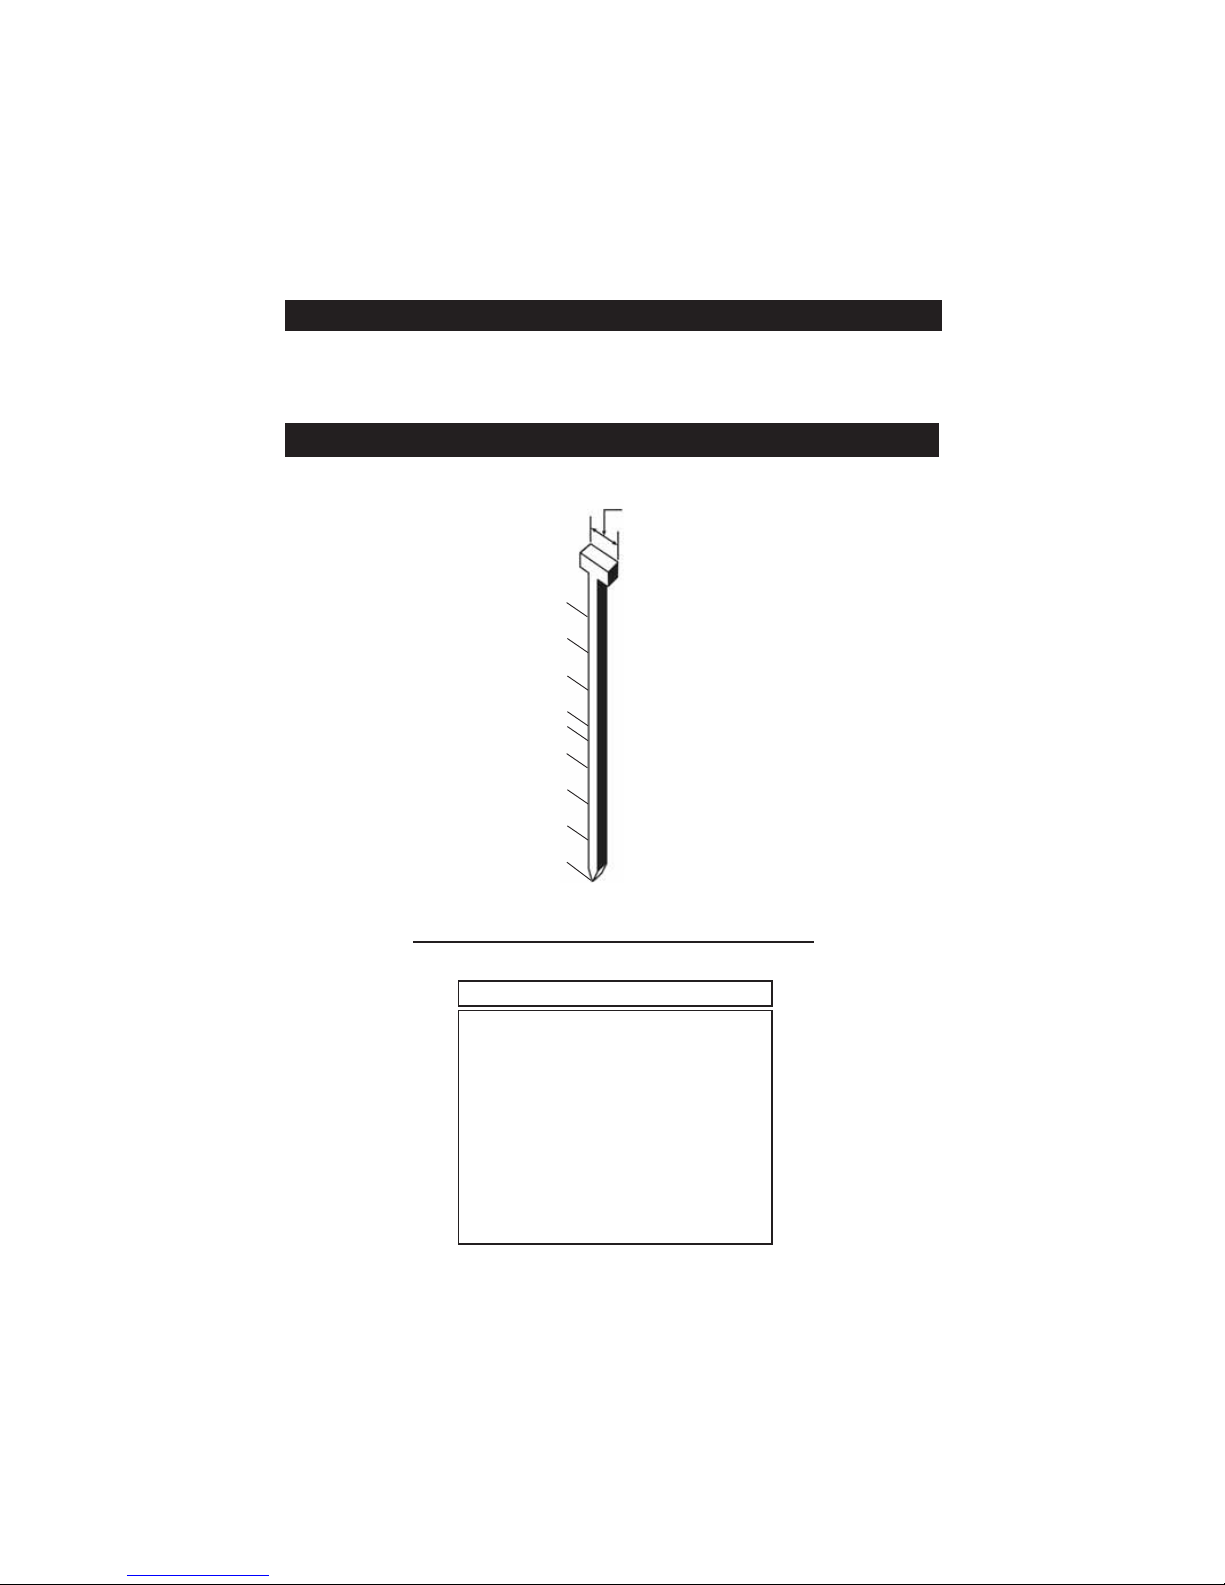
CONSUMABLES
Length Part No:
15mm ................................ 1800413
20mm ................................ 1800415
30mm ................................ 1800417
32mm ................................ 1800419
35mm ................................ 1800421
40mm ................................ 1800423
45mm ................................ 1800425
50mm ................................ 1800427
32
20
25
1.25mm
Crown
30
15
35
40
45
50
18 GAUGE
Nails - 18 Gauge - 1.25mm Crown

8
PARTS DIAGRAM

1 Hex Skt. Hd. Bolt HTCNG1C01
2 Deflector Spring HTCNG1C02
3 Air Deflector HTCNG1C03
4 Bolt M5x50 HTCNG1C04
5 Spring Washer HTCNG1C05
6 Cylinder Head HTCNG1C06
7 O-Ring 3.7x2.4 HTCNG1C07
8 Sealing Washer HTCNG1C08
9 Compression Spring HTCNG1C09
10 Piston HTCNG1C10
11 O-Ring 31.2x2.5 HTCNG1C11
12 O-Ring 24.8x3.5 HTCNG1C12
13 Gasket HTCNG1C13
14 Exhaust Collar HTCNG1C14
15 O-Ring 30x1.8 HTCNG1C15
16 O-Ring 42.6x2.35 HTCNG1C16
17 Cylinder HTCNG1C17
18 O-Ring 21x3 HTCNG1C18
19 Main Piston HTCNG1C19
20 Shock Absorber HTCNG1C20
21 Gun Body HTCNG1C21
22 Rubber Washer HTCNG1C22
23 Rectangle Washer HTCNG1C23
24 Trigger Valve Seat HTCNG1C24
25 Trigger Valve Stem HTCNG1C25
26 O-Ring 1.7x2 HTCNG1C26
27 Trigger Valve Guide HTCNG1C27
28 O-Ring 11.2x2 HTCNG1C28
29 Compression Spring HTCNG1C29
30 Pin HTCNG1C30
31 Trigger HTCNG1C31
32 E-ring 2.5 HTCNG1C32
33 Bearing Plate HTCNG1C33
34 Pin 2.5x16 HTCNG1C34
35 Bracket HTCNG1C35
36 Pusher Spring HTCNG1C36
37 Safety Element HTCNG1C37
38 Spacer HTCNG1C38
39 Pin 4x20 HTCNG1C39
40 Clasp HTCNG1C40
41 Quick Release Handle HTCNG1C41
42 Nose Cover HTCNG1C42
43 Retaining Ring HTCNG1C43
44 Pin 2.5x16 HTCNG1C44
45 Bolt M4x12 HTCNG1C45
46 Guide Nose HTCNG1C46
47 Label HTCNG1C47
48 Nail Carrier HTCNG1C48
49 Magazine Slide Cover HTCNG1C49
52 End Plate HTCNG1C52
53 Clamp HTCNG1C53
54 Nail Pusher HTCNG1C54
55 Spring Adapter HTCNG1C55
56 Compression Spring HTCNG1C56
57 Fixed Plate HTCNG1C57
58 Fixed Lever HTCNG1C58
59 Bolt M4x16 HTCNG1C59
60 Support Bracket HTCNG1C60
61 Nut M4 HTCNG1C61
62 Rubber Grip HTCNG1C62
63 O-Ring 36.3 x 3.55 HTCNG1C63
64 End Cap HTCNG1C64
65 Q/Release Coupling HTCNG1C65
PARTS LIST
No. Description Part No. No. Description Part No.
9

11
DECLARATION OF CONFORMITY
We declare that these products comply to the following standards/directives
• BS EN 792-13: 2000
Model No: CNG1C
Serial or Batch number: See product data plate
signature:
L. E. Fergusson
SERVICE MANAGER
For Spare Parts and Service, please contact your nearest dealer, or CLARKE
International, on one of the following numbers.
PARTS & SERVICE TEL: 020 8988 7400
PARTS & SERVICE FAX: 020 8558 3622
or e-mail as follows:
PARTS: [email protected]
SERVICE: [email protected]
SPARE PARTS & SERVICING CONTACTS
RECOMMENDED AIR SUPPLY CONNECTION
Table of contents
Popular Nail Gun manuals by other brands

Makita
Makita AN901 instruction manual

Bostitch
Bostitch N66C Operation and maintenance manual

Desa
Desa PowerFast 32003 operating instructions

Elektra Beckum
Elektra Beckum SKN 50 Gebruikers en onderhoudshandleiding

Metabo HPT
Metabo HPT Strap-Tite NR3665DA Instruction and safety manual

Makita
Makita Gas nailer GN900SE technical information

Craftsman
Craftsman CMCN616 instruction manual

Bostitch
Bostitch N75C Operation and maintenance manual

Hitachi
Hitachi NV45AE - Coil Roofing Nailer Instruction and safety manual

wurth
wurth DIGA CSM-1 operating instructions

Blue Hawk
Blue Hawk SGY-NR-KITV user manual

Black & Decker
Black & Decker 625779-00 instruction manual


