Clearmount SW7 User manual

INSTRUCTIONS FFOR AASSEMBLING
YOUR CCLEARMOUNT MMITER SSAW SSCALE
CLAMP CLAMP
STOP
PINS FOR
CLAMPS
ALLEN
WRENCH
2 MOUNTING
BOLTS WITH NUTS
(DOUBLE MITER SCALE HAS 4)
CUTTING BLOCK
FENCE OF SCALE
BASE
MEASURING SCALES
(OR BLANK PLATES)
MITER SAW
(INCLUDED ONLY IF YOU HAVE
PURCHASED A COMPLETE SYSTEM)
** Read & Follow Operating and Safety Instructions for your
Miter Saw before attaching or using the scale.
** Always wear safety glasses when operating the saw.
If you have any questions while assembling, please call us at (800) 541-5472
Pictures shown are our SW7 but these instructions apply to all of our
scales. Special information for other models is noted.

page 2
• Turn scale over & using allen wrench, loosen and remove black
bolts (with washers)
• Lift off measuring scales from base (Double Miter Scale -
remove all scales and flat unmarked plates from base)
BOLTS HOLDING SCALES TO BASE
• Turn upright
• Pilot holes (# could vary from 1-5 on each side of the cutting block, depending on your saw) will
be marked. You will only be using 1 pilot hole on each side.
PILOT HOLES FOR MOUNTING TO SAW PILOT HOLES FOR MOUNTING TO SAW
PPRREEPPAARRIINNGGTTHHEEBBAASSEE::

page 3
• Place scale on your miter saw
• If your saw has an adjustable fence, make sure it is positioned as far back as possible from the front of saw
• Line up pencil mark (on back fence of scale base) with your saw blade at 0 degrees - saw should be
unplugged at this point.
** If you purchased a complete system from us, we have already drilled your saw(s) - skip to
instructions on Bolting.
(Double Miter Scale - Start with the saw that is on the Right side as you are facing the unit. After
you have secured this one, repeat the same procedure for attaching the second saw.)
• Feel underneath the table of your saw, under the pilot hole that is marked for you to use, to see
that they will be clear of reinforcement walls when you drill.
• The scale base must be held or clamped firmly against the miter saw's fence when you drill.
• Using an electric drill with a ¼" drill bit, guide the bit through the pilot hole you have selected and
drill a hole through the base of your saw. You only need one hole/bolt per side.
Bolting: Insert a bolt through the scale base and your saw and secure and tighten with the nut under
neath your saw.
• Repeat this on the other side of your saw.
INSERT BOLT INSERT BOLT
AATTTTAACCHHIINNGGYYOOUURRSSCCAALLEETTOOTTHHEESSAAWW::

FIRST CUTS
THROUGH FENCE
CUT TO TOP-FRONT
EDGE OF BLOCK
• DO NOT OPERATE THE SAW UNLESS YOU HAVE READ THE INSTRUCTIONS THAT WERE
PROVIDED BY THE MANUFACTURER
• ALWAYS WEAR SAFETY GLASSES WHEN OPERATING THE SAW BLADE
***BLADE Yes, you will be cutting through the back fence of your scale base and partially into the
wooden cutting block. You should be using a carbide tipped blade (not the standard cross cut blade
that usually comes with a saw) but, you do not have to buy a special metal cutting blade. A carbide
tipped blade designed for cutting wood moulding will not be harmed as you make these 2 initial cuts.
BECAUSE OF THE DESIGN OF OUR SYSTEM, WHERE THE SCALE MOUNTS TO THE TOP OF
YOUR SAW ( guaranteeing a level cutting bed at all times) YOU MUST SET A DEPTH STOP ON
YOUR SAW TO LIMIT HOW DEEPLY YOU CAN CUT. You must never cut all the way through the
cutting block and base or you will destroy the integrity of the system!
Refer to the instructions for your particular saw to see how to control the maximum cutting depth.
You should see references to terms such as: adjusting bolt, stop screw, bevel stop, slotting depth
etc. These should direct you to areas under the head of your saw where by adjusting a bolt or
replacing with a longer bolt, you can control the depth of your cuts - the bolt serving as a stop as
you lower the saw head.
MMAAKKIINNGGFFIIRRSSTTCCUUTTSS::
page 4

• Plug in your saw.
• Turn the saw to one of the 45° markings. (Double Miter System - You only need to make one cut
with each saw - Left Saw with cut to the left / Right Saw with cut to the right)
• Make your cut through the fence of the scale base and into the cutting block. STOP when the blade
has just reached the outside edge of the top of the cutting block. This will give you the full cut-
ting capacity of our system. This is also where you should set your DEPTH STOP!
• Turn your saw to the other 45° angle and make your second cut, as above.
• There may be one or two narrow pieces of aluminum in the fence of the scale after you have made your cuts -
by bending back and forth with pliers, these should be removed. Be Careful as these could be sharp.
POTENTIAL GAP
READ MEASUREMENT WHERE
MOULDING MEETS SCALE
PREMEASURED MOULDING
(MEASURE INSIDE RABBET)
• Unplug your saw
• Read through this entire section before doing in case you have to shorten the cutting
block as indicated by ***
• Have available a premeasured piece of moulding (mitered at both ends) - Measuring the inside rab-
bet. Also, have the black bolts w/washers and allen wrench ready to reattach the scales.
• Place the right scale back in position and push it next to the cutting block
• Lower the head of the unplugged saw until the blade is in the cutting block
• Put the outside of the moulding firmly against the back fence and slide the left side of the piece of
moulding (rabbet facing you) against the edge of the saw blade.
• Now slide the scale back and forth until the correct scale measurement ( where inside edge of right
miter hits the scale markings) is indicated. Now replace and slowly tighten the black bolts.
*** There may be a small gap between the edge of the cutting block and the edge of the scale. Some
saws may require a shortening of the cutting block. This all depends on the particular saw the you
are using.
• Repeat for the left scale
(Double Miter Scale - SW7SP Scale - - Since you only have one side to calibrate, simply
reattach the plain plates and the scale piece that measures from 41-64")
RREEAATTTTAACCHHIINNGGAANNDDCCAALLIIBBRRAATTIINNGGTTHHEESSCCAALLEESS::
page 5
page 6
• Secure your Miter Saw System to a suitable work surface (bench or stand) by following instructions in
your saw manual.
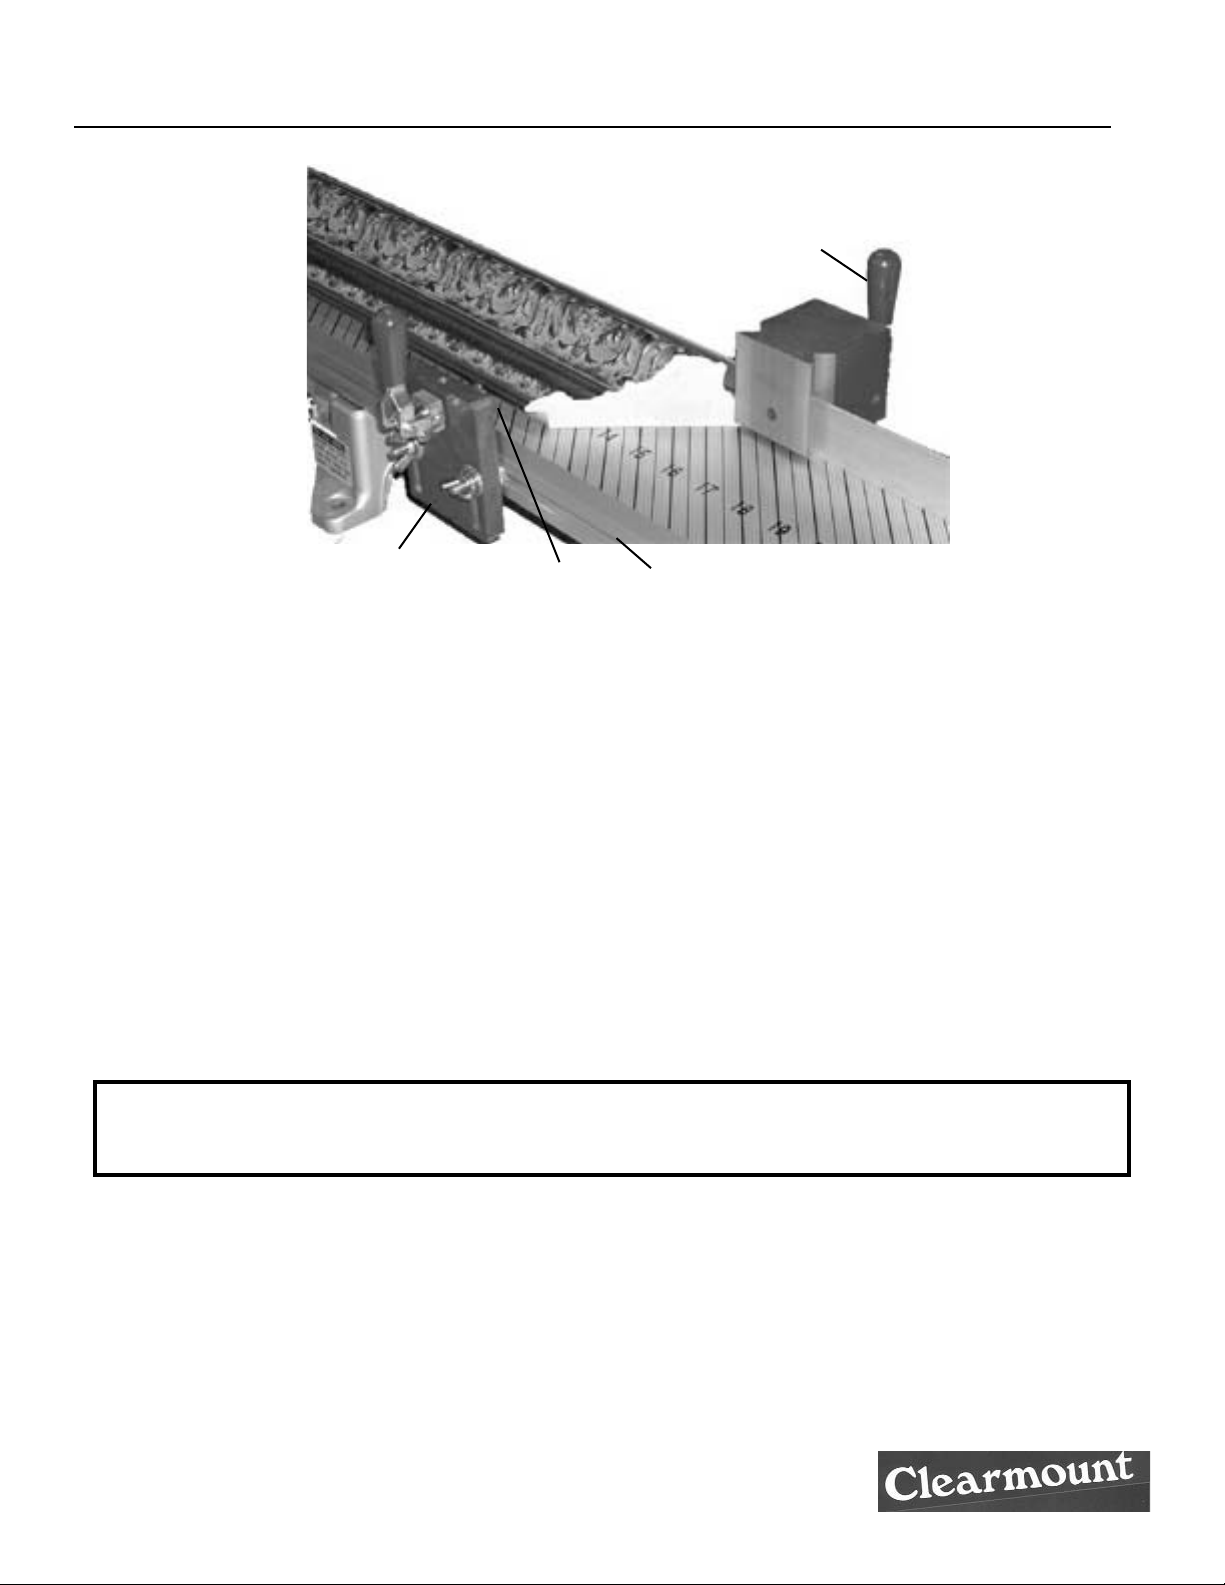
• Attaching Stop - Place the slot in the stop over the fence with the red handle to the rear of scale. Pull
the handle upright to lock / Push it back to unlock
** Some saws, because of the design of their fence, restrict how closely to the saw you can put the stop.
If this occurs with your saw, take a piece of moulding, mitered on both ends, and place it between the
moulding to be cut and the stop, which can now be located farther away from the saw. For example, if
you use a 10" piece of moulding as a spacer and you want to cut a 5" piece, set the stop at 15".
• Attaching Clamps - Loosen 2 wing nuts on each clamp. Place the square heads of bolts in the horizon-
tal channel that runs along the entire front of the scale base. Screw one of red tipped pins into the
clamp (different sizes and different depths for various moulding widths). Position the clamp towards
the saw. Lifting the red handle of the clamp moves the pin to push your moulding against the fence of
the scale. Repeat for the 2nd clamp.
STOP
CLAMP ADJUSTABLE PIN CHANNEL ON BASE
SSEECCUURRIINNGGYYOOUURRSSYYSSTTEEMMTTOOWWOORRKKSSUURRFFAACCEE&&AATTTTAACCHHIINNGGSSTTOOPP&&CCLLAAMMPPSS::
Metal moulding always requires clamping - Metal moulding must come in contact with both fences,
otherwise it is too short and you are at risk being hurt by flying pieces of moulding! Also, improve
the quality of your cut and prolong the lift of your blade by using a lubricant when cutting metal.
Table of contents


