LIMITED
WARRANTY
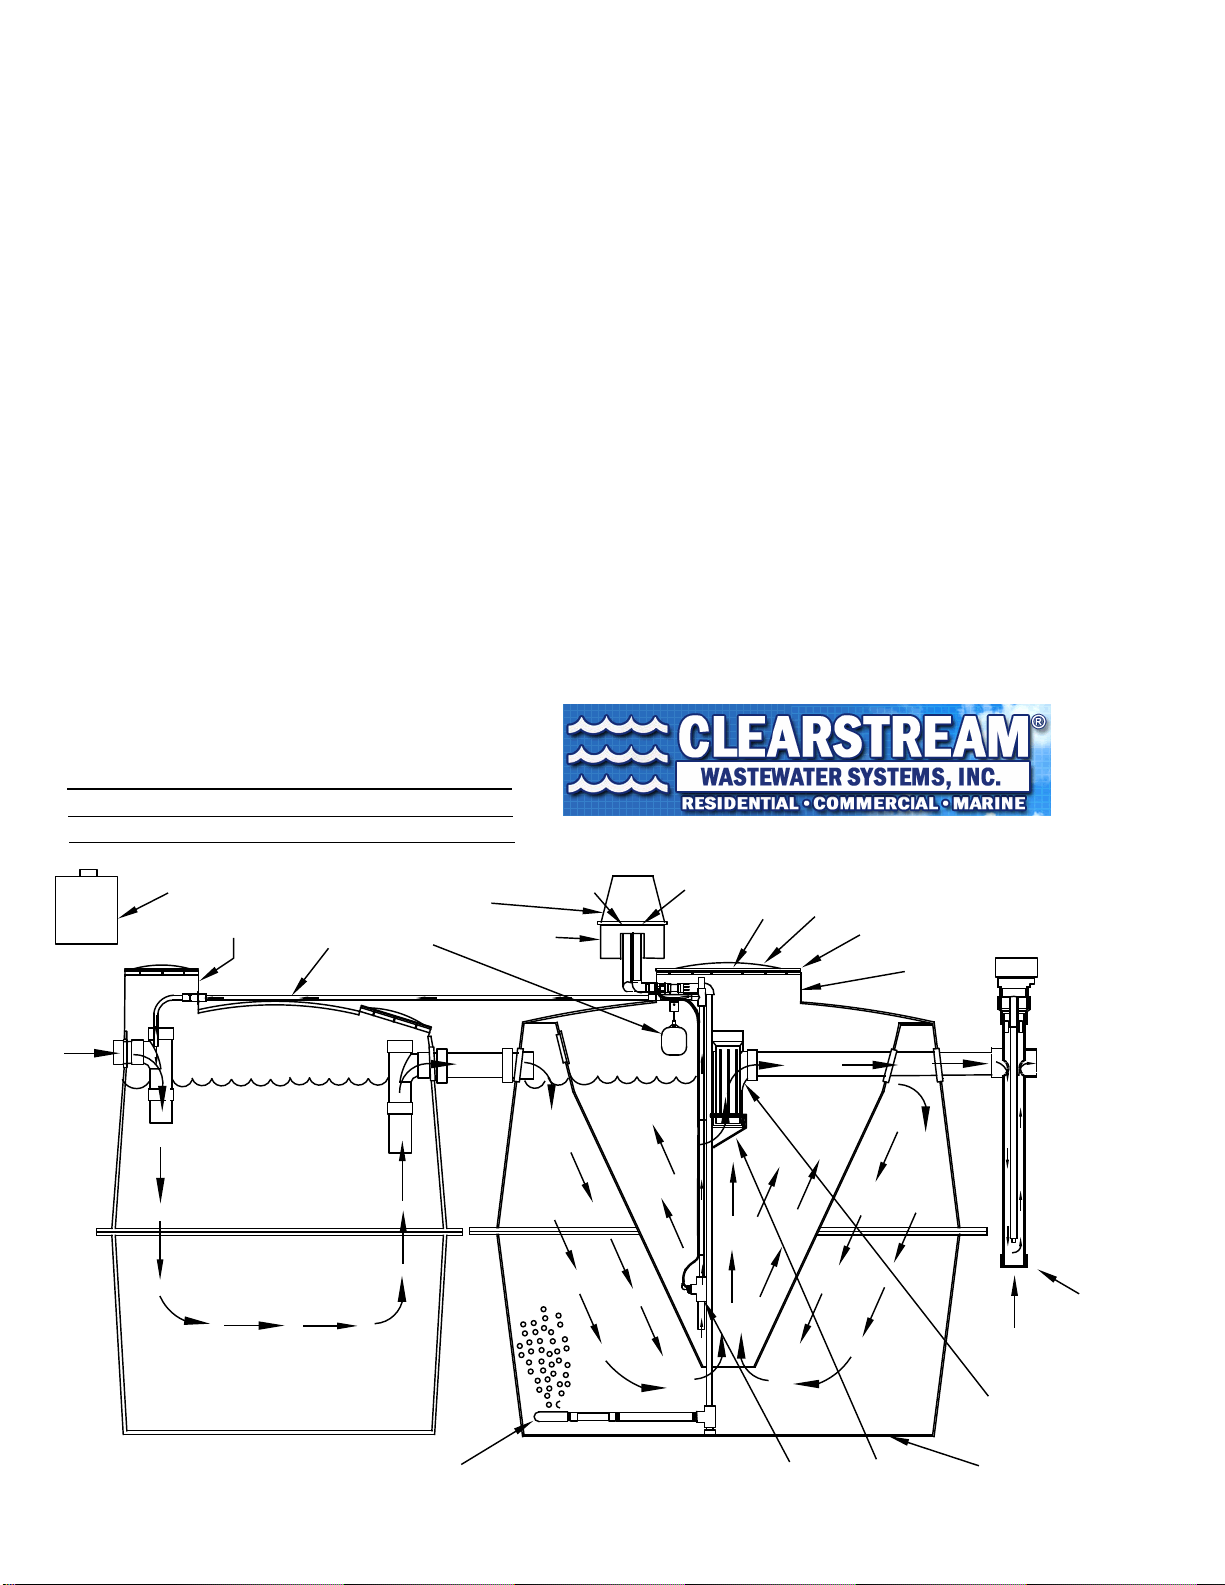
Clearstream Wastewater
Systems,Inc. warrantseach
Clearstream
Aerobic
Wastewater
TreatmentSystem to be free from defects
in materialand workmanship for a period of two (2) yearsfrom the date of sale to the original retail consumer when properly registered
with Clearstream.
Clearstream’s
sole obligation under this warranty is as follows: Clearstreamshall fulfill this warranty by repairing or
exchanging any component part, F.O.B. Factory, that shows evidence of defects, provided said component part has been paid for,
warrantee has notified Clearstream of the defect complained of and the component is returned through an authorized Purchaser,
transportation prepaid. There is no informal dispute settlement available under this
LIMITED WA
RRANT
Y
.
No warranty is made as to the field performance of any system. This
LIMITED WARRANTY
applies only to the parts manufactured by
Clearstream and does not include any portion of the plumbing, drainage, disposal system or installation of the systems. Site
s
pecific
designs of treatment and disposal systems,including treatment plant and disposal system sizing is not the responsibility of Clearstream
and is not covered by this
LIMITED WARRANTY.
Accessoriessupplied by
Clearstream,
but manufactured by others, are warranted only
to the extent of and by the terms and conditions of the original manufacturer’s warranty. In no event shall Clearstreambe
res
ponsible
for delay or damages of any kind or character resulting from, or caused directly or indirectly by, defective component or materials
manufactured by others.
Recommendations for special applications will be based on the best available expertise of Clearstream and published industry
information. Such recommendations do not constitute a warranty of satisfactory performance.
The
LIMITED WARRANTY
extends to the original retail consumer of the product. As herein, original retail consumer is defined as the
purchaser who first has the plant installed, or in the case of a system designed for non-permanent installation, the purchaser who first
uses the system. It is the purchaser’s, or any sub-vendee’s,obligation to make known to any other consumer the terms and conditions
of this warranty.
This warranty is a
LIMITED WARRANTY
and no claim of any nature shall be made against
Clearstream
unless and until the original retail
consumer, or his legal representative, notifies Clearstream in writing of the defect complained of and delivers the product and/or
defective part(s), freight prepaid, to Clearstreamor an authorized service station.
Clearstream
reserves
the right to revise,change, or modify the construction and design of the ClearstreamAerobic TreatmentSystem,
or any component part or parts thereof, without incurring any obligation to make such changes or modifications in equipment previously
sold. Clearstream also reserves the right, in making replacements of component parts under this warranty, to furnish a component
which, in its judgement is equivalent to the part replaced.
To the extent that the
LIMITED WARRANTY
statements herein are inconsistent with the locality where Purchaserused the Clearstream
system, the warranties shall be deemed to be modified consistent with such local law. Under such local law, certain limitations may
not apply. For example, some states in the United States and some jurisdictions outside the United States may: (i) preclude the
disclaimers and limitations of these warranties from limiting the rights of a consumer; (ii) otherwise restrict the ability of a manufacturer
to make such disclaimers or to impose such limitations; or (iii) grant the consumer additional legal rights, specify the duration of implied
warrantieswhich the manufacturer cannot disclaim, or prohibit limitations on how long an implied warranty lasts.
In no event and under no legal theory, including without limitation, tort, contract, or strict product liability, shall Clearstream or any of
its suppliers be liable to the other party for any indirect, special, incidental, or consequential damages of any kind, including without
limitation, damages for loss of goodwill, or any other kind of commercial damage, even if the other party has advised Clearstream of
the possibility of such damages.
TWO YEAR INITIAL SERVICE
POLICY
Date
Our firm,
the first two years from the date of installation. There will be , will inspect and serviceyour
Clearstream
System for
inspections made each year for this initial two year
period. Effluent quality inspection will include a visual inspection for color,turbidity,sludge build up, scum overflow, and
.