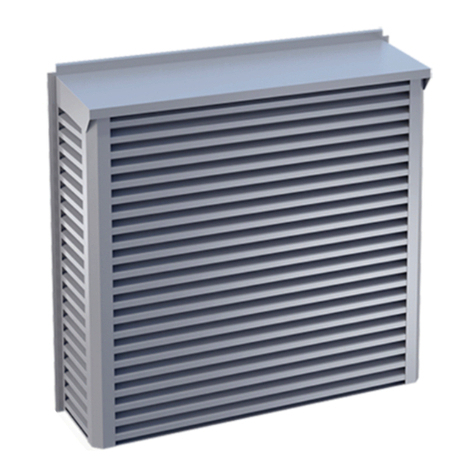
Climecon TUISKU User manual

The mounting instructions are the same for the following product series:
TUISKU-VU and TUISKU-PU
TUISKU-AF
TUISKU-O
TUISKU-IS
The connection instructions of TUISKU-AF is in separate connection manual
TUISKU
flush-mounted
snow covers
Installation manual
climecon.
0322

TUISKU flush mounting
It is advisable to build a chamber with a drainage similar toFigure 1 or 2 behind the TUISKU snow covers to
prevent moisture from getting into the ducts in exceptionally demanding conditions.
Figure 1 is common in multielement TUISKU installations and Figure 2 when there is a one-piece TUISKU
installation and a back seam.
Kammio TUISKUn takana
rauhoittaa ilmavirran nopeuden,
mikä edesauttaa mahdollisen
läpi päässeen kevyen pakkaslu-
men laskeutumisen kammion
pohjalle ilman, että se kulkeutuu
pidemmälle kanavistossa.
Kaivo + saattolämmitys / lumen sulatus
Max. 0,7 m/s
< 2 m/s
Vedenpoisto + lumensulatus
Aukko ~15 mm asennusvaran verran suurempi
Tarkastusluukku
max. 0,7 m/s
TUISKU elements are designed to
perform at high face velocities but
the maximum recommended face
velocity is 0.7 m/s.
1
2
The chamber behind TUISKU calms
-
litates the possible settling of light
frosty snow at the bottom of the
chamber without passing further
through the ductwork.
Water drainage hole + heat tracing / snow melting
Inspection hole
Drainage + snow melting
climecon.fi
© Climecon 2

1-piece
TUISKU flush mounting
Seal the edge behind the TUISKU frame so that TUISKU can be installed tightly.
Mount TUISKU to a load-bearing wall with screws.
We recommend the following methods or equivalent to mount TUISKU to a wall:
• Concrete: Concrete screw Fisher FBS 6x40/5 mm US or equivalent
• Steel: EJOT JT2-6-6.3x25mm zinc-plated drill point
1
1
2
2
3
3
climecon.fi
© Climecon 3

3-piece elements in parallel
TUISKU flush mounting
Seal the edge behind the TUISKU frame so that TUISKU can be installed tightly.
We recommend the following methods or equivalent to mount TUISKU to a wall:
• Concrete: Concrete screw Fisher FBS 6x40/5 mm US or equivalent
• Steel: EJOT JT2-6-6.3x25mm zinc-plated drill point
Mount the TUISKU elements together with zinc-plated drill point screws EJOT JT2-6-6.3x25mm.
1
1
2
2
3
3
1
2
3
1
2
3
climecon.fi
© Climecon 4

3-piece elements on top of one another
TUISKU flush mounting
Seal the edge behind the TUISKU frame so that TUISKU can be installed tightly.
We recommend the following methods or equivalent to mount TUISKU to a wall:
• Concrete: Concrete screw Fisher FBS 6x40/5 mm US or equivalent
• Steel: EJOT JT2-6-6.3x25mm zinc-plated drill point
Mount the TUISKU elements together with zinc-plated drill point screws EJOT JT2-6-6.3x25mm.
11
22
33
1
2
3
1
2
3
climecon.fi
© Climecon 5

TUISKU flush mounting
TUISKU-AK installation frame (accessory)
from hot galvanized structural steel S320GD+Z350 3.0 mm or equivalent..
We recommend the following methods or equivalent
to mount the TUISKU-AK installation frame to the opening:
• Wood: TX-20 4.5X40 zinc-plated countersunk head full thread chipboard screw
• Concrete: Concrete screw Fisher FBS 6x40/5 mm US or equivalent
• Steel: EJOT JT2-6-6.3x25mm zinc-plated drill point
to make installing the multielement TUISKU
pieces easier. The dimensions of the installation
the edges of the opening must be supported
NOTE! The TUISKU-AK installation frame
must not be a part of a load-bearing structure!
The load-bearing structure must be designed
and approved by a structural engineer.
When installing TUISKU elements without an
built in the opening for TUISKU with the struc-
tural engineer’s instructions.
1
1
2
2a 2b Sandwich
structure
Interior
Interior
Exterior
Exterior
50 mm 50 mm
30 mm 30 mm
Width of the
element
Width of the
element
climecon.fi
© Climecon 6

Multielement TUISKU + TUISKU-AK installation frame
TUISKU flush mounting
in the opening for TUISKU with the structural engineer’s instructions.
The bearing frame can be turned if needed.
NOTE! The TUISKU-AK installation frame must not be a part of the building’s load-bearing structures.
We recommend the following screw types or equivalent
to mount the support frame inside the opening or to the edges of the opening:
• Wood: TX-20 4.5X40 full thread chipboard screw csk.hd. Zn
• Concrete: Concrete screw Fisher FBS 6 x 40/5 mm US or equivalent
• Steel: EJOT JT2-6-6.3 x 25 mm zinc-plated drill point
The structure must always be approved by a structural engineer.
1
1
2
3a
3b
2
296 mm
3a 3b
152
100
105
56
Ø10
Ø8
climecon.fi
© Climecon 7

A
ASECTION A-A
B
A
ASECTION A-A
B
1
2
3
4
Multielement TUISKU + TUISKU-AK installation frame,
for example 4-piece
TUISKU flush mounting
Seal the edge behind the TUISKU frame so that TUISKU can be installed tightly.
• The upper edges and the sides of the lower TUISKU elements are mounted from its rear end
• The lower edges and one side are mounted to the load-bearing wall structure.
correspondingly mounted to the installation frame and the load-bearing wall structure.
drill point screw EJOT JT2-6-6.3x25 mm
The TUISKU elements are mounted together from the sides and the top with zinc-plated
drill point screws EJOT JT2-6-6.3x25mm.
12
34
= double screws.
In vertical sections
2 screws side-by-side
and in horizontal
sections 2 screws on
top of one another.
1
1
2
2
2
3a
3a
3b
3b
climecon.fi
© Climecon 8

1
2
3
6
Multielement TUISKU + TUISKU-AK installation frame,
for example 6-piece
TUISKU flush mounting
Seal the edge behind the TUISKU frame so that TUISKU can be installed tightly.
• The upper edges and the sides of the bottom corner TUISKU elements are mounted from
• The lower edges and one side are mounted to the load-bearing wall structure.
• The bottom edge of the middle TUISKU element is mounted to the load-bearing structure
correspondingly mounted to the installation frame and the load-bearing wall structure.
EJOT JT2-6-6.3x25mm.
The TUISKU elements are mounted together from the sides and the top with zinc-plated
drill point screws EJOT JT2-6-6.3x25mm.
123
4
= double screws.
In vertical sections 2 screws side-by-side and in
horizontal sections 2 screws on top of one another.
A
ASECTION A-A
B
A
ASECTION A-A
B
56
4
5
1
1
2
2
2
3a
3a
3b
3b
climecon.fi
© Climecon 9

Fasten the wires as shown in the picture.
Installation of TUISKU-IS snow and rain cover with
removable grille
1
1
2
2
3
3
Vaijeri
We recommend the following methods or equivalent to mount TUISKU to a wall:
• Concrete: Concrete screw Fisher FBS 6x40/5 mm US or equivalent
• Steel: EJOT JT2-6-6.3x25mm zinc-plated drill point
Vaijeri
climecon.fi
© Climecon 10

you can contact the Climecon customer service
Tel. +358 (0)20 1986 600
Email info@climecon.fi
Climecon Oy
Lämmittäjänkatu 4 A
00880 HELSINKI
FINLAND
climecon.fi
climecon.fi
© Climecon 11
Other Climecon Fan manuals
Popular Fan manuals by other brands

NuAire
NuAire XB-EFA-8L-BK Installation, Operating and Maintenance Instructions for the Installer and the User

Hunter
Hunter Cavera installation manual
Orbegozo
Orbegozo TW 0755 instruction manual

Thermador
Thermador PROFESSIONAL VCIN36JP Use and care guide

Morgan
Morgan MFC-Eurus 360BK user manual
Caframo
Caframo Taku operating instructions
