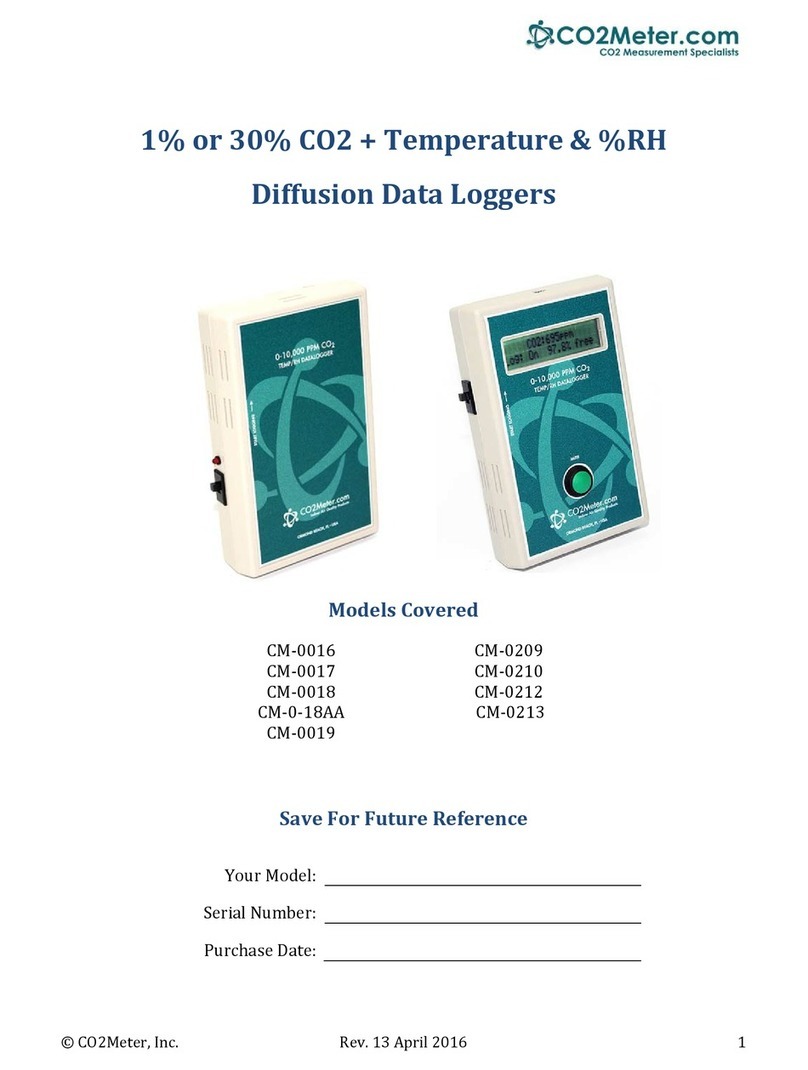
Co2meter ESCM-01 User manual

User’sManual
Copyright©2015CO2Meter,Inc.AllRightsReserved. Rev.2.0
CO2SamplingDataLogger
ModelsCovered
ESCM‐01 ESCM‐02 ESCM‐03
ESCM‐50ESCM‐56
SeeTable1onpage7fordetails.
WARNING!
InstallourcomplimentaryGasLab®softwarebeforeconnectingyourCO2 Meterproduct(s)to
yourcomputer.FailuretodosomayaffecttheabilityforGasLab®todetectyourmeter.
Savemeterinformationforfuturereference
ModelNumber:
SerialNumber:
PurchaseDate:

SamplingDataLoggerUser’sManual
PAGE2of17
WARNING!
InstallourcomplimentaryGasLab®softwarebeforeconnectingyour
CO2 Meterproduct(s)toyourcomputer.Failuretodosomayaffectthe
abilityforGasLab®todetectyourmeter.Ifthishappens,pleasefollowthe
instructionsinthe“USBDriverInstallationInstructions”sectiononpage15of
thismanual.

SamplingDataLoggerUser’sManual
PAGE3of17
TableofContents
WELCOME...................................................................................................................4
IMPORTANTSAFEGUARDS...................................................................................4
PACKAGECONTENTS..............................................................................................5
OPTIONALACCESSORIES...............................................................................................................5
GASLAB®SOFTWARE..............................................................................................5
MINIMUMSYSTEMREQUIREMENTS............................................................................................5
POWERINGTHEMETER.................................................................................................................7
PRODUCTOVERVIEW.............................................................................................7
INSTRUMENTOVERVIEW..............................................................................................................8
DETECTORPRINCIPAL...................................................................................................................8
OPERATIONGUIDE..................................................................................................9
CONNECTINGMETERS...................................................................................................................9
LCDDISPLAY..................................................................................................................................9
DATASTORAGE...............................................................................................................................9
LOGGINGDATA...............................................................................................................................9
SETUP............................................................................................................................................10
DATALOGGERMODELS..............................................................................................................10
SETTINGS................................................................................................................10
DISPLAYSETTINGS......................................................................................................................10
PORTSETTINGS...........................................................................................................................11
TIME/DATESETTINGS...............................................................................................................11
LOGGINGSETTINGS.....................................................................................................................11
QUICKSTARTGUIDE...........................................................................................12
CALIBRATION........................................................................................................12
CALIBRATIONPROCEDURE........................................................................................................13
APPENDIX...............................................................................................................14
METERSPECIFICATIONS.............................................................................................................14
TROUBLESHOOTINGGUIDE..............................................................................15
USBDRIVERINSTALLATIONINSTRUCTIONS..........................................................................15
SUPPORT.................................................................................................................16
WARRANTY............................................................................................................16
LIABILITY................................................................................................................16
RETURNS.................................................................................................................16
CONTACTUS...........................................................................................................17

SamplingDataLoggerUser’sManual
PAGE4of17
Welcome
Thankyouforpurchasingourmeter.
Pleasetakesometimetoreadthroughthismanualinordertobecomefamiliarwiththemeter.Also,pleasepay
specialattentiontotheimportantsafeguards.
ImportantSafeguards
Toreducetheriskoffire,electricalshockand/orinjurytopersons,basicsafetyprecautionsshouldalwaysbe
followedwhenusingelectricalappliances,includingthefollowing:
READALLINSTRUCTIONSBEFOREUSINGTHISMETER.
INSTALLGasLab®SOFTWAREBEFORECONNECTINGMETERTOACOMPUTER.
Useonlytheincludedpowersupplytooperatethismeter.Inappropriatevoltagesupplycouldcause
irreparabledamagetothisdevice.
DoNOTuserechargeableAAbatteries.
DuracellbrandAAAlkalinebatteriesarerecommended
DonotstorethemeterwiththeAAAlkalinebatteriesinstalledtopreventthepotentialforbatteryleakage.
Makesurethatthetubesaresecurelyattachedtothemeterbeforesamplingaclosedenvironment.
Donotoperatewithanobstructedsamplepath.
Thismeterisnotdesignedforoutdooruse.
Donotexposethismetertowateroranyliquids.
Donotoperatethismeteriftheenclosureisopened.
Donotoperatethedeviceifitismalfunctioning.
SAVETHESEINSTRUCTIONS!

SamplingDataLoggerUser’sManual
PAGE5of17
PackageContents
Pleaseverifythatyourpackagecontainsthefollowingitemsbeforeusingthemeter:
ALLUNITS:
(1)Meter
(1)Protectiverubbergrips
(1)6‐footUSBcable
(1)Internationalpowersupply
(1)High‐impactcarryingcase
(1)Certificateofcalibration
(1)Usermanual
(1)10‐footlong1/8”tubing
(2)¼28UNFLockingNut
(2)¼28PanelMountConnector
(2)MaleLuerLockConnectors
(2)LuerLockCaps
(2)1/8”Barbtubingbulkhead
(2)1/8”Barb10‐32UNFfittings
(2)Particulatefilter(CM‐0117)
(2)Hydrophobicfilter(CM‐0118)
(1)Moisturetrap(CM‐0112)
OptionalAccessories
Ifthemeteristooperateinenvironmentswherehumidityisveryhigh(>95%RH),anExtremeMoistureFilter(CM‐
0103)canbepurchasedseparately.Thisfilterwillallowfreeflowofsampledairwhilekeepingmoistureoutofthe
meter.A10,000Hr.pumpisalsoavailableatthetimeofpurchase.
Note:Pleasecontactourtechnicalsupportstaffformoredetailsabouttheseaccessories.
GasLab
®
Software
IMPORTANT:MAKESURETOINSTALLSOFTWAREBEFORECONNECTINGYOURMETERTOYOURCOMPUTER.
MinimumSystemRequirements
Toutilizeourcomplimentarysoftware,thecomputermustmeetthefollowingminimumrequirements:
1GHzprocessorwith1GBRAM,1GBfreediskspace(2GBfreediskspacefor64‐bitsystems).
WindowsXP*/7/8/8.1withMicrosoft.NETFramework4.0**orlater.
OnIntel‐basedMaccomputers,GasLab
®
softwarecanrunusingaWindows7/8virtualmachinesoftware
suchasVMwareFusion®orsimilar.
*Microsoft.NETisnotsupportedonMediaCenterorTableteditions.
**Installerwilloptionallyinstall.NETFramework.
Visitwww.co2meter.com/pages/downloadstodownloadourcomplimentaryGasLab
®
softwaretoyour
computer.YoucanalsodownloadtheGasLab
®
usermanualinPDFfromthispage.
Figure1:Basickit‐ all
units

SamplingDataLoggerUser’sManual
PAGE6of17
PleasereadtheGasLab
®
usermanualcarefullytobecomemorefamiliarwithhowthesoftwareworkssothatyou
cangetthemaximumbenefitfromthisusefultool.
InstalltheGasLab
®
softwarefirsttoensurethattheproperdriver,necessaryforthemeter,isinstalledonyour
computerbeforeconnectingthemeter.
Figure2:GasLab
®
downloadpage(InternetExplorer11shown)
Followthestepsandinstructionspromptedbyyourcomputer’soperatingsystem.Makesureyouhave
administratorprivilegesinordertoinstallthisprogram.
NOTE:WestronglyrecommendallowingGasLab
®
toinstalldriversforthemeterautomatically.
SoftwareCapabilities
OurGasLab
®
softwarewillallowusersto:
Manageanddownloadlogs
ConfigureSensor
Adjustloggingintervals
Calibratethemeter
AutomaticdataloggingwhenmeterispoweredON
DataloggingsessionstatusdisplayedonLCDscreen
Collectdatareal‐time

SamplingDataLoggerUser’sManual
PAGE7of17
PoweringtheMeter
Thismetercanbepoweredbyfour(4)AAsizebatteries(notincluded)butsamplingunitscanalsobepoweredby
theincluded6VDCinternationalwallpowersupply.TheseunitsshouldNOTbepoweredusingtheincludedUSB
cablesinceitsuppliesinconsistentvoltagetothemeter,whichdegradessensoraccuracy.
Iftheunitisnotgoingtobeusedforanextendedperiodoftime,batteriesshouldberemovedtopreventdamage
duetopotentialbatteryleakage.
Thepowerswitch ontheleftsideofthemeterturnstheunitON/OFF.TheLOGswitchontherightsideofthe
meterenables/disablesdataloggingandpumpfunction.
ProductOverview
Thisportablebattery‐poweredCO2Meter,Inc.meterisdesignedtomeasurecarbondioxide(CO2)inrealtimein
inaccessibleareasforapplicationssuchas,butnotlimitedtofermentationvats&barrels,biologicalincubators,
andCO2leakdetection.
MeterswithloggingcapabilitiesaredesignedtorecordCO2concentrationleveldataoverperiodsoftime.Itstores
upto15,000collecteddatapointstoitsinternalmemorytoberetrievedatalatertimeforanalysis.When
combinedwithourGasLab®software,youcanalsoseereal‐timedataonyourcomputer’sscreen.Thesemetersare
idealforapplicationssuchas,butnotlimitedtoCO2monitoringofproductswithmodifiedatmospherepackaging
(MAP),monitoringofmoldproductioninareasusedtostoregrains,andtestingoffiresuppressionsystems.
Itsbuilt‐in1,000hourssamplingmicro‐pump(10,000Hr.optional)ensuresreliableoperationforpersistent
readingsbasedonuser‐selectedtimeintervals.
Scientificdevicessuchasthissamplingmeterrequireuserstohaveintimateknowledgeofthemeter’sfeatures,
limitations,operation,requiredsoftware,andspecificationspriortouse.CO2Meter,Inc.highlyrecommends
readingthisuser’smanualbeforeoperatingthismeter,especiallytheImportantSafeguardssectiononpage4.
Thetablebelowshowsallavailablemodelsandtheirrespectivecharacteristics.
Table1:Metermodelscoveredinthismanual
Model#(P/N)CO2Level MeterType
CM‐0001 1% SamplingLogger
CM‐0002 30% SamplingLogger
CM‐0003 100% SamplingLogger
CM‐0050 60% SamplingLogger
CM‐0056 5% SamplingLogger

SamplingDataLoggerUser’sManual
PAGE8of17
InstrumentOverview
DetectorPrincipal
TheCO2sensorinsidethismeterusesNDIR(non‐dispersiveinfrared)technologytosense,asafunctionof
transmittedlight,theconcentrationofCO2intheair.Thismeterhasbeenfactorycalibratedtooperatewithinthe
specifiedrangeandprecision.
Display
ShowsCO2
concentration
level,data
loggingandfree
memoryspace.
PowerJack
Connectincluded
powersupply.
PowerSwitch
Turnsthemeter
ON/OFF.
LOGSwitch
Turnslogging&
pumpON/OFF.
Inlet
Outlet
RubberBoot(x2)
Protectsmeter
andimprovesgrip.
BarbFitting(x2)
USBConnector(covered)
ConnectincludedUSBcable
tocommunicatewithunit.
USBConnector
(coverremoved)

SamplingDataLoggerUser’sManual
PAGE9of17
OperationGuide
Makesureyoureadthroughtheseinstructionsthoroughlybeforeusingthemeter.Thisguidewillhelpyoubecome
morefamiliarwiththemeterinordertobeasproductiveaspossibleinashortperiodoftime.Pleasereadthe
ImportantSafeguardsonpage4beforecontinuing.
IMPORTANT:Followtheseinstructionstoensurepropersetup:
1. DownloadtheGasLab
®
softwaretoyourcomputerasshownintheGasLab
®
Softwaresectiononpage5.
2. Powerthemeterusingtheincludeduniversalpowersupply.TurnON themeter.
3. Waituntilthedisplaychangescolorstovisuallyconfirmithasresetsuccessfullyafterconnectingittoa
computer.
ConnectingMeters
Thefirsttimethemeterisconnectedtoyourcomputer,theoperatingsystemwillinstallthenecessaryUSBdrivers
asshowninFigure3.Thisprocesscouldtakeafewminutes.
Figure3:USBDriverInstallation.
LCDDisplay
TheLiquidCrystalDisplay(LCD)showsthefollowingfeatures:
CO2concentrationlevelinparts‐per‐million(ppm)for1%and5%models
CO2concentrationlevelinpercentageformat(##.##%)forallothermodels
LoggingON/OFF
Percentageoffreememory
DataStorage
Thismeterfeaturesaninternalmemorycapableofstoring15,000datapoints.Duetothenatureoftheirdesign,
thesemeterswillneedtobeinitializedbeforeoperationanditsloggingperiodandreal‐timeclockwillneedtobe
setunderthe“Settings”menu.
LoggingData
OncetheGasLab
®
softwarehasbeeninstalledandthemeterisconnectedtothecomputer,youcangatherdataina
varietyofways.Datacanbecollectedinrealtime,datalogscanbedownloadedfromthemeter’smemoryand
savedtothecomputer,anddatacanbereviewedonthemeter’sLCDdisplay.
Foreachloggingsession

SamplingDataLoggerUser’sManual
PAGE10 of17
1. TurnthemeterON.
2. Themetermustbestartedatleast1minutepriortodeploymentanddataloggingtoallowtheCO2sensor
timetowarm‐upandcalibrate.
3. Settheloggingintervalasdesiredandcommenceloggingbydepressingthe“Log”buttonontherightside
ofthemeter.
4. Whendataloggingiscompleted,turnthe“Log”OFF.
NOTE:RefertotheGasLab®User’sManualformoreinformation.
Setup
CO2Meter,Inc.’ssamplingmeterswillrequireminimalsetupsincetheyaredesignedtobeportable.Themost
importantaspectofthesetupinvolvesconnectingthesamplinghosesandensuringpropersetup.TheInstrument
Overviewsectiononpage8showsthelabeledcomponentsofthesemeters,asreferencedthroughouttherestof
thismanual.
DataLoggerModels
Thesemodelsfeatureaninternalmemorycapableofstoringdatawhennotconnectedtoacomputer.Theseunits
willallowyoutosimultaneouslyreadandstoreCO2concentrationleveldata.Duetothenatureoftheirdesign,
theseunitsshouldbeconnectedtoyourcomputerfirst,beforeoperation,inordertoinitializeandsetthelogging
intervalandreal‐timeclock.
Insertfour(4)AAsizebatteriesintothisunitorconnecttheunittotheincludedpowersupply.Inordertoinitialize
dataloggingfunctionality,theunitMUSTbeconnectedtothecomputerwithdataloggingswitchedtoOFF,andthe
GasLab®softwarestarted.Oncetheunithasbeenconnected,clickonthe“ConfigureSensor”buttonintheGasLab®
interface,setthedataloggingintervalandpumpperiodsasdesired.Werecommendleavingthepumpintervalto
thedefault10‐secondperiod.Forthepumpperiod,werecommend10ormoreseconds.
ThepumpPWMperiodcanalsobeadjustedforadvancedapplications,with1beingfulldutycycle,andvalues
approaching255beingtheshortestdutycycle.Thepumpmodeshouldalwaysbesetto“Datalogging”forproper
operationoftheunit.
AllmodelshaveaninternalcoincellCR‐20323Vbatterybackupforthereal‐timeclock.Thisbatteryisinsertedin
thefactoryforyourconvenienceandshouldlastthelifetimeoftheproduct.
Settings
Settings–allowsyoutoaccessalltheparameters,options,outputs,communications,anddate/timesettingstobe
changedorprogrammed.
DisplaySettings
Hereyoucanchangethebrightnessandcolortheme(3available)onthedeviceandyoucanalsoactivateaScreen
Timeouttosavepower.Thissettingwillnotaffectthemeter’sfunctionalitybutwillaffectthebatterylife
dependingonhowyousetthisparameter.

SamplingDataLoggerUser’sManual
PAGE11 of17
PortSettings
HereyoucanconfigureandactivateportsthatcontroladditionalaccessoriessuchasthedeviceModbusaddress.
Pleasecalltechnicalsupportforguidanceandimportantinformationbeforemakingchangestotheconfiguration
ofanyoftheseports.Youcanreachusduringregularbusinesshoursat(386)256‐4910orsendusamessageto
Time/DateSettings
Hereyoucanchangethedateandtimeonthemeterformoreaccuratereferenceontherecords.Thedefaulttime
ofyourmetercouldvarydependingonyourlocation.Reviewthesesettingsbeforeyoustartusingthemeter.
LoggingSettings
Hereyoucanchangetheloggingintervalandduration.Thiswillenableyoutocollectthedataforaperiodoftime
inaspecificlogginginterval.Thisscreenalsogivesyoutheoptiontosetthedesiredpumpinterval.Rememberto
synchronizethepumpbefore,during,oraftertheloggingintervaltoreadandcollectthecorrectreadingaccording
totheapplication.
ClosedLoopOperation
Figure4:ClosedLoop
OpenLoopwithEnvironmentalExhaust
Figure5:OpenLoop
Inordertousethismeterproperly,hoses/tubingmustbeattachedtotheinletandoutletbarbfittingssecurely.
Thepumpwilldrawairfromtheinletbyvacuumeffect,pushittothesensingchamberthroughthesensor,and
thenexhausttheairoutsidethemeterthroughtheoutlet.

SamplingDataLoggerUser’sManual
PAGE12 of17
Werecommendinstallingtheincludedhumidity/contaminatefiltertoensurethesensingchamberandpump
bafflestaysclearandcorrosion‐free.ReplacementsfiltersareavailableonCO2meter.com.
Figure6:FilterInstallationandOrientation
QuickStartGuide
IMPORTANT:MAKESURETOINSTALLSOFTWAREBEFORECONNECTINGYOURMETERTOYOURCOMPUTER.
1. InstallfreshsetofAAbatteries(Duracellbrandrecommended)orconnecttheincludedpowersupply.
2. InstallfiltersandtubingincludedasshownonFigure6.
3. TurnthemeterONbypressingthepowerswitchonce.
4. TurnloggingONbypressingtheLOGswitchonce.Oncethesamplingprocessiscompleted,datacanbe
downloadedtoyourcomputerusingourGasLab
®
software.
Calibration
Allunitsarefactory‐calibratedwithmultiplereferencepointsofgas,andhavebeenverifiedtobeaccuratewithin
theirspecificfunctionalitybeforeshipment.However,iftheunitisseverelyjoltedorotherwisemechanically
disturbed,thesensorcandriftrequiringrecalibration.Allcalibrationproceduresfollowasingle‐pointcalibration
routinethateffectivelyshiftsthezero‐pointoftheCO2sensor.
Supplycalibrationgastotheunitandconnecttheunittoapersonalcomputer.Openthecalibrationscreeninthe
GasLab
®
software.ClicktheCALIBRATEbuttoninthecalibrationtabforthedesiredgas,locatedinthe
CONFIGURESENSORscreen.Aslongasthegasconcentrationisstable,theunitshouldinstantlyreflectthe
calibratedvalue.Thiscanbeconfirmedbywatchingthedisplay.Toseethecalibrationvalueinrealtime,clickin
theCOLLECTREAL‐TIMEbuttontocapturethesevaluesbeforeopeningtheconfigurationscreen.
Particulate
Filter

SamplingDataLoggerUser’sManual
PAGE13 of17
1%or30%SamplingDataLogger
Calibrationcanbeperformedusingeither100%CO2calibrationgas(typicallynitrogen,argon,etc.),orusinga
freshsourceofair,assumedtobeapproximately400ppm.
NOTE:RefertotheGasLab®User’sManualforcompleteinstructions.
CalibrationProcedure
Tocalibrateyourmeter,followthesesteps:
1. TurnONthemeter.
2. Exposethemetertoambientair(assumedtobeat400ppm)orsupplycalibrationgasbottle/cylinder
(100%nitrogenorargon)withtheappropriatedemandregulator.
3. Wait25secondstocollectasample.Writedownthisvalueasthe“before”value.
4. ClicktheCALIBRATEbuttonafterselectingyourcalibrationgas.
5. Wait25secondsagain.Thistime,themeterwilltakeasampleandusethisdatatoadjustzerovalues.The
displayedmeasurementwillshowthenewcalibrationvalue(0or400ppm,dependingonmethodused).
6. DisconnecttheCalibrationgasandwait25seconds.Alldisplayeddatawillnowbebasedonthenew
calibrationvalue.Repeatthisprocedureifthesensorisstilloperatingoutsideofitsspecifiedrangeorif
readingsvarygreatly.
5%,60%,and100%SamplingDataLogger
ThesemodelsdonotfeatureAutomaticBackgroundCalibration(ABC)algorithmduetotheCO2scalethey
measure.Toensurethehighestaccuracy,werecommendcalibratingtheseunitswithcalibrationgas(Nitrogenfor
ZEROorCO2),closetotheconcentrationbeingmeasured.Alternatively,a100%orambientcalibrationcanbe
performed.
Toperformacalibration,attachtheunittoyourcomputer,poweritwiththewalladapterandeitherexposeitto
atmosphereorsupplyitwithyourcalibrationgas,fedwithademand‐basedregulator.
OpentheGasLab®softwareonyourpersonalcomputerandclicktheCONFIGURESENSORbutton.CicktheTURN
PUMPONCONTINUOUSLYbuttontoensurecontinuousflow.(Toapplyanychanges,themeterhastobe
restarted).
ZeroorFreshAirCalibration
Supplygasandselecttheappropriateconcentrationinthescreen.ClicktheCALIBRATEbutton.Thesensorreading
shouldinstantlyreflectthecalibration.
High‐ConcentrationCalibration
WritedowntheoriginalZeroValuebeforeadjustmentforfuturereference.Applythedesiredconcentration
calibrationgas;adjusttheZeroValueinincrementsof10pressingthelargeSAVEbuttonontherightuntiltheunit
displaysthecorrectconcentration.

SamplingDataLoggerUser’sManual
PAGE14 of17
Appendix
MeterSpecifications
CO2Sensor
Performance
andRatings
SensorTypeNon‐dispersiveinfrared
(NDIR)
Measuring
Range
0‐10,000ppm(1%CO2)
0‐50,000ppm(5%CO2)
0‐30%vol.(30%CO2)
0‐60%vol.(60%CO2)
0‐100%vol. (100%CO2)
Accuracy±30ppm,±5%ofmeasured
value
Repeatability
±20ppm,±1%measured
value(1%models)
±0.1%,±2%ofmeasured
value(allothermodels)
General
Warm‐up
Time
<1 min.(instant
measurements)
Life
Expectancy>15years
Maintenance
IntervalNomaintenancerequired
DataLogging
DataPoints 15,000
Programma‐
bleInterval
Data
Date,time,CO2,O2 (every15
secondsto18hours)
Pump
Characteristics
Max.Flow
(STP)
0.40 LPM
Max.Vacuum 150mbar
Max.
Pressure
500mbar
Max.System
Pressure
~101.3KPa(1atm.)
Life
Expectancy
1,000(standard),depending
onsamplinginterval
Power
InputVoltage 6VDC
MethodPowersupplyor4xAA
batteries
Power
Consumption
~0.5Watt.Avg.(pump
running)
DimensionsWxHxD
in(mm)4.8(122)x7.1(181)x2.1(55)

SamplingDataLoggerUser’sManual
PAGE15 of17
TroubleshootingGuide
Symptom/
Issue
PossibleCause/Resolution
Meternot
recognizedby
computer/OS
Yourdevice’sbatteriesmightbedepleted.Replacethebatteries
withfreshones,ormakesurethepowersupplyisconnected
properly(usetheincludedpowersupplyonly).
Device
doesn’tpower
ON
Makesurethepowersupply isconnectedproperlyandthat
thereispowerintheoutlettheadapterisconnectedhasthe
appropriatevoltage.Ifusingbatteries,makesuretheyarenot
depleted.
TheGasLab®
software
doesn’tstart*
Yoursoftwaremightbeoutofdate.Updateyoursoftwareby
eithervisitingourdownloadwebpageat
http://www.co2meter.com/pages/downloadsorbyselecting
the“CheckforUpdates”undertheHelpmenu.Makesureyour
PCmeetstheminimumrequirements.
Slow
response
Checktheairflowchannelstomakesuretheyarenot
obstructed.
Reading
doesn’t
change
Makesurethemeterisinmaximumorminimummode.
“Bat”and
greenLED
keepflashing
Thepowersupplyoutputvoltageisinappropriateorbatteries
depleted.Pleaseusetheincludedpowersupplyonlyorreplace
batterieswithafreshset.
*FormoretroubleshootingtipsonGasLab®software,seeitsmanuallocatedatwww.co2meter.com/pages/downloads.
USBDriverInstallationInstructions
ToinstalltheappropriateUSBportdriverscompatiblewithyourmeter,followthesesteps:
1. Gotohttp://www.ftdichip.com/Drivers/VCP.htmanddownloadthepackageappropriatefortheversionof
Windowsinstalledinyourcomputer.
2. Movethefileyoudownloadedtoalocationyoucaneasilyaccess.Makesureyouhaveadministrator
privileges.
3. Extractthefilebyrightclickingonitandselectingextracthere.
4. Gotoyourcomputer’sDeviceManagerintheControlPanel.
ForWindows8,presstheWindowskeyand'x'atthesametimetobringupthestartmenuthenclickon
DeviceManager.
ForWindows7,openthestartmenuandtypeDeviceManagerinthesearchbar.
5. FindtheUnrecognizedUSBDeviceinthelist(itusually,butnotalways,hasayellowtriangleicon).
6. RightclicktheUnrecognizedUSBDeviceitemandselectUpdateDriverSoftware.
7. SelectBrowseMyComputerandpointtothefolderwhereyouextractedthedriverfilesto(step#3).
ThiswillinstallthenecessarydriverstoyourcomputerandallowyoutouseyourmeterwithGasLab®.Ifyouhave
multiplesensorsyoushouldonlyhavetoperformthisprocedureonce;theoperatingsystemwillautomatically
findthedriverforalltheothersensors.

SamplingDataLoggerUser’sManual
PAGE16 of17
Support
Thequickestwaytoobtaintechnicalsupportisviaemail.Pleasesendallsupportinquiresto
Pleaseincludeaclear,concisedefinitionoftheproblemandanyrelevanttroubleshootinginformationorsteps
takensofar,sowecanduplicatetheproblemandquicklyrespondtoyourinquiry.
Warranty
Thismetercomeswitha1YEAR(warrantyperiodlimitedmanufacturer’swarranty,startingfromthedatethe
meterwasshippedtothebuyer.
Duringthisperiodoftime,Edaphic Scientific Pty Ltd warrantsourproductstobefreefromdefectsinmaterials
andworkmanshipwhenusedfortheirintendedpurposeandagreestofixorreplace(atourdiscretion)anypart
orproductthatfailsundernormaluse.Totakeadvantageofthiswarranty,theproductmustbereturnedto
Edaphic Scientific Pty Ltdatyourexpense.If,afterexamination,wedeterminetheproductisdefective,wewill
repairorreplaceitatnoadditionalcosttoyou.
Thiswarrantydoesnotcoveranyproductsthathavebeensubjectedtomisuse,neglect,accident,modificationsor
repairsbyyouorbyathirdparty.Noemployeeorresellerofthisproductsmayalterthiswarrantyverballyorin
writing.
Liability
AllliabilitiesunderthisagreementshallbelimitedtotheactualcostoftheproductpaidtoEdaphic Scientific Pty
Ltd.InnoeventshallEdaphic Scientific Pty Ltdbeliableforanyincidentalorconsequentialdamages,lostprofits,
lossoftime,lostsalesorlossordamagetodata,injurytopersonorpersonalpropertyoranyotherindirect
damagesastheresultofuseofourproducts.
Returns
Iftheproductfailsundernormaluseduringthewarrantyperiod,aRMA(ReturnMaterialAuthorization)number
mustbeobtainedfromEdaphic Scientific.Aftertheitemisreceivedwewillrepairorreplacetheitematour
discretion.
ToobtainaRMAnumber, email: [email protected]WhenrequestingaRMApleaseprovidereasonforreturn
andoriginalordernumber.
Ifwedeterminethattheproductfailedbecauseofimproperuse(waterdamage,dropping,tampering,electrical
damageetc.),orifitisbeyondthewarrantydate,wewillinformyouofthecosttofixorreplacetheproduct.

SamplingDataLoggerUser’sManual
PAGE17 of17
ContactUs
Weareheretohelp!
Forinformationortechnicalsupport,pleasecontactus.
www.edaphic.com.au
This manual suits for next models
4
Table of contents
Other Co2meter Other manuals
