Comfort audio Programmer DT20 User manual

Comfort Digisystem
Programmer DT20
Instructions for use
English


Contents
1. Introduction...............................................................5
Your device..........................................................................5
SST™.............................................................................5
Overview.......................................................................6
Included accessories...................................................7
2. Getting started...........................................................9
Charge.................................................................................9
Start up..............................................................................11
Use the headphones.........................................................11
Attach a mini receiver.......................................................12
Navigate the menu............................................................13
Change the menu language..............................................14
3. Usage.......................................................................17
Use the step-by-step guide...............................................17
Manual settings.................................................................20
Select ear...................................................................21
R and R+M modes......................................................22
Configure auto sleep.................................................24
Configure on/off by push button................................24
Configure pairing by push button..............................24
Save the settings to a computer................................24
Scan a hearing instrument...............................................26
4. Advanced features...................................................29
Reset all settings..............................................................29
Set reception sensitivity....................................................29
Spectrum scanner.............................................................30
Use the spectrum scanner........................................30
3Programmer DT20

5. Product information.................................................33
Function indicator.............................................................33
Technical specifications....................................................33
6. Miscellaneous..........................................................35
Radio..................................................................................35
Channel planning.......................................................35
Radio range................................................................35
Battery maintenance.........................................................35
Troubleshooting................................................................36
Service and warranty..................................................39
Contact information.....................................................41
Product symbols..........................................................43
Programmer DT204

Introduction1.
Thank you for choosing Programmer DT20!
Programmer DT20 is part of
Comfort Digisystem™
that uses
digital wireless technology to give you the best sound quality
available, together with secured transmission to prevent
eavesdropping.
To get the most out of your new product, please read these
instructions before using it for the first time. Take special notice
to the printed document
Important Safety Instructions
included
in the box.
Your device
Programmer DT20 is a programming tool for the mini receiver
Micro Receiver DT20 and allows a hearing care professional to
make individual settings for each client. It is possible to see and
read the settings that are made in each specific Micro Receiver
DT20. The settings can easily be exported to a computer. The
product also contains a convenient step-by-step guide that takes
you through the fitting procedure.
SST™
SecureStream Technology (SST)
is Comfort Audio's proprietary
digital transmission technology. It lets you communicate securely
and latency free with other Comfort Digisystem devices.
5Programmer DT20
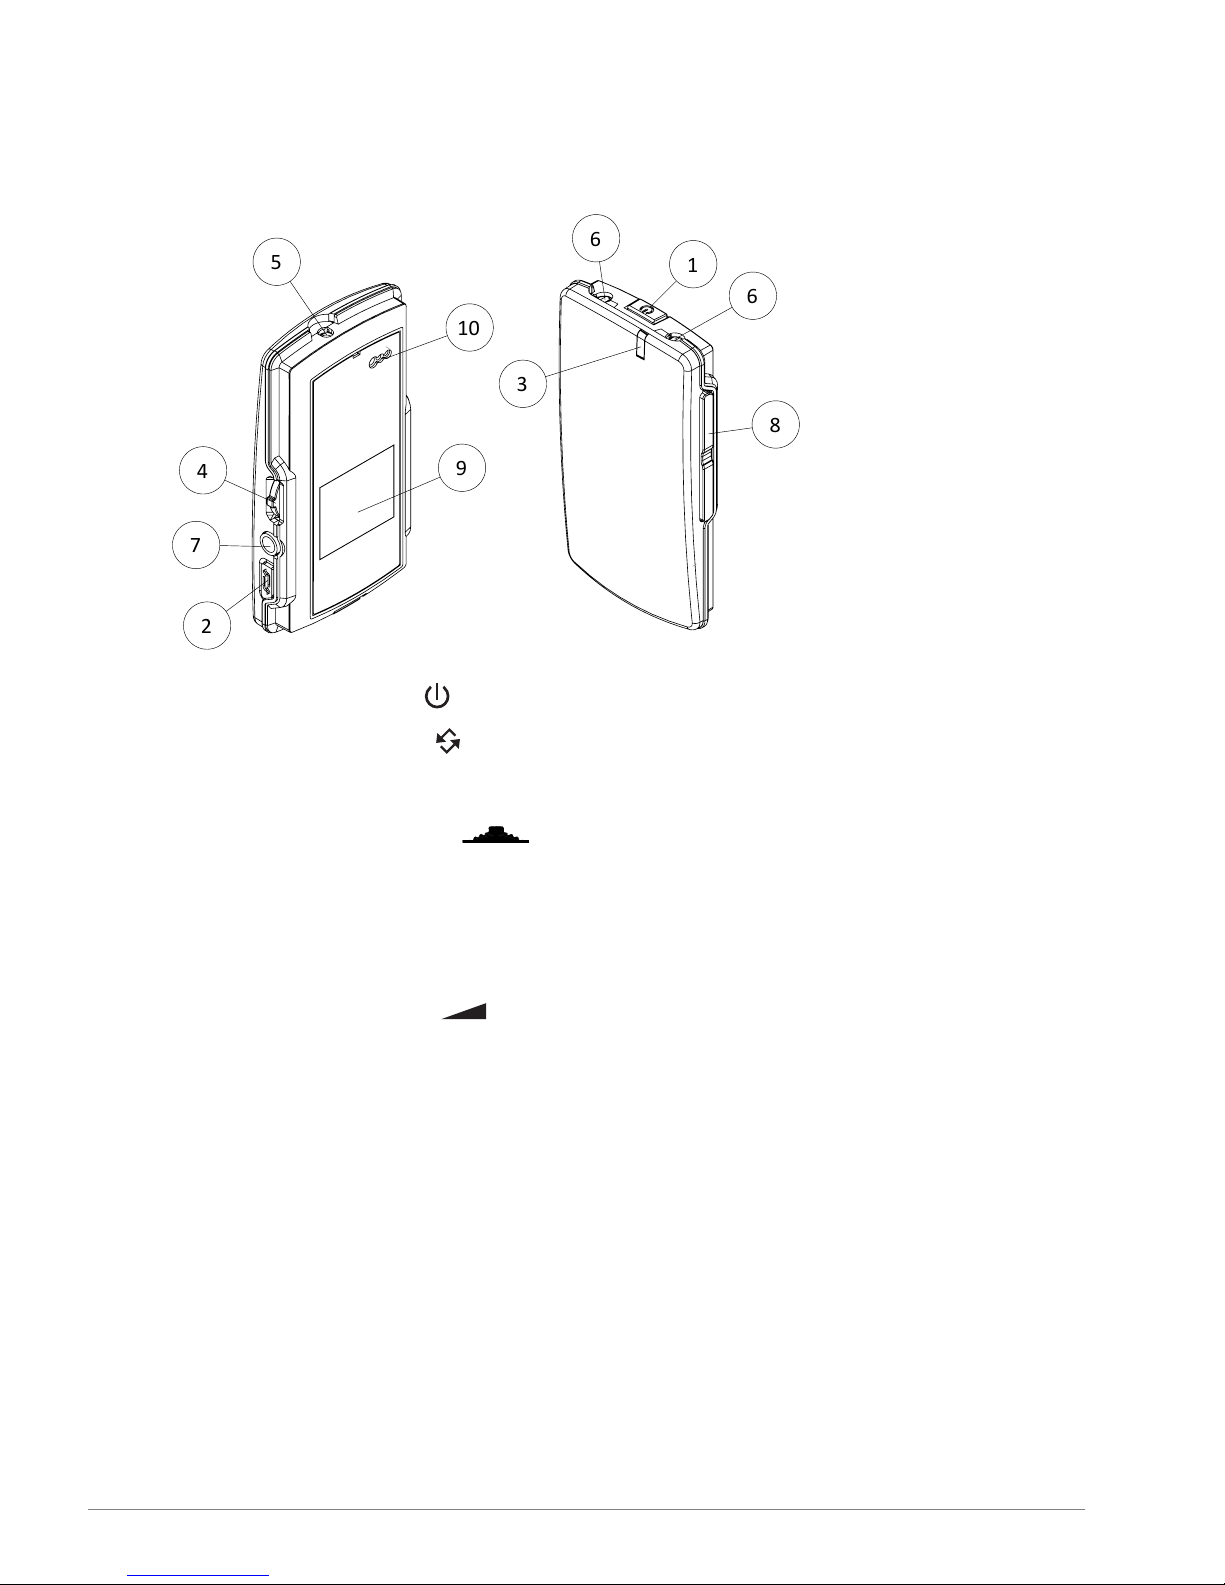
Overview
1
3
8
6
6
2
4
7
5
10
9
1. Power button
2. Pairing button
3. Function indicator
4. Menu controller
5. Charger input
6. Neckloop output
7. Aux input and output
8. Volume button
9. Display
10. Europlug socket
Programmer DT206
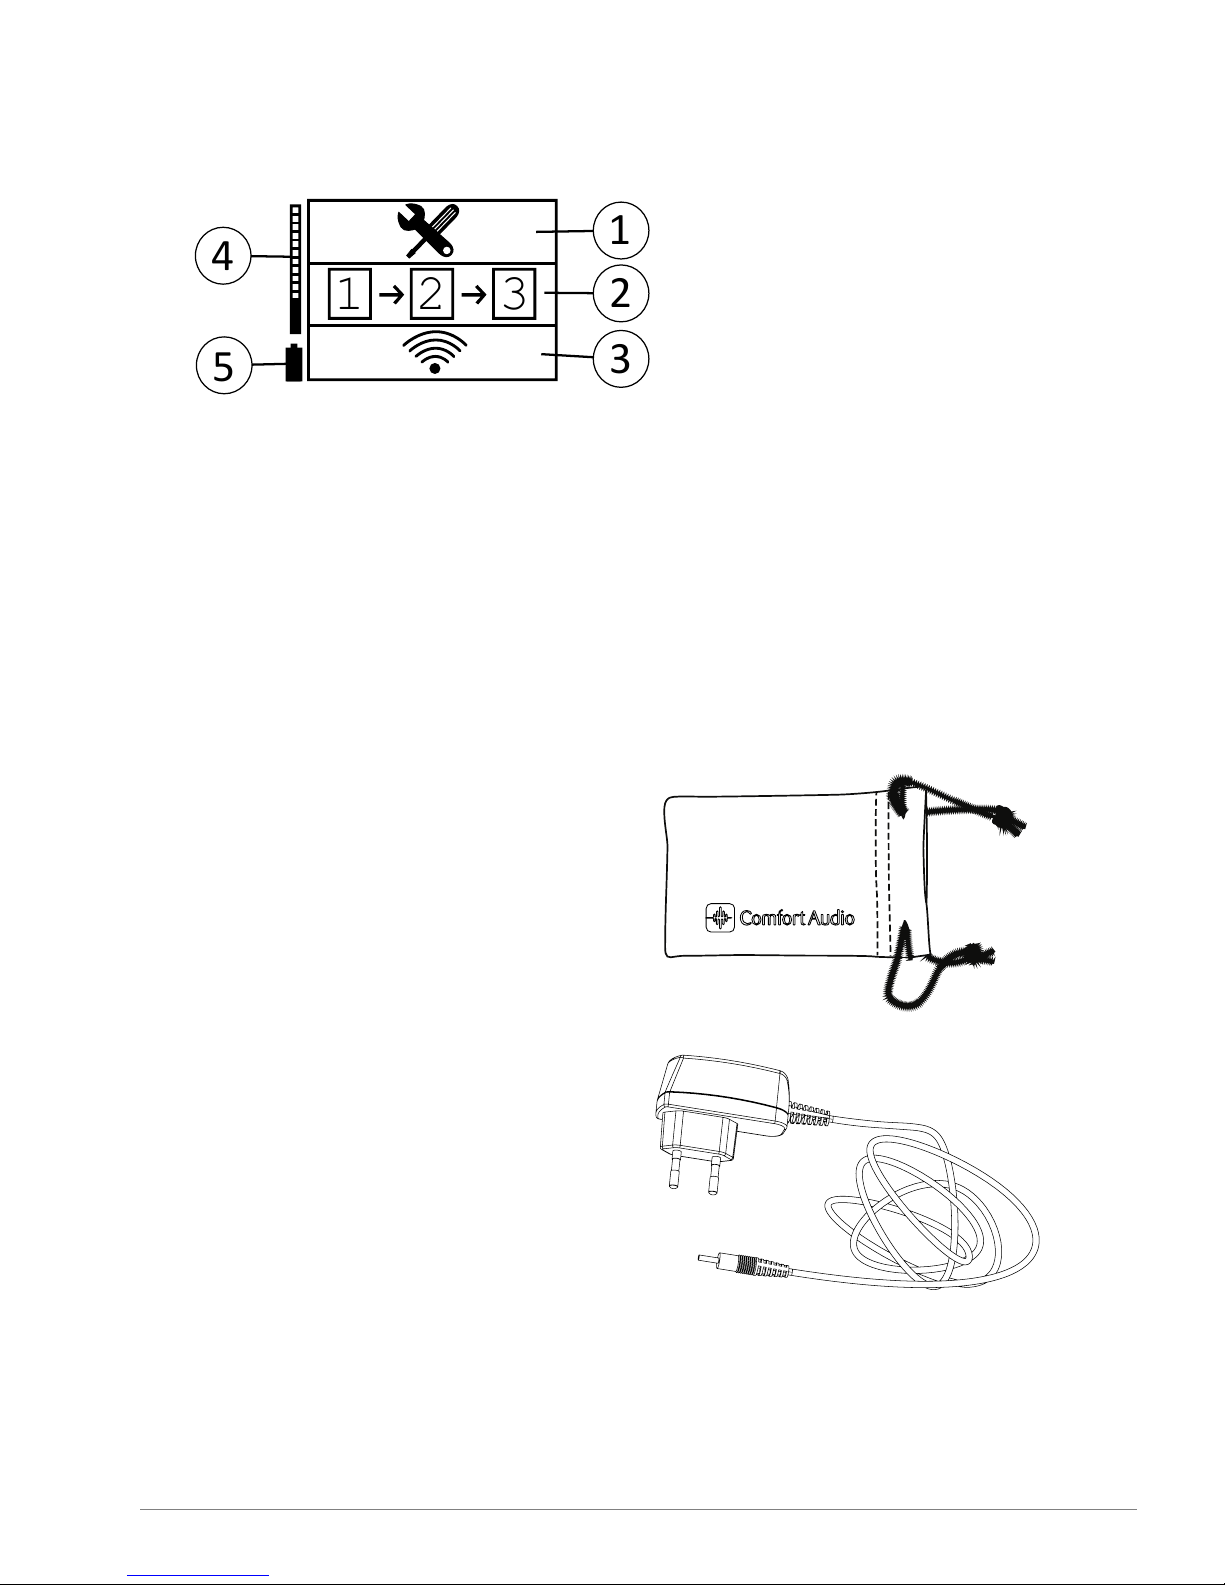
Display
1 2 3
1
2
3
4
5
1. Main menu
2. Step-by-step guide
3. Scanner
4. Volume bar
5. Battery status
Included accessories
Microfibre pouch
Power supply
7Programmer DT20

Headphones
USB-3.5mm cable
Programmer DT208
Getting started2.
This section will teach you how to perform the basic steps needed
to get started.
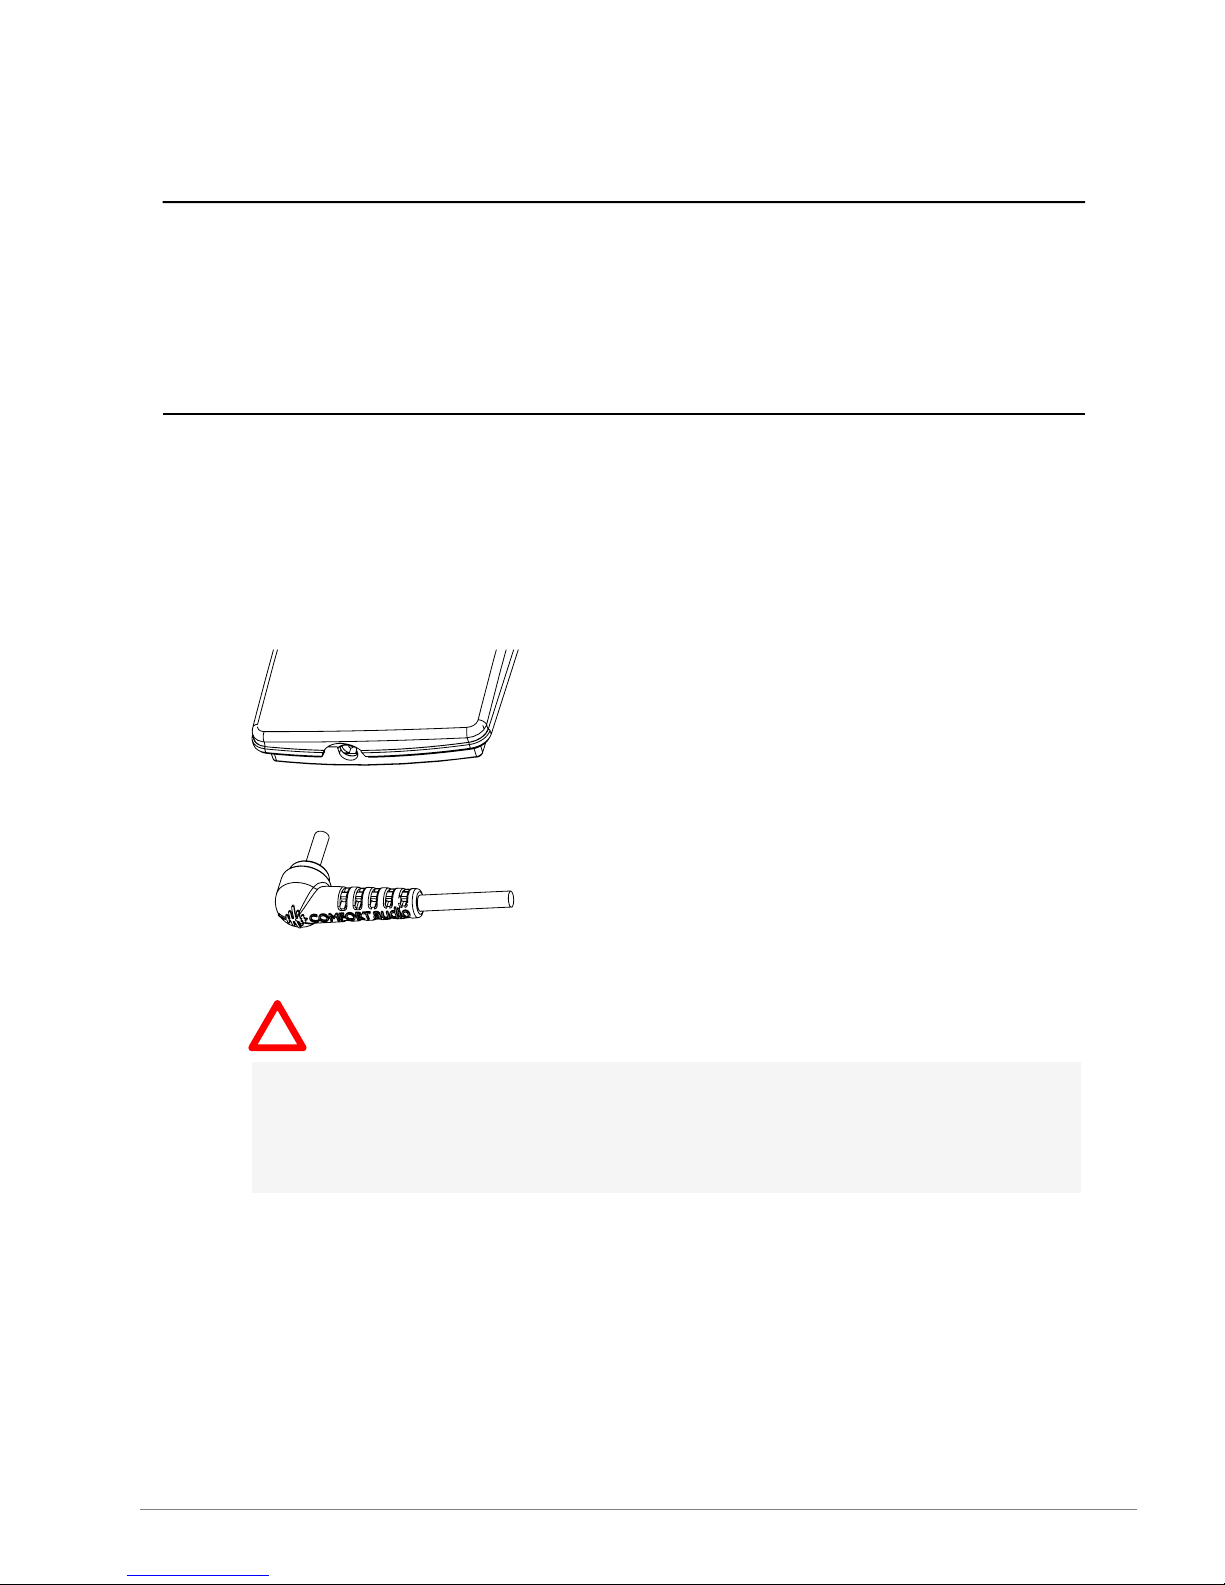
Charge
Charging can be done at any time. If you make it routine to charge
your product whenever you do not use it, it is always ready for
use when you need it.
1.
Insert the supplied charger into the charger input.
Caution: Only use the charger supplied by Comfort Audio
AB. Using any other type of charger might damage your
device.
9Programmer DT20

2.
Plug the charger into the wall socket.
The function indicator turns red to indicate charging.
!
Note: The unit might become warm during charging, this
is entirely normal. The unit is equipped with overcharging-
and temperature monitoring to protect the batteries.
The charging is done when the function indicator turns green.
Programmer DT2010
Other manuals for Programmer DT20
3
Table of contents


