commercial cool CCFWR16W User manual

ENGLISH
16” Wall Fan
User Manual
MODEL CCFWR16W

ENGLISH
Page 2
DANGER
DANGER - Immediate hazards
which WILL result in severe
personal injury or death
WARNING
WARNING - Hazards or unsafe
practices which COULD result in
severe personal injury or death
CAUTION
CAUTION - Hazards or unsafe
practices which COULD result in
minor personal injury
IMPORTANT SAFETY INSTRUCTIONS
WARNING
When using electrical appliances, basic safety precautions should always be followed to
reduce the risk of re, electric shock and personal injury.
:
READ ALL INSTRUCTIONS BEFORE USING THE PRODUCT
SAFETY INFORMATION
1. READ ALL INSTRUCTIONS BEFORE USE
2. Never insert ngers, pencils, or any other object through the grill when
fan is running.
3. Disconnect fan when moving from one location to another.
4. Disconnect fan when not in use and before cleaning.
5. To protect against risk of electrical shock, do not immerse fan in water
or any other liquid.
6. Do not let cord hang over edge of table or counter.
7. Be sure fan is on a stable surface when operating to avoid overturning.
8. Do not use fan in window. Rain may create electrical hazard.
9. Close supervision is necessary when any appliance is used by or near
children.
10. This product employs overload protection (fuse). A blown fuse indicates
an overload or short-circuit situation. If the fuse blows, unplug the
product from the outlet. Replace the fuse as per the user manual (follow
product marking for proper fuse rating) and check the product. If the
replacement fuse blows, a short-circuit may be present and the product
should be discarded or returned to an authorized service facility for
examination and/or repair.
11. Do not operate any fan with a damaged cord or plug. Discard fan or
return to an authorized service facility for examination and/or repair.
12. Do not run cord under carpeting. Do not cover cord with throw rugs,
runners, or similar coverings. Do not route cord under furniture or
appliances. Arrange cord away from trafc area and where it will not be
tripped over.
13. To reduce the risk of re or electric shock, DO NOT use this fan with any
solid state speed control devices.
14. Do not use outdoors.
SAVE THESE INSTRUCTIONS
HOUSEHOLD USE ONLY

ENGLISH
Page 3
SAFETY INFORMATION
ELECTRICAL REQUIREMENTS
This appliance has a polarized plug (one blade is wider than the other). To reduce the risk
of electric shock, this plug is intended to t into a polarized outlet only one way. If the
plug does not t into the outlet, reverse the plug. If it still does not t, contact a qualied
electrician. Do not attempt to modify the plug in any way.
POWER SUPPLY CORD
1. If the power supply cord is too short, do not use an extension cord. Have a qualied
electrician or serviceman to install an outlet near the appliance.
2. If it is absolutely necessary to use longer cord sets or an extension cord, extreme care
must be exercised.
a) The marked electrical rating of the cord set or extension cord must equal to or be
greater than the electrical rating of the appliance. The longer cord should be arranged
so that it will not drape over the counter top or table top where it can be pulled on by
children or tripped over unintentionally.
NOTE: Neither Commercial Cool nor the dealer can accept any liability for damage to the product
or personal injury resulting from failure to observe the electrical connection procedures.
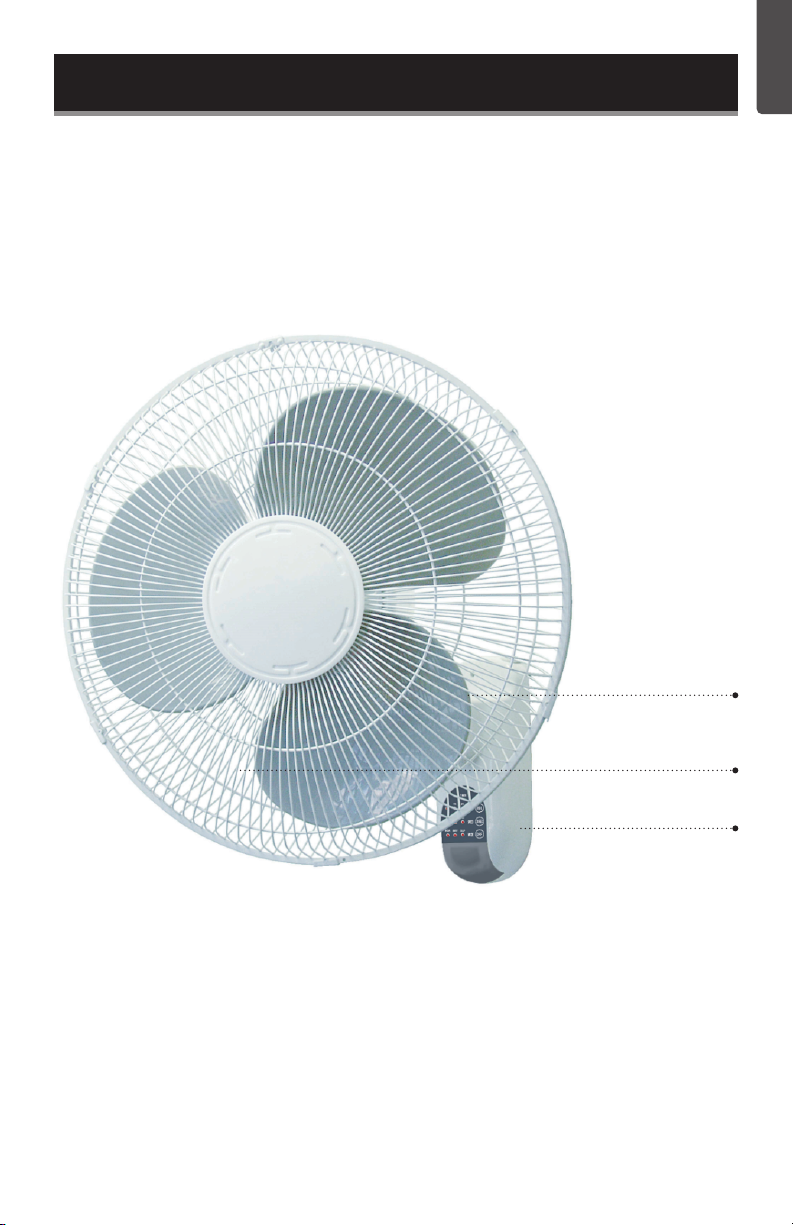
SPECIFICATIONS
• Unit Dimensions (W x D x H): 17” x 12” x 18”
• Net Weight: Approx. 4.9 lbs.
This device complies with part 15 of the FCC rules. Operation is subject to the following two
conditions: 1) This device may not cause harmful interference, and 2) This device must accept
any interference received, including interference that may cause undesired operation. This
equipment has been tested and found to comply with the limits for a Class B digital device,
pursuant to Part 15 of the FCC rules. These limits are designed to provide reasonable protection
against harmful interference in a residential installation. This equipment generates, uses and can
radiate radio frequency energy and, if not installed and used in accordance with the instructions,
may cause harmful interference to radio communications. However, there is no guarantee that
the interference will not occur in a particular installation. If this equipment does cause harmful
interference to radio or television reception, which can be determined by turning the equipment
off and on, the user is encouraged to try to correct the interference by one or more of the
following measures: a) Reorient or relocate the receiving antenna. b) Increase the separation
between the equipment and the receiver. c) Connect the equipment into an outlet different
from that which the receiver is connected. d) Consult the dealer or an experienced radio/TV
technician for help.
1. READ these instructions carefully before installing and operating the appliance.
Keep them for further reference.
2. Record in the space below the “SERIAL/MODEL NUMBER” found on the back or
bottom of your appliance and retain this information for future reference.
SERIAL NUMBER:
MODEL NUMBER:
DATE OF PURCHASE:
Save and staple your sales receipt to your manual for warranty coverage.

ENGLISH
Page 4
HANDLING ALKALINE BATTERIES
1. Should uid from the battery accidentally get into your eyes, there is a threat of loss
of eyesight, do not rub them. Immediately rinse your eyes with clean tap water and
then consult a physician immediately.
2. Do not put the battery in a re, expose it to heat, dismantle or modify it. If the
insulation or safety valve is damaged, the battery may leak uid, overheat or explode.
3. Do not insert the battery with the poles reversed. Doing so may cause some
abnormality or a short and the battery may leak uid, overheat or explode.
4. Keep the battery out of the reach of children. If the battery is swallowed, contact a
physician immediately.
5. If the alkali uid gets in your mouth, rinse your mouth with water and contact a
physician immediately.
6. If the alkali uid gets on your skin or clothes, it may burn your skin, thoroughly rinse
the affected area with tap water.
7. Do not mix new and old batteries or other makes of batteries. The different attributes
may cause the battery to leak uid, overheat or explode.
8. This battery was not made to be recharged. Recharging this battery may damage the
insulation or internal structure and may cause the battery to leak uid, overheat or
explode.
9. Do not damage or remove the label on the exterior of the battery. Doing so may cause
the battery to short, leak uid, overheat or explode.
10. Do not drop, throw or expose the battery to extreme impact. Doing so may cause the
battery to leak uid, overheat or explode.
11. Do not alter the shape of the battery. If the insulation or safety valve is damaged, the
battery may leak uid, overheat or explode.
12. Immediately remove batteries when they have lost all power. Leaving the batteries in
the unit for a long time may cause the batteries to leak uid, overheat or explode due
to gas that is generated by the batteries.
Contact your local government for disposal practices in your area.
WARNING
When handling alkaline batteries, basic safety precautions
should be followed, including the following
SAFETY INFORMATION

ENGLISH
Page 5
SET UP & USE
PARTS & FEATURES
Front Guard
Tilt Adjustment Knob
(Not shown)
Base

ENGLISH
Page 6
FAN ASSEMBLY
WARNING: Never attempt to run the fan without the grill in place and properly
secured. Failure to have the grill in place can result in serious injury.
1. Remove the rear grill plastic nut from the motor shaft pin by turning it clockwise, while
holding the motor housing tightly.
2. Thread the rear grill nut onto the motor housing to lock the rear grille securely in place.
3. Thread the rear grill nut onto the motor housing to lock the rear grille securely in place.
4. Remove any protective covering over the shaft before fan blade installation. Place the
fan blade onto the motor shaft. The pin on the motor shaft should be inserted into the
slot of the fan blade assembly.
SET UP & USE

ENGLISH
Page 7
SET UP & USE
Secure the fan blades by threading the spinner onto the end of the motor shaft. Turn
the fan spinner counter-clockwise to tighten.
5. Attach the front grille to the rear grille with the hook clip centered on the top above the
wire handle.
6. Press the remaining grille clips onto the rear grill to securely attach the front grille.
Note: Do not operate the fan without grille in place.

ENGLISH
Page 8
SET UP & USE
WALL INSTALLATION
Install your wall fan near a properly functioning wall outlet.
1. Secure Wall Bracket to the wall in the desired location by inserting 3 screws through the
3 holes in the wall bracket as shown. 3 screws are provided for use if suitable for the wall
type the fan is being installed on. Wall anchors are not included.
WARNING: Use proper anchors for the wall material. It is recommended to
mount the bracket to wall studs.
2. Hang the fan on the wall bracket by placing the bracket screw through the fan and
threading the screw through the top center hole of the wall bracket.

ENGLISH
Page 9
OPERATION OF YOUR FAN
TILT ADJUSTMENT
To adjust the air flow upward or downward, push the grill section lightly to the desired
direction.
REMOTE CONTROL BATTERY INSTALLATION
1. Press down on the battery compartment cover and slide it out.
2. Insert 2 “AAA” batteries (not included) making sure that the positive terminals are
facing the proper way.
3. Replace the cover.
NOTE: Use size “AAA” alkaline batteries. Do not use rechargeable batteries.
REMOTE CONTROL
Point the remote control at the receiver on body of the fan and press the desired button.
The remote control will work at distances of up to roughly 16 feet (5 meters) and an angle
of 30 degrees left and right of the control panel.
SET UP & USE
Remote Control
Battery
Battery Cover

ENGLISH
Page 10
ON / SPEED
• Press this button to turn the fan ON. The fan will begin to operate at low speed if it is the
rst time you have plugged it in. If the fan was plugged in previously, it will operate at
the speed setting when last turned off.
• Continue to press the key to scroll through the SPEED settings. The corresponding LED
light Low, Medium or High will illuminate on the control panel to indicate the selected
speed.
MODE
• Pressing the “MODE” button repeatedly will select NORMAL, NATURAL or SLEEP
modes.
• NORMAL mode provides steady airow and cycles through high, medium and low fan
speeds.
• NATURAL mode simulates a breeze and cycles through the high to low fan speed.
• SLEEP mode simulates a breeze like natural mode but will cycle to a lower speed after a
period of time.
When set at HIGH speed the fan will cycle from the highest to the lowest speed for the
rst 30 minutes, then run from Medium to the lowest speed for the next 30 minutes and
continue for the duration of use at variable low speeds.
When set at MEDIUM speed the fan will cycle from medium to the lowest speed for the
rst 30 minutes, then continue for the duration of use at variable low speeds.
When set at LOW speed the fan will operate at variable low speeds.
• The light below NORMAL, NATURAL and SLEEP on the control panel will illuminate to
indicate the selections.
TIMER
• The fan is equipped with a shut-off timer that allows you to set its length of operation
from .5 hour to 7.5 hours. Continue to press the TIMER button to scroll through the
different time selections of .5 hour, 1 hour, 2 hours, and 4 hours. The combination of
selections .5, 1, 2 and 4 will be illuminated. The fan will automatically shut-off after the
selected duration.
OSC
• Pressing the ‘OSC’ button will start and stop the oscillation function.
OFF
• Press this button to turn the fan off at any time.
SET UP & USE

ENGLISH
Page 11
CONTROL PANEL
• Press this button to turn the fan ON. The fan will begin to operate at low
speed if it is the rst time you have plugged it in. If the fan was plugged in
previously, it will operate at the speed setting when last turned off.
• Continue to press the key to scroll through the SPEED settings. The
corresponding LED light Low, Medium or High will illuminate to indicate the
selected speed.
• Pressing the ‘OSC’ button will start and stop the oscillation function.
• Press OFF to power off the fan at any time.
SET UP & USE
CLEANING AND MAINTENANCE
• Before cleaning and assembling, unplug the fan.
• To ensure adequate air circulation to the motor, keep vents at the rear of the motor
housing free of dust, debris, etc. Unplug fan before using a vacuum cleaner to clean
these vents. Do not disassemble the fan motor to clean.
• Plastic parts of the fan should be cleaned with mild soap and a damp cloth or sponge.
Rinse with clean water to remove any soapy lm residue.
• Be sure not to get water or any other liquid inside the motor.
SLEEPNATURALNORMAL
LOW MEDIUM HIGH
SPEED
ON
OSC
OFF
SPEED
ON
OFF
OSC

ENGLISH
Page 12
BEFORE YOU CALL FOR SERVICE
IF THE APPLIANCE FAILS TO OPERATE:
A) Check to make sure that the appliance is plugged in securely. If it is not, remove the
plug from the outlet, wait 10 seconds and plug it in again securely.
B) Check for a blown circuit fuse or a tripped main circuit breaker. If these seem to be
operating properly, test the outlet with another appliance.
IF NONE OF THE ABOVE SOLVES THE PROBLEM, CONTACT A QUALIFIED
TECHNICIAN. DO NOT TRY TO ADJUST OR REPAIR THE APPLIANCE YOURSELF.
CUSTOMER SERVICE
IMPORTANT
DO NOT RETURN THIS Appliance TO THE STORE
If you have a problem with this appliance, please contact the
W Appliance Co. Customer Satisfaction Center at 1-855-855-0294.
DATED PROOF OF PURCHASE, MODEL # AND DATE CODE
REQUIRED FOR WARRANTY SERVICE
TROUBLESHOOTING
Troubleshoot your problem by using the chart below. If the appliance still does not work
properly, contact W Appliance Co. customer service center or the nearest authorized
service center. Customers must never troubleshoot internal components.
TROUBLESHOOTING & WARRANTY
TROUBLE POSSIBLE CAUSE POSSIBLE REMEDY
Appliance does not turn on
Appliance is not plugged in Check that appliance is
plugged into a working outlet
The fuse cover may be open Disconnect the plug from
outlet and close the cover of
the fuse.

ENGLISH
Page 13
TROUBLESHOOTING & WARRANTY
LIMITED WARRANTY
Commercial Cool brand is used under license.
Any repair, replacement, or warranty service,
and all questions about this appliance should be
directed to W Appliance Co. at 1 (855) 855-
0294 from the USA or Puerto Rico.
W Appliance Co. warrants to the original purchaser
that the appliance will be free from defects in material,
parts and workmanship for the period designated for
this appliance. The warranty commences the day the
appliance is purchased and covers up to a period of 1
year (12 months) for labor/1 year (12 months) for parts
(manufacturing defects only)/carry in service.
W Appliance Co. agrees that it will, at its option,
replace the defective appliance with either a new or
remanufactured appliance equivalent to your original
purchase during the warranty period.
Exclusions: This warranty does not apply to the
below:
1. If the appearance or exterior of the
appliance has been damaged or
defaced, altered or modied in design or
construction.
2. If the appliance original serial number has
been altered or removed or cannot be
readily determined.
3. If there is damage due to power line surge,
user damage to the AC power cord or
connection to improper voltage source.
4. If damage is due to general misuse,
accidents or acts of God.
5. If repair attempts are done by unauthorized
service agents, use of parts other than
genuine parts or parts obtained from
persons other than authorized service
companies.
6. On units that have been transferred from
the original owner.
7. On appliances that have been purchased
as refurbished, like new, second-hand, in a
“As-Is” or “Final Sale” terms.
8. To appliances used in a commercial or
rental setting.
9. To appliances used in settings other than
ordinary household use or used other
than in accordance with the provided
instructions.
10. To damages for service calls for improper
installations.
11. To glass parts and other accessory items
that are included with the unit.
12. Transportation and shipping costs
associated with the replacement of the
unit.
13. Service calls to repair or replace the house
fuse, reset the circuit breaker or correct the
wiring in the house.
REPAIR OR REPLACEMENT AS PROVIDED UNDER
THIS WARRANTY IS THE EXCLUSIVE REMEDY OF
THE CUSTOMER; W Appliance Co. SHALL NOT BE
LIABLE FOR ANY INCIDENTAL OR CONSEQUENTIAL
DAMAGES FOR BREACH OF ANY EXPRESS OR
IMPLIED WARRANTY ON THIS Appliance, EXCEPT
TO THE EXTENT PROHIBITED BY APPLICABLE LAW.
ANY IMPLIED WARRANTY OF MERCHANTABILITY
OF FITNESS FOR A PARTICULAR PURPOSE ON THIS
Appliance IS LIMITED TO THE DURATION OF THE
WARRANTY.
Some states do not allow the exclusion or limitations of
incidental or consequential damages, or limitations on
how long the warranty lasts. In these cases the above
exclusions or limitations may not apply to you. This
warranty gives you specic legal rights and you may also
have other rights which vary from state to state.
Obtaining Service: To obtain service, appliance literature,
supplies or accessories please call
1 (855) 855-0294 to create a ticket for exchange/repair.
Please make sure to provide the date of purchase, model
number and a brief description of the problem. Our
customer service representative will contact you or send
detailed return instructions.
W Appliance Co. does not warrant that the appliance will work
properly in all environmental conditions, and makes no warranty
and representation, either implied or expressed, with respect to
the quality, performance, merchantability, or tness for a particular
purpose other than the purpose identied within this user’s manual.
W Appliance Co. has made every effort to ensure that this user’s
manual is accurate and disclaims liability for any inaccuracies
or omissions that may have occurred. Information in this user’s
manual is subject to change without notice and does not represent
a commitment on the part of W Appliance Co.. W Appliance Co.
reserves the right to make improvements to this user’s manual and/
or to the appliances described in this user’s manual at any time
without notice. If you nd information in this manual that is incorrect,
misleading, or incomplete, please contact us at 1- 855-855-0294.
W Appliance Co.,
1356 Broadway
New York, NY 10018

© 2021 Commercial Cool is a W Appliance Company. All Rights Reserved.
March 2021

Ventilateur Mural de 16 po
Manuel de l’Utilisateur
MODÈLE CCFWR16W

Page 16
DANGER
DANGER - Dangers immédiats
qui VONT entraîner des blessures
graves ou la mort
AVERTISSEMENT
AVERTISSEMENT - Dangers ou pratiques
dangereuses qui POURRAIENT entraîner
des blessures graves ou la mort
ATTENTION
ATTENTION - Dangers ou pratiques
dangereuses qui POURRAIENT
entraîner des blessures légères
CONSIGNES DE SÉCURITÉ IMPORTANTES
AVERTISSEMENT
Lors de l’utilisation d’appareils électriques, des précautions de sécurité de base doivent toujours
être suivies an de réduire le risque d’incendie, choc électrique et blessure:
LISEZ TOUTES LES INSTRUCTIONS AVANT D’UTILISER LE PRODUIT
INFORMATION SUR LA SÉCURITÉ
1. LISEZ TOUTES LES INSTRUCTIONS AVANT L’UTILISATION
2. N’insérez jamais de doigts, crayons ou tout autre objet à travers le gril quand le
ventilateur fonctionne.
3. Débranchez le ventilateur lors du déplacement d’un endroit à un autre.
4. Débranchez le ventilateur lorsqu’il n’est pas utilisé et avant le nettoyage.
5. Pour éviter tout risque d’électrocution, ne plongez pas le ventilateur dans l’eau ou
tout autre liquide.
6. Ne laissez pas le cordon pendre du bord de la table ou du comptoir.
7. Assurez-vous que le ventilateur se trouve sur une surface stable lors du
fonctionnement pour éviter de se renverser.
8. N’utilisez pas le ventilateur dans la fenêtre. La pluie peut créer un risque électrique.
9. Une surveillance étroite est nécessaire lorsqu’un appareil est utilisé par ou à
proximité des enfants
10. Ce produit utilise une protection contre les surcharges (fusible). Un fusible
grillé indique une situation de surcharge ou de court-circuit. Si le fusible saute,
débranchez le produit de la prise. Remplacez le fusible conformément au manuel
d’utilisation (suivez le marquage du produit pour le calibre approprié du fusible) et
vériez le produit. Si le fusible de remplacement saute, un court-circuit peut être
présent et le produit doit être jeté ou retourné à un centre de service autorisé pour
examen et/ou réparation.
11. N’utilisez aucun ventilateur dont le cordon ou la che est endommagé. Jetez le
ventilateur ou retournez dans un centre de service autorisé pour examen et/ou
réparation.
12. Ne faites pas passer le cordon sous la moquette. Ne couvrez pas le cordon avec
des tapis, carpettes ou revêtements similaires. Ne faites pas passer le cordon sous
un meuble ou des appareils électroménagers. Arrangez le cordon loin de la zone
de circulation et où elle ne sera pas trébuché.
13. Pour réduire le risque d’incendie ou de choc électrique, N’UTILISEZ PAS ce
ventilateur avec
14. Ne l’utilisez pas à l’extérieur.
GARDEZ CES INSTRUCTIONS
UTILISATION DOMESTIQUE UNIQUEMENT
FRANÇAIS

Page 17
FRANÇAIS
INFORMATION SUR LA SÉCURITÉ
EXIGENCES ÉLECTRIQUES
Cet appareil est équipé d’une che polarisée (une lame est plus large que l’autre). Pour
réduire le risque de choc électrique, cette che est destinée à être insérée dans une prise
polarisée dans un seul sens. Si la che ne rentre pas dans la prise, inversez la che. S’il ne
rentre toujours pas, contactez un électricien qualié. N’essayez en aucun cas de modier
la che.
CORDON D’ALIMENTATION
1. Si le cordon d’alimentation est trop court, n’utilisez pas de rallonge. Demandez à un
électricien qualié ou un réparateur pour installer une prise près de l’appareil.
2. S’il est absolument nécessaire d’utiliser des cordons plus longs ou une rallonge, un soin
extrême doit être exercé.
a) La puissance électrique indiquée du jeu de cordons ou de la rallonge doit être égale
ou supérieure à la puissance électrique de l’appareil. Le cordon le plus long doit être
disposé de sorte qu’il ne se drape pas sur le comptoir ou le dessus de table où il peut
être tiré par des enfants ou trébuché involontairement.
REMARQUE: Ni Commercial Cool ni le marchand ne peuvent accepter de responsabilité pour les
dommages au produit ou les blessures corporelles résultant du non-respect des
procédures de connexion électrique.
SPÉCIFICATIONS
• Dimensions De l’Unité (L x P x H): 17” x 12” x 18”
• Poids Net: Env. 4.9 livres
Cet appareil est conforme à la partie 15 des règles FCC. Son fonctionnement est soumis aux deux
conditions: 1) Cet appareil ne doit pas causer d’interférences nuisibles, et 2) Cet appareil doit
accepter toute interférence reçue, y compris les interférences pouvant entraîner un fonctionnement
indésirable. Cet équipement a été testé et déclaré conforme aux limites d’un appareil numérique de
classe B, conformément à la partie 15 des règles de la FCC. Ces limites sont conçues pour fournir
une protection raisonnable contre les interférences nuisibles dans une installation résidentielle. Cet
équipement génère, utilise et peut émettre de l’énergie radiofréquence et, s’il n’est pas installé et utilisé
conformément aux instructions, peut causer des interférences nuisibles aux communications radio.
Cependant, rien ne garantit que l’interférence ne se produira pas dans une installation particulière.
Si cet équipement cause des interférences à la réception radio ou télévision, qui peuvent être
déterminées en tournant l’équipement éteint et allumé, l’utilisateur est encouragé à essayer de corriger
l’interférence par un ou plusieurs des mesures suivantes: a) Réorienter ou déplacer l’antenne de
réception. b) Augmentez la séparation entre l’équipement et le récepteur. c) Branchez l’équipement
dans une prise différente de celui auquel le récepteur est connecté. d) Consultez le marchand ou un
technicien radio / TV expérimenté pour obtenir de l’aide.
1. LISEZ ces instructions attentivement avant d’installer et d’utiliser l’appareil. Gardez-les
pour référence ultérieure.
2. Enregistrez dans l’espace sous le “NUMÉRO DE SÉRIE/MODÈLE” situé au dos ou au bas
de votre appareil et gardez ces informations pour référence future.
NUMÉRO DE SÉRIE:
NUMÉRO DE MODÈLE:
DATE D’ACHAT:
Gardez et agrafez votre reçu de vente dans votre manuel pour la couverture de la garantie.

Page 18
MANIPULATION DES PILES ALCALINES
1. DSi du liquide de la pile entre accidentellement dans vos yeux, il y a un risque de perte
de la vue, ne les frottez pas. Rincez-vous immédiatement les yeux à l’eau claire du
robinet et puis consultez immédiatement un médecin.
2. Ne placez pas la pile dans un feu, l’exposer à la chaleur, la démonter ou la modier.
Si l’isolation ou la soupape de sécurité est endommagée, la pile peut fuir du liquide,
surchauffer ou exploser.
3. N’insérez pas la pile avec les pôles inversés. Cela pourrait entraîner une anomalie ou un
court-circuit et la pile peut fuir du liquide, surchauffer ou exploser.
4. Gardez la pile hors de portée des enfants. Si la pile est avalée, contactez un médecin
immédiatement.
5. Si le uide alcalin pénètre dans votre bouche, rincez-vous la bouche avec de l’eau et
contactez un médecin immédiatement.
6. Si le uide alcalin entre en contact avec votre peau ou vos vêtements, il peut brûler
votre peau, rincez abondamment la zone touchée avec de l’eau du robinet.
7. Ne mélangez pas des piles neuves et anciennes ou d’autres marques de piles. Les
différents attributs peuvent provoquer une fuite de liquide dans la pile, surchauffer ou
exploser.
8. Cette pile n’a pas été conçue pour être rechargée. La recharge de cette pile peut
endommager l’isolation ou structure interne et peut provoquer une fuite de liquide
dans la pile, surchauffer ou exploser.
9. N’endommagez pas et ne retirez pas l’étiquette à l’extérieur de la pile. Cela pourrait
entraîner peut provoquer un court-circuit, une fuite de liquide, une surchauffe ou une
explosion de la pile.
10. Ne laissez pas tomber, ne jetez pas et n’exposez pas la pile à des chocs extrêmes.
Cela pourrait entraîner une fuite de liquide, une surchauffe ou une explosion de la pile.
11. Ne modiez pas la forme de la pile. Si l’isolation ou la soupape de sécurité est
endommagée, la pile peut fuir du liquide, surchauffer ou exploser.
12. Retirez immédiatement les piles lorsqu’elles ont perdu toute alimentation. Laisser les
piles dans l’appareil pendant une longue période peut provoquer une fuite de liquide,
une surchauffe ou une explosion des piles en raison du gaz généré par les piles.
Contactez votre gouvernement local pour connaître les pratiques d’élimination dans votre
région.
AVERTISSEMENT
Lors de la manipulation de piles alcalines, les précautions de sécurité
de base doivent être suivies, y compris les suivants
INFORMATION SUR LA SÉCURITÉ
FRANÇAIS

Page 19
CONFIGURATION ET UTILISATION
PIÈCES ET CARACTÉRISTIQUES
Garde Avant
Bouton De Réglage De
l’Inclinaison
(Pas montré)
Base
FRANÇAIS

Page 20
ASSEMBLAGE DU VENTILATEUR
AVERTISSEMENT: N’essayez jamais de faire fonctionner le ventilateur sans le gril en
place et correctement sécurisé. Le fait de ne pas avoir le gril en
place peut entraîner des blessures graves.
1. Retirez l’écrou en plastique de la grille arrière de l’axe de l’arbre du moteur en le
tournant dans le sens horaire, en tenant fermement le boîtier du moteur.
2. Vissez l’écrou de la grille arrière sur le boîtier du moteur pour verrouiller la grille arrière
solidement en place.
3. Vissez l’écrou de la grille arrière sur le boîtier du moteur pour verrouiller la grille arrière
solidement en place.
4. Enlevez tout revêtement protecteur sur l’arbre avant l’installation des pales du
ventilateur. Placez la pale du ventilateur sur l’arbre du moteur. La goupille sur l’arbre du
moteur doit être insérée dans la fente de l’assemblage des pales du ventilateur.
CONFIGURATION ET UTILISATION
FRANÇAIS
Table of contents
Languages:
Other commercial cool Fan manuals

commercial cool
commercial cool CCF45P20 User manual

commercial cool
commercial cool CCF54P50 User manual

commercial cool
commercial cool CFF16B User manual

commercial cool
commercial cool CCF43P40 User manual

commercial cool
commercial cool CCF55P60 User manual

commercial cool
commercial cool CCF45P10 User manual
Popular Fan manuals by other brands

Bionaire
Bionaire BTF1616 Instruction leaflet

Alf
Alf ISIV-01 user manual

Applica
Applica WCF600 series Use and care book

Monte Carlo Fan Company
Monte Carlo Fan Company 3MAVR60 D Series Owner's guide and installation manual

Honeywell
Honeywell HSF1630E Operation instructions

Kichler Lighting
Kichler Lighting Hatteras Bay Patio instruction manual