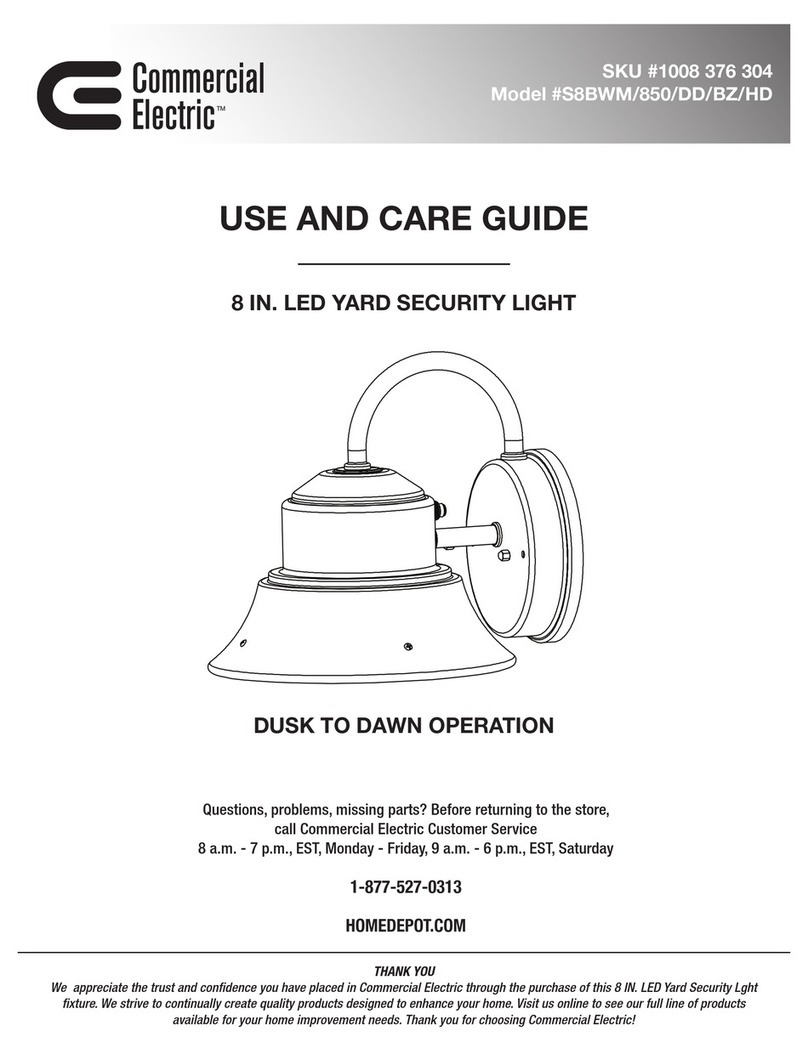
Commercial Electric 849-816 User manual

Page 1
INSTRUCTION MANUAL
3LT Interior Wall Vanity
The Home Depot SKU 8 9-816 (UPC 69 050030 397)

Page 2
Thank you for purchasing this Commercial Electric interior wall vanity. This
product has been manufactured with the highest standards of safety and
quality.
FEATURES:
1. Three light interior vanity in rustic iron finish and antique ivory glass.
2. This fixture has been engineered to safely use three 60 watt medium base
incandescent light bulbs (do not exceed 60 watts each) (not included).
3. For energy savings, this fixture has been engineered to safely use three
standard base compact fluorescent light bulbs (for equivalent light output,
do not exceed 15 watts each) (not included).
QUESTIONS, PROBLEMS, MISSING PARTS:
Before returning to your local The Home Depot, please call our Customer
Service Team at 1 877 527 0313 or visit www.homedepot.com. Please
reference your SKU 849 816 or UPC 6940500304397.

Page 3
CAUTION:
1. Before starting installation of this fixture or removal of a previous fixture,
disconnect the power by turning off the circuit breaker or by removing
the fuse at the fuse box.
2. CONSULT A QUALIFIED ELECTRICIAN IF YOU HAVE ANY
ELECTRICAL QUESTIONS.
3. If you have any non electrical questions about this fixture, please contact
our Customer Service Team at 1 877 527 0313 or visit
www.homedepot.com. Please reference your SKU 849 816 or UPC
6940500304397.
4. Keep your receipt and these Instructions for Proof of Purchase.
TOOLS REQUIRED FOR ASSEMBLY & INSTALLATION
(not included):
3 Light Bulbs Safety Goggles Ladder Gloves Wire Strippers
(60 watt maximum)
(or CFL equivalent)
Flathead Screwdriver Phillips Screwdriver Electrical Tape Wire Cutters

Page 4
PARTS INCLUDED FOR ASSEMBLY (parts are not to scale):
3ea Shades (#4) 3ea Socket Rings (#5)
ASSEMBLY INSTRUCTIONS:
1. Carefully unpack the fixture. Lay out all parts on a clean surface.
2. Unscrew the Socket Rings (#5) from the Sockets (#3). Place the Shades (#4)
over the Sockets (#3). Screw the Socket Rings (#5) onto the Sockets (#3) to
secure the Shades (#4).
3. Install three 60 watt medium base incandescent light Bulbs (#6) (not
included) or three equivalent standard base compact fluorescent light bulbs
(not included) in the Sockets (#3) in the fixture.

Page 5
ASSEMBLY:

Page 6
PARTS INCLUDED FOR INSTALLATION (parts are not to scale):
2ea Lock Nuts (#2) 3ea Wire Connectors (#8) 1ea Cross Bar (#9)
2ea Outlet Box Screws (#10) 2ea Mounting Screws (#11) 1ea Ground Screw (#12)
INSTALLATION INSTRUCTIONS:
1. Screw the two Mounting Screws (#11) onto the Cross Bar (#9). Mount the Cross Bar (#9)
to the Outlet Box (#7) using the two Outlet Box Screws (#10). [Make sure the threads of
the Mounting Screws (#11) are facing outside when the Cross Bar (#9) is attached to the
Outlet Box (#7).]
2. Wrap the ground wire from the fixture around the Ground Screw (#12) on the Cross Bar
(#9), and then connect the ground wire from the fixture to the ground wire from the
Outlet Box (#7). Connect the white wire from the fixture to the white wire (neutral wire)
from the Outlet Box (#7). Connect the black wire from the fixture to the black wire (live
wire) from the Outlet Box (#7). Cover the three connections using the three Wire
Connectors (#8). Wrap the three wire connections with electrical tape for a more secure
connection. Position the wires back inside the Outlet Box (#7). Note: If you have
electrical questions, consult your local electrical code for approved grounding methods.
3. Place the fixture body on the wall by aligning the protruding Mounting Screws (#11) all
the way through the appropriate holes on the Wall Plate (#1). Secure the fixture to the
wall by screwing the two Lock Nuts (#2) onto the two protruding Mounting Screws (#11).
4. Installation is complete. Turn on the power at the circuit breaker or fuse box. Turn the
light switch on to activate the fixture.

Page 7
INSTALLATION:

Page 8
TROUBLESHOOTING:
PRODUCT MAINTENANCE:
1. To clean the outside of the fixture, use a dry or slightly dampened clean cloth (use clean
water, never a solvent) to wipe the glass and surface of the fixture.
2. To clean the inside of the fixture, first disconnect power to the fixture by turning off the
circuit breaker or by removing the fuse at the fuse box. Next, use a dry or slightly
dampened clean cloth (use clean water, never a solvent) to wipe the inside glass and
interior surface of the fixture.
3. Do not use any cleaners with chemicals, solvents or harsh abrasives. Use only a dry soft
cloth to dust or wipe carefully.
LIMITED WARRANTY
The manufacturer warrants this lighting fixture to be free from defects in materials and workmanship for a period
of five (5) years from date of purchase. This warranty applies only to the original consumer purchaser and only
to products used in normal use and service. If this product is found to be defective, the manufacturer’s only
obligation, and your exclusive remedy, is the repair or replacement of the product at the manufacturer’s
discretion, provided that the product has not been damaged through misuse, abuse, accident, modifications,
alterations, neglect or mishandling. This warranty shall not apply to any product that is found to have been
improperly installed, set up, or used in any way not in accordance with the instructions supplied with the product.
This warranty shall not apply to a failure of the product as a result of an accident, misuse, abuse, negligence,
alteration, or faulty installation, or any other failure not relating to faulty material or workmanship. This
warranty shall not apply to the finish on any portion of the product, such as surface and/or weathering, as this is
considered normal wear and tear. The manufacturer does not warrant and specially disclaims any warranty,
whether express or implied, of fitness for a particular purpose, other than the warranty contained herein.
The manufacturer specifically disclaims any liability and shall not be liable for any consequential or
incidental loss or damage, including but not limited to any labor / expense costs involved in the
replacement or repair of said product.
Problem Possible Cause Corrective Action
1. Light bulb is burned out. 1. Replace light bulb.
2. Power is off. 2. Make sure power supply is on.
3. Faulty wire connection. 3. Check wiring.
Light bulb will not
illuminate.
4. Faulty switch. 4. Test or replace switch.
Fuse blows or circuit
breaker trips when light
bulb is illuminated.
Crossed wires or power
wire is grounding out.
Check wire connections.

Page 9
MANUAL DE INSTRUCCIONES
Lámpara de Pared para Mesa de Tocador de 3 luces
The Home Depot SKU 8 9-816 (UPC 69 050030 397)

Page 10
Gracias por comprar esta lámpara de pared para mesa de tocador Comercial
Eléctrico para interiores. Este producto ha sido manufacturado con los
estándares de seguridad y calidad más altos.
CARACTERÍSTICAS:
1. Lámpara de tocador para interiores de tres luces en acabado en hierro
rústico y cristal marfil antiguo.
2. Esta instalación ha sido diseñado para usar con seguridad tres bombillas de
luz incandescente de base medio de 60 vatios (no exceder de 60 vatios cada
una) (no incluido).
3. Por ahorro de energía, esta instalación ha sido diseñada para usar con
seguridad tres bombillas de luz fluorescentes compactas estándares de base
medio (para la salida de luz equivalente, no exceder de 15 vatios cada una)
(no incluido).
PREGUNTAS, PROBLEMAS, PARTES QUE FALTAN:
Antes de devolver a su The Home Depot local, por favor llame a nuestro
Equipo de Atención al Cliente al 1 877 527 0313 o visite
www.homedepot.com. Por favor haga referencia de su SKU 849 816 o UPC
6940500304397.

Page 11
PRECAUCIÓN:
1. Antes de comenzar la instalación o de quitar la instalación anterior,
desconecte la alimentación apagando el interruptor del circuito o quitando
el fusible en la caja de fusible.
2. POR FAVOR CONSULTE CON UN ELECTRICISTA CUALIFICADO SI
TIENE CUALQUIER PREGUNTA ELÉCTRICA.
3. Si tiene cualquier pregunta no eléctrica sobre esta instalación, por favor
contacte con nuestro Equipo de Atención al Cliente en el 1 877 527 0313 o
visite www.homedepot.com. Por favor haga referencia de su SKU 849 816
o UPC 6940500304397.
4. Guarde su recibo y estas Instrucciones como Prueba de Adquisición.
HERRAMIENTAS NECESARIAS PARA EL ENSAMBLAJE &
INSTALACIÓN (no incluido):
3 Bombillas Gafas de Seguridad Escalera Guantes Peladores de Cables
(60 vatios máximo)
(o equivalente a CFL)
Destornillador Destornillador Cinta Aislan Pinzas
de Cabeza Plana Phillips Cortacables

Page 12
PARTES INCLUIDAS PARA EL MONTAJE (las partes no están en
proporción de escala):
3ea Pantallas (#4) 1ea Aros del Portalámparas (#5)
INSTRUCCIÓN DE ASAMBLEA:
1. Desempaquetar cuidadosamente la instalación, disponer todas las piezas
sobre una superficie límpia.
2. Desatornillar los Aros del Portalámparas (#5) desde los Portalámparas (#3).
Coloque las Pantallas (#4) sobre los Portalámparas (#3). Atornillar los Aros
de los Portalámparas (#5) en los Portalámparas (#3) para fijar las Pantallas
(#4).
3. Instalar tres Bombillas de luz incandescente de base medio de 60 vatios (#6)
(no incluido) o tres bombillas estándares equivalentes de luz fluorescente de
base compacta (no includo) en las tres Portalámparas (#3) en la instalación.

Page 13
ASAMBLEA:

Page 14
PARTES INCLUIDAS PARA EL INSTALACIÓN
(las partes no están en proporción de escala):
2ea Tuercas de Cierre (#2) 3ea Conectores de Cables (#8) 1ea Barra Cruzada (#9)
2ea Tornillos de la Caja de Salida (#10) 2ea Tornillos de Montaje (#11) 1ea Tornillo de Toma de Tierra (#12)
INSTRUCCIONES PARA LA INSTALACIÓN:
1. Atornille los dos Tornillos de Montaje (#11) en la Barra Cruzada (#9). Monte la Barra
Cruzada (#9) a la Caja de Salida (#7) usando los dos Tornillos de la Caja de Salida (#10).
[Asegurese de que las roscas de los Tornillos de Montaje (#11) estén encarando hacia la
parte exterior cuando la Barra Cruzada (#9) esté acoplada a la Caja de Salida (#7).]
2. Envuelva el cable de toma de tierra de la instalación en el Tornillo de Toma de Tierra (#12)
que hay en la Barra Cruzada (#9), y después conecte el cable de toma de tierra de la
instalación al cable de toma de tierra de la Caja de Salida (#7). Conecte el cable blanco de
la instalación al cable blanco (cable neutral) de la Caja de Salida (#7). Conecte el cable
negro de la instalación al cable negro (cable vivo) de la Caja de Salida (#7). Cubra las tres
conexiones usando los tres Conectores de Cables (#8) Envuelva las tres conexiones de los
cables con cinta aislante para una conexión más segura. Posicione los cables de vuelta al
interior de la Caja de Salida (#7). Nota: Si tiene preguntas eléctricas. consulte con su
código eléctrico local para los métodos de toma de tierra aprovados.
3. Coloque el cuerpo de la instalación en la pared alineando los Tornillos de Montaje
protuberantes (#11) a través de los agujeros apropiados que hay en la Placa de la Pared
(#1). Fije la instalación a la pared atornillando las dos Tuercas de Cierre (#2) en los dos
Tornillos de Montaje protuberantes (#11).
4. La instalación está completada. Encienda la alimentación en el interruptor del circuito o en
la caja de fusible. Encienda el interruptor de la luz para activar la instalación.

Page 15
INSTALACIÓN:

Page 16
SOLUCIÓN DE PROBLEMAS:
MANTENIMIENTO DEL PRODUCTO:
1. Para limpiar la instalación, use un paño limpio seco o ligeramente humedecido (use agua
limpia, no use núnca disolvente) para frotar el cristal y la superficie de la instalación.
2. Para limpiar el interior de una instalación, primero desconecte la alimentación a la
instalación apagando el interruptor del circuito o quitando el fusible en la caja de fusible.
Después, use un paño seco o ligeramente humedecido (use agua limpia, no use núnca un
disolvente) para frotar el cristal interior y ka superficie exterior de la instalación.
3. No use ningún limpiador con productos químicos, disolventes o abrasivos ásperos. Use
solamente un paño seco y suave para quitar el polvo o frotar cuidadosamente.
GARANTÍA LIMITADA
El fabricante garantiza esta instalación de luz libre de defectos en materiales y mano de obra durante un periodo
de cinco (5) años desde la fecha de adquisición. Esta garantía se aplica solamente al consumidor adquiridor
original y solamente a productos usados en uso y servicio normales. Si este producto está defectuoso, la única
obligación del fabricante y su exclusivo remedio es la de reparar o reemplazar el producto a discreción del
fabricante, con tal de que el producto no haya sido dañado por mal uso, abuso, accidente, modificaciones,
alteraciones, negligencia o manipulación incorrecta. Esta garantía no se aplicaría a productos que haya sido
instalado, ajustado, o usado inadecuadamente de cualquier forma que no esté de acuerdo con las instrucciones
suministradas con el producto. Esta garantía no se aplicaría a fallos del producto debido a un accidente, mal uso,
abuso, negligencia, alteración, o instalación errónea, o cualquier otro fallo que no esté relacionado con fallos
materiales o de mano de obra. Esta garantía no se aplicaría al acabado o a cuialquier porción del prodcuto, tales
como una superficie y/o erosión, porque esto está considerado como uso y desgaste. El fabricante no garantiza
y especialmente niega cualquier garantía, tanto si es expreso como implicado, de aptitud para un
propósito particular, con excepción de la garantía contenida adjunta aquí. El fabricante niega
especialmente cualquier responsabilidad y no estará obligado por ninguna pérdida o daño consecuente o
fortuita, incluyendo pero no limitado a cualquier trabajo / coste de gastos implicados en el reemplazo o
reparación de dicho producto.
Problema Causa posible Acción Correctiva
1. La bombilla está quemada. 1. Reemplace la bombilla.
2. No hay alimentación. 2. Compruebe si hay
suministro de electricidad.
3. La conexión de los cables no es
la correcta. 3. Inspeccione el cableado.
La bombilla no se
enciende.
4. El interruptor está defectuoso. 4. Pruebe o reemplace el
interruptor.
Cuando se enciende la
luz, el fusible se quema
o el interruptor de
circuito se dispara.
Hay cables cruzados o el conductor
de suministro no está conectado a
tierra.
Compruebe las conexiones
del cableado.

Page 17
MANUEL D'INSTRUCTIONS
Vanity Murale d’Intérieur 3LM
The Home Depot UGS 8 9-816 (UPC 69 050030 397)

Page 18
Nous vous remercions d’avoir acheté cette vanity murale d’intérieur de chez
Commercial Electric. Ce produit a été fabriqué en respectant les plus hauts standards
de sécurité et de qualité.
CARACTERISTIQUES:
1. Vanity murale d’intérieur à trois ampoules au fini fer rustique et avec un
verre ivoire antique.
2. Ce luminaire a été conçu pour utiliser trois ampoules incandescentes à culot
moyen de 60 watts (ne pas dépasser 60 watts chacune) (non incluses).
3. Pour économiser l'énergie, ce luminaire a été conçu pour utiliser en toute
sécurité jusqu'à trois ampoules fluorescentes compactes à culot standard
(pour un éclairage équivalent, ne pas dépasser 15 watts chacune) (non
incluses).
QUESTIONS, PROBLEMES, PIECES MANQUANTES:
Avant de retourner à votre magasin local The Home Depot, veuillez appeler notre
centre de Service à la Clientèle au 1 877 527 0313 ou visiter www.homedepot.com.
Veuillez indiquer votre UGS 849 816 ou UPC 6940500304397.

Page 19
AVERTISSEMENT:
1. Avant de commencer à installer ce luminaire ou d'enlever l'ancien luminaire,
déconnectez le courant en éteignant le disjoncteur ou en enlevant le fusible
correspondant du coffret à fusibles.
2. CONSULTER UN ELECTRICIEN QUALIFIE POUR TOUTE
QUESTION RELATIVE A L'ELECTRICITE.
3. En cas de questions non relatives à l'électricité à propos de ce luminaire,
veuillez contacter notre centre de Service à la Clientèle au 1 877 527 0313
ou visiter www.homedepot.com. Veuillez indiquer votre UGS 849 816 ou
UPC 6940500304397.
4. Conserver votre reçu et ces Instructions comme Preuve d'Achat.
OUTILS REQUIS POUR L'ASSEMBLAGE & L'INSTALLATION
(non inclus):
3 Ampoules Lunettes de Protection Echelle Gants Dénudeur de Câbles Electriques
(60 watts maxima)
(ou équivalent LFC)
Tournevis à Tête Plate Tournevis à Croisillon Ruban Adhésif Isolant Pince pour Câbles Electriques

Page 20
PIECES INCLUSES POUR L'ASSEMBLAGE
(les pièces ne sont pas à l'échelle):
3x Abat jour (#4) 3x Anneaux de Douille (#5)
INSTRUCTIONS D'ASSEMBLAGE:
1. Déballer soigneusement le luminaire. Placer toutes les pièces sur une
surface propre.
2. Dévisser les Anneaux de Douilles (#5) des Douilles (#3). Placer les Abats
jour (#4) sur les Douilles (#3). Visser les Anneaux de Douilles (#5) sur les
Douilles (#3) pour maintenir les Abats jour (#4).
3. Installer trois Ampoules incandescentes de 60 watts à culot moyen (#6)
(non incluses) ou trois ampoules fluorescentes équivalentes à culot standard
(non incluses) dans les trois Douilles (#3) du luminaire.
This manual suits for next models
1
Table of contents
Languages:
Other Commercial Electric Outdoor Light manuals

Commercial Electric
Commercial Electric S10WPK/850/DD/BZ/HD User manual

Commercial Electric
Commercial Electric NOVA150-PC-4K-BZ User manual

Commercial Electric
Commercial Electric LVSL-05CB-04 User manual

Commercial Electric
Commercial Electric HEL50-4K-BZ User manual

Commercial Electric
Commercial Electric 51405141 User manual

Commercial Electric
Commercial Electric S8BWM/850/DD/BZ/HD User manual