Commodore ARM2SID User manual
ARM2SID quick installation guide
Thank you for your purchase!
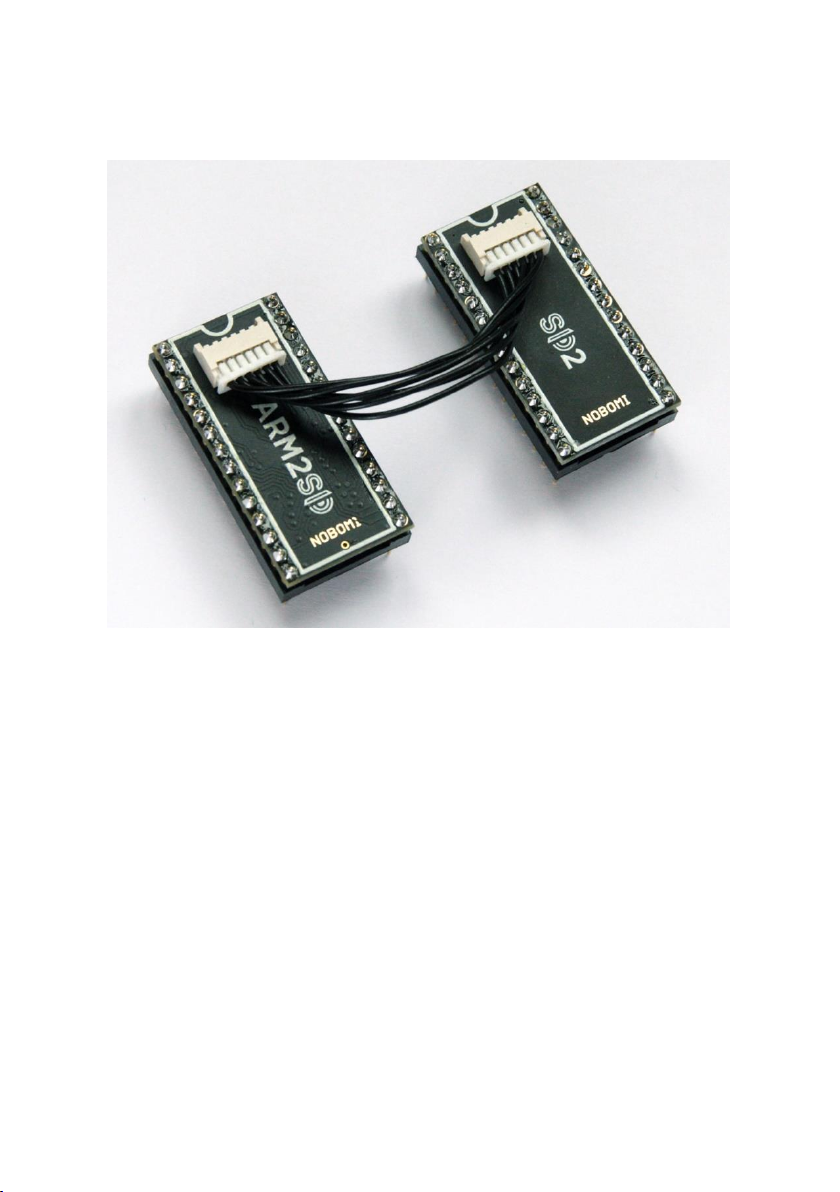
ARM2SID is a new replacement for 2 Commodore SID music chips and more.
ARM2SID is a bigger brother of our well known ARMSID, which is a real "plug
& play solution and fully replaces both the MOS6581 and MOS8580 chips.
ARM2SID comes whenever 2 SID chips are needed, usually for stereo. If you
have 2 SID sockets, just place the ARM2SID in the primary socket, SID2 in the
secondary socket, connect both of them with the provided 5 or 10 cm cable,
configure with the provided C64/C128 utility and go.
If you have just one socket and are not afraid of soldering, you can get even
more. Use the provided connector cable, connect the 6 wires to your
C64/C128 and you get the 2nd SID for stereo, the 3rd SID for 3SID music and
OPL FM synthesis compatible with FM Sound Expander!
Enjoy your ARM2SID!
CAUTION: Before you install ARM2SID, the computer must be turned OFF
and disconnected from the power supply.
WARNING: The installation of ARM2SID should be performed by a skilled
person. It requires you to open your Commodore computer. Most of the
chips are sensitive to static electricity, ground yourself. Neither ARTAX nor
NOBOMI will be responsible for any damages caused by an improper
ARM2SID installation.
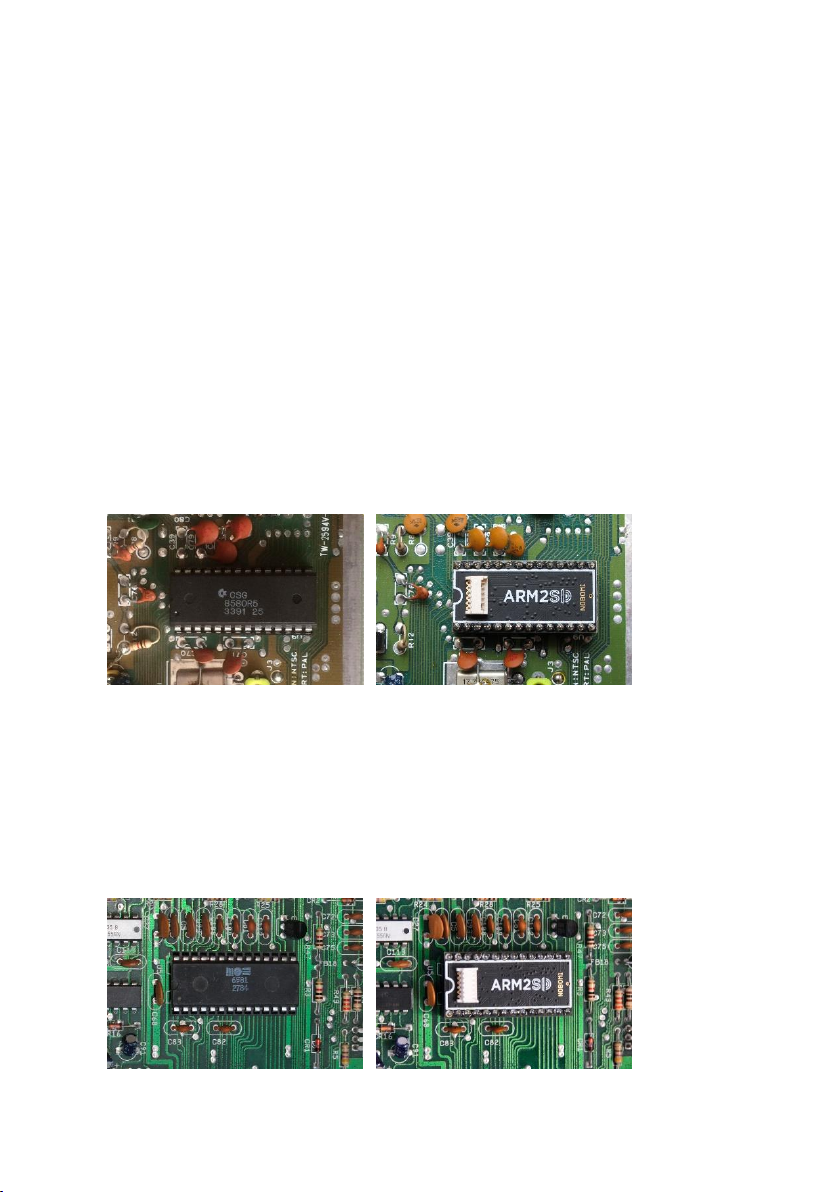
ARM2SID orientation.
It is very important to place your ARM2SID into the socket the correct way.
The original SID chip has a slightly beveled notch near the pin 1. ARM2SID
has a white printed notch on the PCB above the pin 1. See the pictures from
the Commodore C64:
CAUTION: Please, really DO take care about the ARM2SID orientation. If
you turn the ARM2SID the wrong way, you WILL damage your computer.
High voltage (9 or 12 V) will go to your computer bus and most likely
destroy your computer RAM, ROM and more chips.
The orientation in the Commodore C128 is similar. Always place ARM2SID
with the same orientation as the original SID chip.
NOTCH
Pin 1
Pin 1
printed
NOTCH
NOTCH
printed
NOTCH
Pin 1
Pin 1

Dual socket configuration
This is easy no-soldering solution for stereo SID expanders (MixSID, SIDFX,
SID2SID etc.) or dual-SID boards.
Install the ARM2SID in the primary socket, SID2 in the secondary socket and
connect them with the provided 5 or 10 cm cable. Take care for the proper
ARM2SID and SID2 orientation! Wrong orientation will destroy your
computer!
Configure ARM2SID with the provided ARMSID TESTER utility. Start it,
choose $D400 SID, select M for ADDRESS MAPPING CONFIGURATION and
select PIN CONNECTION: SOCKET, then choose what to play in the LEFT and
RIGHT socket. If your socket supports $DFxx addressing, you can use SFX
(FM) too.

Dual socket configuration for C64 Reloaded MK2
The special ARM2SID version for C64 Reloaded MK2 allows correct
autodetection in this computer. This option however affects the Digifix
introduced in newer ARMSID firmware versions.
Fortunately the Digifix can be set by hardware pin or the software. The
hardware is affected and will set your Digifix to -100%, so for the ARM2SID
usage in C64 Reloaded MK2 you have to change the Digifix configuration to
Software to enjoy the SID music the best. Adjust the Digifix value to desired
level then.
Remember to save the settings to flash memory by pressing ‘P’ key.

Ultimate 64 usage and configuration
Install the ARM2SID in the primary (lower, SID-1) socket and SID2 in the
secondary (upper, SID-2) socket in your Ultimate 64. Connect ARM2SID and
SID2 with the provided special cable harness for Ultimate 64. The small
connector with all pins populated belongs to ARM2SID and the connector
with only 5 pins populated to SID2. The one longer wire connects to left pin
on SID A[5..9] dual pin header in Ultimate 64.
Take care for the proper ARM2SID and SID2 orientation! Wrong orientation
could damage your computer!
The SID A[5..9] brings an addition address line to the ARM2SID to recognize
more different addresses where internal SIDs/SFX could be positioned. It is
controlled by Ext DualSID Range Split setting of Ultimate 64 configuration.
There are some setting common for all ARM2SID modes and then you have
to configure Ultimate 64 and ARM2SID with its configuration utility for
required mode of operation:
•Standard 2 SID stereo
•3 SIDs
•SID + SFX Sound Expander
•SFX Sound Expander only

Common Ultimate 64 settings for ARM2SID usage
You have to enable both SID sockets and disable UltiSID.
U64: SID Socket 1 ... Enabled
U64: SID Socket 2 ... Enabled
U64: UltiSID 1 Address ... Unmapped
U64: UltiSID 2 Address ... Unmapped
It is also necessary to disable Ultimate 64 SID Player Autoconfiguration. The
Ultimate 64 can configure ARMSID using public API and it will modify your
settings unintentionally, the way you did not want it and you could be
confused what is going on, so it is definitely better to disable the
Autoconfiguration and to all configuration yourself. Also disable the UltiSID.
SID Player Autoconfig … Disabled
Allow Autoconfig uses UltiSid … Off
It also a good idea to slightly adjust the Audio Mixer, but this is about
preference of different people. We usually slightly increase the volume of
both sockets and extend the pan for both sockets to wider stereo
enjoyment.

The next screen is ARM2SID test and configuration utility. You will need to
make ARM2SID configuration changes to use different modes. You can also
use it to change between 6581 and 8580 emulation, adjust Digifix and more.
You can download it with the newest firmware from Downloads section on
Retrocomp e-shop or from the author’s pages:
https://www.nobomi.cz/8bit/arm2sid/
Standard 2 SID stereo (SIDs on addresses $D400 and $D420)
Adjust SID Addressing in Ultimate 64 configuration
U64: SID Socket 1 Address ... $D400
U64: SID Socket 2 Address ... $D420
U64: Ext DualSID Range Split ... A8
Configure ARM2SID using ARM2SID Test and Configuration Utility
ARM2SID: PIN CONNECTIONS ... SOCKET
ARM2SID: SID/1 ... SIDL
ARM2SID: SID/2 ... SIDR
ARM2SID: EMULATION MODE ... SID
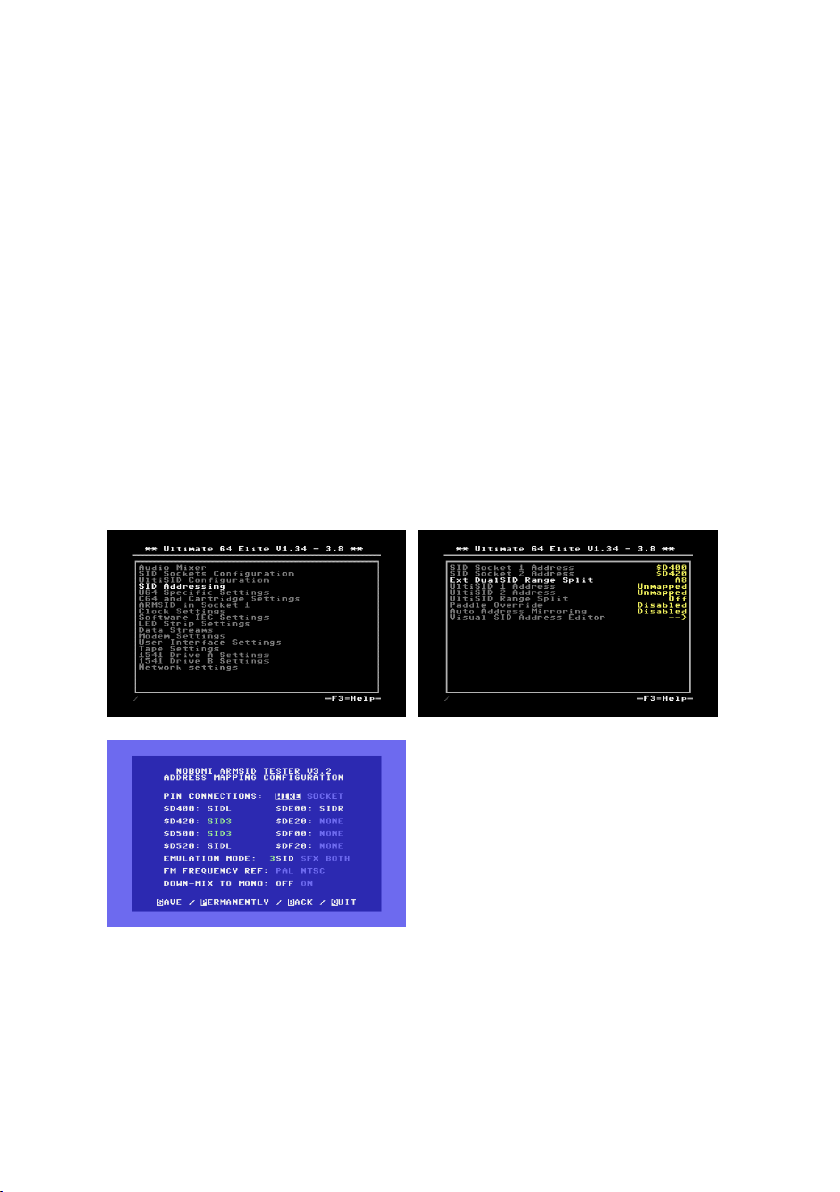
3 SIDs (SIDs on addresses $D400, $D420 and $D500)
Adjust SID Addressing in Ultimate 64 configuration
U64: SID Socket 1 Address ... $D400
U64: SID Socket 2 Address ... $D420
U64: Ext DualSID Range Split ... A8
Configure ARM2SID using ARM2SID Test and Configuration Utility
ARM2SID: PIN CONNECTIONS ... WIRE
ARM2SID: $D400 ... SIDL
ARM2SID: $D420 ... SID3
ARM2SID: $D500 ... SID3
ARM2SID: $D520 ... SIDL
ARM2SID: $DE00 ... SIDR
ARM2SID: EMULATION MODE ... 3SID
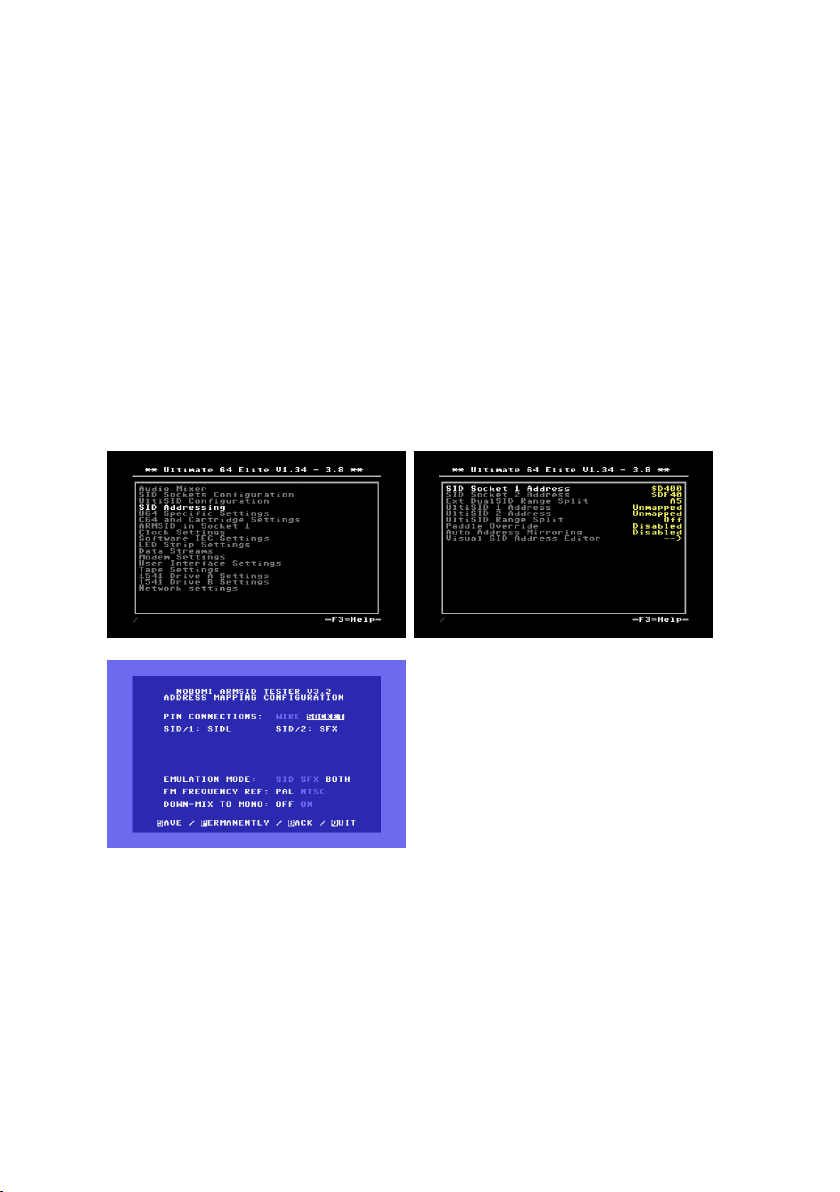
SID + SFX Sound Expander (SID on address $D400, SFX on addresses $DFxx)
Adjust SID Addressing in Ultimate 64 configuration
U64: SID Socket 1 Address ... $D400
U64: SID Socket 2 Address ... $DF40
U64: Ext DualSID Range Split ... A5
Configure ARM2SID using ARM2SID Test and Configuration Utility
ARM2SID: PIN CONNECTIONS ... SOCKET
ARM2SID: SID/1 ... SIDL
ARM2SID: SID/2 ... SFX
ARM2SID: EMULATION MODE ... BOTH


