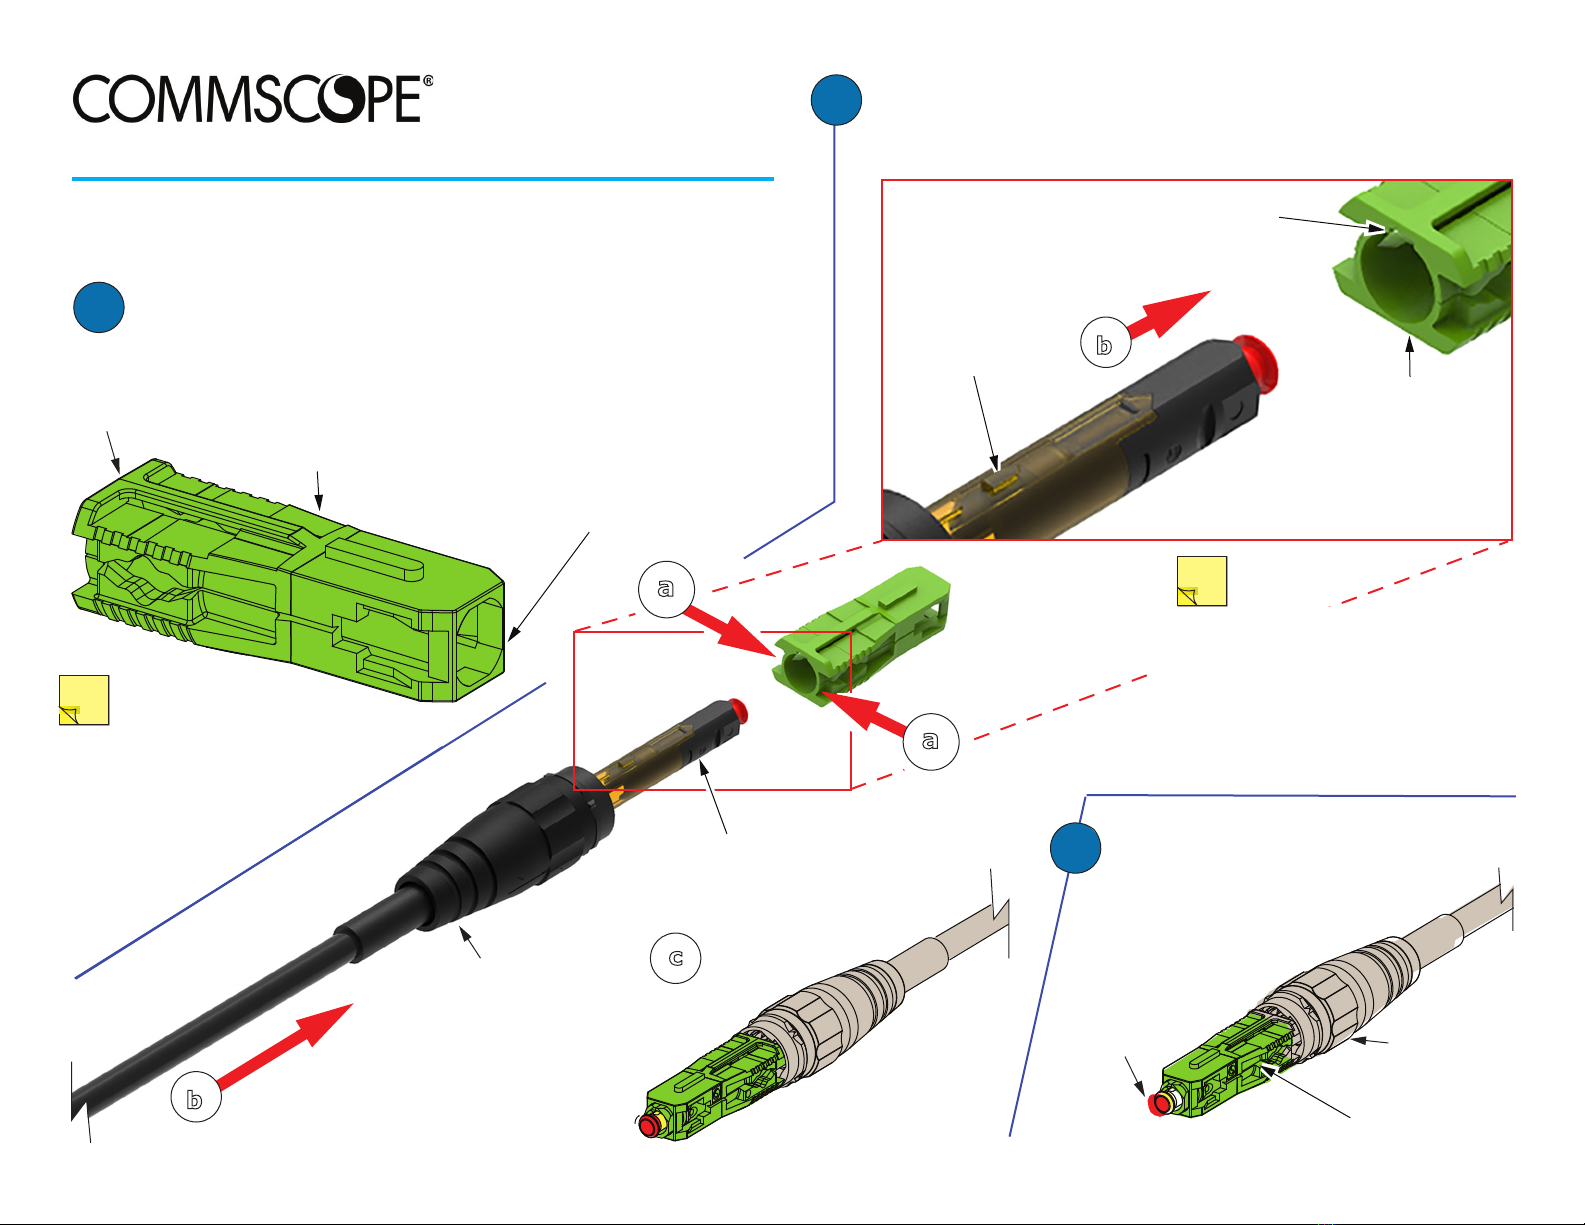
ALIGNMENT
DETAIL
©
Installing SC Converter
on Prodigy™ Connector
Quick
Start
TC-96309-IP · Rev A · May 2021
CommScope (logo), CommScope, and Prodigy are trademarks.
Electronic Only Document (EOD) 2021, CommScope, Inc. All Rights Reserved.
2
Install SC converter: (a) align alignment key on the
Prodigy connector core with the alignment guide in the
converter body (see detail), (b) insert connector core all
the way in until it clicks into position as shown in (c).
Hold converter body stationary while
inserting connector core into rear
opening of converter, as indicated
in (a). Align Prodigy connector using
alignment key and alignment guide
as shown in Alignment Detail above.
NOTE:
FERRULE
DUST CAP
LOCKING
NUT
LOCKING
NUT
27424-A
Page 1 of 2
Prior to installing Prodigy connector
into adapter, remove
ferrule dust cap,
shown below.
FULLY
ASSEMBED
PRODIGY
CONNECTOR
CORE
PRODIGY
CONNECTOR
PRODIGY
CONNECTOR
CORE
ALIGNMENT
GUIDE
CONVERTER
BODY
ALIGNMENT
KEY
1Locate SC converter and note the alignment key on the
prodigy connector core and the alignment guide on the
SC converter, which are used to guide the Prodigy
connector core into the SC comverter.
Work on a clean
surface, taking
care to avoid
NOTE:
dust contamination
of mating
surfaces.
ALIGNMENT
KEY
SC
CONVERTER REAR
OPENING
OF
CONVERTER
3
c
3b
3b
3
3
a
3
a


