Comnet CNFE2DOE2 User manual
INSTALLATION AND OPERATION MANUAL
CNFE2DOE2
TERMINAL SERVER
v1.0 Oct 2011
The ComNet CNFE2DOE2 terminal server converts RS-232, RS-422 and 2- and 4-wire
RS-485 serial data to a 10/100 Ethernet-based signal. The CNFE2DOE2 is a two-
channel unit and can transport each channel of Ethernet data over either optical fiber
or through RJ-45 cable. A wide variety of ComNet SFP (Small Form Pluggable) optical
interfaces are available to meet transmission distance requirements.
The two serial ports may be configured through either the user’s network, or via a PC,
through the unit’s web server. Open source com0com TCP/IP protocol is supported to
communication with terminal servers over the Ethernet network.
LED indicators confirm the operating status of the device. The ComNet CNFE2DOE2
may be wall mounted, rack mounted (“ComFit” packaging) or DIN-rail mounted with
the use of the ComNet DINBKT1 adapter. ComNet products are made in the USA.

INS_CNFE2DOE2_REV–
10/11/11 PAGE 2
INSTALLATION AND OPERATION MANUAL CNFE2DOE2
TECH SUPPORT: 1.888.678.9427
Contents
Hardware description 3
Assign IP Address to a Terminal Server 5
Using Terminal Server as a Serial Extender over Ethernet 11
Install ComNet Software Utilities 13
Install the com2com 13
Install the com2tcp 17
Install ComNet Terminal Server Configuration software 18
Using Terminal Server as a Virtual COM port (VCP) 20
Connection creation 21
Edit port names 22
Manual VCP Configuration 23
Verify VCP Operation 24
Using TeraTerm Telnet Connection 25
Using Windows UPnP to Discover Your Terminal Servers 26
INS_CNFE2DOE2_REV–
10/11/11 PAGE 3
INSTALLATION AND OPERATION MANUAL CNFE2DOE2
TECH SUPPORT: 1.888.678.9427
Hardware description
The ComNet™CNFE2DOE2 terminal server supports bi-directional data transmission over 2
optical fibers. The server is universally compatible with RS232, RS422, RS485 and serial data
protocols. All configurations are done through its web server. The CNFE2DOE2 has two serial
ports which can be configured by communicating from one port to another through the network.
Distances depend on which SFP (Small Form Pluggable) module is used. The RJ45 Ethernet and
SFP interfaces are both enabled. They function as an Ethernet media converter.
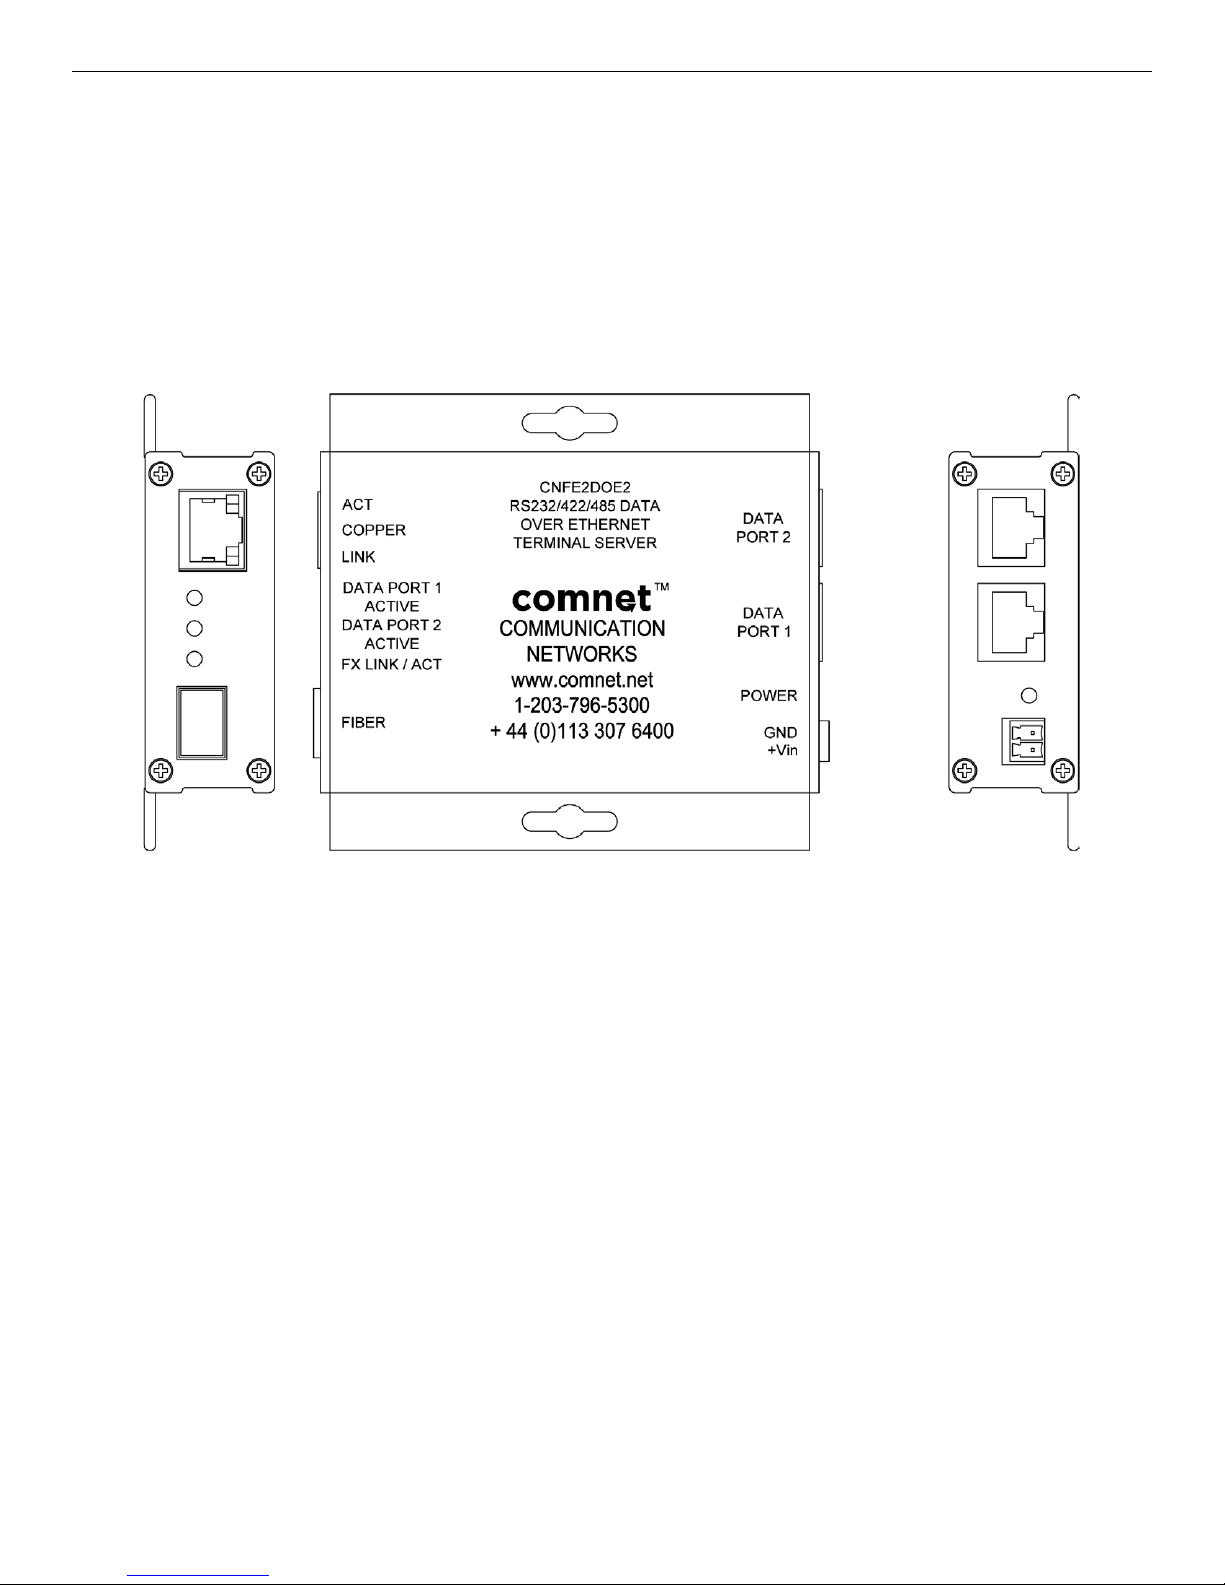
Mechanical Drawing of CNFE2DOE2 Unit
INS_CNFE2DOE2_REV–
10/11/11 PAGE 4
INSTALLATION AND OPERATION MANUAL CNFE2DOE2
TECH SUPPORT: 1.888.678.9427
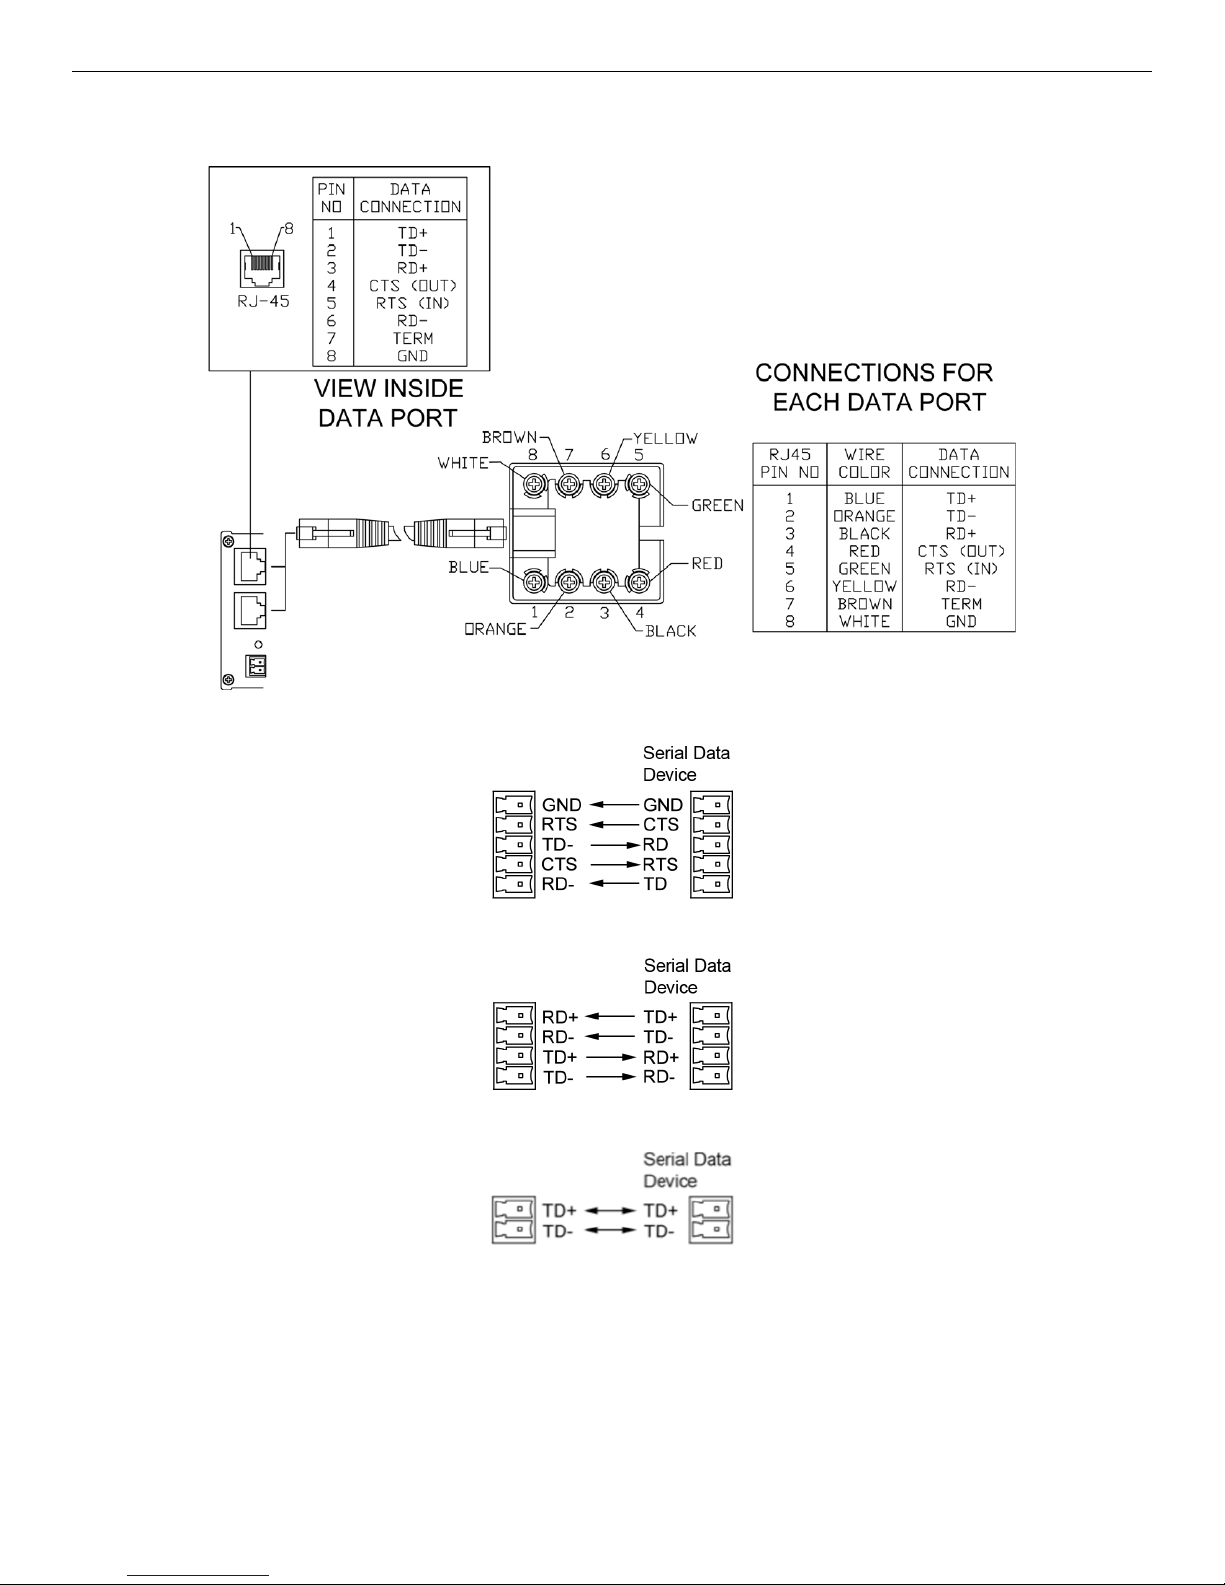
The data connector pin-out is as below:
RS232
RS422 / RS485 4-Wire
RS485 2-Wire
Settings by Data Type (Port 1 or 2)
INS_CNFE2DOE2_REV–
10/11/11 PAGE 5
INSTALLATION AND OPERATION MANUAL CNFE2DOE2
TECH SUPPORT: 1.888.678.9427
Assign IP Address to a Terminal Server
A unique IP address has to be assigned to each terminal server device. You can connect one
at a time to change the default IP address. The default IP address of the device is the same:
192.168.12.1.
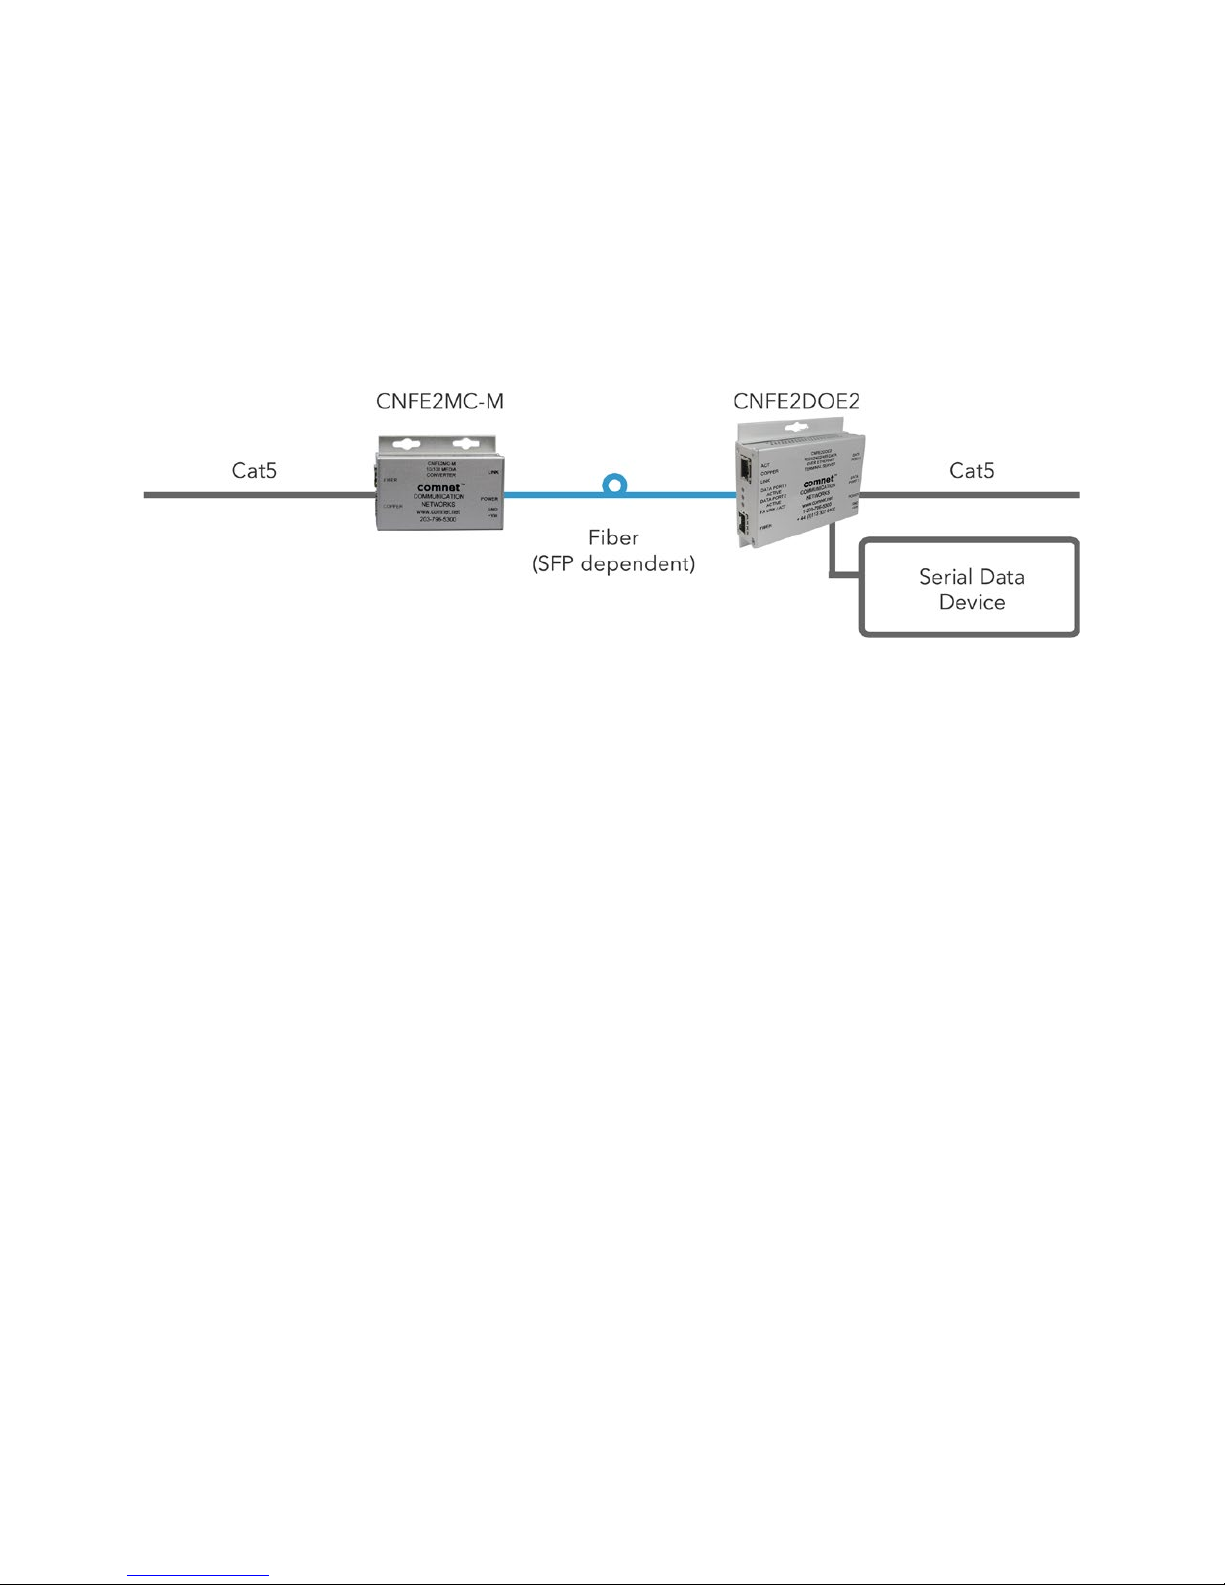
Connect the terminal server on to your local Ethernet network which your PC is connected to, as
Figure 1 below, and power on the unit.
Figure 1
Following the steps below to set up your PC IP address to the same subnet as the terminal servers.
Disable the machine’s wireless network connection and any other internet connections that could
interfere with the network being created.
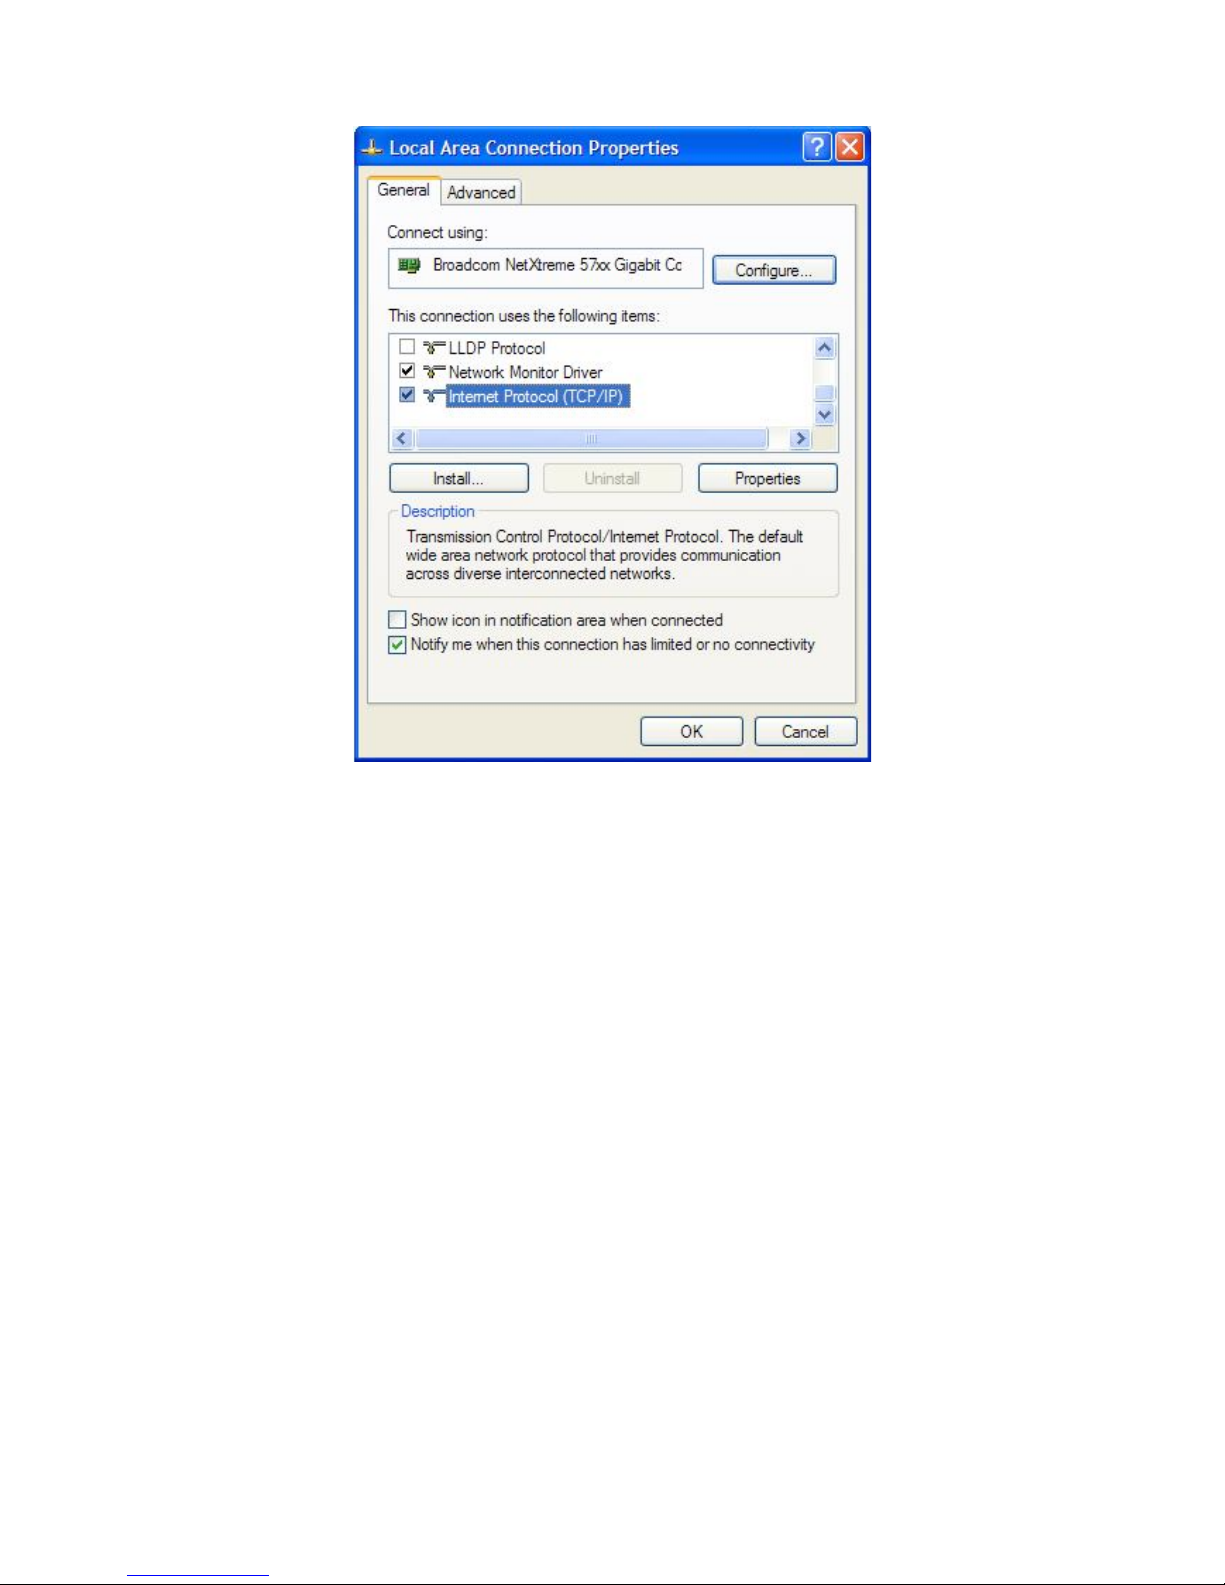
Select the Internet Protocol (TCP/IP) connection within the Local Area Connection Properties from
start -> Control Panel -> Network Connections -> Properties.
INS_CNFE2DOE2_REV–
10/11/11 PAGE 6
INSTALLATION AND OPERATION MANUAL CNFE2DOE2
TECH SUPPORT: 1.888.678.9427
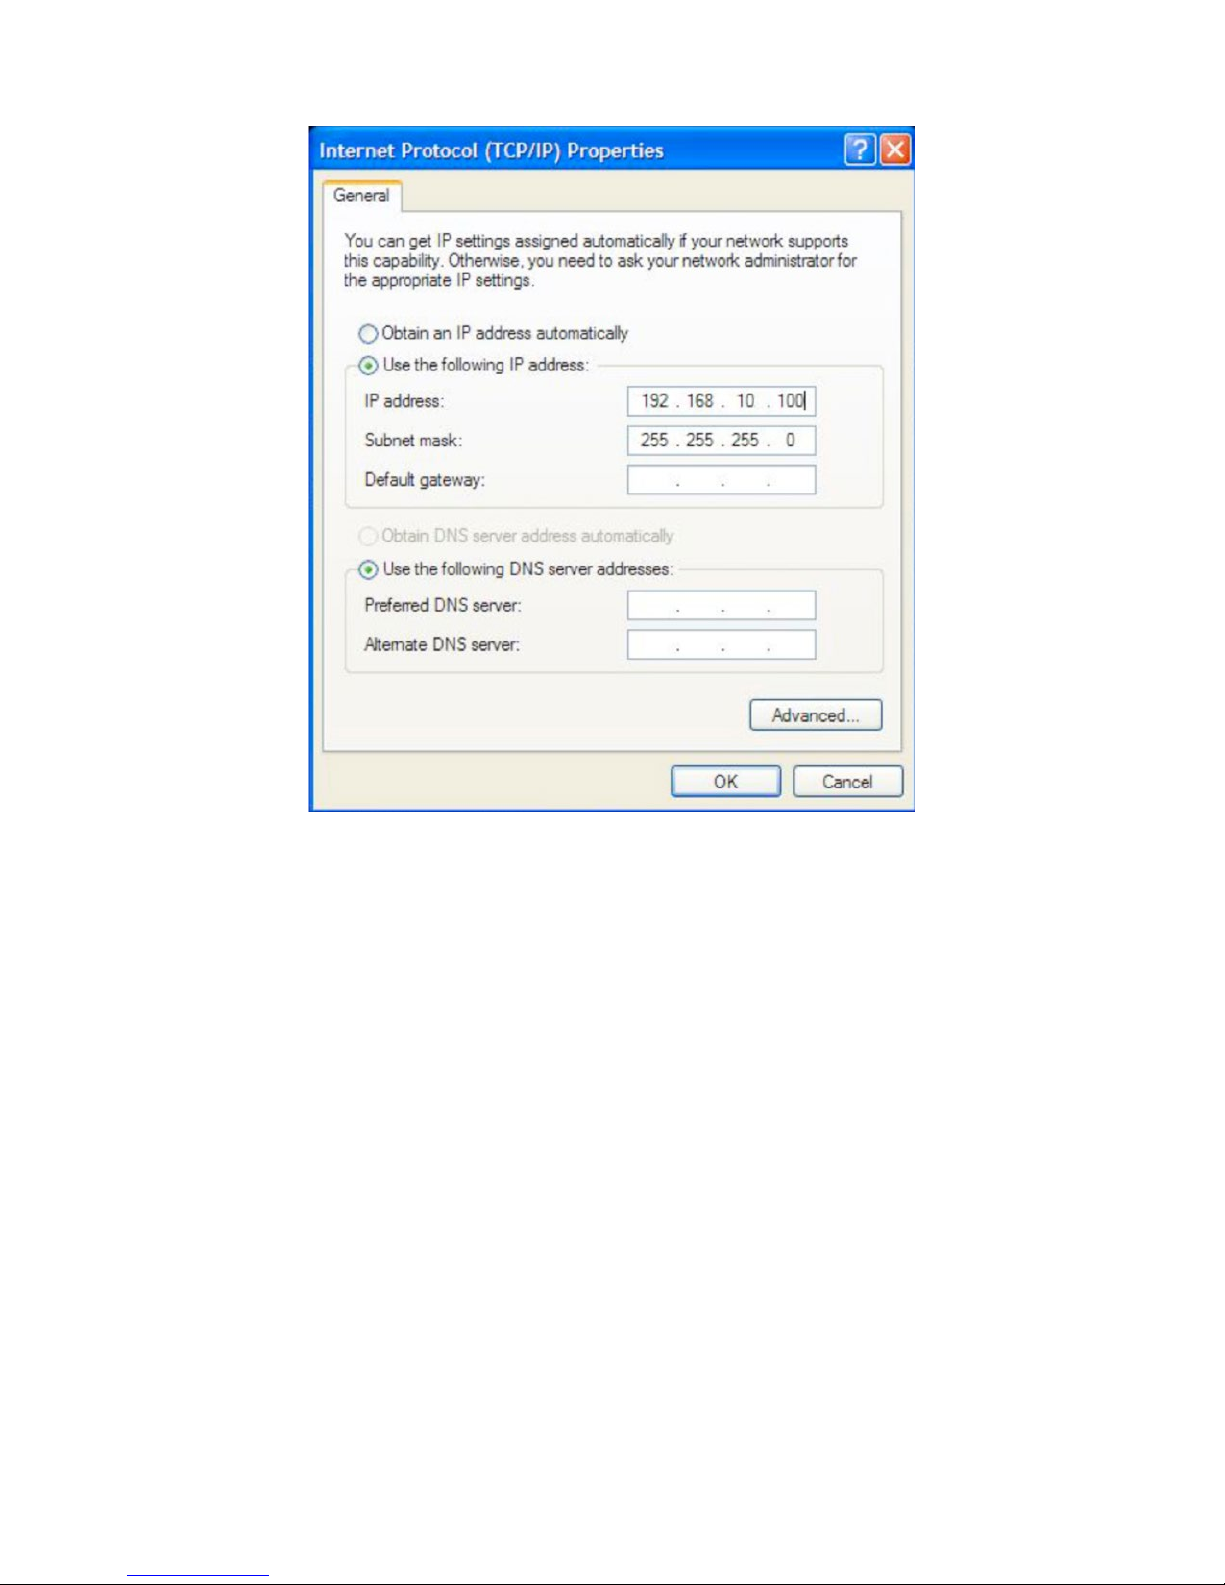
Next, manually set your IP address to 192.168.12.100, for instance, and your subnet mask to
255.255.255.0, as shown below.
INS_CNFE2DOE2_REV–
10/11/11 PAGE 7
INSTALLATION AND OPERATION MANUAL CNFE2DOE2
TECH SUPPORT: 1.888.678.9427
Click OK to finish the setting.
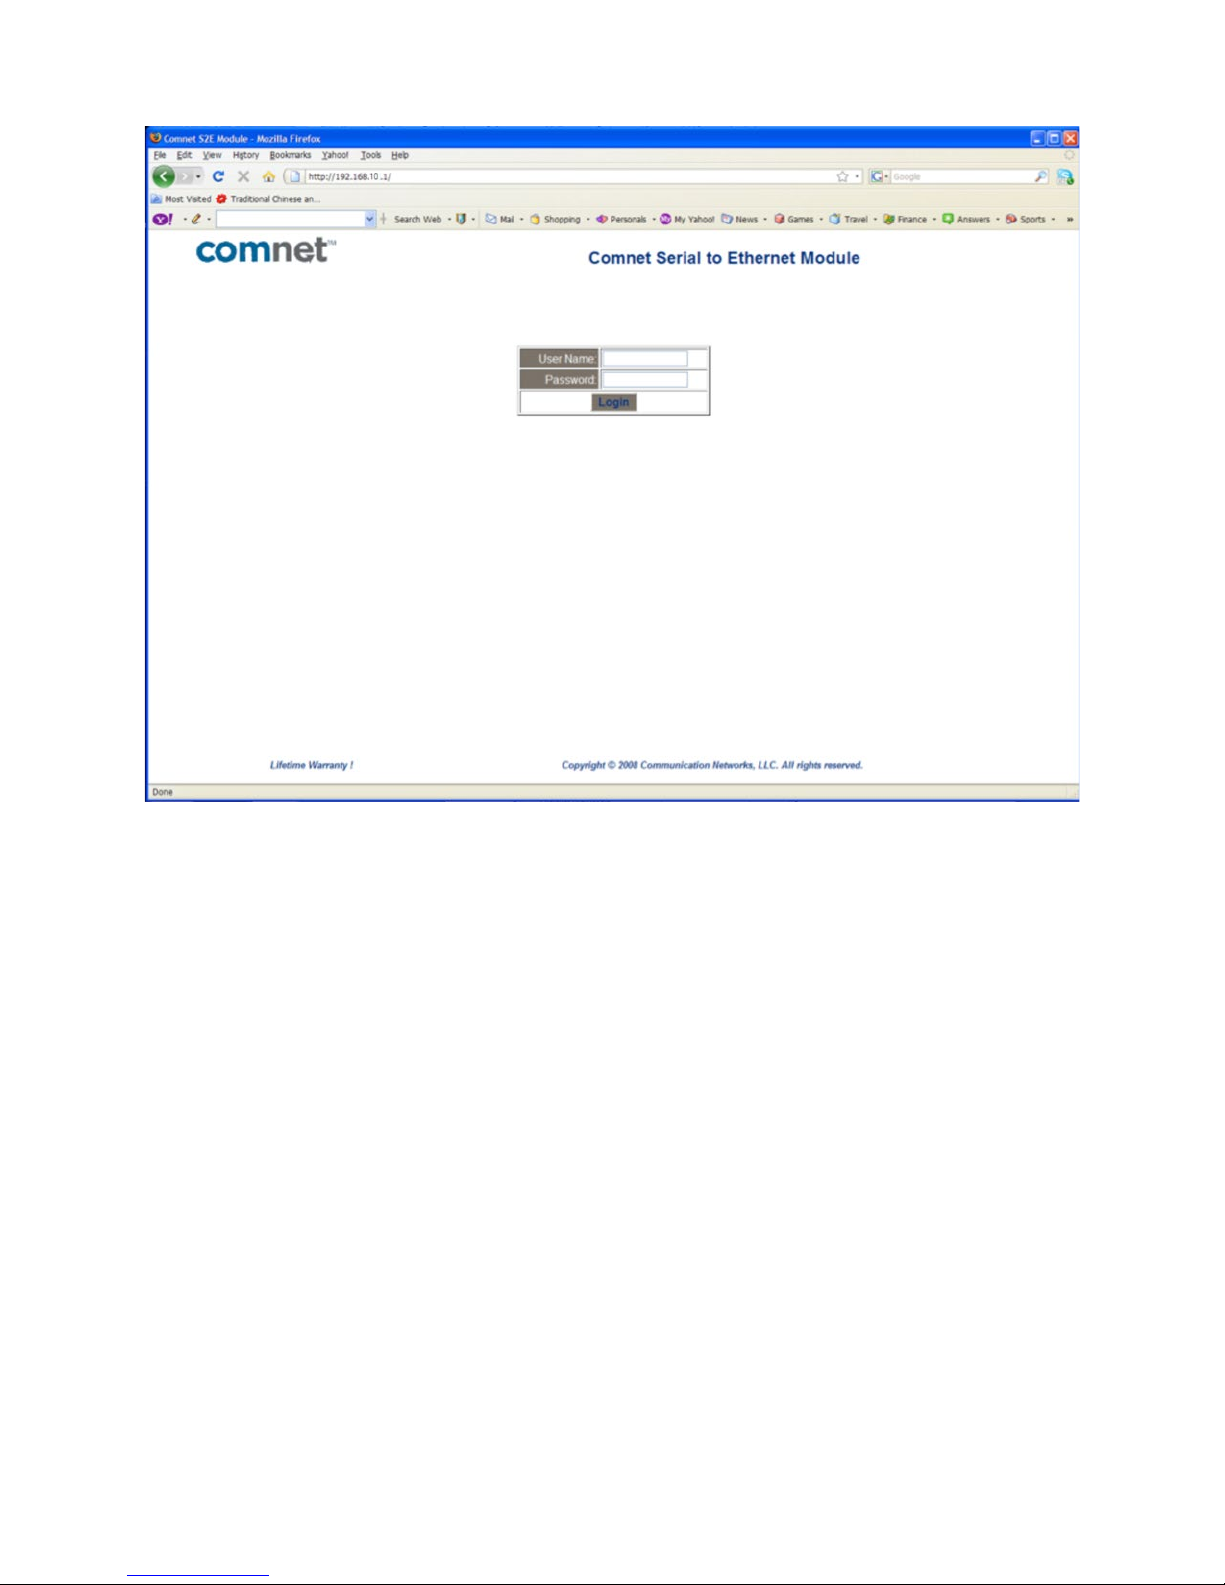
Open the browser on your PC, and type in 192.168.12 .1 and open the Terminal Server Log in Page
as shown.
The default User Name and Password are both admin
Log in to the Terminal Server Home Page as shown.
INS_CNFE2DOE2_REV–
10/11/11 PAGE 8
INSTALLATION AND OPERATION MANUAL CNFE2DOE2
TECH SUPPORT: 1.888.678.9427
Terminal Server Log in Page
INS_CNFE2DOE2_REV–
10/11/11 PAGE 9
INSTALLATION AND OPERATION MANUAL CNFE2DOE2
TECH SUPPORT: 1.888.678.9427
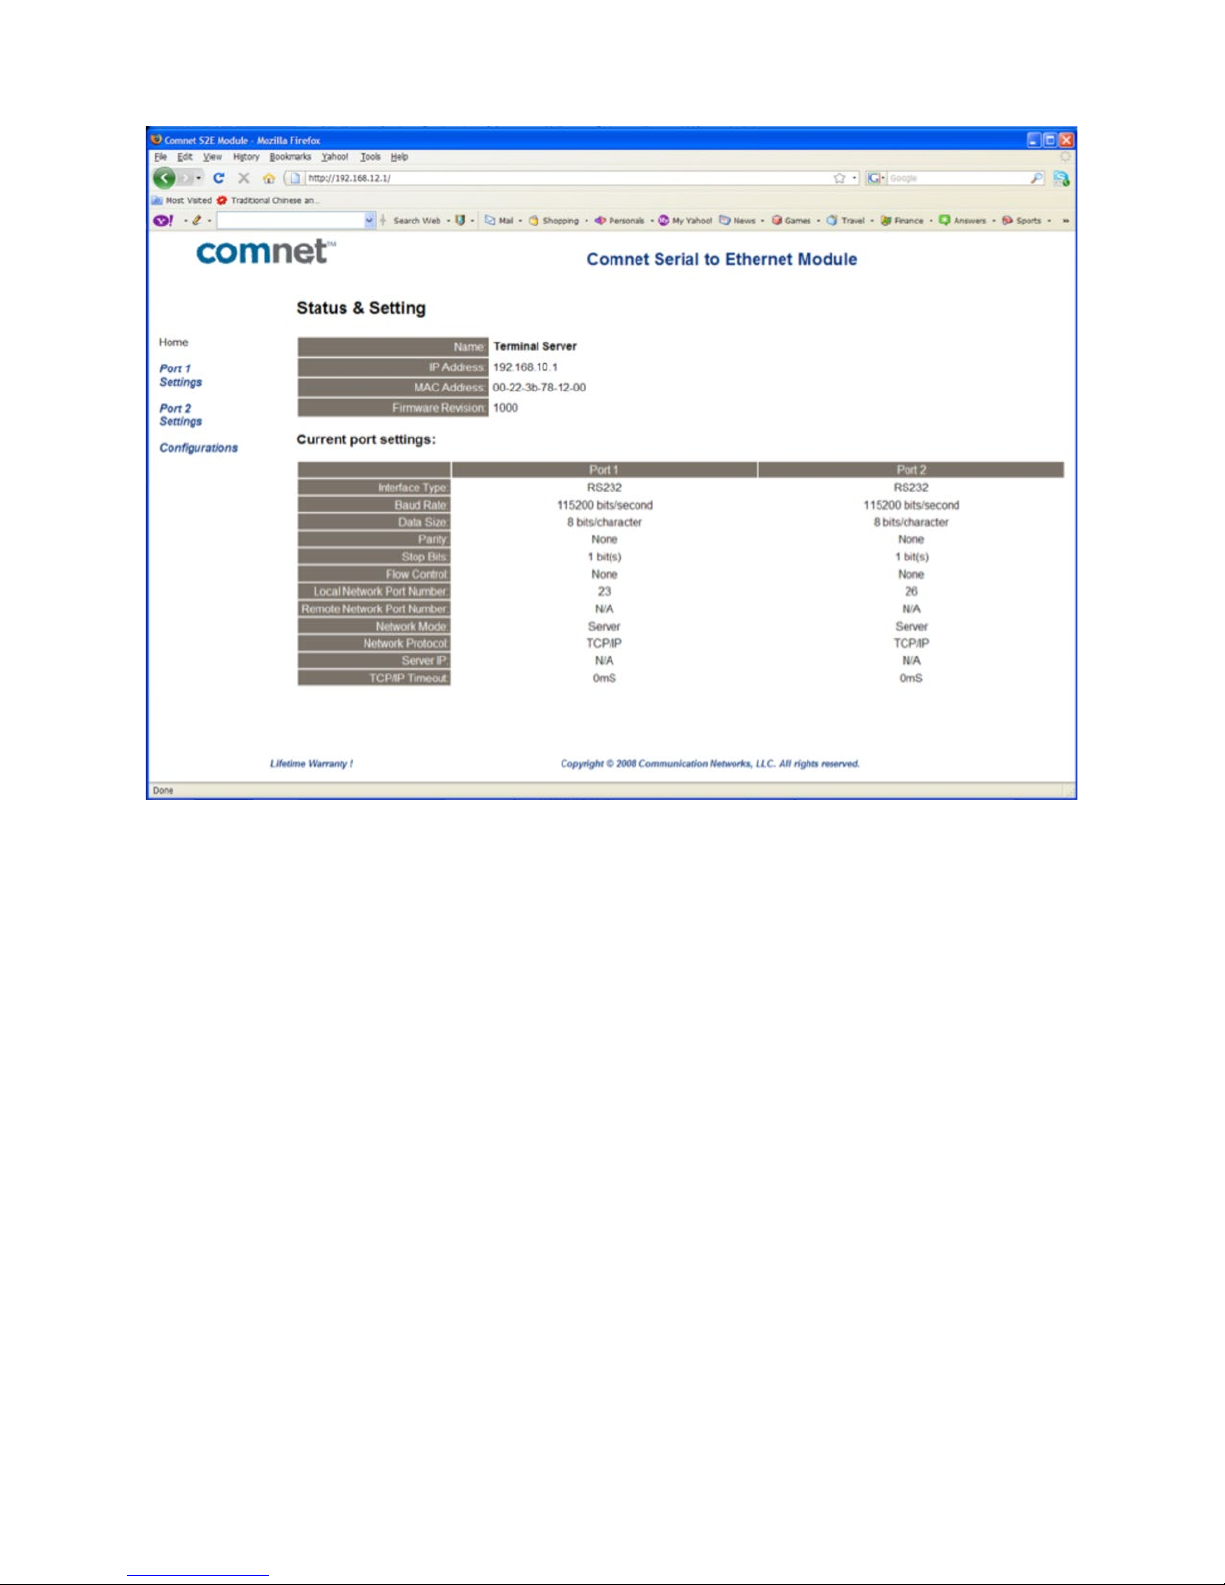
Terminal Server Home Page
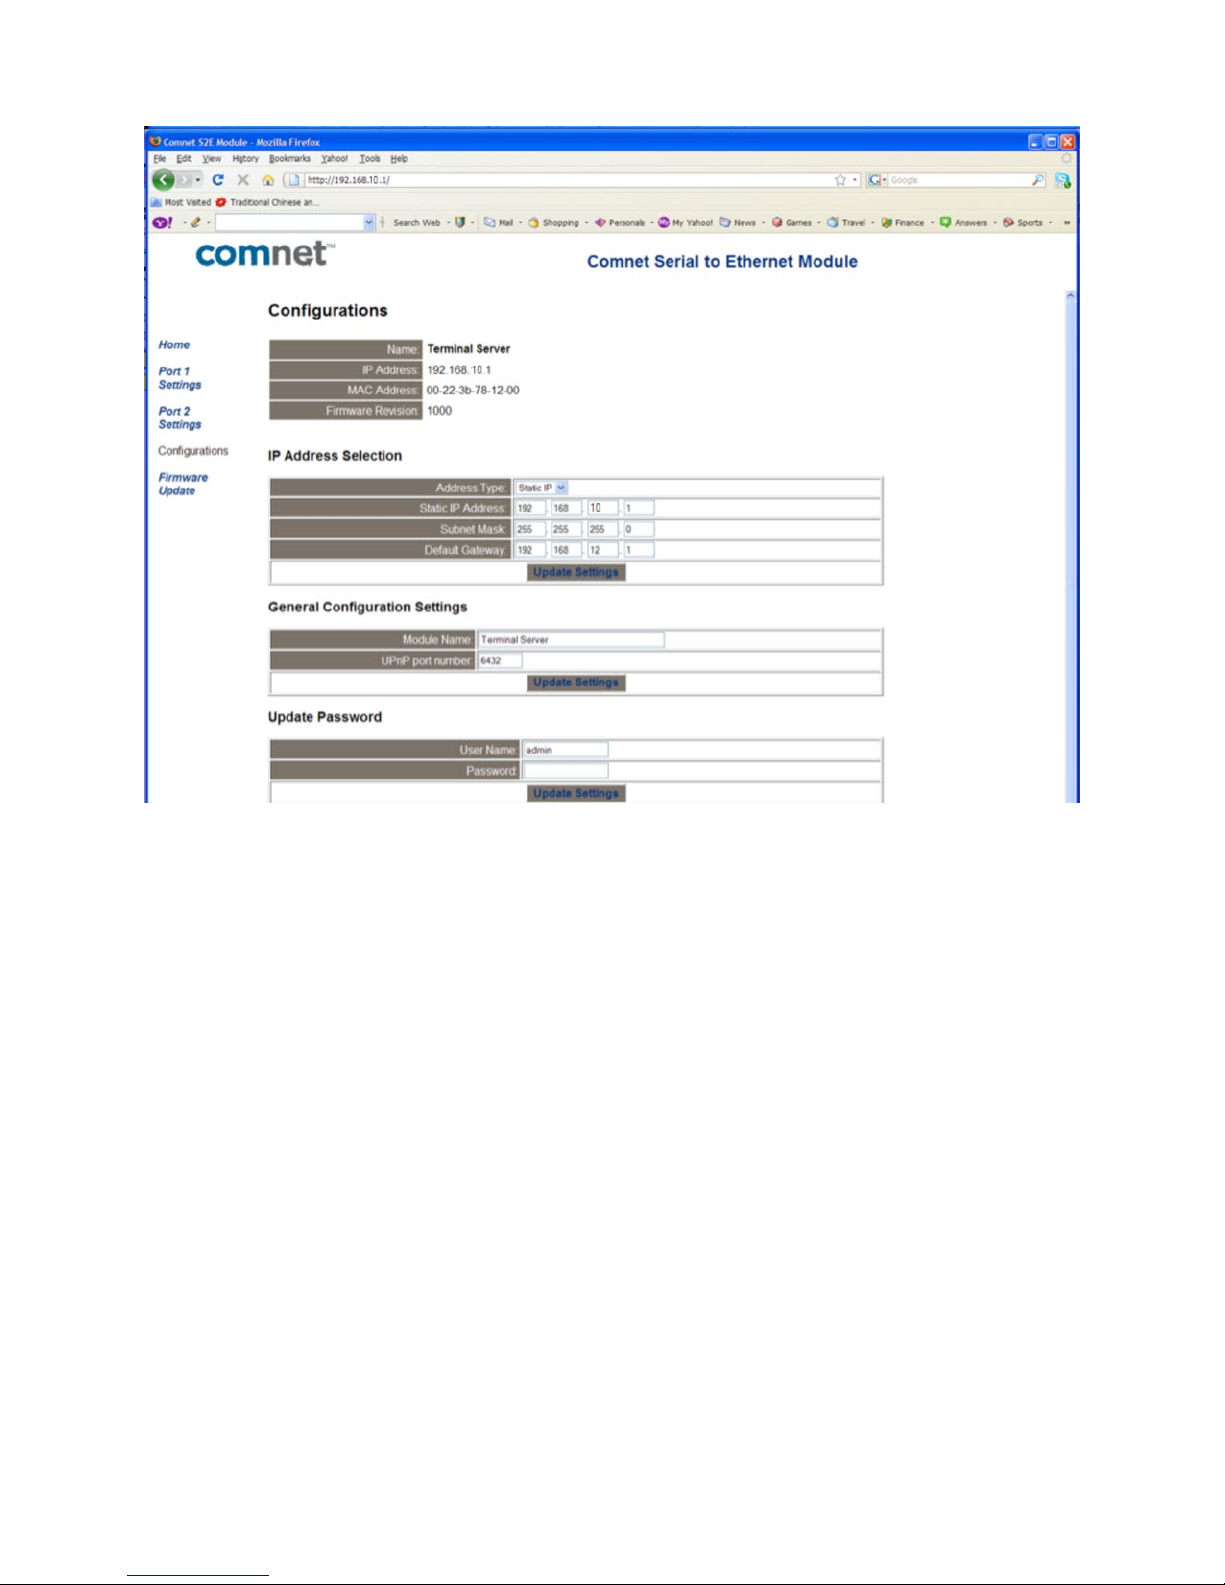
Click on Configuration on the left of the screen.
Change the IP address to an IP address with subnet appropriate for your network. In the following
examples an IP address in subnet 192 .168.12 .x x x will be used.
Configure the IP address to 192.168.12.10 as shown in the Terminal Server Configuration Page.
Click Update Settings.
INS_CNFE2DOE2_REV–
10/11/11 PAGE 10
INSTALLATION AND OPERATION MANUAL CNFE2DOE2
TECH SUPPORT: 1.888.678.9427
Terminal Server Configuration Page
Log in to the terminal server again using the new IP address.
If an IP address in a different subnet was used, be sure to change the PC’s network address to an
IP address in the appropriate subnet.
Table of contents


