8
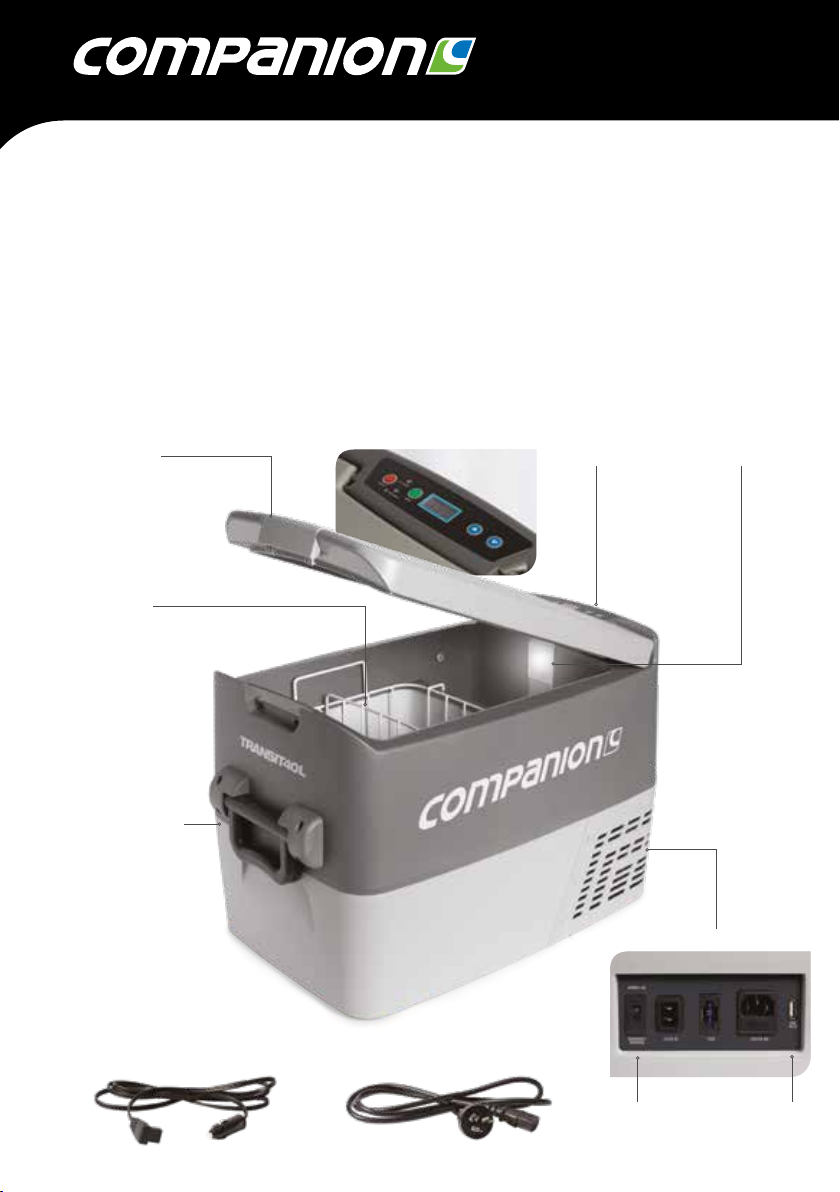
USING YOUR FRIDGE/FREEZER WITH ACCESSORIES
USING SOLAR PANELS
The power consumption and efficiency of
your Fridge/Freezer makes it ideal to be used
in conjunction with solar panels to provide
recharging of the DC supply. Solar panels will
provide charge into the battery during the
daylight hours even while the appliance is
operating.
As the output from solar panels changes
depending on the level of sunlight and intensity,
your Fridge/Freezer cannot be connected directly
to the solar panels. The appliance must
be connected to a suitable DC battery and then
the solar panels connected to the battery.
We recommend the use of the Roman range of
Portable Solar Panel Kits from for use with your
Fridge/Freezer.
You cannot connect the Fridge/Freezer directly to
the solar panel as it will not work.
Connection must be via the battery.
USING PORTABLE GENERATORS
It is important that the correct generator is used
with your Fridge/Freezer. An incorrect generator
or output may result in reduced performance or
damage to your Fridge/Freezer which may void
your appliance warranty.
If connecting directly to an AC generator, ensure
that only a digital or inverter type generator is
used. These provide a more reliable and constant
240V AC output and are specifically designed
to power electronic and other power sensitive
appliances.
We recommend the use of Kipor Digital Inverter
generators to provide AC power to your Fridge/
Freezer when in remote locations.
Most generators are fitted with a DC output - DO
NOT connect your fridge directly to the DC output
of the generator as this will result in damage to
your appliance and void warranty.
It is recommended that the appliance remains
connected to the DC power source. Then using
the DC output of the generator connect this to
the battery to recharge it. It is important that you
monitor the battery being charged, ensuring that
an oversupply of charge is not being provided to it
causing damage.
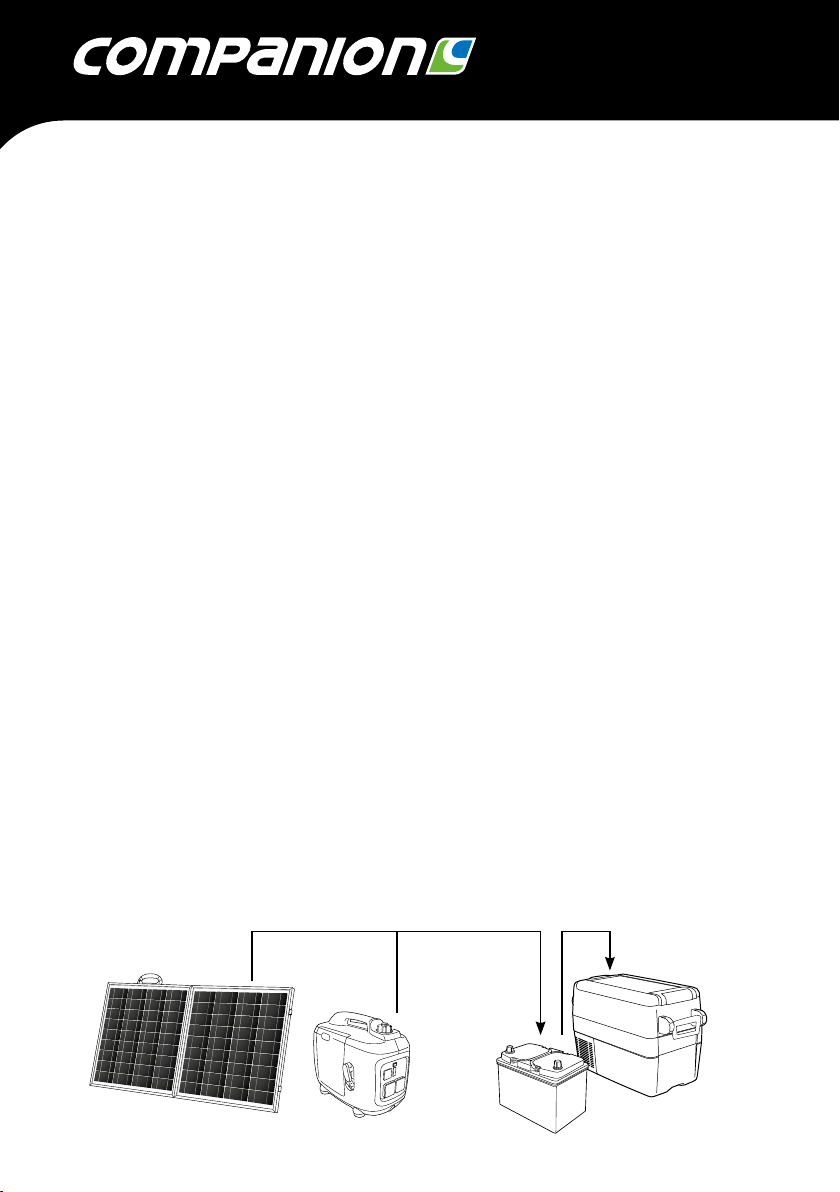
You cannot connect the Fridge/Freezer directly to
the DC output of the generator as it will not work.
Connection must be via the battery.
SOLAR PANEL GENERATOR BATTERY FRIDGE/FREEZER