INSTALLATION GUIDE
Bucket Sinks
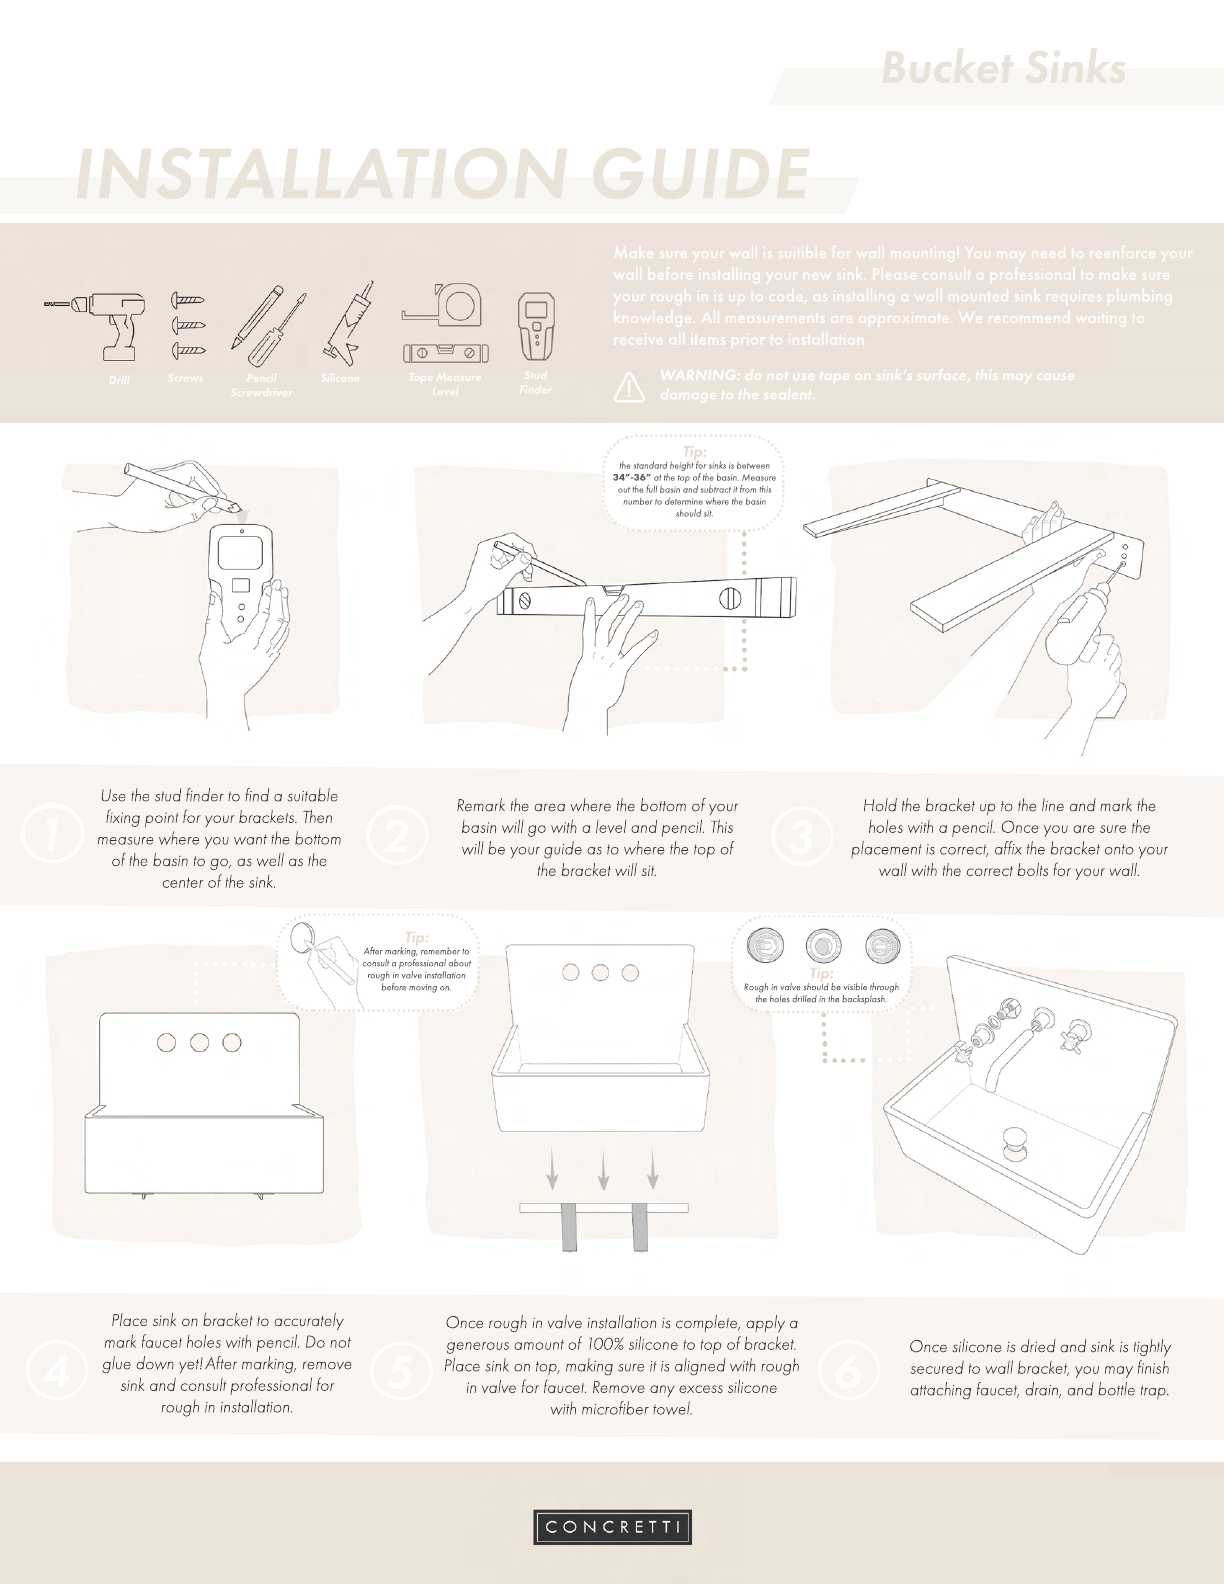
Tip:
the standard height for sinks is between
34”-36” at the top of the basin. Measure
out the full basin and subtract it from this
number to determine where the basin
should sit.
Tip:
After marking, remember to
consult a professional about
rough in valve installation
before moving on.
Tip:
Rough in valve should be visible through
the holes drilled in the backsplash.
Drill Screws Pencil
Screwdriver
Silicone Tape Measure
Level
Stud
Finder
123
64 5
Use the stud finder to find a suitable
fixing point for your brackets. Then
measure where you want the bottom
of the basin to go, as well as the
center of the sink.
Remark the area where the bottom of your
basin will go with a level and pencil. This
will be your guide as to where the top of
the bracket will sit.
Hold the bracket up to the line and mark the
holes with a pencil. Once you are sure the
placement is correct, affix the bracket onto your
wall with the correct bolts for your wall.
Place sink on bracket to accurately
mark faucet holes with pencil. Do not
glue down yet!
After marking, remove
sink and consult professional for
rough in installation.
Once rough in valve installation is complete, apply a
generous amount of 100% silicone to top of bracket.
Place sink on top, making sure it is aligned with rough
in valve for faucet. Remove any excess silicone
with microfiber towel.
Once silicone is dried and sink is tightly
secured to wall bracket, you may finish
attaching faucet, drain, and bottle trap.
Make sure your wall is suitible for wall mounting! You may need to reenforce your
wall before installing your new sink. Please consult a professional to make sure
your rough in is up to code, as installing a wall mounted sink requires plumbing
knowledge. All measurements are approximate. We recommend waiting to
receive all items prior to installation.
WARNING: do not use tape on sink’s surface, this may cause
damage to the sealent.


