www.ellumiere.co.uk FOR SALES & TECHNICAL ASSISTANCE CALL 0345 450 9000
AUTOMATIC LIGHT SENSOR - HOW TO OVERRIDE & PROGRAM
FOR 4 HOUR TIMER
Press the button so the green light comes on and the 4-hour timer begins. Your Automatic Light
Sensor will start to work at sundown and will stop after 4 hours. During this process, if the Automatic
Light Sensor is exposed to strong light e.g. Torch, flashlight or sunlight, it will reset the 4-hour cycle
and start again.
FOR 6 HOUR TIMER
Press the button twice, so the blue light comes on and the 6 hour timer begins Your Automatic Light
Sensor will start to work at sundown and will stop after 6 hours. During this process, if the Automatic
Light Sensor is exposed to strong light e.g. Torch, flashlight or sunlight, it will reset the 6-hour cycle
and start again. To reset the Automatic Light Sensor back to default dusk til dawn setting: Press the
button three times.
NOTE:
The Automatic Light Sensor will stop working immediately if it is exposed to strong light.
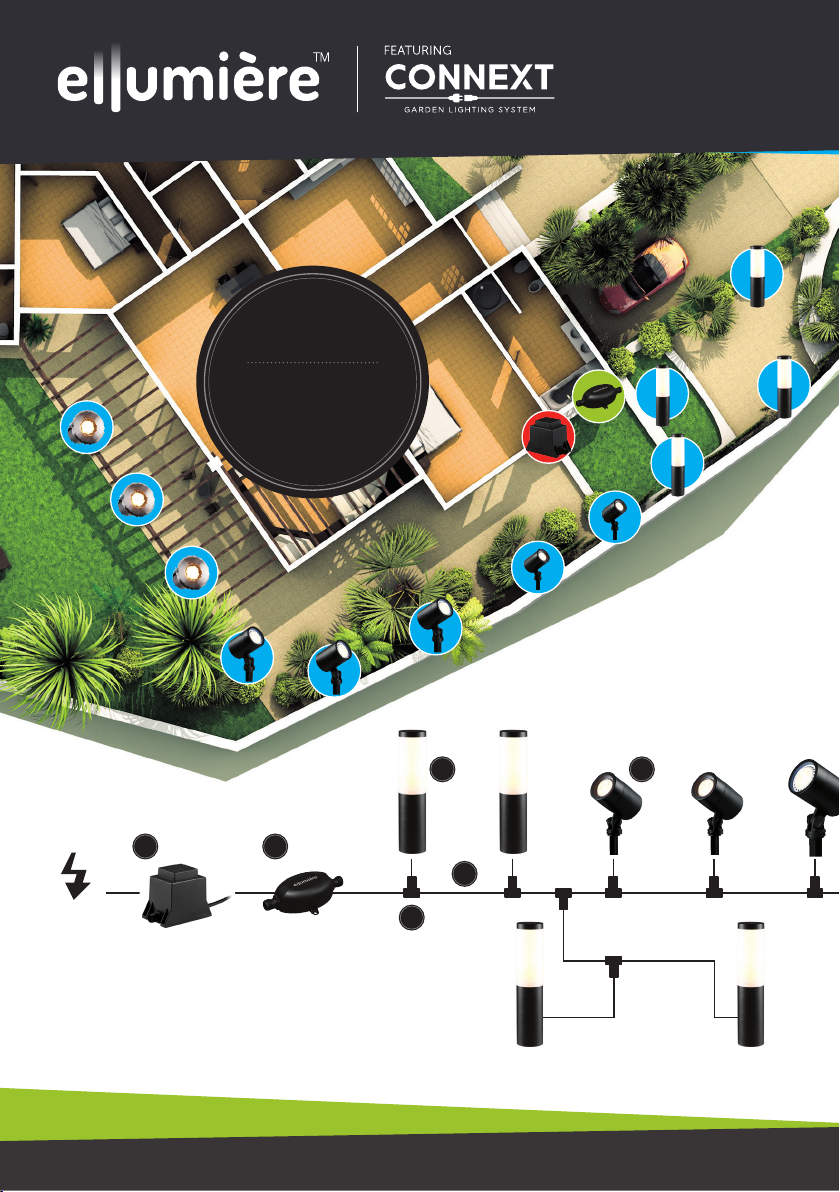
INSTALLATION
• If required, have a qualified electrician install a
weather-proof power point near to the garden,
within reach of the transformer.
• Mount the transformer in a protected location
making sure that it can’t be submerged or
overheat.
• For garden installation, slide the garden spike
into the circular recess on the underside of the
light body. Holding the light body firmly, push
the light with attached spike into the desired
location taking care not to penetrate any
hidden services. Alternatively, you can use the
supplied standard base, which attaches in the
same way.
• Adjust the light until facing in the general
direction of the feature you wish to illuminate.
• Once in the correct position lock the light by
tightening the thumb screws, taking care not
to over tighten.
• We recommend final adjustments be carried
out at night.
• For single light installations plug the end of
the extension cable into the transformer and
plug the light into the other end of the cable.
Tighten all the locking collars firmly. The
transformer can now be turned on.
• Multiple lights can be connected together
using the 2 Pin extension cables and multiple
T-Pieces.
• In the case of the small deck lights(a), use
a 32mm diameter hole saw, with a minimum
depth of 65mm. For the larger model (b0 use
a 45mm diameter hole saw, with a minimum
depth of 75mm.
20.00
65.00
32.00
75.00
48.00
20.00
(a)
(b)