Continuum Maestro User manual

Continuum®Pedicure Spas
OWNER’S MANUAL
MAESTRO
®
PEDICURE SPA
Continuum Footspas, LLC P.O. Box 363 Brookfield, WI 53008
Toll Free: 1.877.255.3030 Telephone: 262.754.4900 Fax: 262.754.4901 MyContinuumPedicure.com

Continuum Footspas
Limited Warranty
Continuum Footspas has designed and manufactured their pedicure chairs to the highest standards. Accordingly, Continuum Footspas express-
ly warrants their pedicure chairs as follows:
To the original owner of our pedicure chairs, Continuum Footspas may repair or replace, at its option, any pedicure chairs found to be defective
in material or workmanship upon inspection by a factory authorized representative of Continuum Footspas.
This limited warranty covers the following:
This Limited Warranty covers parts and components. It also covers all Continuum Models for a period of one (1) year from date of shipment
except as noted below:
●
Maestro Model: Two (2) years from Date Of Shipment (DOS).
●
Solid Surface Echo Basin: Five (5) years from DOS.
●
Maestro Solid Surface Basin: Five (5) years from DOS.
●
Vibra-Massage + Heat System: Two (2) years from DOS.
●
LE Chair Only: Two (2) years from DOS.
●
Replacement Parts (Non-Warranted): Ninety (90) days from DOS.
●
Fiberglass Basin: Two (2) years from DOS.
●
Accessories: Ninety (90) days from DOS.
●
Shipping Costs Associated with Warranty Parts: One (1) year from date of shipment. Continuum will cover normal
domestic shipping costs. Expedited and/or International shipping will incur additional charges .
●
Labor - All Models Except as Noted below: One (1) year from the date of shipment. Continuum Footspas will cover reasonable labor costs
associated with the installation of replacement parts found to be defective in material or workmanship upon inspection by a factory authorized
representative of Continuum Footspas. NOTE EXCEPTIONS BELOW. No labor costs or replacement parts will be covered under this Limited
Warranty, if at the sole discretion of Continuum Footspas, it is determined a failure was caused by negligence, accident or improper use, improper
installation or lack of proper maintenance as outlined in the Ownerʼs Manual.
The exchange of a pedicure chair is limited to supplying a replacement pedicure chair of equal style. Owner is responsible for all labor and
shipping costs necessary to replace a pedicure chair.
NO CONSEQUENTIAL, INCIDENTAL, CONTINGENT, INDIRECT, SPECIAL OR OTHER DAMAGES WILL BE ALLOWED WHATSOEVER. This
limited warranty is null and void if the pedicure chair is removed from itʼs original installation, or is not installed in accordance with specifications
of Continuum Footspas, or national, state or local codes, regulations and ordinances. Furthermore, this Limited Warranty is null and void if the
pedicure chair is subjected to improper installation or maintenance, negligence, improper cleaning or any other circumstances beyond Continuum
Footspas control. In order for your Limited Warranty to be valid, your pedicure chair must be installed by a licensed professional in accordance
with Continuum Footspas installation instructions.
EXCLUDED FROM LIMITED WARRANTY:
1) Unauthorized repairs.
2) Damage due to freight, accident, natural disaster and/or abuse.
3) Staining, fading or discolorization of the seat, seat back, armrests, leg supports and footrests.
4) Damage or malfunctions due to improper installation including but not limited to, failure
to comply with all national, state and local plumbing, electrical and building codes.
5) Fading, discoloration or staining of any part due to improper water additives, hard water or harmful
cleaning agents or chemicals.
6) Damage to drain pump due to obstruction in drain hose and/or debris in pump impeller housing.
Parts and/or circumstances for which Labor is NOT COVERED - Parts Noted Below Are Simple to Replace and DO NOT Require a Service
Technician.
●
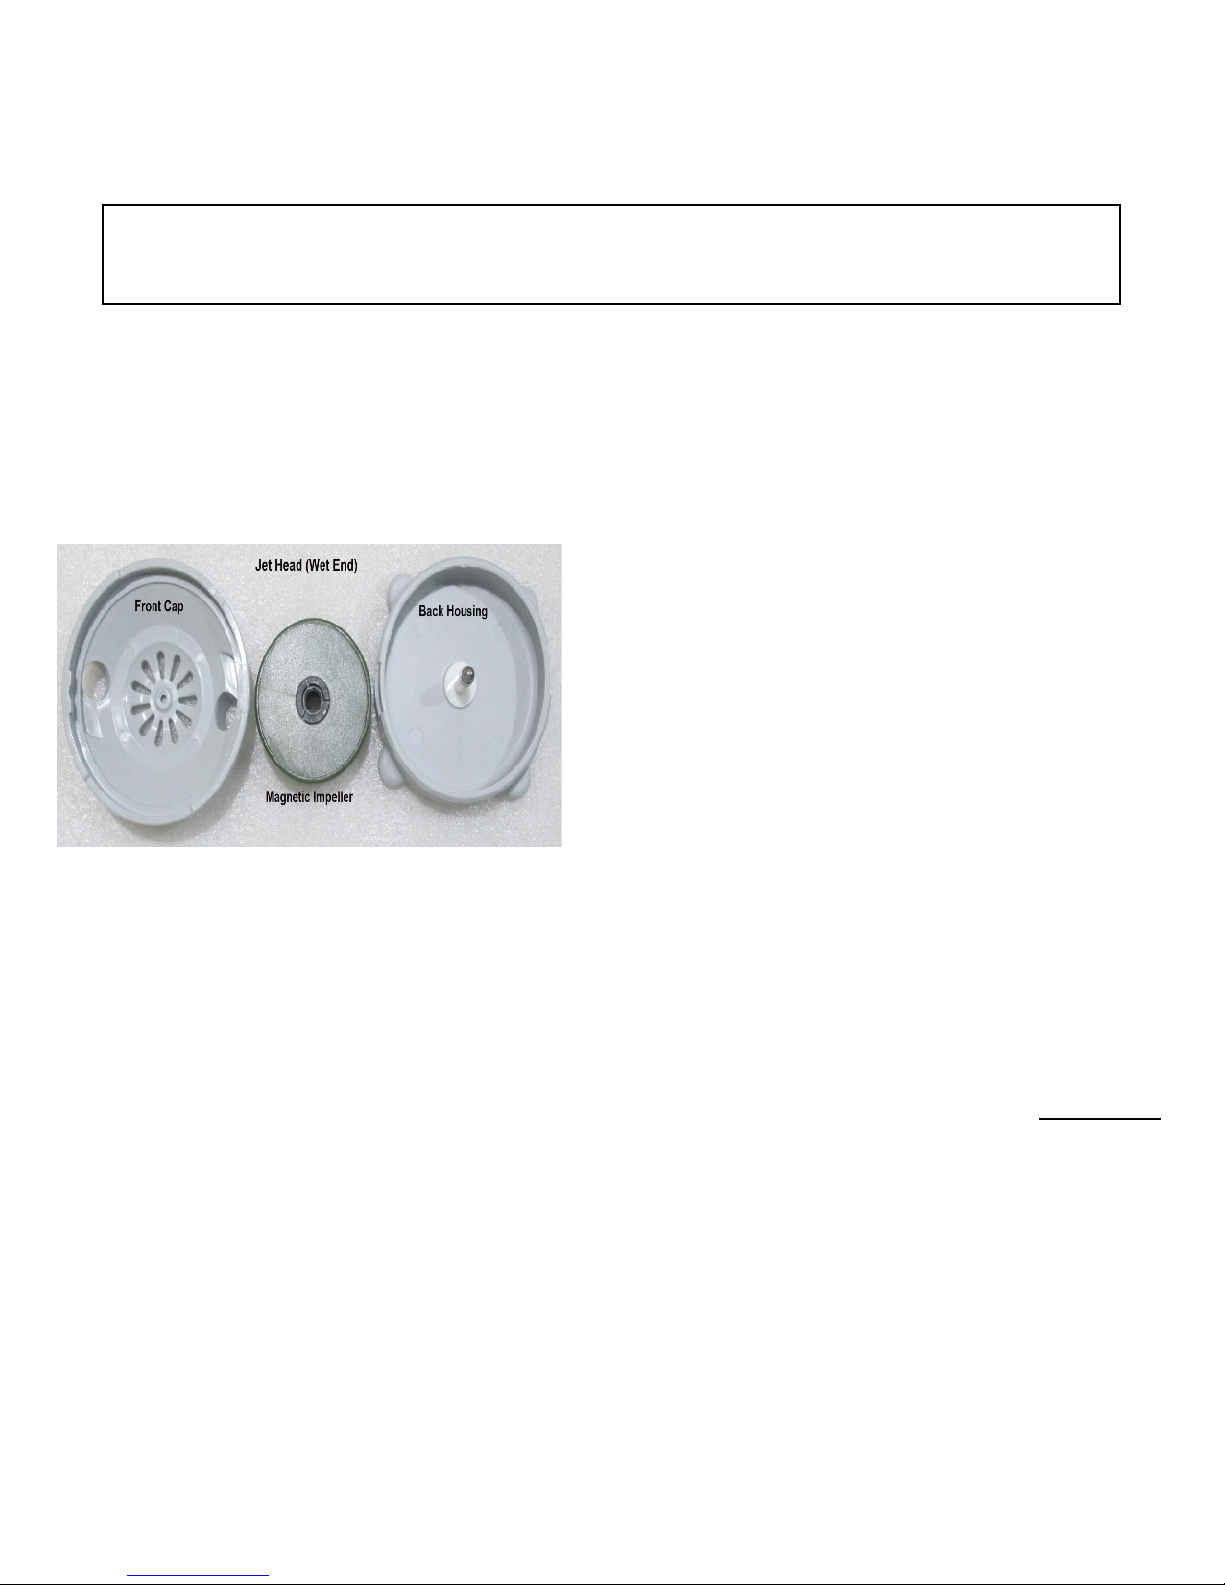
Jet Cover and/or Impeller
●
Faucet Cartridge and/or Filler-Sprayer
●
Handheld Control Wands
●
Footrest/Leg Supports
●
Roller Massage or Vibra-Massage + Heat System
●
Manicure Trays
●
On/Off Air Actuated Button
●
Any LED Light
●
Replacement Upholstery
●
Pedicute Model
●
Any International Shipments including but not limited to Canada and Mexico
●
Replacement of black plastic parts
For service or information regarding this limited warranty, please contact.
Continuum Footspas, LLC ● P.O. Box 363 Brookfield, WI 53008
Toll Free: 1 877 255 3030 ● Telephone: 262 754 4900 ●
Service: 262 777 2248 ● Fax: 262 754 4901 ● MyContinuumPedicure.com
This Limited Warranty is to the original owner and is not transferable. The original owner agrees by using Continuum pedicure chairs the obliga-
tion of Continuum Footspas shall not extend to indirect or contingent damages or injury. Furthermore, the obligations of Continuum Footspas
are limited to those set forth herein. This limited warranty is the exclusive remedy and is in lieu of all other warranties, express or limited, includ-
ing, but not limited to, any implied warranty of fitness or merchantability for a particular purpose. No distributor, dealer or other person has the
right or authority to bind Continuum Footspas to changes to this limited warranty. Consequently, Continuum Footspas is not responsible for
such warranties or representations.
ADDITIONAL PROVISIONS
●
Any assistance Continuum Footspas provides to the original owner above and beyond the scope
of this limited warranty does not constitute a waiver of such terms, limitations or exclusions. Furthermore,
such assistance does not extend this Limited Warranty.
●
Continuum Footspas shall not be liable for any other obligations or liabilities as a result of breach
of contract of warranty, negligence or strict liability with regards to their pedicure chairs.
●
This Limited Warranty applies only to pedicure chairs installed in any one of the fifty (50) States of the United States,
the District of Columbia or provinces of Canada.
© 2017, Continuum Footspas, LLC August, 2017

Introduction
The entire team at Continuum® Footspas sincerely thanks you for choosing one of our pedicure chairs.
We fully realize you had a choice and we look forward to making absolutely sure you made the right
choice. A tremendous amount of time and energy has gone into designing and manufacturing not only
a beautiful looking pedicure chair, but a pedicure chair that will perform trouble free for many years.
If you have any questions, concerns or problems, please feel free to call us at 1 877 255 3030.
Very Important Safety Instructions
© 2017, Continuum Footspas, LLC Maestro - August, 2017
Please take a moment to read this entire Owners Manual before installation and use.
SAVE THESE INSTRUCTIONS
Pedicure Chairs from
Continuum
®
Footspas
If you have any questions, concerns or problems, please feel free to call us at 1 877 255 3030.
Very Important Safety Instructions
●
Maximum weight capacity of your pedicure chair is 300 pounds.
●
Never bring or operate any electrical device in or near your pedicure chair.
●
Always enter and exit your pedicure chair very slowly and carefully.
●
NEVER STAND IN THE BASIN.
●
Avoid excessive water temperatures. This can be dangerous and water
temperature must be checked before each use.
●
Maximum operational water temperature should never exceed 105o F (41o C)
●
Maximum supply water temperature should never exceed 150o F (65o C)
Always check state or local codes to verify maximum supply temperatures.

© 2017, Continuum Footspas, LLC Maestro - August, 2017
Very Important Requirements
Every Continuum pedicure chair must be installed by a licensed plumber and licensed electrician.
Installation must comply with all national, state and local building codes and/or regulations. Your pedi-
cure chair will not operate properly unless it has sufficient water pressure and temperature, proper
drainage and adequate electrical power.
ANY INSPECTIONS OR APPROVALS ARE THE SOLE RESPONSIBILITY OF THE PURCHASER.
PRIOR TO INSTALLATION, ONE SHOULD CONTACT THEIR LOCAL BUILDING INSPECTOR TO
MAKE SURE ALL LOCAL CODES ARE COMPLIED WITH.
WARNING!!!
Possible Health Risks
Clients whose feet or legs are inflamed for any reason or clients who have open wounds should never
be allowed to use a pedicure chair. If there is any sign of fungal infection, fracture, swelling or persist-
ent pain, clients should consult their physician before using a pedicure chair. Diabetics should always
consult their physician prior to receiving a pedicure.
If your client experiences any pain or discomfort while using
any Continuum pedicure chair, discontinue use immediately.
SAVE THESE INSTRUCTIONS

© 2017, Continuum Footspas, LLC Maestro - August, 2017
Important Utility and
Installation Requirements and
Instructions
Electrical Service
A separate, 120V, 60HZ, 15 amp GFCI protected grounded circuit MUST be used to supply power to
each pedicure chair. Failure to do so renders the Limited Warranty null and void.
NOTE: IF INSTALLED IN CANADA THIS UNIT MUST BE IN ACCORDANCE WITH
THE CANADIAN ELECTRICAL CODE, PART 1.
Grounding and GFCI Requirements
WARNING - When using electrical products, basic precautions should always be followed, includ-
ing the following:
1. DANGER: RISK OF ELECTRIC SHOCK. Connect ONLY to a circuit protected by a ground-fault
circuit-interrupter (GFCI).
2. GROUNDING IS REQUIRED. Every Continuum pedicure chair MUST be installed by a qualified
service representative and MUST be properly grounded. Also, the designated outlet MUST be
grounded.
DO NOT IN ANY WAY MODIFY THE PLUG PROVIDED ON YOUR PEDICURE CHAIR.
NEVER USE A NON-GROUNDED ADAPTER WITH ANY CONTINUUM PEDICURE CHAIR.
WARNING:
TO REDUCE THE RISK OF BURNS, ELECTRIC SHOCK, FIRE OR INJURY TO PERSONS:
●Any servicing of your pedicure chair must be performed by authorized
service personnel only.
●DO NOT operate your pedicure chair if it has a damaged cord or plug.
●Keep cord away from heated surfaces.
●DO NOT use outdoors.
Hot/Cold Water Supply and Drain
●All plumbing connections must conform to all national, state and local codes.
●Shut-off valves are strongly recommended per plumbing codes.
●Maximum water temperature must not exceed 105o F (41o C)
●Maximum SUPPLY water temperature must not exceed 150o F (65o C)
●Hot/Cold water supply and drain connections are located in the back of pedicure chair.
●When utilizing optional factory installed drain pump, in-line backflow prevention is
provided.
●If pedicure chair is plumbed utilizing drain pump and drain hose; the drain hose
connecting the pedicure chair to the wall connection (drain) must be 3/4” ID.
●Size of supplied plumbing fittings:
Hot/Cold water supply: 1/2” NPT (male)
Drain Pump: 3/4” NPT (male)
SAVE THESE INSTRUCTIONS

© 2017, Continuum Footspas, LLC Maestro - August, 2017
Instructions Pertaining to a
Risk of Fire, Electric Shock or Injury to Persons
Important Safety Instructions
WARNING - When using Continuum pedicure chairs, basic precautions MUST be followed, includ-
ing the following:
1. READ AND FOLLOW ALL INSTRUCTIONS.
2. WARNING: RISK OF ACCIDENTAL INJURY OR DROWNING. CHILDREN SHOULD NOT USE
PEDICURE CHAIRS WITHOUT ADULT SUPERVISION.
3. Use your pedicure chair only for its intended use as described in this manual.
Do not use attachments not recommended by the manufacturer.
4. WARNING: RISK OF ELECTRIC SHOCK. DO NOT PERMIT ELECTRIC APPLIANCES (SUCH
AS A HAIR DRYER, LAMP, TELEPHONE, RADIO, OR TELEVISION) WITHIN 5 FEET (1.5 M)
OF YOUR PEDICURE CHAIR.
5. Do not operate your pedicure chair without the jet covers attached to the jet housing.
6. Any Continuum pedicure chair must be connected only to a supply circuit that is protected by
a ground fault circuit-interrupter (GFCI). Such a GFCI should be provided by the installer
and should be tested on a routine basis. To test the GFCI, push the test button. The GFCI
should interrupt power. Push the reset button. Power should be restored. If the GFCI fails to
operate in this manner, the GFCI is defective. If the GFCI interrupts power to the pedicure chair
without the test button being pushed, a ground current is flowing, indicating the possibility of
an electric shock. Do not use your pedicure chair. Disconnect the pedicure chair and have the
problem corrected by a qualified service representative before using.
7. GROUNDING IS REQUIRED. Your pedicure chair MUST be installed by a qualified service
representative and MUST be properly grounded. ALSO, THE DESIGNATED OUTLET MUST BE
GROUNDED. DO NOT IN ANY WAY MODIFY THE PLUG PROVIDED ON YOUR PEDICURE
CHAIR. NO ADAPTER SHOULD BE USED WITH YOUR PEDICURE CHAIR.
8. SAVE THESE INSTRUCTIONS.
WARNING
Any service that may be required MUST be performed by a qualified service representative.

© 2017, Continuum Footspas, LLC Maestro - August, 2017
Unpacking
The Maestro Pedicure Spa requires very little assembly.
Remove and discard all packing and lifting materials.
Installation Instructions
Install to Permit Access for Servicing
In order to ensure access after installation, please refer to installation drawings available at
MyContinuumPedicure.com
Each pedicure chair MUST be anchored to the floor. This is especially critical if pedicure chair is grav-
ity drained with or without air gap. There are two (2) black mounting brackets supplied with each pedi-
cure chair for this purpose. Your warranty may be null and void if pedicure chair is not properly
secured to floor.
Installation Instructions:
Step 1
Utilizing a level, carefully adjust the six (6) leveling feet. It is extremely important that your pedicure
chair is level. (Note: All leveling feet have been factory adjusted prior to shipment. In most cases no
further adjustment should be necessary). The entire pedicure chair may be raised or lowered slightly to
ensure the technicianʼs chair touches the front stainless steel guard and not the wood or Formica®.
Step 2
Mounting brackets are to be used on only two (2) of the four (4) main frame leveling feet. Slotted por-
tion of the mounting bracket fits between frame and the leveling foot (one in front, one in back, opposite
of each other). The flat portion with holes should be positioned to the floor. Use appropriate hardware
to secure to the floor (not supplied).
Location and Support
The floor structure must be level and capable of supporting the occupied pedicure chair. Please note
your pedicure chair must be installed at least eleven (11) inches away from a back wall to
ensure proper clearance for reclining seat back. Refer to installation drawings at
www.MyContinuumPedicure.com
PLEASE NOTE:
Pedicure chairs assembled and shipped during Wisconsin winter months are tested using a pink RV
anti-freeze solution. It is perfectly normal for a small amount of this pink fluid to remain within the
plumbing system. To eliminate any traces of the RV anti-freeze, simply fill and operate your pedicure
chair several times before actual use.
EVERY CONTINUUM PEDICURE CHAIR MUST BE INSTALLED BY A LICENSED PLUMBER AND A LICENSED ELECTRICIAN.
INSTALLATION MUST COMPLY WITH ALL NATIONAL, STATE AND LOCAL BUILDING CODES AND/OR REGULATIONS. FAILURE
TO COMPLY WITH THESE CODES AND/OR REGULATIONS WILL RESULT IN THE LIMITED WARRANTY BEING NULL AND VOID.
Extremely Important

© 2017, Continuum Footspas, LLC Maestro - August, 2017
User Maintenance Instructions
Cleaning and Disinfecting
IMPORTANT
YOU ARE REQUIRED TO CHECK WITH YOUR STATE BOARD FOR MANDATORY CLEANING
AND DISINFECTING REQUIREMENTS AND PROCEDURES.
The following procedures are important guidelines that will help in keeping
your pedicure chair clean and trouble free for years. It is extremely important
to clean and disinfect each and every pedicure chair after each pedicure and
after the last pedicure of the day.
A SPECIAL NOTE PERTAINING TO BLEACH
While bleach seems to be used extensively for cleaning and disinfecting of
pedicure chair basins, it is NOT recommended nor is it effective. Moreover,
excessive use of bleach may greatly reduce the longevity of your pedicure
chair internal components (i.e. pumps, jet, waste assembly, etc.). Excessive
and repeated use of bleach may also void your warranty. As always, you are
required to check with your state board for mandatory cleaning and
disinfecting requirements and procedures.
Cleaning and Disinfecting Products
Your state board requires disinfecting of your pedicure basin. Continuum
recommends “Splish Splash One-Step Disinfectant.” The following page
outlines the benefits of Splish Splash together with contact
information.
While other EPA registered products are available for maintaining pedicure
tubs, we have found Splish Splash to be the most effective, multi-purpose
and economical product on the market.


© 2017, Continuum Footspas, LLC Maestro - August, 2017
End of Each Day Cleaning Procedures
The Maestro utilizes two pipeless “magnetic” jets. The removable wet-end assembly MUST be placed
onto the motor housing in the correct position or the jet may be damaged. The motor housing and the
wet end housing must fit in the proper groove. If the wet end is not positioned correctly, damage to the
jet may occur due to misalignment. This will NOT be covered by any Continuum warranty. Never turn
the jet on without adequate water in the basin. There must be at least one (1) inch of water above the
motor housing.
1.
Drain all water from the basin.
2. Remove the Wet End consisting of the cover, impeller, and housing from the jet. No tools are required. Simply pull the
wet end away from the jet. Make sure motor has completely stopped. Twist the cover from the housing to expose the
3. Clean all 3 wet end parts with a brush, liquid soap and water to remove all visible residue. Reattach all 3 parts to the
motor housing. Make sure the wet end is placed in the proper groove on the jet housing.
4. Fill the basin with warm water and circulate the correct amount of the EPA Registered Liquid Disinfectant (Splish Splash
is strongly recommended) through the basin for 10 minutes.
Scrub all visible residue from the inside walls of the basin with a sponge/soft brush. Brushes must be cleaned and
disinfected after each use.
5. Drain the water and rinse the basin; wipe dry with a clean paper towel.
THE ABOVE SHOULD BE FOLLOWED EVEN IF TUB LINERS ARE USED.
Note:
The use of oil based products can build up in the whirlpool system causing clogging in
the jet and build up onto the surface of the basin. Adherence to the above cleaning
will minimize build up thus the manufacturer recommend not to use mineral oil based
product.
YOUR ARE REQUIRED TO CHECK WITH YOUR STATE BOARD FOR MANDATORY
CLEANING AND DISINFECTING REQUIREMENTS AND PROCEDURES.

© 2017, Continuum Footspas, LLC Maestro - August, 2017
OPERATING INSTRUCTIONS
NOTE: Please read these instructions carefully before operating your pedicure chair.
CAUTION: To avoid injury and irreparable damage, always remain seated when using your pedicure
chair. NEVER STAND ON OR IN THE BASIN.
SPECIAL WARNINGS
●If you have any concerns regarding your health, consult your doctor before using your pedicure
chair.
●Never use any pedicure chair on open wounds, or any area of the body that is swollen, burned,
inflamed or where skin eruptions or sores are present.
●Consult your doctor before using a pedicure chair if you have diabetes, as diabetes can
contribute to foot problems including decreased feeling or circulation to the feet.
●Use of this product should be pleasant and comfortable. Should pain or discomfort result,
discontinue use and consult your physician.
WARNING: WHEN USING CONTINUUM PEDICURE CHAIRS, BASIC PRECAUTIONS
SHOULD ALWAYS BE FOLLOWED, INCLUDING THE FOLLOWING:
1. READ AND FOLLOW ALL INSTRUCTIONS.
2. DANGER: To reduce the risk of injury, do not permit children to use pedicure chairs unless they
are closely supervised at all times.
3. Use your pedicure chair only for its intended use as described in this manual. Do not use
attachments not recommended by manufacturer. Do not tamper with your pedicure chair.
After your pedicure chair is installed and the plumbing and electrical connections are made,
clean and disinfect the basin before initial use. You are required to check with your state board
for mandatory cleaning and disinfecting requirements and procedures.
SAVE THESE INSTRUCTIONS

© 2017 Continuum Footspas, LLC Maestro - August, 2017
Technicianʼs Chair
Control Keypad
Client Chair
Control Keypad
The Maestro utilizes two Chair Control Keypads, one located on the arm for the client; the other
located on the front panel for the technician. Both keypads control forward/backward and tilting
of the chair. The chair will automatically stop when fully tilted, full forward/backward or when a
movement button is released.
ENTERING AND EXITING THE CHAIR - Make sure each client moves slowly and carefully.
ONLY enter and exit chair when it is in a locked position.
TO SWIVEL CHAIR - The Chair Release Lever is centered directly below the curved portion of the
chair. Gently lift up on the lever allowing the chair to swivel. This must be done each and every time
a client enters or exits the chair. Please note: In order for the chair locking mechanism to work prop-
erly, one must sit normally in the chair, that is to say, NOT on the outer edge of the chair, but rather
sitting back in the chair. This allows for the locking pin to engage and disengage easily.
When entering: Lift lever allowing chair to swivel either left or right. With client seated, swivel chair
to front position until a click is heard. This safely locks the chair in place.
When exiting: Lift lever allowing chair to swivel either left or right until a click is heard. This safely
locks the chair allowing exit.
IMPORTANT! Never spray water directly on the Technician Chair Control Keypad.
This will damage the keypad and void the Limited Warranty.
Chair Control

Operational Summary
FILLING/SPRAYING
Locate the chrome hot/cold water valve handle on the front of your pedicure chair. This valve handle
controls both the flow of water and the temperature of water. Note: The sprayer/filler has a dual function; it
is both a sprayer and filler for the basin.
TO FILL
Make sure drain pop-up is in the open or “up” position. LIFT AND TURN chrome water valve handle. Press faucet icon
button on circular “I Fill” touch pad. When water reaches desired temperature, close or lower drain pop-up.
Please refer to additional information/instructions for “Auto-Fill” in this Owner’s Manual.
TO DRAIN
With optional factory installed drain pump:
Step 1) Gently turn chrome drain handle located on front of base.
This activates “Pop-Up” located on bottom of basin allowing water to drain.
Step 2) Wait for the air bubbles to exit. Press chrome button marked “DRAIN.”
This will activate drain pump. When basin is fully emptied, press button once again to
turn pump off. VERY IMPORTANT! When draining basin, ALWAYS perform Step 1 before Step 2.
NEVER reverse the steps as this may cause the pop-up to become jammed in the
waste assembly.
Note:
Drain pump will automatically turn off in five (5) minutes if button is not pressed a
second time.
GRAVITY DRAIN
Step 1) Gently turn chrome drain handle located on front of base.
This activates “Pop-Up” located on bottom of basin allowing water to drain.
Dual Stream Jets
All Maestro Pedicure Spas feature an I Fill system ( Auto Fill) with two (2) “pipeless” magnetic jets.
Your Maestro is equipped with I Fill 3. Two (2) “magnetic” jets are utilized. With “magnetic” jets, the entire front jet
cover assembly is removable for cleaning and disinfecting. The impeller is held in place by a strong magnet
together with a corresponding magnet embedded in the jet body.
PLEASE NOTE:
Pedicure chairs assembled and shipped during Wisconsin winter months are tested using a pink RV anti-freeze solution. It
is perfectly normal for a small amount of this pink fluid to remain within the plumbing system. To eliminate any traces of RV
anti-freeze, simply fill and operate your pedicure chair several times before actual use.
Cleaning and Disinfecting after Draining
YOU ARE REQUIRED TO CHECK WITH YOUR STATE BOARD FOR MANDATORY CLEANING
AND DISINFECTING REQUIREMENTS AND PROCEDURES.
WARNING: It is extremely important to follow the cleaning instructions provided by your State
Board. Failure to clean your pedicure chair adequately can result in serious health issues for your
clients as well as the nail technician. Failing to clean your pedicure chair may also cause it to work
improperly. Regular cleaning will keep your pedicure chair in good working condition.
© 2017 Continuum Footspas, LLC Maestro - August, 2017

Operating Instructions for Standard i-Fill™ System (Auto Fill)
(The Standard Auto Fill System is included in all Maestro Models)
NOTE: The standard I-Fill system cannot be used with liners. If liners are desired, one must order I-Fill 3.
Step #1) LIFT AND TURN chrome handle for Hot/Cold water valve located in front of spa.
Make sure drain pop-up is in the up position allowing water to drain from basin.
Step #2) Press “i-Fill-Auto” button to begin water flow. If spa has optional drain pump, one must also
start the drain pump by pressing button marked “PUMP”. When water reaches desired temperature;
turn drain handle to lower pop-up. Water flow will automatically stop and jet will start running when
water level reaches preset level (Jet has a built-in one (1) hour timer). Jet may be shut off manually
by pressing Jet Icon located on the i-Fill button. Press button a second time to restart jet (See picture
below). To add additional water; press Faucet Icon located on i-Fill button (See picture below). Press
button a second time to stop water flow. There is an audible tone as additional water is being added
to basin. VERY IMPORTANT (Applies ONLY to i-Fill Equipped Spas)
In order to prevent hot/cold water from mixing inside an open water valve; once water stops flowing
close valve handle by gently pushing it to the down position. Furthermore, Neoperl check valves have
been installed on the brass hot/cold water inlets located in back of spa. This will prevent any cross
connection of hot/cold water.
There are two (2) small, round stainless steel sensors located on the top of the front face of the jet
housing. They are similar to a screw-head without a slot. In order to ensure the i-Fill system works
properly, they MUST be cleaned periodically with a little rubbing alcohol.
Adjusting Sensor Delay Time Setting
As a result of water pressure and/or basin size, it may be necessary to change the amount of time
water flows after reaching the sensors located on the jet body. If this is the case, please note the fol-
lowing:
A green colored control box is located underneath the left curved plastic shroud (When facing spa).
Removing this curved shroud is quite easy. (Note: Because of space constraints, the control box is
mounted upside down.)
On the side of the control box is a blue LED light. Next to it is a blue circle control. Utilizing a small
screwdriver, GENTLY turn the arrow inside the circle to read from 5 seconds to 55 seconds. By turn-
ing the arrow and changing the time delay; more or less water will fill the basin. For safety purposes,
there is a four (4) minute water flow timer built into the control box.
Faucet Icon
(Press for Additional Water) i-Fill Button
(Auto Fill ON/OFF)
Jet
Icon
(ON/OFF)
© 2017 Continuum Footspas, LLC Maestro - August, 2017

MasterBox Control Keypad
When using electrical equipment, basic safety precautions should always be followed to reduce the risk
of fire, electric shock and injury. Safety precautions are as follows:
1. Read and follow all instructions before using the equipment.
2. Keep the cord out of heavy traffic area. To avoid fire hazard NEVER put the cord under rugs, near heat
generating devices.
3. Always turn off the equipment before servicing.
4. Do not drop or insert any object into any openings.
5. Do not operate any equipment with damaged parts .
6. Any other use not recommended by the manufacturer may result in electrical shock or injury.
7. This system is for indoor use only.
8. Do not attempt to repair or adjust any electrical or mechanical functions on this unit. Doing so will void the
warranty.
9. As a condition of acceptability UL requires that this product be installed over a non-combustible surface; if
this product is installed over a combustible surface, a non-combustible layer must be installed between the
device and the surface.
After reading this owner’s guide, if you have any questions or comments, please call +1-817-633-1080 or contact our technical
support department at support@luraco.com or visit our website at www.luraco.com for more information
PLEASE READ AND SAVE THESE IMPORTANT SAFETY INSTRUCTIONS
iFill Spa Control System iFill 3
MODEL L0903A
NOTE: I-Fill 3 was designed to work with or without liners. The standard I-Fill system cannot be used with liners.
USER’S MANUAL
© 20167Continuum Footspas, LLC iFill 3 - August, 2017

iFill Features
� Automatic spa fill with intelligent and reliable level sensor
� Can also be used with a disposable liner
� Time delay setting
� Dual switched outlets
� Dual continuous outlets
� Single drain pump controlled outlet with 3 minute timer
� Heavy duty water valve
� Can be operated in both automatic or manual modes
� Automatically shutdown Jet and color light if water level in the basin is below the sensor
� Built-in 12V LED light power supply
� 12V color light (optional)
� Built-in 1 hour timer
� Audible overflow warning in manual fill mode
Installation Guide
I) Overall System Integration
Fig. 1 Connection Diagram
ATTENTION: BACKFLOW PREVENTERS ARE REQUIRED FOR EVERY SPA CHAIR. THEY MUST BE INSTALLED ON BOTH HOT
AND COLD WATER LINES TO AVOID LOSING HOT WATER FROM ONE CHAIR TO THE OTHER.
II) System Installation
A capacitive sensor with advanced electronics and firmware are used to detect the water level. This
technology can also work with a disposable liner.
FEATURES - OPERATIONS
© 2017 Continuum Footspas, LLC iFill 3 - August, 2017
iFill 3 Features
- iFill 3

Fig. 2 ) Capacitive sensor installed on JET Housing Fig. 3 ) Input and Output Control Ports
Follow the steps below for the water level sensor installation
a) Connect the sensor cable to MasterBox port named “LEVEL SENSOR”, (Fig. 3)
b) Connect the Water Valve to MasterBox port named “WATER VALVE”, (Fig. 3). Note: The water valve
is unidirectional.
c) Connect the Light to MasterBox port named “12VDC LIGHT”, (Fig. 3). Note: You can also use the
adaptor with the AC port named “LIGHT”, (Fig. 3)
d) Connect the Control Keypad to MasterBox port named “KEYPAD”, (Fig. 3)
e) Connect power to the MasterBox ( Note: The blue light on the back of MasterBox should turn on)
ATTENTION: BACKFLOW PREVENTERS ARE REQUIRED FOR EVERY SPA CHAIR. THEY MUST BE INSTALLED ON BOTH HOT
AND COLD WATER LINES TO AVOID LOSING HOT WATER FROM ONE CHAIR TO THE OTHER.
Sensor Delay Time Setting:
The sensor delay time can be adjusted by a knob located next to the blue light.
Depending on the knob position (Fig. 4), a valve shutoff delay time will be added after water reaches the
sensor. This delay allows the user to set the preferred water level in automatic fill mode.
Fig. 4: Time delay setting
© 2017 Continuum Footspas, LLC iFill 3 - August, 2017

© 2017 Continuum Footspas, LLC iFill 3 - August, 2017

© 2017, Continuum Footspas, LLC Maestro - August, 2017
LEG SUPPORTS, MASSAGE SYSTEM and OPTIONS
LEG SUPPORTS
The Maestroʼs leg supports have been designed and engineered to lock in the up position for dual and
independent feet and calf treatment.
To utilize one or both leg supports, using both hands at the base of the support, simply pivot it inward
until it stops. With both hands, gently push down on the leg support to make sure it locks securely. To
unlock, lift up with both hands and carefully position them back to the side of the basin.
WARNINGS: DO NOT DROP THE LEG SUPPORT INTO THE STORING POSITION. GENTLY GUIDE IT INTO PLACE.
WHEN THE LEG SUPPORT IS IN THE VERTICAL POSITION DO NOT SIT ON LEG SUPPORT.
NEVER LIFT THE MAESTRO FROM THE LEG SUPPORTS.
VIBRATION + HEAT MASSAGE SYSTEM
The Maestro Pedicure Chair features a six (6) motor Vibra-Massage + Heat System. (Some earlier
versions of the Vibra-Massage + Heat Massage System incorporate four (4) motors). Four of the six
motors, together with the heating pad, are located in the lower to middle lumbar area and two motors
are located in the seat area. All motors and the heating pad are controlled from a handheld control
wand.
Operating Instructions for massage system:
Massage: Press POWER or either ZONE key to turn massage ON. Press again to turn massage OFF.
Timer: Press and hold POWER key to change timer from 15 to 30 min. (Green light indicates 15 min.
Amber light indicates 20 min. Red light indicates 30 min.)
Zone: Press Zone 1, 2 or 3 keys to turn either zone ON or OFF.
Wave / Steady / Pulse: Press Wave, Steady or Pulse keys to choose massage type
Intensity +/-: Press + or - keys to increase of decrease massage intensity
Speed +/-: Press + or - keys to increase or decrease the massage speed
(PULSE and WAVE modes only)
Heat: Press HEAT key to run heat ON high (Red light). Press again to turn heat OFF. Press and hold
HEAT key to turn heat to MED setting (Amber light) and LO setting (Green light).
Note: Only use the power supply furnished with the unit.
Manicure Trays:
●Optional manicure trays are available (depending on date of manufacture) for The Maestro.
When
manicure trays are ordered with the pedicure chair, brackets will be factory installed. Simply attach
the trays with provided wood screws making sure they fit tightly against the upholstered arms.
If ordering manicure trays AFTER after shipping, please call Continuum Footspas at:1-877-255-3030 for
further assistance.

© 2017, Continuum Footspas, LLC Maestro - August, 2017
Care and Maintenance
BASIN, UPHOLSTERY, and LEG SUPPORTS
Basin
The Maestroʼs solid surface basin is extremely durable and stain resistant. In addition to cleaning and
disinfecting procedures as outlined by your state board, one may choose to scrub the basin as
well. Simply use a fine nylon scouring pad (ie; Scotch Bright™ #6448 or #7448) together with a
good cleaning powder (ie; Bar Keeperʼs Friend™). This additional cleaning will keep the basin of
your Maestro Pedicure Spa looking brand new for many years.
NOTE: DO NOT USE THE NYLON SCOURING PAD ON ANY CHROME FINISH.
Upholstery
Simply use a mild detergent with warm water and gently clean any dirt or grime that may appear on the
seat, seat back or arms. The leather-like material is very durable and with reasonable care should look
like new for many years to come.
Leg Supports
A mild detergent and warm water is all that is needed to clean the padded leg supports. However
care should be taken to prevent nail polish or acetone from coming in contact with the leg supports.
These products may damage or discolor the outer “skin” of the foam.
In spite of taking necessary precautions to protect the leg supports, hard water and/or certain
products many cause the black footrests to develop a white film or some discoloration.
If this occurs, a product called “Black Max”-Vinyl and Rubber Dressing works well to restore the leg
supports. Black Max can be purchased at most hardware stores or online.
NOTE: DO NOT USE THE NYLON SCOURING PAD ON THE LEG SUPPORTS.
Table of contents
Popular Hot Tub manuals by other brands

Sundance Spas
Sundance Spas Portofino Series Installation and owner's manual

Richy
Richy RWH001-635I Assembly instruction

Comfort Line Products
Comfort Line Products STG-1 owner's manual

American Standard
American Standard Cadet 2773.018H parts list

Poolspa
Poolspa GENESIS SPA 213 x 213 Operation and installation manual

4SeasonSpa
4SeasonSpa Savannah user manual

Jacuzzi
Jacuzzi SALON SPA BATH SERIES Installation and operation instructions

Kaldewei
Kaldewei SKIN TOUCH operating instructions

Teuco
Teuco 122W manual

Sunrise spas
Sunrise spas Classic Collection Series owner's manual

Conair
Conair BTS4C Series Instruction booklet

Bestway
Bestway SaluSpa 54185 owner's manual