CONTOUR NEXT GEN User manual

10 45 426 20
52
USER GUIDE
Uses only Contour®next
blood glucose test strips.
Works with the Contour®Diabetes app available for
download from the App StoreSM or on Google PlayTM.
Blood Glucose
Monitoring System

i ii
Contour®next GEN blood glucose monitoring system
use on supported Apple iOS and Android devices and is designed to
be used with a wirelessly enabled Contour branded meter.
IMPORTANT SAFETY INFORMATION
WARNING
If your blood glucose reading is under the critical level you
have established with your health care professional, follow
their advice immediately.
If your blood glucose reading is over the recommended limit
set by your health care professional:
1. Wash and dry your hands well.
2. Retest with a new strip.
If you get a similar result, follow your health care professional’s
advice immediately.
Serious Illness
The system should not be used to test critically ill patients. Capillary
blood glucose testing may not be clinically appropriate for persons
with reduced peripheral blood ow. Shock, severe hypotension and
severe dehydration are examples of clinical conditions that may
adversely aect the measurement of glucose in peripheral blood.1-3
Talk to Your Health Care Professional:
• Before setting any Target Ranges in your meter or in the
Contour Diabetes app.
• Before changing your treatment or medication based on test results.
• About whether Alternative Site Testing (AST) is appropriate for you.
• Before making any other decision of medical relevance.
INTENDED USE
The Contour®next GEN blood glucose monitoring system is intended
to be used for the measurement of blood glucose in both insulin and
non-insulin treated patients with diabetes as an aid for patients and
their health care professionals in monitoring the eectiveness of the
patient’s diabetes control. The Contour next GEN blood glucose
monitoring system is intended for self-testing by persons with diabetes
and health care professionals for use on a single patient in venous
blood and fresh capillary whole blood drawn from the ngertip or palm.
The Contour next GEN blood glucose monitoring system is intended
for self-testing outside the body (in vitro diagnostic use).
The Contour next GEN blood glucose monitoring system should
not be used for the diagnosis of or screening for diabetes or for
neonatal use. Alternative site testing (palm) should be done only
during steady state times (when glucose is not changing rapidly). The
Contour®next test strips are for use with the Contour®next GEN
blood glucose meter to quantitatively measure glucose in venous blood
and fresh capillary whole blood drawn from the ngertips or palm.
The meter is for the quantitative measurement of glucose in whole
blood from 0.6 mmol/L–33.3 mmol/L.
The meter and lancing device are for single-patient use only.
The system is intended for in vitro diagnostic use only.
INTENDED USE: Contour Diabetes app
The Contour®Diabetes app is intended for use by individuals with
insulin and non-insulin treated diabetes, and/or their caregivers, to
store, view, trend, and share blood glucose meter readings, either
manually entered in the app or wirelessly transmitted from the
Contour family of meters. Other related health indicators which can
be captured and shown in a printable report and graphical format on a
mobile device for insulin and non-insulin treated patients with diabetes
are available to support diabetes management. The app is available for

iii iv
Contour®next GEN blood glucose monitoring system
Potential Biohazard
• Always wash your hands with antibacterial soap and water and
dry them well before and after testing or handling the meter,
lancing device, or test strips.
• All parts of the kit are considered biohazardous and can
potentially transmit infectious diseases, even after you have
performed cleaning and disinfection.
For complete instructions on cleaning and disinfecting your
meter and lancing device, see Cleaning and Disinfection
on page 55.
• The lancing device provided with your kit should not be used for
assisted blood draws by health care professionals or at health
care provision sites.
• Always dispose of used test strips and lancets as medical waste
or as advised by your health care professional.
• All products that come in contact with human blood should be
handled as if capable of transmitting infectious diseases.
• Keep out of reach of children. This kit contains small parts that
could cause suocation if accidentally swallowed.
• Keep batteries away from children. Many types of batteries
are poisonous. If swallowed, immediately contact your poison
control center.
PRECAUTIONS
• Read your Contour next GEN user guide, the lancing
device package insert, if provided, and all instructional
materials provided in your meter kit before testing. Follow
all instructions for use and care exactly as described to help
avoid inaccurate results.
• Examine the product for missing, damaged, or broken parts. If
the test strip bottle is open inside a new box of strips, do not use
those strips.
For replacement parts, contact Customer Service. See the
back cover for contact information.
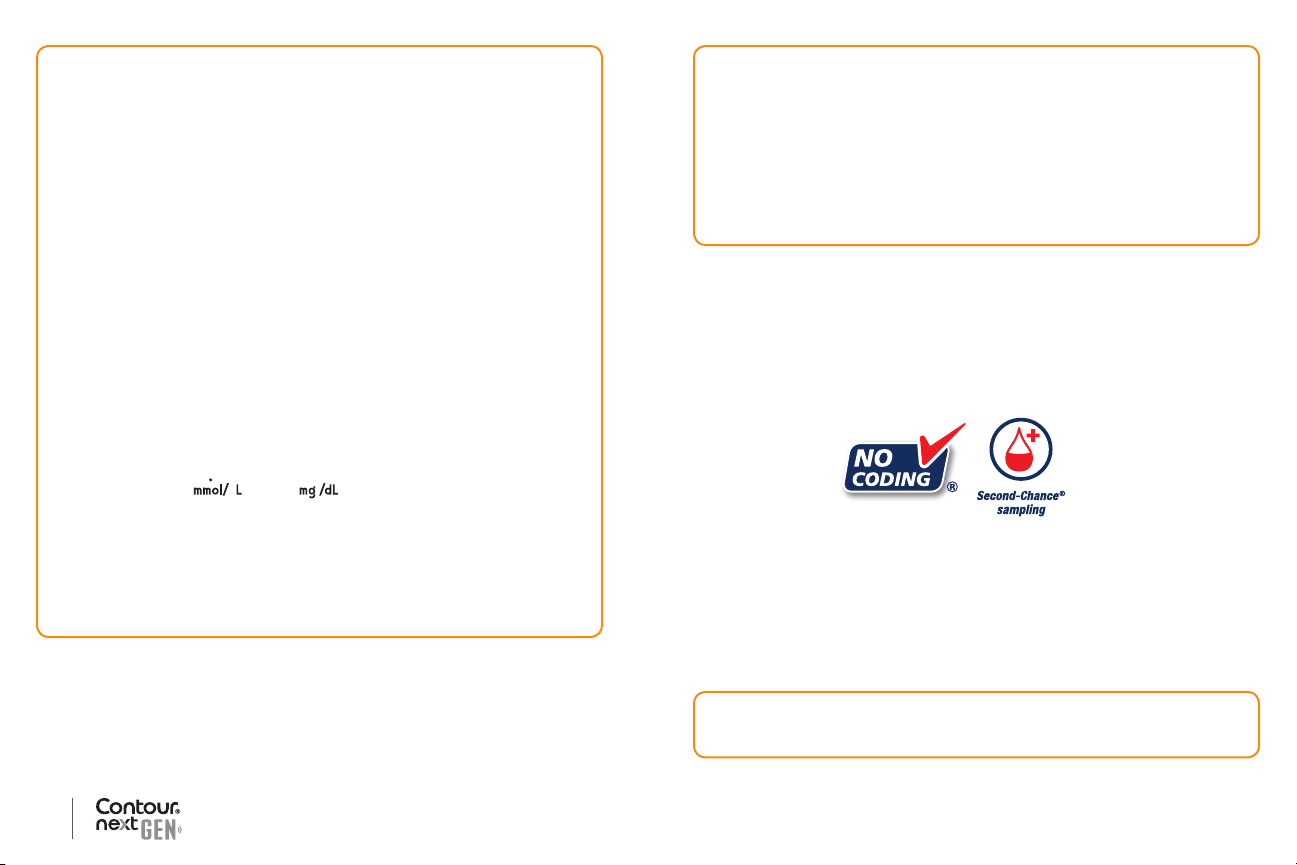
• Your Contour next GEN meter works ONLY with
Contour next test strips and Contour®next control solution.
• Always keep the Contour next test strips in their original bottle.
Tightly close the bottle immediately after removing a test strip.
The bottle is designed to keep the test strips dry. Do not place
or store other items or medications in the test strip bottle. Avoid
exposing meter and test strips to excessive humidity, heat, cold,
dust, or dirt. Exposure to room humidity by leaving the bottle
open or not storing the strips in their original bottle can damage
your test strips. This could lead to inaccurate results. Do not use
a test strip that appears damaged or has been used.
• Do not use expired materials. Using expired material can cause
inaccurate results. Always check the expiration dates on your test
materials.
NOTE: If this is the rst time you are opening the control
solution, write the date on the bottle.
• Do not use control solution that is more than 6 months past the
date you rst opened the bottle.
• If your control solution test result is out of range, contact
Customer Service. See the back cover for contact information.
Do not use the meter for blood glucose testing until you resolve
this issue.
LIMITATIONS
• Altitude: This system has not been tested at altitudes higher
than 20,674 feet (6301 meters).
• Xylose: Do not use during or soon after xylose absorption
testing. Xylose in the blood will cause an interference.

v vi
Contour®next GEN blood glucose monitoring system
• The meter is designed to give accurate blood testing results at
temperatures between 5°C and 45°C. If the meter or test strip is
outside this range, you should not test until the meter and test
strip are within this range. Whenever the meter is moved from
one location to another, allow approximately 20 minutes for the
meter to adjust to the temperature of the new location before
performing a blood glucose test.
• Do not attempt to perform a blood glucose test when the
Contour next GEN meter is connected to a computer.
• Use only approved equipment from the manufacturer or certied
body such as UL, CSA, TUV, or CE.
• Avoid use of electronic devices in very dry environments,
especially if synthetic materials are present.
• Your Contour next GEN meter has been preset and locked to
display results in mmol/L (millimoles of glucose per liter of blood).
Results in mmol/L will always have a decimal point.
Results in mg/dL will never have a decimal point.
Example:
52
or
93
Check your display screen to be sure the results are shown
correctly (mmol/L). If not, contact Customer Service. See the
back cover for contact information.
• The Contour next GEN blood glucose monitoring system
has a measuring range of 0.6 mmol/L to 33.3 mmol/L.
For results under 0.6 mmol/L or over 33.3 mmol/L:
If your blood glucose reading is under 0.6 mmol/L, the
meter displays the LO screen. Contact your health care
professional immediately.
If your blood glucose reading is over 33.3 mmol/L, the
meter displays the HI screen. Wash your hands or the test
site. Repeat the test with a new strip. If results are still over
33.3 mmol/L, follow medical advice immediately.
Your Meter Features
Easy: The Contour next GEN blood glucose monitoring system is
about simplicity. You will notice this the rst time you use it.
Automatic: The Contour next GEN meter is designed with
No Coding technology, to automatically code itself every time you
insert a test strip. It will also automatically mark a control solution test.
Second-Chance®sampling allows you to apply more blood to the
same test strip if the rst blood sample is not enough. Your test strip is
designed to easily ‘sip’ the blood into the sample tip. Do not drop blood
directly on the at surface of the test strip.
Thank you for choosing the Contour next GEN blood glucose
monitoring system. We are proud to be your partner in helping you
manage your diabetes.
CAUTION: Your Contour next GEN meter works ONLY with
Contour next test strips and Contour next control solution.

vii 1
Contour®next GEN blood glucose monitoring system
Ascensia, the Ascensia Diabetes Care logo, Contour, Microlet, the No Coding logo,
Second-Chance, the Second-Chance sampling logo, Smartcolour, and Smartlight are
trademarks and/or registered trademarks of Ascensia Diabetes Care Holdings AG.
TM see www.ascensiadiabetes.ca/tm-mc
Apple and the Apple logo are trademarks of Apple Inc., registered in the U.S. and
other countries. App Store is a service mark of Apple Inc.
The Bluetooth® word mark and logos are registered trademarks owned by Bluetooth
SIG, Inc., and any use of such marks by Ascensia Diabetes Care is under license.
Google Play and the Google Play logo are trademarks of Google LLC.
(® = registered trademark. TM = unregistered trademark. SM = service mark.)
All other trademarks are properties of their respective owners and are used solely for
informative purposes. No relationship or endorsement should be inferred or implied.
Table of Contents
INTENDED USE............................................................................i
IMPORTANT SAFETY INFORMATION......................................... ii
Your Meter Features .................................................................... vi
GETTING STARTED
Your Contour next GEN meter..................................................3
Check the Meter Display...............................................................6
Target Ranges ..............................................................................7
Meal Markers................................................................................8
TESTING
Get Ready to Test .........................................................................9
Symptoms of High or Low Blood Glucose...................................10
Get the Blood Drop: Fingertip Testing .........................................15
Select a Meal Marker..................................................................18
Set a Reminder...........................................................................20
smartLIGHT target range indicator .............................................21
Test Results ................................................................................23
Expected Test Result Values.......................................................23
LO or HI Results .........................................................................24
Alternative Site Testing (AST): Palm............................................24
Control Solution Testing ..............................................................33
FEATURES
Logbook......................................................................................36
View Averages............................................................................37
Settings ......................................................................................38
Change the Time.....................................................................39
Change the Date.....................................................................41
Set the Sound .........................................................................42
Set Meal Markers....................................................................44
Set Reminder Feature .............................................................45
Change Overall Target Range .................................................46
Change Individual Target Ranges ...........................................47
Set smartLIGHT target range indicator ...................................49

2 3
Contour®next GEN blood glucose monitoring system
GETTING STARTED
Your Contour next GEN meter
10 45 42620
52
Te st Strip Port
OK Button
Press and hold
to turn the meter
On or Off
Press to accept
a selection
Te st Strip Port Light
Up/Down
Scroll Buttons
Press to scroll up
Press and hold
to keep scrolling
Pr
ess to scroll down
Press and hold
to keep scrolling
Navigate with 3 Buttons
Press and hold the OK button until the meter turns On.
Press and hold the OK button until the meter turns O.
The and buttons on the meter allow you to scroll through the
options. You can hold the or button to scroll continuously through
a list.
Press the OK button to accept a selection.
To exit from the Logbook or Averages and return to the Home screen,
press the OK button.
NOTE: When a symbol is blinking, you can select it.
The Contour Diabetes app for
Your Contour next GEN meter................................................51
Download the Contour Diabetes app......................................52
Pairing Mode ..............................................................................52
HELP
Meter Care..................................................................................54
Transfer Results to the Contour Diabetes app ........................57
Transfer Results to a Personal Computer....................................58
Batteries .....................................................................................58
TECHNICAL INFORMATION
Error Detection Displays .............................................................60
Customer Service Checklist .......................................................62
Technical Information: Accuracy .................................................63
User Accuracy.........................................................................64
Technical Information: Precision..............................................66
Specications .............................................................................68
Warranty .....................................................................................72
Index...........................................................................................74

4 5
Contour®next GEN blood glucose monitoring system
GETTING STARTED
Your Contour next GEN meter Screen
10 45 42620
52
Date
Meal Mark
er
Time
Test Result
in Target
Te st Strip Port
Te st Strip
Port Light
Symbol What the Symbol Means
Blood glucose test result is above Target Range.
Blood glucose test result is in Target Range.
Blood glucose test result is below Target Range.
Blood glucose test result is above 33.3 mmol/L.
Blood glucose test result is below 0.6 mmol/L.
Your Logbook.
Meter Settings.
Symbol What the Symbol Means
Fasting marker.
Before Meal marker.
After Meal marker.
No marker selected.
A Target Range or Target Range setting.
smartLIGHTTM target range indicator setting.
Meter is ready to test.
Add more blood to same test strip.
Control solution test result.
Bluetooth®symbol: indicates the Bluetooth
wireless setting is On; the meter can communicate
with a mobile device.
Indicates low batteries.
Indicates dead batteries.
Indicates a meter error.
Reminder feature.
Sound feature.
7-, 14-, 30-, and 90-day averages.
Total number of blood glucose readings used to
calculate averages.

6 7
Contour®next GEN blood glucose monitoring system
GETTING STARTED
Your Contour next test strip
Grey Square End:
Insert this end into the test strip por
t
Sample Tip: Blood sample pulled in here
Check the Meter Display
Press and hold the OK button until the meter turns on, about
3 seconds.
The screen displays the Power On Self Test.
88 88 88 88 88
888
All symbols on the screen and the white strip
port briey light up. It is very important to verify
that 8.8.8 displays fully and that the white light
from the test strip port is visible.
If there are missing characters or if the strip
port light is a colour other than white, contact
Customer Service. This may aect the way you
see your results.
NOTE: Your meter comes with a pre-set time, date, and target range.
You can change these features in Settings. See Settings on page 38.
Target Ranges
The meter compares your blood glucose results with a Target Range
(for example, 3.9 mmol/L–7.2 mmol/L) to let you know if your test result
is above, in, or below your Target Range.
10 45 42620
111
Above Your Target Range.
10 45 42620
56
In Your Target Range.
10 45 42620
36
Below Your Target Range.
You can change Target Ranges in Settings .
See Settings on page 38.

8 9
Contour®next GEN blood glucose monitoring system
TESTING
Meal Markers
During a blood glucose test, you can attach a Meal Marker to your
blood glucose result when the Meal Marker feature in the meter is
turned On. This feature lets you track your blood glucose levels over
time with separate Target Ranges for Fasting/Before Meal and
After Meal markers.
Your Contour next GEN meter comes with Meal Markers turned
O. You can turn Meal Markers On and change Target Ranges in
Settings . See Settings on page 38.
Meal Marker choices if Meal Marker feature is On
Symbol What the Symbol Means Comparison/Target Range
Fasting: Use the Fasting
marker when testing
blood glucose levels after
fasting (no food or drink for
8 hours, except water or
non-caloric beverages).
If you mark your test result as
Fasting, the meter compares
your result against the Before
Meal Target Range.
Pre-set Before Meal Target
Range: 3.9 mmol/L–
7.2 mmol/L
Before Meal: Use the
Before Meal marker when
testing blood glucose
levels within 1 hour before
a meal.
If you mark your test result
as Before Meal, the meter
compares your result against
the Before Meal Target
Range.
Pre-set Before Meal Target
Range: 3.9 mmol/L–
7.2 mmol/L
Symbol What the Symbol Means Comparison/Target Range
After Meal: Use the
After Meal marker when
testing blood glucose
levels within 2 hours after
the rst bite of a meal.
If you mark your result
as After Meal, the meter
compares the result against
the After Meal Target Range.
Pre-set After Meal Target
Range: 3.9 mmol/L–
10.0 mmol/L
No Mark Selected: Use
the No Mark symbol when
testing at times other than
after fasting or before or
after a meal.
If you do not mark the result,
the meter compares your test
result against the Overall
Target Range.
Pre-set Overall Target
Range: 3.9 mmol/L–
10.0 mmol/L
Get Ready to Test
Read your Contour next GEN user guide, the lancing device
package insert, if provided, and all instructional materials provided in
your meter kit before testing. Follow all instructions for use and care
exactly as described to help avoid inaccurate results.
Examine the product for missing, damaged, or broken parts. If the test
strip bottle is open inside a new box of strips, do not use those strips.
For replacement parts, contact Customer Service. See the back cover
for contact information.
CAUTION: Your Contour next GEN meter works only with
Contour next test strips and Contour next control solution.

10 11
Contour®next GEN blood glucose monitoring system
TESTING
Fingertip Testing
Ensure that you have the materials you need before you begin testing:
• Contour next GEN meter.
• Contour next test strips.
• Lancing device and lancets from your kit, if provided.
To perform a quality control check, you also need Contour next
control solution. Some supplies are sold separately. Contact Customer
Service for questions about your kit. See the back cover for contact
information.
Symptoms of High or Low Blood Glucose
You can better understand your test results by being aware of
the symptoms of high or low blood glucose. According to the
American Diabetes Association (www.diabetes.org), some of the most
common symptoms are:
WARNING: Potential Biohazard
• All parts of the kit are considered biohazardous and can
potentially transmit infectious diseases, even after you have
performed cleaning and disinfection, see page 55.
• Always wash your hands with antibacterial soap and water and
dry them well before and after testing or handling the meter,
lancing device, or test strips.
• For complete instructions on cleaning and disinfecting your meter
and lancing device, see page 55.
Low blood glucose (Hypoglycemia):
• shakiness
• sweating
• fast heartbeat
• blurred vision
• confusion
• passing out
• seizure
• irritability
• extreme hunger
• dizziness
High blood glucose (Hyperglycemia):
• frequent urination
• excessive thirst
• blurred vision
• increased fatigue
• hunger
Ketones (Ketoacidosis):
• shortness of breath
• nausea or vomiting
• very dry mouth
For additional information and a complete list of symptoms, contact
your health care professional.
WARNING
If you are experiencing any of these symptoms, test your
blood glucose. If your test result is under the critical level you
have established with your health care professional or over
the recommended limit, follow your health care professional’s
advice immediately.

12 13
Contour®next GEN blood glucose monitoring system
TESTING
Prepare the Lancing Device
The lancing device graphics are for illustration purposes only.
Your lancing device may look dierent. Refer to your lancing
device insert for detailed instructions on preparing the lancing
device.
WARNING: Potential Biohazard
• The lancing device provided with your kit is intended for single-
patient use only. It should not be used for assisted blood draws
by health care providers or at health care provision sites, and
should never be shared with anyone else, even a family member,
due to risk of infection.
• Do not reuse lancets. Used lancets are not sterile. Use a
new lancet each time you test.
WARNING: Potential Biohazard
Always dispose of used test strips and lancets as medical waste or
as advised by your health care professional.
1. Remove the endcap from the lancing device.
2. Loosen the round protective cap
on a lancet by rotating the cap
¼ turn, but do not remove the
cap.
3. Insert the lancet rmly into the
lancing device until the lancet
comes to a complete stop.
4. Twist o the round protective
lancet cap. Save the cap for
disposing of the used lancet.

14 15
Contour®next GEN blood glucose monitoring system
TESTING
5. Replace the endcap.
6. Rotate the endcap dial to adjust
the puncture depth.
The amount of pressure applied
to the puncture site also aects
puncture depth.
Insert the Test Strip
1. Remove a Contour next test
strip from the bottle.
2. Tightly close the bottle lid
immediately after you have
removed the test strip.
CAUTION: Do not use expired materials. Using expired material can
cause inaccurate results. Always check the expiration dates on your
test materials.
3. Hold the test strip with the grey
square end facing toward the
meter.
4. Insert the grey square end rmly
into the test strip port until the
meter beeps.
10 45 42620The screen displays the blinking blood drop
indicating it is ready to test a blood drop.
NOTE: After you insert the test strip, apply blood to the test strip within
3 minutes or the meter turns o. Remove the test strip and reinsert it to
begin a test.
Get the Blood Drop: Fingertip Testing
NOTE: For Alternative Site Testing instructions, see page 24.
WARNING: Potential Biohazard
Always wash your hands with antibacterial soap and water and dry
them well before and after testing or handling the meter, lancing
device, or test strips.

16 17
Contour®next GEN blood glucose monitoring system
TESTING
1. Press the lancing device rmly
against the puncture site and
press the release button.
2. Stroke your hand and nger
toward the puncture site to form
a drop of blood.
Do not squeeze around the
puncture site.
3. Test immediately after you have
formed a small, round blood
drop, as shown.
4. Immediately touch the tip of the
test strip to the drop of blood.
The blood is drawn into the test
strip through the tip.
CAUTION: Do not press the
tip of the test strip against the
skin or place the blood on top
of the test strip. These actions
could lead to inaccurate
results or errors.
5. Hold the tip of the test strip in the
blood drop until the meter beeps.
NOTE: If the Meal Marker feature
is On, do not remove the test strip
until you select a Meal Marker.
Second-Chance sampling—Apply More Blood
00 60
1. If the meter beeps twice and the screen displays a
blinking blood drop with a plus sign, the test strip
does not have enough blood.
2. Apply more blood to the same test strip within
60 seconds.
NOTE: If the screen displays an E 1 error message,
remove the strip and start with a new strip.
The meter displays your blood glucose result. If Meal Markers are On,
the Meal Marker symbol is blinking.

18 19
Contour®next GEN blood glucose monitoring system
TESTING
Select a Meal Marker
NOTE: During a blood glucose test, if Meal Markers are On, you can
select a Meal Marker when the meter displays your result. You cannot
select a Meal Marker in the Settings screen.
If the Meal Marker feature is On, a Fasting , Before Meal ,
After Meal , or No Mark marker is blinking on the blood glucose
result screen. The meter suggests this Meal Marker based on the time
of day and the meal period: breakfast, lunch, dinner, or overnight. For
more information about Meal Markers, see page 8.
Example:
65
Do not press the OK button or
remove the test strip yet.
You can select the blinking marker
or choose a dierent Meal Marker.
To turn Meal Markers On, see Set Meal Markers on page 44.
65
1. If the blinking Meal Marker is
the one you want, press the
OK button
or
2. To select a dierent Meal
Marker, press the or button
on the meter to scroll between
markers.
65
Example: If you scroll up to Before Meal, the
Before Meal marker blinks.
65
Example: If you scroll down to After Meal, the
After Meal marker blinks.

20 21
Contour®next GEN blood glucose monitoring system
TESTING
65
3. When the Meal Marker you want
is blinking, press the OK button.
4. If this is a Before Meal reading,
you can set a Reminder to test
your blood glucose later. See the
next section, Set a Reminder.
If you do not make a Meal Marker selection within 3 minutes, the meter
turns o. Your blood glucose reading is stored in the Logbook without a
Meal Marker.
Set a Reminder
1. Make sure the Reminder feature is On in Settings.
See Set Reminder Feature on page 45.
2. Mark a blood glucose reading as a Before Meal reading, then press
the OK button.
h2
3. To scroll from 2 hours to 0.5 hours by half-hour
intervals, press the or button.
4. To set the Reminder, press the OK button.
10 45 42620
61
The screen returns to the Before Meal reading.
The Reminder symbol displays to conrm the
Reminder is set.
Blood glucose test is complete.
smartLIGHT target range indicator
When your blood glucose test is complete, the meter displays your
result with the units, time, date, meal marker (if selected), and target
range symbol: Above Target , In Target , or Below Target .
Example: Blood test result with Meal Marker selected and a
Reminder set:
10 45 42620
61
If the smartLIGHT target range indicator is On, the test strip port
displays a colour representing your result value compared to your
Before Meal, After Meal, or Overall Target Range.

22 23
Contour®next GEN blood glucose monitoring system
TESTING
If you do not select a Meal Marker, your blood glucose test result is
compared to an Overall Target Range.
Above
Target Range
In
Target Range
Below
Target Range
If your blood glucose result is below target, the smartLIGHT target
range indicator is red and the meter beeps twice.
NOTE: To change an Individual Target Range, see Change Individual
Target Ranges on page 47. To change the Overall Target Range, see
Change Overall Target Range on page 46.
To move to the Home screen,
press the OK button
or
To turn the meter o, remove the
test strip.
Test Results
Expected Test Result Values
Blood glucose values will vary depending on food intake, medication
dosages, health, stress, or activity. Nondiabetic plasma glucose
concentrations are normally maintained within a relatively narrow
range, approximately 3.9 mmol/L–6.1 mmol/L in a fasting state.4You
should consult with your health care professional for glucose values
specic to your needs.
WARNING
• Always consult your health care professional before
changing your medication based on test results.
• If your blood glucose reading is under the critical level you
have established with your health care professional, follow
their advice immediately.
• If your blood glucose reading is over the recommended
limit set by your health care professional:
1. Wash and dry your hands well.
2. Retest with a new strip.
If you get a similar result, follow your health care professional’s
advice immediately.

24 25
Contour®next GEN blood glucose monitoring system
TESTING
LO or HI Results
10 45 42620
l0
• If the meter beeps twice and displays the
LO screen, your blood glucose reading is
under 0.6 mmol/L. Follow medical advice
immediately. Contact your health care
professional.
10 45 42620
hi
• If the meter beeps once and displays the
HI screen, your blood glucose reading is over
33.3 mmol/L:
1. Wash and dry your hands well.
2. Retest with a new strip.
If results are still over 33.3 mmol/L, follow
medical advice immediately.
Alternative Site Testing (AST): Palm
Always wash your hands with antibacterial soap and water and dry
them well before and after testing or handling the meter, lancing
device, or test strips.
WARNING
• Ask your health care professional if Alternative Site Testing
(AST) is right for you.
• Do not calibrate a continuous glucose monitoring device
from an AST result.
• Do not calculate an insulin dose based on an AST result.
For Alternative Site Testing, use the clear endcap. Your
Contour next GEN meter can be used for ngertip or palm
testing. See the lancing device insert for detailed instructions
on Alternative Site Testing.
Do not use AST under the following conditions:
• If you think your blood glucose is low.
• When blood glucose is changing rapidly, such as after a meal, after
an insulin dose, or during or after exercise.
• If you are unable to feel symptoms of low blood glucose
(hypoglycemic unawareness).
• If you get alternative site blood glucose results that do not agree with
how you feel.
• During illness or times of stress.
• If you will be driving a car or operating machinery.
Alternative site results may be dierent from ngertip results when
glucose levels are changing rapidly (e.g., after a meal, after taking
insulin, or during or after exercise). Additionally, glucose levels may not
rise as high or fall as low as levels in the ngertip. As such, ngertip
results may identify hypoglycemic levels sooner than alternative site
results.
Alternative Site Testing is recommended only when it is more than
2 hours after a meal, diabetes medication, or exercise.
If you do not have a clear lancing device endcap to perform AST,
contact Customer Service. See the back cover for contact information.

26 27
Contour®next GEN blood glucose monitoring system
TESTING
Get a Blood Drop: Alternative Site Testing
1. Wash your hands and the
puncture site with antibacterial
soap and warm water.
Rinse and dry well.
2. Attach the clear AST endcap to
the lancing device, if provided
with your kit.
Refer to the lancing
device insert for detailed
instructions.
3. Select a puncture site from a
eshy area on the palm. Avoid
veins, moles, bones, and
tendons.
The lancing device graphics are for illustration purposes only.
4. Press the lancing device rmly
against puncture site, then press
the release button.
5. Maintain steady pressure until a
small, round blood drop forms.
6. Lift the lancing device straight up
and away from the skin without
smearing the blood.
7. Test immediately after you have
formed a small, round blood
drop, as shown.
Immediately touch the tip of the
test strip to the drop of blood.
The blood is drawn into the test
strip through the tip.

28 29
Contour®next GEN blood glucose monitoring system
TESTING
Do not test the blood sample from palm if you get:
• Smeared blood.
• Clotted blood.
• Runny blood.
• Clear uid mixed with the blood.
8. Hold the tip of the test strip in the blood drop until the meter beeps.
Second-Chance sampling for AST—Apply More Blood
00 60
1. If the meter beeps twice and the screen displays
a blinking blood drop with a plus sign, the test
strip does not have enough blood.
2. Apply more blood to the same test strip within
60 seconds.
NOTE: If the screen displays an E 1 error message,
remove the strip and start with a new strip.
If the Meal Marker feature is On, the meter suggests a Fasting ,
Before Meal , After Meal , or No Mark marker for your blood
glucose result. This is based on the time of day and the meal period:
fasting/breakfast, lunch, dinner or overnight. The Meal Marker is
blinking.
CAUTION: Do not press the test strip tip against the skin or place
the blood on top of the test strip. These actions could lead to
inaccurate results or errors.
65
Do not press the OK button yet.
You can select the blinking marker
or choose a dierent Meal Marker.
65
3. If the blinking Meal Marker is
the one you want, press the
OK button
or
4. To select another Meal Marker,
press the or button to scroll
between markers.

30 31
Contour®next GEN blood glucose monitoring system
TESTING
Meal Marker choices if Meal Marker feature is On
Symbol What the Symbol Means Related Target Range
Fasting: Use the Fasting
marker when testing blood
glucose levels after fasting
(no food or drink for 8 hours,
except water or non-caloric
beverages).
Before Meal
Target Range
Before Meal: Use the
Before Meal marker when
testing blood glucose levels
within 1 hour before a meal.
After Meal: Use the
After Meal marker when
testing blood glucose levels
within 2 hours after the rst
bite of a meal.
After Meal
Target Range
No Mark Selected: Use
the No Mark symbol when
testing at times other than
after fasting or before or after
a meal.
Overall
Target Range
5. When the Meal Marker you want is blinking, press the OK button.
To set a Reminder to test your blood after a meal, see Set a
Reminder on page 20.
For more information about Meal Markers, see Select a Meal Marker
on page 18.
Eject and Dispose of the Used Lancet
1. Do not use your ngers to
remove the lancet from the
lancing device.
The lancing device provided with
your kit has an automatic lancet
ejection feature.
2. Refer to the separate lancing
device insert, if provided
with your kit, for instructions
on automatic ejection of the
lancet.
WARNING: Potential Biohazard
• The lancing device, lancets, and test strips are for single-
patient use. Do not share them with anyone including other
family members. Do not use on multiple patients.5
• All products that come in contact with human blood
should be handled as if capable of transmitting infectious
diseases.
• Always dispose of used test strips and lancets as medical waste
or as advised by your health care professional.
• Do not reuse lancets. Used lancets are not sterile. Use
a new lancet each time you test.
• Always wash your hands with antibacterial soap and water and
dry them well before and after testing or handling the meter,
lancing device, or test strips.
Other manuals for GEN
1
Table of contents
Other CONTOUR NEXT Blood Glucose Meter manuals
Popular Blood Glucose Meter manuals by other brands

Medline
Medline EVENCARE ProView Operator's manual

MediVena
MediVena ONE-CARE PRO Operations & Procedures Manual

Abbott
Abbott FreeStyle Libre 2 In-Service Guide

I-QARE
I-QARE DS-WALKIE owner's booklet

NIPRO Diagnostics
NIPRO Diagnostics TrueResult Twist owner's manual

Polymer Technology Systems
Polymer Technology Systems A1C Now Self Check user manual