ConXeasy SWA401 User manual

SWA401
Wall-Mount Loudspeakers,
Amplifier and In-Wall
Control System
Exclusive provider of
ConXeasy™ Audio Products

2Steljes Audio . ConXeasy SWA401 User Guide
CONTENTS
Safety Instructions......................................... 3
Important Information ................................... 4
Control Panel & Rear Panel ............................ 5
Remote Control............................................. 6
Connecting Your Speakers............................. 7
Installation ................................................ 8-10
Limited Warranty .......................................... 11
Specifications............................................... 12
SWA401
Wall-Mount Loudspeakers, Amplifier
and In-Wall Control System

Steljes Audio . ConXeasy SWA401 User Guide 3
SAFETY INSTRUCTIONS
ATTENTION
The owner’s manual contains important operating and
maintenance instructions, for your safety, it is necessary
to refer to the manual.
DANGEROUS VOLTAGE
Voltage is of sufficient magnitude to constitute a risk of
electric shock. Do not open this product unless you are a
qualified service engineer.
SAFETY INSTRUCTIONS
• Do not use this product near water or
moisture
• Do not place the unit on sloped or unstable
surfaces as the unit may fall off or tip over.
• Clean only with a dry cloth. Unplug this
product from the wall outlet
• Do not attempt to service this product
yourself.
• Opening or removing covers may expose
you to dangerous voltages or other
hazards.
• Please contact the manufacturer to be
referred to an authorized service center
near you.
• Place the unit on a solid surface.
• Do not block any ventilation openings.
• To prevent risk of fire or electric shock,
avoid over loading wall outlets,
• Do not put it in a closed bookcase or
cabinet that may keep air from flowing
through its ventilation openings.
• Do not let objects or liquids enter the
product.
• Protect the power cord from being walked
on or pinched, particularly at plugs and the
point where they exit from the product.
READ BEFORE OPERATING EQUIPMENT
Read all the instructions carefully before
using the unit and keep them for future
reference. Check that the voltage selector
is switched to the correct position for your
country.

4Steljes Audio . ConXeasy SWA401 User Guide
IMPORTANT INFORMATION
SPEAKER CONDITIONING AND BREAK-IN:
• Although a break-in period is not required,
we recommend that you play between 24
to 48 hours of music through the speakers
before doing any critical listening or
speaker placement.
SPEAKER CLEANING:
• We don’t recommend using any solvents or
cleaners on cabinets or speaker Drive units.
Just wipe down with a soft,
dry cloth.
UNPACKING:
• These speakers were carefully tested and
inspected during production and before
packaging and shipping. After unpacking
please check for any damage. It is rare that
a unit is damaged during shipping, but
if this does happen contact your retailer
immediately.
• We recommend that you keep the original
carton and packing material for future
shipping.

Steljes Audio . ConXeasy SWA401 User Guide 5
CONTROL PANEL AND REAR PANEL
FRONT PANEL CONTROLS
1. Volume
2. Power
3. Mode
4. Source
5. IR sensor area
6. USB Port (see following page)
7. Audio Input
REAR PANEL FEATURES
1. DC Input: This 19V DC, 2.1A input connects
to the included power supply. Once
connected, the power supply can plug into
any AC power source.
2. Speaker Output: The speaker output
section terminates with standard audio
wire. This provides the amplified audio
signal to the attached speakers.
The SWA401 AMP is designed for a pair of
4-ohm speakers or a single stereo speaker
rated at 4-ohms per channel.
3. Audio Inputs A and B: These inputs
allow up to two line level sources to be
permanently hardwired into the back panel.
Selection for source playback is made
through from the front panel A/B button or
the wireless remote control. The inputs are
automatically overridden when one of the
front panel audio inputs is used.
SWA401-AMP

6Steljes Audio . ConXeasy SWA401 User Guide
REMOTE CONTROL
1. Power
2. Mute
3. Volume Up
4. Previous track (USB port)
5. Play Pause
6. Next track
7. Volume down
8. Source
9. Mode
1
3
4
5
6
7
8
9
2
USB PORT
When using either of the standard 3.5mm
stereo analogue inputs, the USB port will
automatically switch to the charging function.
To use it as an audio playback input, please
ensure it is selected using the input button on
the remote or the wall panel.
The USB port has two functions. It may be
used as a usb charging point for your mobile
‘phone, tablet, etc. Just plug in the cable
provided with your portable device and it will
charge in the usual manner.
In addition to this, the usb port may be used
as an audio input for a flash memory device
and will play back MP3/WMA/WAV files, with
full transport control from the remote control
provided. Please note that audio playback
from iOS devices is not supported.

Steljes Audio . ConXeasy SWA401 User Guide 7
WIRING DIAGRAM
AMP FRONT
AMP BACK
SWA401-AMP

8Steljes Audio . ConXeasy SWA401 User Guide
INSTALLATION
STEP 1: Choose the desired location of the
SWA401-AMP. It is designed to fit into a
standard 35mm deep UK back box. The
SWA401-AMP dimensions are a standard 50
x 50mm UK size, and has a screwless trim
plate kit included in the package. Make the
appropriate cutout for the mounting back box.
The amplifier itself is compatible with standard
50 x 50mm wall plates.
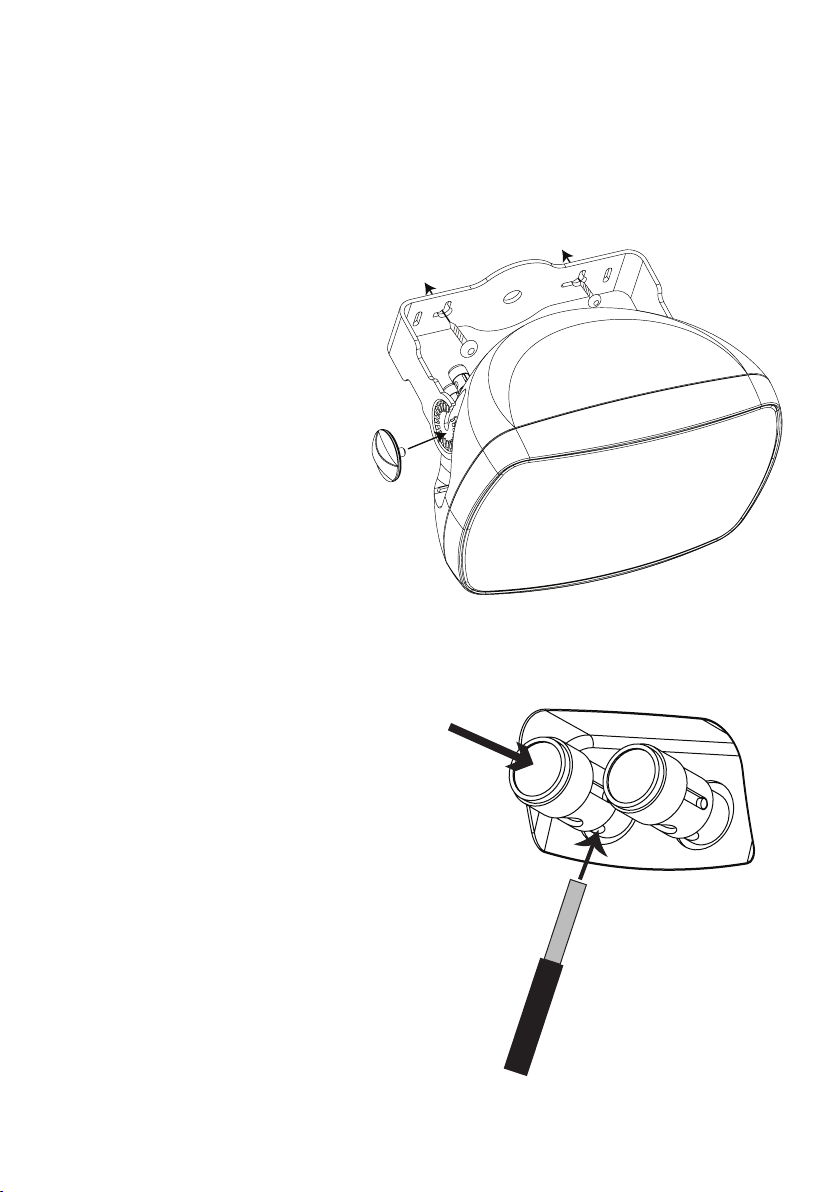
STEP 2: Define the best location for the
speakers that will be connected to the
SWA401-AMP amplifier. These can be in wall,
in ceiling, floor standing, or bookshelf speakers,
but should not present less than an 4-ohm
load to the amplifier. 16-gauge speaker wire,
either two or four conductor, is recommended
for this purpose. The wire should be routed
to the cutout for the SWA401-AMP for
termination into the back of the component, as
shown in fig. 1.
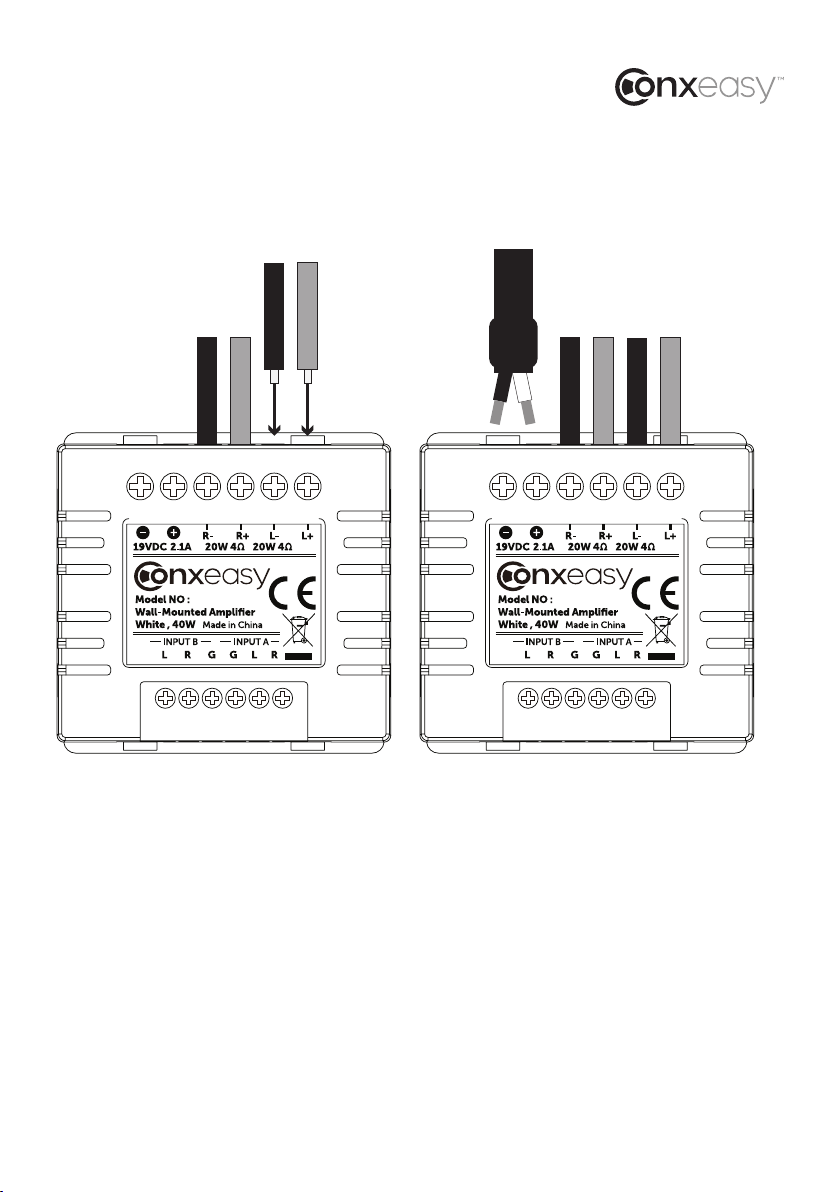
STEP 3: Along with the speaker wire, route
the power supply to the same cutout and
terminate the positive and negative leads at
the back of the SWA401-AMP, as shown in
fig. 2.
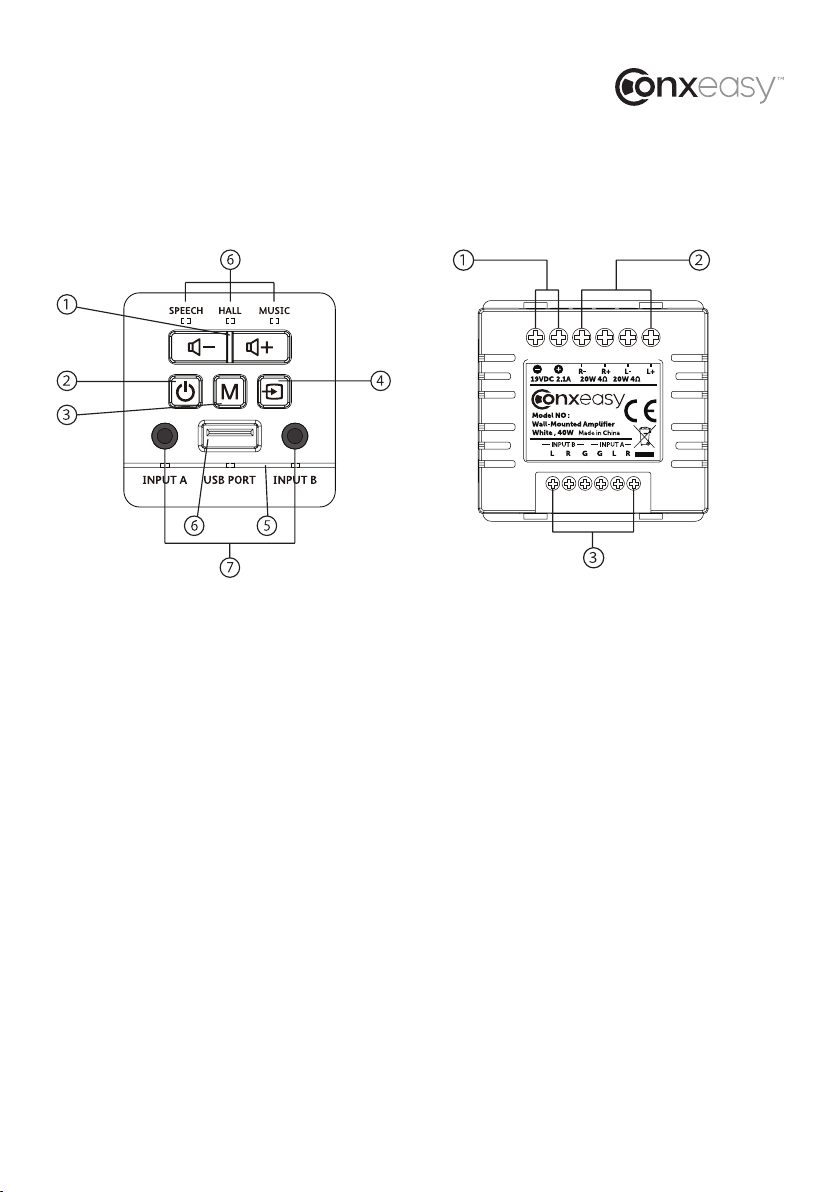
STEP 4: Connect the optional back panel
audio inputs. There are two hardwired audio
inputs on the back of the SWA401-AMP. They
are labeled Input A and Input B. Two individual
audio sources can be wired to these inputs
simultaneously. The actual source for playback
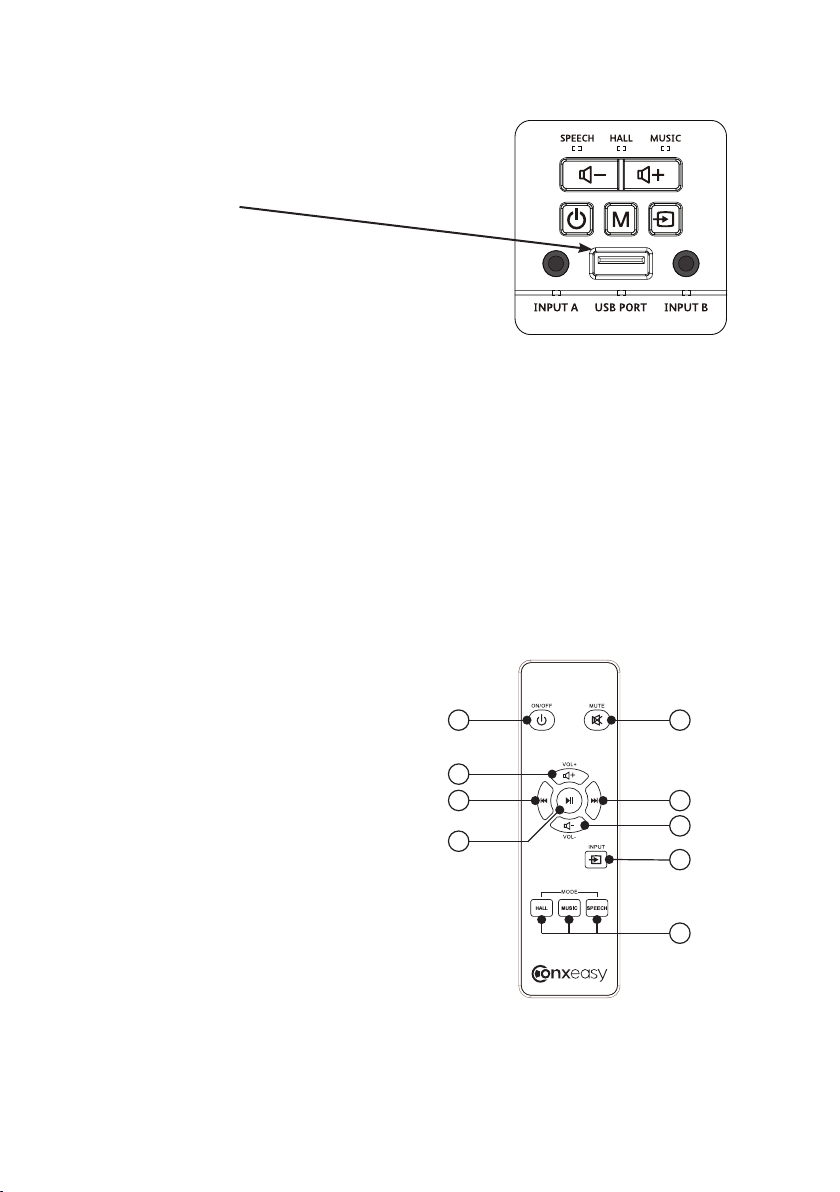
is selected from the front Panel A/B button, or
from the A/B button on the wireless remote
control.
To make the termination, strip the left, right
and ground leads on the input side of a stereo
RCA or stereo mini, 3.5mm audio cable.
Terminate those leads into the appropriate
screw down terminals on the SWA401-AMP.
STEP 5: When the desired inputs on the
SWA401-AMP are complete, screw the
mounting plate into the installed back box
STEP 6: Snap the SWA401-AMP into the
installed mounting plate and install the
screwless trim plate over the entire assembly.
Any incoming signal wired to the back panel
will be amplified to the attached speakers.
When an audio source is plugged into
one of the front panel 3.5mm inputs, it will
automatically override the back panel inputs.

Steljes Audio . ConXeasy SWA401 User Guide 9
Fig. 1. Fig. 2.
SWA401-AMPSWA401-AMP

10 Steljes Audio . ConXeasy SWA401 User Guide
INSTALLATION
The SWA401 package includes a
pair of 0n-wall speakers. These are
easily mounted to any wall using the
included brackets, as shown in fig. 3.
To properly terminate the speaker, strip
about 5 to 6mm of insulation, exposing the
inner copper wire. Press the desired speaker
terminal and insert the stripped portion of the
speaker wire, as shown in fig. 4.
Be careful to terminate the positive and
negative conductors the same at the speakers
as you did at the SWA401-AMP amplifier.
Fig. 3.
Fig. 4.

Steljes Audio . ConXeasy SWA401 User Guide 11
LIMITED WARRANTY
LIMITED WARRANTY
This product had been designed and
manufactured to the highest quality
standards; however, should you encounter
any problems with this product please
contact your local dealer or your country
distributor.
This limited warranty is valid for the original
owner for a period of one year from the date
of purchase, it is not transferable.
What is covered by the limited warranty:
The limited warranty covers all production
and material defects of the product, except
for the specifics stated below.
What is not covered by the limited
warranty:
Damage caused by packing and transport.
Defects caused by accidents, misuse, normal
wear and tear, mis-maintenance, voltage
variation and overloading.
Damage caused by incorrect installation or
operation. Damage caused by modification
or repair by a non-authorized service centre
and use of non-original spare parts.
Other damage due to conditions beyond the
supplier’s control such as fire, rain, war and
other force majeure events.
How to claim parts or repair under warranty:
To have your product serviced under
warranty, you must contact the dealer from
whom the product was purchased.
You will need to produce this warranty
booklet completed and stamped by your
dealer on the date of purchase.
Alternatively, you will need the original sales
invoice or other proof of ownership and date
of purchase.
The supplier is liable only to repair or replace
defective parts of products and the supplier
is not responsible for indirect losses or
damage arising from the use of the product.
Transportation costs for servicing are not
covered by the warranty.
A service repair or replacement cannot
exceed the value of the product under
warranty; in no event shall the supplier be
responsible or liable for special, incidential,
consequential or indirect damage.

SWA401 SPECIFICATIONS
AMPLIFIER
Power Amplifier Output
Continuous Average Output Power : 40W (20W x 2)
Both channels : 1KHz / 1%THD
Rated Distortion (1/2 power) : 0.40%
Rated Impedance : 4phm
Frequency Response (20-20kHz) : ±2 dB
Source Input
Front A & B : 3.5mm Stereo Jack
Input Impedance : 20K Ohms
Input Sensitivity for Rated Power : 300mV RMS
Front USB port : USB A type jack
USB decode : MP3/WMA/WAV
Back
Variable Input : Screw Terminal
Input Impedance : 20K Ohms
Input Sensitivity for Rated Power : 300mV RMS
Fixed Input : Screw Terminal
Input Impedance : 20K Ohms
Input Sensitivity for Rated Power : 300mV RMS
4 INCH SPEAKER
Electrical
Power : 10-40W
Impedance : 4 ohm
Physical Specifications
Unit Size : 240mm H x 160mm W x 150mm D
9.4” H x 6.3” W x 5.9” D
Power Requirements
Power Supply : 19V DC
Power Consumption at maximum available output : 40W
Power Consumption with music (typical) : 10W
Power Consumption no signal : 2.1W
Power Consumption standby : 0.5W
Mode
Hall / Music /Speech Mode
Physical Specifications
Unit Size : 50mm x 50mm x 29mm
1.97” x 1.97”x 1.14”300mV RMS
SWA401-AMP Approvals
CE-EMC
REMOTE CONTROL
Electrical
IR Frequency : 38.7 kHz
Batteries : AAA x 2
Physical Specifications
Unit Size : 140mm L x 42mm W x 18mm D
5.5” L x 1.65” W x 0.7” D
Steljes Audio reserves the right to change specifications without notice. Images and
photos are for illustration only and actual product may vary. E&OE.
Exclusive provider of
ConXeasy™ Audio Products
Table of contents
Other ConXeasy Speakers manuals