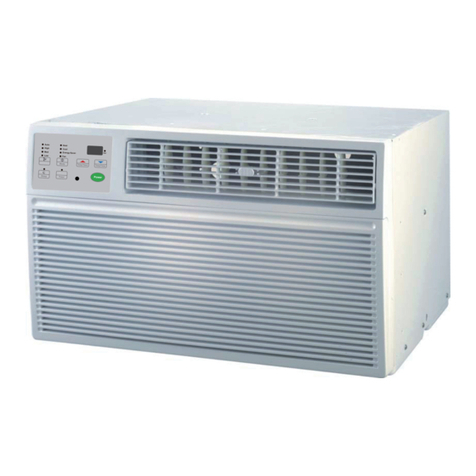
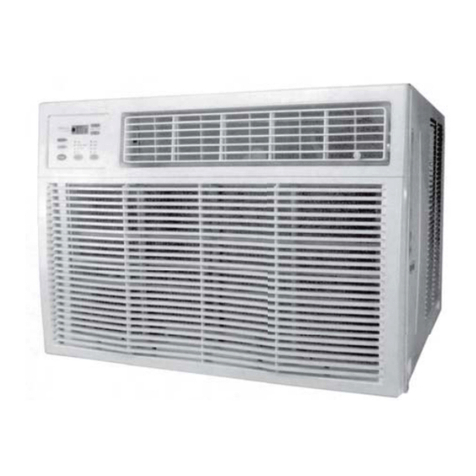
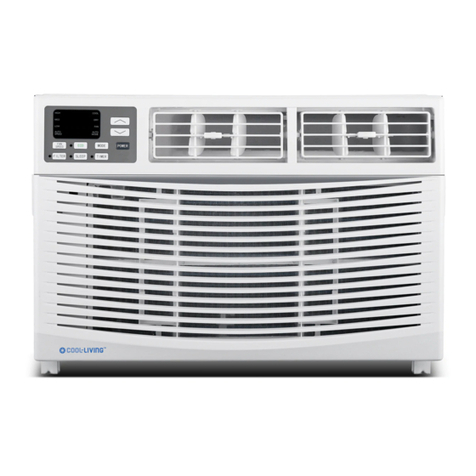
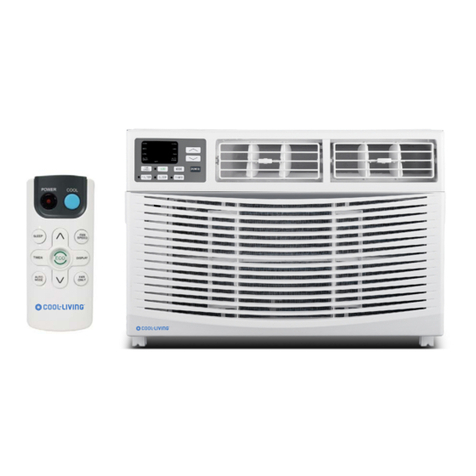
Cool-Living CL-TIWC-08CRD1 User manual

CL-TIWC-08CRD1 - 8,000 BTU WINDOW AIR CONDITIONER
WWW.COOLLIVINGPRODUCTS.COM OR EMAIL [email protected]OM

IMPORTANT SAFETY INSTRUCTIONS
ASSEMBLING YOUR AIR CONDITIONER
USING YOUR AIR CONDITIONER
CLEANING AND MAINTENANCE
TROUBLESHOOTING
............................................................................................10
..................................................................................................1
.........................................................................................................................24
.......................................................................................................23
.......................................................................................................18
CONTENTS
* The design and specifications are subject to change without prior notice for product improvement.
Consult with the sales agency or manufacturer for details.
* The shape and position of buttons and indicators may vary according to the model, but their function
are the same.

1
1. Installationmust be performed accordingto the installation instructions.Improper
installation cancause waterleakage, electricalshock, or fire.
2. Use onlythe included accessoriesand parts, andspecified tools for the installation.
Using nonstandardparts can causewater leakage,electrical shock, fire, and injuryor
property damage.
3. Makesure that the outlet youare using isgrounded and hasthe appropriatevoltage.
The power cord is equippedwith a three-prong grounding plugto protectagainst shock.
Voltage information canbe found onthe nameplate ofthe appliance.
4. Your appliance mustbe used ina properly grounded wall receptacle. If thewall receptacle
you intendto use isnot adequately grounded or protected by a time delay fuse orcircuit
breaker (thefuse or circuitbreaker neededis determined by the maximumcurrent of the
appliance. The maximumcurrent is indicated on thenameplate locatedon the appliance),
have aqualified electrician install the properreceptacle.
4. Installthe appliance ona flat, sturdy surface.Failure todo so couldresult in damage or
excessive noiseand vibration.
6. The appliancemust be kept free from obstruction to ensure proper function andto mitigate
safety hazards.
7. Do notmodify the lengthof the powercord or usean extension cord topower the appliance.
8. Do notshare a singleoutlet with otherelectrical appliances. Improper power supplycan
cause fire orelectrical shock.
9. Do notinstall your air conditioner ina wet room such asa bathroom or laundry room.Too
much exposure to water can cause electricalcomponents to short circuit.
10.Do not install the appliancein a locationthat may be exposed to combustible gas, as this
could cause fire.
11.he appliance haswheels to facilitate moving.Make surenot to usethe wheels on thick
carpet or to roll over objects, asthese could causetipping.
12.Do not operate the appliance if ithas been droppedor damaged.
13.Theappliance with electricheater shall have at least 3 feet / 1meter space away fromthe
combustible materials.
14.Do not touchthe appliance withwet or damphands or whenbarefoot.
15.If the airconditioner is knocked over duringuse, turn offthe appliance andunplug it
from the mainpower supply immediately.Visually inspect theappliance to ensure there
is no damage.If you suspectthe appliance hasbeen damaged, contact a technician or
customer service for assistance.
IMPORTANT SAFETY INSTRUCTIONS
Read All Instructions and CautionaryMarkings Before Operation and Installation to prevent
death or injuryto the useror other peopleand property damage, the following instructions
must be followed. Incorrectoperation due to ignoring ofinstructions may cause death, harm
or damage.
This symbol indicates the
possibility of personnel
injury or lossof life.
This symbol indicates the possibility
of property damage or serious
consequences.
WARNING
WARNING CAUTION

2
16.In a thunderstorm, the powermust be cutoff to avoid damage to the machine due to
lightning. Your air conditionershould be usedin such away thatit is protected from
moisture. e.g. condensation, splashed water,etc. Do notplace or store your air
conditioner where it can fall or be pulled into water or any other liquid. Unplug
immediately if itoccurs.
17.All wiring mustbe performed strictly in accordancewith the wiringdiagram located
inside of theappliance.
18.Theappliance's circuit board(PCB)is designed with a fuse toprovide overcurrent
protection. The specifications of thefuse are printed on thecircuit board, such
as: T 3.15A/250V,etc.
19.After proper installation, condensate will notoverflow during normal use. If the fan hits
the built-up water and thesound annoys you, please remove the caplocated atthe back
of the airconditioner to drain the water away.
IMPORTANT SAFETY INSTRUCTIONS
1. This appliancecan be usedby children aged from 8years and above and person with
reduced physical,sensory or mentalcapabilities or lackof experience andknowledge if
they havebeen given supervisionor instruction concerning use ofthe appliance ina safe
way andunderstand thehazards involved.Children shall notplay with theappliance.
Cleaning and usermaintenance shall not be madeby children without supervision.
(be applicable for the EuropeanCountries)
2. This applianceis not intendedfor use by persons (includingchildren) with reduced physical,
sensory or mentalcapabilities or lackof experience andknowledge, unless theyhave been
given supervision orinstruction concerning use of theappliance by aperson responsible
for theirsafety.Children should besupervised to ensurethat they donot play with the
appliance. Children must be supervisedaround the applianceat all times.
(Be applicable for other countriesexcept theEuropean Countries.)
3. If thesupply cord isdamaged, it mustbe replaced bythe manufacturer,its service agentor
similarly qualified persons in orderto avoida hazard.
4. Prior tocleaning or othermaintenance, the appliancemust be disconnected from the
supply mains.
5. Never usethis appliance ifit is notworking properly, or ifit has beendropped or damaged.
6. Do notrun cord under carpeting. Donot cover cord with throw rugs, runners, or similar
coverings. Donot route cord under furniture or appliances.Arrange cordaway fromtraffic
area and where it willnot be tripped over.
7. Do notoperate witha damaged cord, plug, powerfuse or circuitbreaker. Discardthe
appliance or returnto an authorized service facilityfor examinationand/or repair.
8. To reduce therisk of fireor electric shock,do not usethis fan with any solid-state speed
control device.
9. The applianceshall be installedin accordance withnational wiring regulations.
10.Contact theauthorized service technicianfor repair or maintenance ofthis appliance.
11.Contact theauthorized installerfor installationof this appliance.
12.Do not coveror obstruct theinlet or outletgrilles.
CAUTION

3
IMPORTANT SAFETY INSTRUCTIONS
13.Do not usethis product for functions otherthan those describedin this instruction
manual.14.Before cleaning, turnoff the powerand unplug theappliance.
15.Disconnect the powerif strangesounds, smell, orsmoke comesfrom it.
16.Do not pressthe buttons onthe controlpanel with anythingother than yourfingers.
17.Do not operate or stop the appliance by inserting or pulling out the power cord plug.
18.Do not usehazardous chemicalsto clean orcome into contact with the appliance.
Do not usethe appliance in the presence ofinflammable substances or vapour suchas
alcohol, insecticides, petrol,etc.
19.Always contact a qualifiedperson to carry out repairs. If thedamaged power supply cord
must be replaced with anew power supplycord obtainedfrom the product manufacturer
and not repaired.
20.Hold the plugby the head of the powerplug when takingit out.
21.Turn off theproduct when notin use.
Operation ofCurrent Device
The power supplycord containsa current measuringdevice that detects damage to the
power cord.Testyour power supplycord as follows:
1. Plug inthe air conditioner.
2. The powersupply cord will have TWO buttons on the plughead. Press theTEST button.
Youwill notice aclick as theRESET button pops out.
3. Press theRESET Button. You will notice aclick as thebutton engages.
4. The powersupply cord is now supplyingelectricity to theunit.
(On some products this isalso indicated by a lighton the plughead.)
NOTE:
1. The power supplycord with thisair conditioner contains a current detectiondevice
designed to reduce the riskof fire.
2. In theevent that the power supplycord is damaged, it can not berepaired. Itmust be
replaced with acord fromthe manufacturer.
3. Do notuse this deviceto turn theunit on oroff.
4. Alwaysmake surethe RESET button is pushedin for correct operation.
5. The powersupply cord must be replaced if itfails toreset when either the TEST button is
pushed, or itcan not bereset.Please contactCustomer Service.
Plug in & press RESET
Grounding type wall receptacle
Do not, under any
circumstances, cut,
remove or bypass
the grounding prong.
Power supply cord with 3-prong grounding
plug and current detection device.

WARNING FOR USING R32 REFRIGERANT
4
IMPORTANT SAFETY INSTRUCTIONS
For R32 refrigerant models:
1. Appliance shallbe installed, operated andstored in a room witha floor arealarger
2
than 4 m .
2
2. Appliance shallnot be installed in anunvertilated space,if that spaceis smaller than 4 m .
3. Compliance withnational gas regulations shall be observed.
4. Keep ventilation openings clearof obstruction.
5. The applianceshall be stored so as to prevent mechanical damage from occurring.
6. A warningthat the applianceshall be stored in awell-ventilated areawhere the room size
corresponds tothe room area as specifiedfor operation.
7. Any person who isinvolved with working on orbreaking into a refrigerantcircuit should
hold a currentvalid certificatefrom an industry-accredited assessment authority,which
authorises their competence to handlerefrigerants safely in accordance with an industry
recognised assessment specification.
8. Servicing shallonly be performedas recommended bythe equipment manufacturer.
Maintenance and repair requiring theassistance of otherskilled personnel shallbe carried
out under thesupervision of the person competentin the useof flammable refrigerants.
9. Please followthe instruction carefully to handle,install, clear, service the air conditioner
to avoidany damage or hazard. Flammable Refrigerant R32 isused within airconditioner.
When maintaining or disposing the air conditioner, the refrigerant (R32) shall be recovered
properly,shall not dischargeto air directly.
10.No any openfire or devicelike switchwhich may generate spark/arcing shall bearound
air conditioner toavoid causingignition of theflammable refrigerantused.
11.Please followthe instruction carefully to store ormaintain the air conditioner toprevent
mechanical damage from occurring.
12.Flammable refrigerant-R32 is usedin air conditioner. Please followthe instruction
carefully toavoid anyhazard.
13.For specific information on thetype of gas and theamount, please tothe relevantlabel
on the unititself.
Caution: Risk offire/flammable materials
(Required forR32 units only)
Warning: lowburning velocity material
(For R32 modelsapply to IEC60335-2-40:2018)
Note about Fluorinated Gases
1. Fluorinated greenhouse gases are containedin hermetically sealedequipment. For specific
information onthe type, theamount and theCo2 equivalent in tonnes ofthe fluorinated
greenhouse gas(onsome models), please refer tothe relevantlabel on theunit itself.
2. Installation, service,maintenance and repairof this unitmust be performedby a certified
technician.
3. Product uninstallation and recycling must beperformed by acertified technician.

5
IMPORTANT SAFETY INSTRUCTIONS
Explanation of symbols displayed on the unit:
FOR HOUSEHOLD USE ONLY READ AND SAVE THESE INSTRUCTIONS
1. Transport of equipmentcontaining flammable refrigerants
See transport regulations.
2. Marking ofequipment using signs
See local regulations.
3. Disposal ofequipment using flammablerefrigerants
See national regulations.
4. Storageof equipment/appliances
The storageof equipment shouldbe in accordancewith the manufacturer's instructions.
5. Storageof packed (unsold) equipment
Storage packageprotection should be constructed such that mechanicaldamage to the
equipment inside thepackage will not cause aleak of the refrigerant charge. The maximum
number of piecesof equipment permittedto be stored togetherwill be determinedby
local regulations.
6. Informationon servicing
1) Checks tothe area
Prior to beginningwork on systems containingflammable refrigerants,safety checksare
necessary to ensurethat the riskof ignition isminimised. For repair to therefrigerating
system, thefollowing precautionsshall be compliedwith prior toconducting work on the
system.
2) Workprocedure
Work shallbe undertakenunder a controlled procedureso as tominimise the riskof a
flammable gasor vapour beingpresent while the work isbeing performed.
3) General work area
All maintenance staff and others working inthe local areashall be instructedon the
nature of work being carriedout. Workin confined spacesshall be avoided. The area
around the workspace shall besectioned off. Ensure that the conditionswithin the area
have beenmade safe by control of flammable material.
4) Checking forpresence of refrigerant
The area shallbe checkedwith an appropriate refrigerant detectorprior to andduring
work, to ensure the technician is aware of potentially flammable atmospheres. Ensure
that the leakdetection equipment beingused is suitablefor use withflammable
refrigerants,i.e. non-sparking, adequatelysealed or intrinsically safe.

IMPORTANT SAFETY INSTRUCTIONS
6
5) Presence offire extinguisher
If any hotwork is tobe conducted onthe refrigerationequipment or any associated parts,
appropriate fireextinguishing equipment shall be available to hand.Have a dry powder or
CO2 fireextinguisher adjacent to the chargingarea.
6) No ignitionsources
No person carryingout work inrelation toa refrigerationsystem whichinvolves exposing
any pipe work that contains or hascontained flammable refrigerant shalluse any sources
of ignition insuch a mannerthat it may lead tothe risk offire or explosion. All possible
ignition sources, including cigarettesmoking, should bekept sufficientlyfar awayfrom
the site ofinstallation, repairing,removing and disposal,during which flammable
refrigerant can possibly bereleased to the surrounding space.Prior to worktaking place,
the area around the equipmentis to besurveyed to make surethat there are no flammable
hazards orignition risks. NoSmoking signs shallbe displayed.
7) Ventilated area
Ensure that thearea is inthe open or that it isadequately ventilatedbefore breakinginto
the systemor conducting any hot work.A degree ofventilation shall continue during the
period that thework is carried out. Theventilation shouldsafely disperseany released
refrigerant andpreferablyexpel it externally intothe atmosphere.
8) Checks tothe refrigerationequipment
Where electricalcomponents arebeing changed, theyshall be fitfor the purpose and to
the correct specification. Atall times themanufacturer's maintenanceand service
guidelines shall befollowed. Ifin doubt consultthe manufacturer's technical department
for assistance.The following checks shall beapplied to installations using flammable
refrigerants:
a. The chargesize is inaccordance with theroom sizewithin which therefrigerant containing
parts are installed;
b. The ventilation machinery andoutlets are operating adequatelyand are notobstructed;
c. If anindirect refrigerating circuit isbeing used, thesecondary circuit shallbe checked for
the presence ofrefrigerant; Markingto the equipmentcontinues to bevisible and legible.
Markings and signsthat are illegibleshall be corrected;
d. Refrigeration pipe orcomponents are installed in a position wherethey are unlikely tobe
exposed toany substancewhich may corrode refrigerant containingcomponents, unless
the components are constructedof materials whichare inherentlyresistant tobeing
corroded orare suitably protected against being socorroded.
9) Checks toelectrical devices
Repair and maintenance toelectrical componentsshall include initialsafety checksand
component inspectionprocedures. If a fault exists thatcould compromise safety, then no
electrical supply shallbe connected to the circuituntil it issatisfactorily dealtwith. If the
fault cannotbe correctedimmediately but it is necessaryto continue operation, an
adequate temporarysolution shall beused. This shallbe reported to the ownerof the
equipment so allparties are advised.Initial safetychecks shall include:
a. That capacitors aredischarged: thisshall be donein a safe manner toavoid possibilityof
sparking;
b. That thereno live electricalcomponents and wiringare exposed while charging,
recovering orpurging the system;
c. That there is continuity of earthbonding.

IMPORTANT SAFETY INSTRUCTIONS
7
7. Repair to intrinsically safe components
Do not applyany permanent inductive or capacitance loads tothe circuit withoutensuring
that this willnot exceed the permissible voltage and currentpermitted forthe equipment
in use. Intrinsicallysafe componentsare the onlytypes that canbe worked on while livein
the presence ofa flammable atmosphere.The test apparatus shall beat the correct rating.
Replace componentsonly with partsspecified by themanufacturer. Other partsmay result
in the ignitionof refrigerantin the atmospherefrom a leak.
8. Cabling
Check that cablingwill not besubject to wear, corrosion, excessive pressure, vibration,
sharp edges orany other adverse environmental effects.The check shallalso takeinto
account the effects ofaging or continual vibration from sourcessuch as compressors or
fans.
9. Detection offlammable refrigerants
Under no circumstances shall potential sourcesof ignition beused in thesearching foror
detection of refrigerant leaks.A halide torch (or anyother detectorusing a naked flame)
shall not beused.
10.Leak detection methods
The following leak detection methods are deemedacceptable forsystems containing
flammable refrigerants.Electronic leak detectors shall be used todetect flammable
refrigerants, but the sensitivitymay not beadequate, or may need re-calibration.
(Detection equipment shall be calibrated in arefrigerant-free area.) Ensure that the
detector isnot a potentialsource of ignitionand is suitablefor the refrigerant used.Leak
detection equipment shall be setat a percentage of the LFL of the refrigerantand shall be
calibrated tothe refrigerantemployed and theappropriate percentage of gas (25 %
maximum) is confirmed. Leak detectionfluids are suitable for use with mostrefrigerants
but the useof detergentscontaining chlorine shall be avoided as thechlorine may react
with the refrigerant andcorrode the copper pipe-work. Ifa leak issuspected, all naked
flames shall beremoved/extinguished. Ifa leakage of refrigerantis found whichrequires
brazing, all ofthe refrigerantshall be recovered fromthe system,or isolated (by means
of shut offvalves) in a part ofthe system remote from the leak. Oxygen free nitrogen
(OFN) shall thenbe purged through the system both before and during the brazing process.
11.Removal andevacuation
When breaking into the refrigerant circuit to make repairs or for any other purpose
conventional procedures shall beused. However, it isimportant that best practice is
followed sinceflammability is aconsideration. The following procedureshall be adhered
to: Removerefrigerant; Purge the circuit with inertgas; Evacuate; Purge again with inert
gas; Open thecircuit by cutting or brazing.The refrigerantcharge shall be recoveredinto
the correct recovery cylinders.The systemshall be flushed with OFN torender the unitsafe.
This process may need tobe repeatedseveral times. Compressed air oroxygen shall not be
used for this task. Flushingshall be achievedby breaking thevacuum in thesystem withOFN
and continuing to fill untilthe working pressure is achieved, then venting to atmosphere,
and finally pullingdown to avacuum. This process shall berepeated untilno refrigerantis
within the system. When thefinal OFN chargeis used, thesystem shallbe vented down to
atmospheric pressureto enable workto takeplace. This operation is absolutelyvital if
brazing operationson the pipe-workare to take place.Ensure that the outlet for the
vacuum pump isnot close toany ignition sources and there is ventilation available.

IMPORTANT SAFETY INSTRUCTIONS
8
12.Charging procedures
In addition to conventional charging procedures, the following requirements shall be
followed. Ensure that contamination of different refrigerants does not occur when using
charging equipment. Hoses or lines shall be as short as possible to minimise the amount
of refrigerant contained in them. Cylinders shall be kept upright. Ensure that the
refrigeration system is earthed prior to charging the system with refrigerant. Label the
system when charging is complete (if not already). Extreme care shall be taken not to
overfill the refrigeration system. Prior to recharging thesystem it shall be pressure tested
with OFN. The system shallbe leak tested on completion of charging but prior to
commissioning. A follow up leak test shallbe carried out prior to leaving the site.
13.Decommissioning
Before carrying out this procedure, it is essential that the technician is completely familiar
with the equipment and all its detail. It isrecommended good practice that all refrigerants
are recovered safely. Prior to the task being carried out, an oil and refrigerant sample shall
be taken in case analysis is required prior to re-use of reclaimed refrigerant. It is essential
that electrical power is available before the task is commenced.
a.Become familiar with the equipment and its operation.
b.Isolate system electrically.
c.Before attempting the procedure ensure that: Mechanical handling equipment is available,
if required, for handling refrigerant cylinders; All personal protective equipment is
available and being used correctly; The recovery process is supervised at all times by a
competent person; Recovery equipment and cylinders conform to the appropriate standards.
d. Pump down refrigerant system, if possible.
e. If a vacuum is not possible, make a manifold so that refrigerant can be removed from various
parts of the system.
f. Makesure that cylinder is situated on thescales before recoverytakes place.
g. Start the recovery machine andoperate in accordance with manufacturer's instructions.
h. Do not overfill cylinders. (No more than 80 % volume liquid charge).
i. Do not exceed the maximum working pressure of the cylinder, even temporarily.
j. When the cylinders have beenfilled correctly and the process completed, make sure thatthe
cylinders and the equipment are removed from site promptly andall isolation valves on the
equipment are closed off.
k. Recovered refrigerant shall not be charged intoanother refrigeration system unless it has
been cleaned and checked.
14.Labelling
Equipment shall be labelled statingthat it has been de-commissioned and emptied of
refrigerant. The label shall bedated and signed. Ensure that there are labels on the
equipment stating the equipment contains flammable refrigerant.
15.Recovery
When removing refrigerant from a system, either for servicing or decommissioning, it is
recommended good practice that all refrigerants are removedsafely. When transferring
refrigerant into cylinders, ensure that only appropriaterefrigerant recovery cylinders are
employed. Ensure that the correctnumber of cylinders for holding the total system charge
is available. All cylinders to beused are designated for the recovered refrigerantand
labelled for that refrigerant (i.e. special cylinders for the recovery of refrigerant).

9
IMPORTANT SAFETY INSTRUCTIONS
Cylinders shall becomplete with pressure reliefvalve and associated shut-off valves in
good working order.Empty recoverycylinders areevacuated and,if possible, cooled
before recovery occurs. The recovery equipment shall bein good workingorder with a
set of instructionsconcerning the equipmentthat is athand and shallbe suitable for the
recovery offlammable refrigerants.In addition, aset of calibrated weighing scales shall
be availableand in goodworking order. Hoses shallbe complete with leak-free disconnect
couplings and ingood condition. Before using the recovery machine, check thatit is in
satisfactory workingorder,has been properlymaintained and that any associated
electrical components are sealed toprevent ignition in the eventof a refrigerant release.
Consult manufacturer if in doubt.The recoveredrefrigerant shallbe returned to the
refrigerant supplierin the correct recovery cylinder,and the relevant WasteTransfer
Note arranged.Do not mixrefrigerants inrecovery unitsand especially notin cylinders.
If compressorsor compressor oils are to be removed, ensure that they have been
evacuated toan acceptable level to make certain thatflammable refrigerantdoes not
remain within thelubricant. The evacuation process shallbe carried outprior to
returning the compressor tothe suppliers. Onlyelectric heating to the compressor body
shall be employedto acceleratethis process. Whenoil is drained from asystem, itshall be
carried out safely.
Gentle Reminder
Check the applianceregularly and refer to TROUBLESHOOTING orcontact our customer
support if itshows any of the followingsigns:
- Powercord or plug is damaged.
- Loud noise,unusual smell orexcessive heat.

10
ASSEMBLING YOUR AIR CONDITIONER
Package Contents
Part Name Quantity
Window Air Conditioner
Remote Control
Long Foam Seal
(Non-Adhesive)
Long Foam Seal
(Adhesive)
Security Bracket
3/4 Screw"
1/2 Screw"
Plasticene
Remote ControlBattery
1
1
1
1
1
4
3
1
2

11
ASSEMBLING YOUR AIR CONDITIONER
Window Requirements
1. This airconditioner is designedto be installed in astandard single-hungor double-hung
window with awindow width between25" and 36"(645mm- 915mm).
2. The airconditioner can beinstalled without the side panelsto fit ina narrow window
opening. See thewindow dimensions. Ifthe air conditioneris installedon a windowwith
a width of645-720mm, the airconditioner must beinstalled tothe right andthe right
bracket must be abuton the airconditioner,otherwise the airconditioner will not
operate normally.
3. The lowersash (the lowerpart of thewindow that moves up anddown) must allowfor
14.5" of verticalclearance when open.
4. All supportingparts must besecured to firm wood, masonryor metal.
5. The electricaloutlet must bewithin reach ofthe power cord.
NOTE:
1. Savethe product packaging and installation instructions for future reference.
2. Storethe air conditionerin the productbox during winter or whennot in use.

12
ASSEMBLING YOUR AIR CONDITIONER
Getting Started
SUGGESTED TOOLS FOR INSTALLATION (Not included)
CAUTION:
Heavy object. Team handling is required during the installation process.
1. Removing All the Packaging
Carefully remove all the packaging straps and wraps from theair conditioner and accessories.
CAUTION:
When handling the unit, be careful toavoid cuts from the sharp metal edges and aluminum
fins on the front and rear coils.
NOTE:
To be easy installation, both the left and right curtains, curtain frames, top channel,and bottom
channel, are pre-assembled in factory.
2.Applying the Adhesive Foam Seal
Measure the length of the upper window frame, trim the adhesive foam
seal to the appropriate lengthand apply as shown.
Phillips
screwdriver
Scissors
or knife
Pencil Level Ruler or
tape measure
Left curtain frame,
pre-assembled in factory.
Left curtain,
pre-assembled in factory.
Top channel,
pre-assembled in factory.
Right curtain frame,
pre-assembled in factory.
Right curtain,
pre-assembled in factory.
Bottom channel,
pre-assembled in factory.

ASSEMBLING YOUR AIR CONDITIONER
13
3.Placing Inside anOpen Window
Carefully lift the air conditionerwith a helperto the windowsill and pull
down the sash,making sure theair conditioner iscentered and its bottom
rail is flush against the windowsill.
NOTE:
o
The air conditionershould be tiltedabout 3 for betterdrainage of condensate and
rainwater. Use alevel: about 1/3 bubble willshowcorrect slant.
4.Securing the SideBrackets
Extend the sidebrackets from both sidesof the airconditioner ontothe
left and rightwindow framesand secure byinstalling four3/4" screwsas
shown.
NOTE:
Fix the upperscrews first,then the lowerscrews.

14
ASSEMBLING YOUR AIR CONDITIONER
5.Securing the SidePanels
Pull the sidepanels inwards to align withthe brackets,then secure onto
the sides bysnapping the jutting points onto the locking pins.
6.Sealing the Creviceswith Plasticene (Optional)
Fill the crevicesbetween the sidebrackets andpanels with theincluded
plasticene.

15
ASSEMBLING YOUR AIR CONDITIONER
7.Installing the Screw Intothe Top Rail
Install the 1/2" screw into the toprail of the air conditioner.
8.Applying the PanelSeals
Measure the length extended by the sidepanels, trim thepanel seals to
the appropriatelength, peel off the backingsand apply onthe panels on
both sides.

16
ASSEMBLING YOUR AIR CONDITIONER
9.Installing the SecurityBracket
Attach thesecurity bracketon top ofthe window sashand secure withtwo 1/2" screws.
10.Filling the GapBetween Sashes
Trim thenon-adhesive foamseal to theappropriate lengthand insert
between the window sashes.
CAUTION:
When open thewindow,besure that the fixed screws areavaliable fromthe curtain to the
window frame.
If AC Is BlockedBy Storm Window
1. Add woodas shown, orremove
storm windowbefore air
conditioner is installed.
2. If StormWindow Frame must
remain, be sure the drainholes
or slots arenot caulkedor
painted shut. Accumulated Rain
Water orCondensate mustbe
allowed to drain out.

ASSEMBLING YOUR AIR CONDITIONER
17
Installation &Assembly Instructions
Important Considerations
1. Beforeinstalling the appliance,you must read the manual carefully to
get the safety information and notes.
2. Unit refrigerant chargeamount: referto unit nameplate marking.
3. A leaktest must be done afterthe installation is completed.
4. It isa must todo the safety inspection before maintaining or repairing
an air conditionerusing combustible refrigerant in order to ensure
that the firerisk is reducedto minimum.
5. It isnecessary to operate the machine under acontrolled procedure
in order to ensure that any risk arising fromthe combustible gas or
vapor during theoperation isreduced to minimum.
Introduction toRefrigerants R32
1.Site Safety 2.Operation Safety
3.Installation Safety
- Refrigerant Leak Detector
- AppropriateInstallation Location
- The leftpicture is theschematic diagramof arefrigerantleak detector.
Please note that:
1. The installation siteshould be ina well-ventilatedcondition.
2. The sitesfor installingand maintaining an air conditionerusing Refrigerant R32 shouldbe
free fromopen fire orwelding, smoking, dryingoven or any other heatsource higher than
548 which easily producesopen fire.
3. When installing an airconditioner,it is necessaryto takeappropriate anti-static measures
such as wearanti-static clothingand/or gloves.
4. It isnecessary to choosethe site convenient forinstallation ormaintenance whereinthe air
inlets and outletsof the indoorand outdoor unitsshould be notsurrounded by obstacles
or close toany heat source or combustible and/or explosive environment.
5. If theindoor unit suffers refrigerant leak duringthe installation,all the personnel should go
out till therefrigerant leaks completely for 15 minutes. If theproduct is damaged, it isa
must to carry such damagedproduct back tothe maintenance station and itis prohibited to
weld the refrigerant pipeor conduct otheroperations onthe user's site.
6. It isnecessary to choosethe place wherethe inlet andoutlet air ofthe indoor unitis even.
7. It isnecessary to avoid the placeswhere thereare other electrical products, power switch
plugs and sockets, kitchencabinet, bed, sofa and othervaluables right under the lineson
two sides ofthe indoor unit,and also prevent mechanical damagefrom occurring.
Open Flames
Prohibited
Ventilation
Necessary
Mind Static
Electricity
Must Wear
Protective Clothing
and Anti-Static
Gloves
Don't Use
Mobile Phone

18
USING YOUR AIR CONDITIONER
Turn on the air conditioner or switch to standby.
Adjust fan speed (Low, Med, High, Auto)
NOTE: Fan speed setting is available in Auto,Cool, and Fan modes only.
Select to adjust the airflow direction by swingingthe louver
vertically.
Decrease the air conditioning temperature.
Increase the air conditioning temperature.
Switch between Cool/Dry/Fan/Auto mode.
Remind to clean the dust filter.
Turn on/off the ECO mode, under Cool/Dry mode.
Timer on or Timer off the unit.
Turn on/off the MUTE mode.
Indicates Cool, Dry, Fan, and Auto mode, respectively.
Indicates the unit is in Sleep mode.
Indicates the unit is in MUTE mode.
Indicates that there is aWiFi connection
Indicates Low, Medium, High, and Automatic fan speeds, respectively.
Table of contents
Other Cool-Living Air Conditioner manuals

Cool-Living
Cool-Living CL-WAC-12 User manual

Cool-Living
Cool-Living CL-PAC121 User manual

Cool-Living
Cool-Living CL-RAC08EWIES User manual

Cool-Living
Cool-Living CL-RAC15EWES User manual

Cool-Living
Cool-Living CL-RAC10EWES-6A User manual

Cool-Living
Cool-Living cl-wac-25 User manual

Cool-Living
Cool-Living CLYW-53C2A-M09AD Service manual

Cool-Living
Cool-Living CL-TTW-10 User manual

Cool-Living
Cool-Living CL-WAC-18 User manual

Cool-Living
Cool-Living CL-WAC-82 User manual