CoolGear MSD-SRF2XM User manual

Sales@coolgear.com www.CoolGear.com
MSD-SRF2XM Multi-port RS-232 to Ethernet Data Gateway User Manual
The MSD-SRF2X Dual port RS-232 to Ethernet data gateway will address
the need to add 2 RS-232C devices to an IP-based Ethernet LAN on your
system, has built-in watch dog function for hardware hangs.
The MSD-SRF2XM Dual-Port RS-232 to Ethernet Data Gateway addresses
the need to connect individual RS-232C devices, such as PLCs, meters,
sensors, to an IP-based Ethernet LAN. It enables your application
software to access serial devices anywhere on a local area network or the
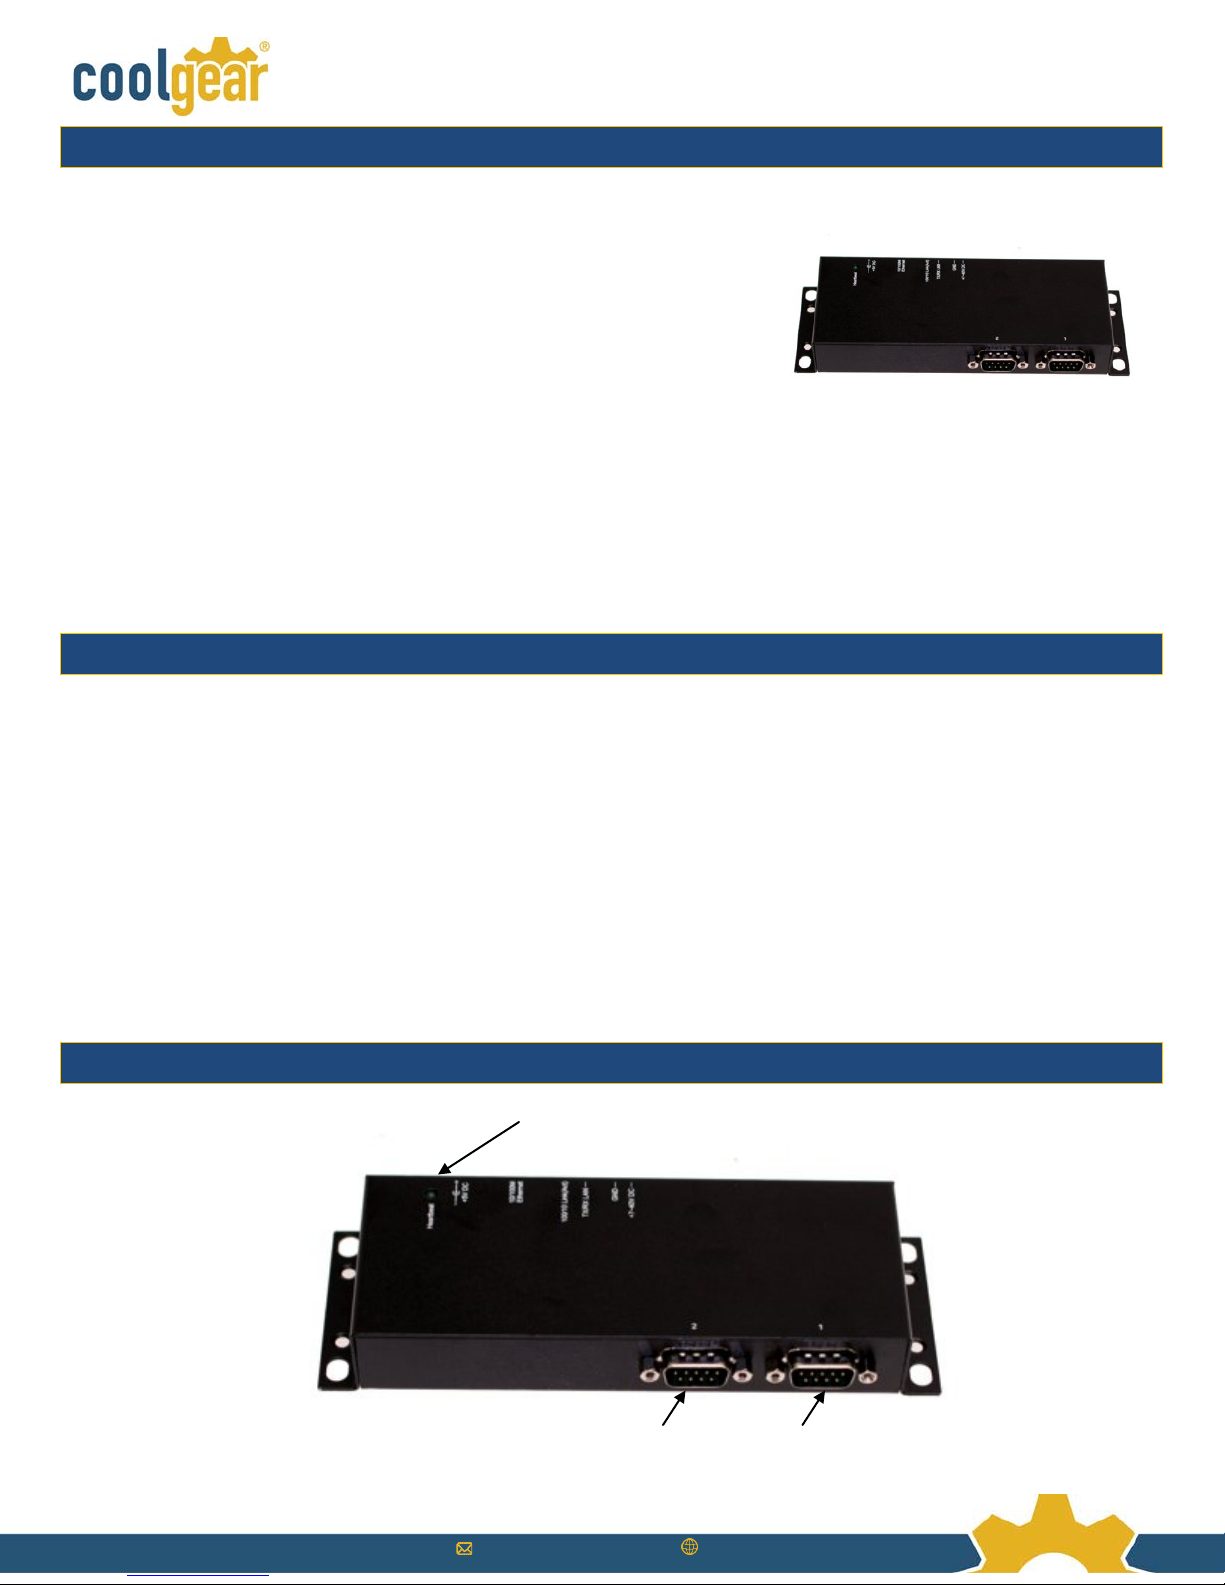
Internet. This RS-232 to Ethernet adapter is a ruggedly constructed metal
chassis with its RJ45 connection, 12VDC power jack, and LED indicators conveniently located on the back panel, out of
the way of any serial cable connection.
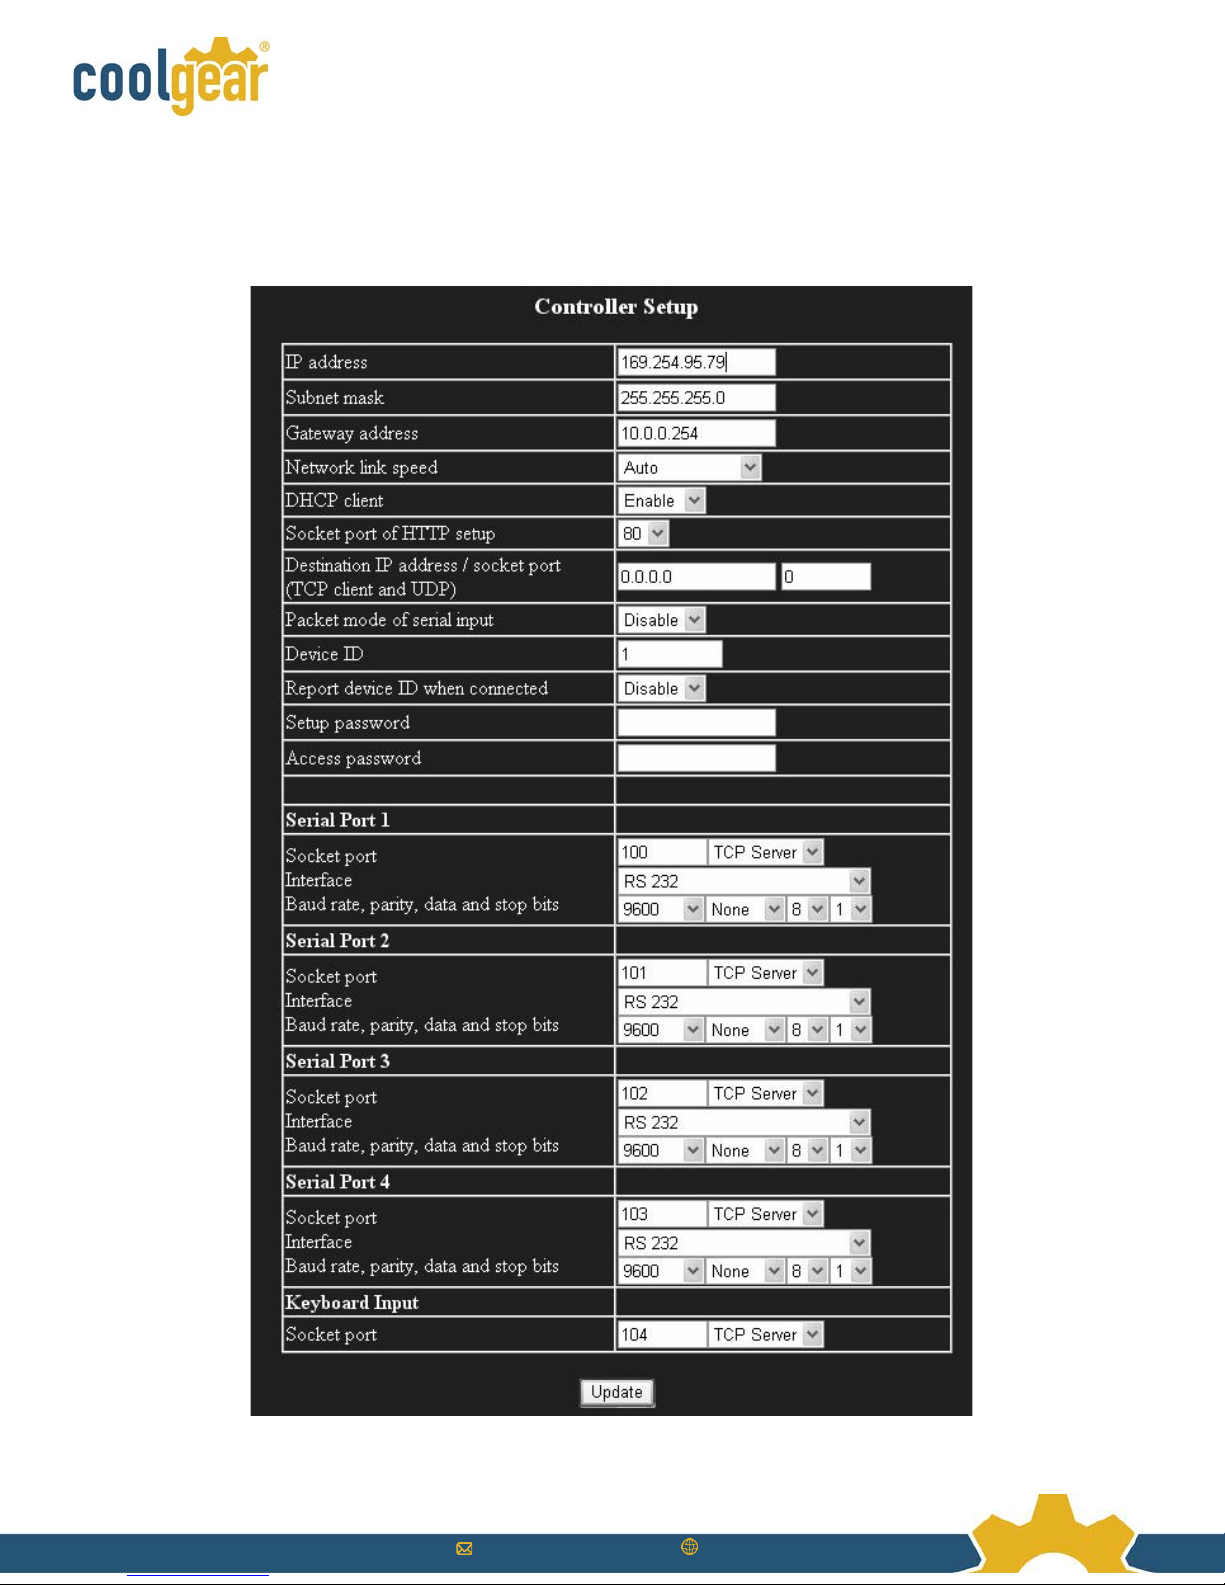
The Dual-Port RS-232 to Ethernet Data Gateway is easy to install and remotely connect through a variety IP addressing
methods (UDP, IP, TCP, ICMP, HTTP, DHCP, ARP-Ping). Its rugged industrial-grade construction provides the ideal
solution for applications requiring serial port environments and network device management.
Features
•Provides 2RS-232 Ports over Ethernet
•Provides 2DB9 RS-232 Male Connectors
•RS-232 Speed from 300bps to 115.2Kbps
•Provides one 10/100Mbps, RJ45 LAN Port
•LAN Supports Auto Cross Over Feature
•Supports Setup and Connect Passwords
•Supports Standard Windows Socket Protocol
•Provides TCP Server, TCP Client, and UDP
•Equipped with Wall Mounting Holes
•Provides a Built-in watch dog function designed to reset the unit when the hardware/software encounters an
error
Connector Layout
Port 1
Port 2
Heartbeat LED

Sales@coolgear.com www.CoolGear.com
•DC Jack Power connector: A DC5V / 2A AC adapter is supplied with this product.
•RJ Ethernet Connector: 10 / 100Mbps Ethernet port. It supports auto cross-over feature. You can use the same
cable to connect to a Hub, Switch or a host computer.
•Led Indicators: The data gateway’s top panel has a heartbeat LED and its rear panel has 4 LAN LED’s. They are
described as the following table:
LED Name
Color
LED Function
Heartbeat Green Blinking: Normal operation
Else: Malfunction
Link/Act
100
Green Steady on: Linked in 100Mbps mode.
Blinking: Transferring data
Link/Act 10 Green Steady on: Linked in 10Mbps mode.
Blinking: Transferring data
LAN TX
Green
Blinking: Sending data out to LAN port
LAN RX
Green
Blinking: Receiving data from LAN port
Hardware Installation
1. Use static electricity discharge precautions. Remove possible static discharge potential from any objects that
the data gateway may come in contact with before installation. This can be accomplished by touching a bare
metal chassis rail after you have turned off the power.
2. Attached the power adapter.
Link / ACT100 LED
Link / ACT10 LED
LAN TX LED
LAN RX LED
Aux Power
Input
LED’s
RJ45 LAN
DC Jack

Sales@coolgear.com www.CoolGear.com
3. Connecting LAN cable: Use a standard straight-through Ethernet cable to connect to a Hub or Switch. If
youconnect the data gateway to your computer’s Ethernet port instead, you don’t need to change to a cross-
over type cable since the data gateway provides auto cross-over feature.
4. Connect the data gateway’s serial ports to your serial devices.
5. Use the wall mounting Kit if you to place the data gateway on the wall.
Data Gateway Setup
Setting IP Address
Please consult your Network Administrator to determine the appropriate IP address. The IP address can be set in any of
the following ways:
•Automatically from a DHCP Server
•Web Browser
•Ethernet managing utility (Em.exe supplied by this product)
The data gateway comes with factory installed IP address 192.168.1.254. It is ready to accept a new IP address from a
DHCP Server. If your network has a DHCP server, it will automatically assign an IP address to the data gateway the first
time it is connected and powered up.
1. Setting the IP address from a DHCP Server
A DHCP server will automatically assign an IP address (dynamic address) as well as Subnet Mask and Gateway to this
product. If you power up the data gateway without
a fixed (static) IP address, the DHCP server will be able to assign an IP address (this is the default setting, Enable DHCP).
If you will set the IP address using another method, the address becomes static. This was done when you Disable the
DHCP setting in the Setup Menu of the data gateway.
2. Setting the IP address using Web Browser
Run your browser and access the data gateway by entering the default (192.168.1.254) or current IP address into your
browser’s address window. Enter the password (default has no password). Then go to change your IP address as well
other parameters if required.
3. Setting the IP address using Em.exe Utility
The Em.exe is a Microsoft Windows based utility to find all the data gateways connected on the same subnet and
network segment. To run the Em.exe utility, please insert the driver CD supplied with the data gateway. Open (double
click) the program at the following location (assume the CD-ROM drive is at E)
E:\Utility\82500\Em.exe

Sales@coolgear.com www.CoolGear.com
Data Gateway Setup
When you entered Setup Menu of the data gateway, the following page will be available for your access. Please click
Update button after you changing your settings. Please also remember you password because you need it when you are
going to enter this setup menu next time.

Sales@coolgear.com www.CoolGear.com
Male DB9 Pin Assignments and Cable Wiring
Environmental Information
•Power Requirements: 5V DC, 250mA (max)
•Operating Temp.: 0 to 55°C (32 to 131°F)
•Operating Humidity: 5 to 95% RH
•Dimensions (LxWxH): 5.90”(L)x2.61”(W)x1.02”(H) (15.00 x 6.65 x 2.60 cm)
Table of contents
Other CoolGear Gateway manuals