Coolmax CN-550 User manual

1
Network Attached Storage
User Manual
NAS
User Manual

2
Table of Contents
1. Introduction
Overview
Features
System Requirements
Power Requirements
Package List
Hardware Components
Ports and Buttons
Status Indicators
2. Getting Started
Hard disk installation
IDE cable connection
Connecting the 4 pin Power Plug
Connecting the NAS to network
Link with computer directly
Connect NAS to a computer
Power on the NAS
3. How to find NAS from the network
Static IP
Dynamic IP
Host Name
Through Search from START menu
4. How to find NAS through direct PC connection
PC network card configuration
PC connects to NAS through USB cable

3
5. System Configuration
Entering the Web Interface
Authentication
Menu Bar
Network TCP/IP Settings
Host name and group name
Auto DHCP server
IP status
IP CONFIG
Hard Disk
Disk Utility
File System Language
Hard Disk sleep time
Status Log
Disk Information
Folder Manager
Folder List
Sharing List
FTP
FTP Server
Anonymous
Accounts management
Time
Date
Time
SNTP
Time Server
Time Zone
System
Administrator
Firmware

4
6. Setup NAS as File Server
Setup file server under Windows environment
7. Troubleshooting
8. Appendix
Specifications

5
Chapter 1 Introduction
Overview
Coolmax Technology introduces an affordable SOHO NAS (Network Attached
Storage) for home or small business users. This user friendly network disk is ready to
plug and play; no prior networking experience is required. It supports Windows, Mac,
and Linux operation systems. It is easy to share data files through the Internet and
easy to setup and operate. By using NAS, it adds great flexibility for the network. It
extends the personal computing to a new powerful level.
Features
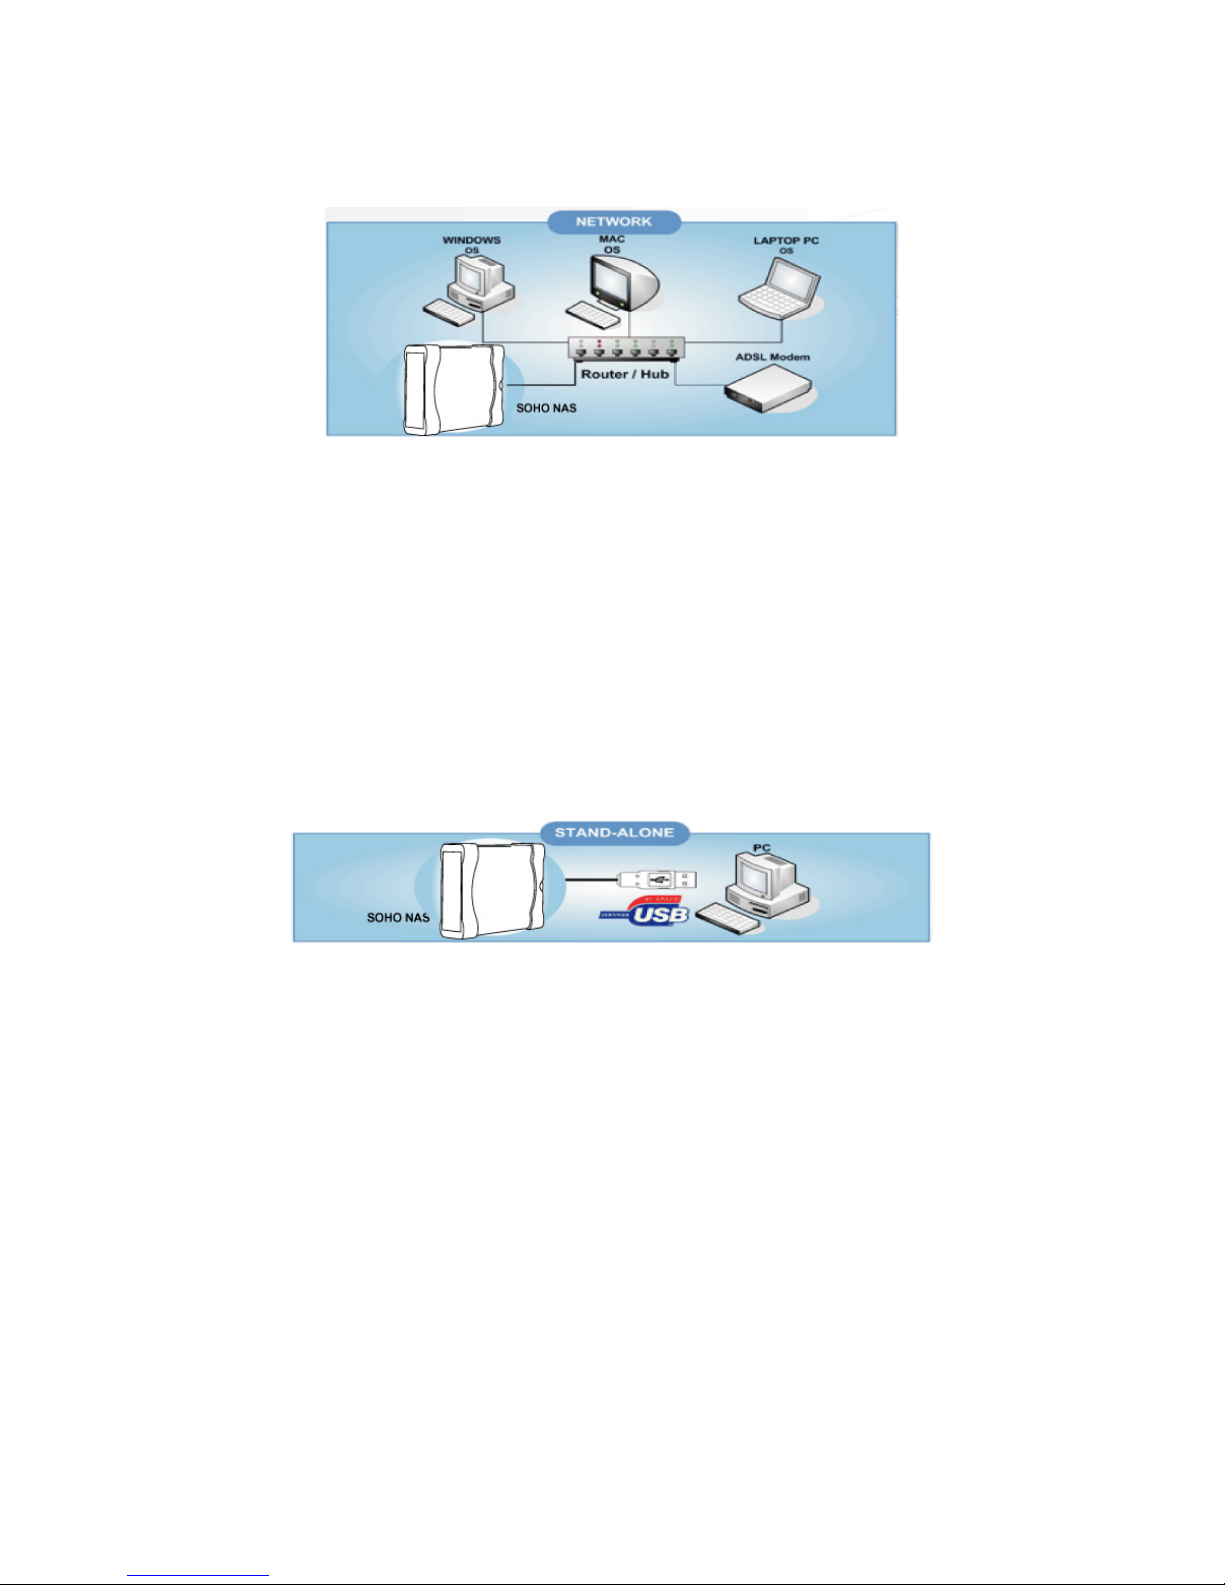
Data sharing over a network
Complied with TCP/IP, SMB, FTP, SNTP protocol
Sharing data via a local area network through SMB protocol
High speed USB2.0 interface
Share-level security through web-based network management tool
Thermal fan controller for hard disk protection
File sharing between Windows, Mac, and Linux clients
No drivers needed, no server required
System Requirements
File server for local network
Windows 98, ME, 2000, XP
Mac OS 10.2 or above
FTP server for internet
Windows 98, ME, 2000, XP
Mac OS 9 or above
USB Enclosure
Windows 98, ME, 2000, XP
Mac OS 9.X, 10.3 or above
Packing List
Please make sure the package includes the following items:
NAS x1
Network cable x1: RJ-45, Cat 5, 1.5M
USB 2.0 cable x1: Type A female to type B female, 1M
Power Adapter x1: Input AC100V-240V, Output DC12V 2A, peak 2.5A

6
One User Manual CD
One NAS Quick Installation Guide
Hardware Components
Ports and Buttons
Status Indicators
Blue Light: NAS system ready
Green Light: Connect to a network, Blinks when there is data transfer
Red Light: Blinks when data read and write from hard disk
Chapter 2 Getting Started
Hard disk installation
This NAS is a standard IDE hard drive supported device. It supports up to 1 Terabyte
capacity. Before the Hard Drive is placed into the enclosure, adjust the jumper to the
master position. Please refer to the documentation from hard drive manufacture.

7
Jumper Setting
IDE cable connection
Match The IDE ribbon cable RED strip to the Hard Drive connector pin 1 and attach
firmly.
IDE cable connector
Connecting the 4 pin power plug
Carefully connect the power plug to the Hard Drive power connector and press firmly.
Power connector
※Once you have finished all the steps above, secure the Hard Drive with provided
screws and carefully close the enclosure.

8
Connecting the NAS to Network
The USB cable should be detached if any before connecting the NAS device to the
network.
Simply connect NAS to a 10/100Mbps switch, hub or router with the provided Cat 5
Straight through cable. The network connectivity will be established right after the
power on process.
Link With Computer Directly
The NAS device can connect to computer directly with a Cat 5 cable or USB 2.0
cable for storage and configuration purpose.
Simply connect NAS to a computer via an included straight through Cat 5 cable or
USB cable. The NAS has its own build in DHCP server to assign an IP address for the
connected computer. It is recommended to connect the NAS directly to the client PC
at first time for easier configuration.
The default IP address for the NAS device is 169.254.0.1
Power on the NAS
Only use the power adapter supplied with the NAS. Use different adapter may
damage the product.
After the power switch has been turned on, the System LED will be lighted. If the
Link LED lights up or blinks as well, this indicates there is connectivity from the
network.

9
Congratulation! Now you have finished the hardware installation. Please have the
NAS device placed on a proper location with a good ventilation environment.
※When connect the NAS via the USB 2.0 cable to the computer, the network cable
should be disconnected
Chapter 3 How to find NAS from the network
Once the NAS attached to the network, the NAS is accessible from any computer on
the network. There will be few ways to locate the NAS device either from the IP
address or host name.
Static IP
Please confirm the NAS’s host name and the IP address from the Network
Administrator if a static IP address has been assigned to the NAS device.
Dynamic assigned IP
Consult Network Administrator for the NAS IP address. If NAS is behind a router,
you can search the DHCP client table. Check the host name “storage-xxxx” from the
DHCP list on the network gateway or router
Through Search from start menu
Use “Search Results” from the Windows system to look for a computer named
“storage” on the network.
Click on “start” menu→”Search”→”Computers or people”

10
Next, click on “A computer on the network”
Key in “storage” at the computer name field and click the “Search” button

11
The device named “STORAGE-XXXX” should appear on the search results

12
How to find NAS through direct PC connection
PC network card configuration
If the NAS is attached directly to a PC through Cat 5 network cable, make sure the PC
network card is configured properly. To configure the local area connection, right
click on my network places, choose properties. Next right click on the connected
network card, click on the “Properties”
Select Internet Protocol (TCP/IP), next click on the “Properties” button.

13
Select “Obtain an IP address automatically”, next click on the “OK” button.
The connected PC should be able to obtain an IP address 169.254.0.X through NAS.
Since both the PC and NAS are on the same subnet, you can follow Chapter 3 to
locate the NAS.
PC connects to NAS through USB cable
The NAS becomes an extra storage enclosure drive for the computer through USB
connection. Windows will automatically detect the hard drive without installing any
driver. Once the hard drive is recognized, an additional drive will appear on the My
Computer window.

14
Chapter 4 System configuration
Entering the Web set up page
Open a browser and input NAS’s IP address (default IP: 169.254.0.1) or host name
from the URL field and press “enter”.
Authentication
After the browser brings up the next page, input administrator account and password,
and click OK to enter the management web page. The default account and password is
“admin”.
Manu Bar
The first home page shows below. There will be brief description on each
configuration page.

15
Network TCP/IP setting
This page enables you to configure your network environment. It also displays the
network information.
Host name and group name
Click on “Edit” button to change workgroup and host name if necessary.
Input workgroup and host name, next click on “OK” to finish it.
Auto DHCPserver shows the current DHCP server status.

16
IPStatus displays the current TCP/IP setting
IPCONFIG
This allows you to configure Dynamic IP or Static IP address for the NAS.
Automatic IP: the NAS will obtain an IP address from any available DHCP
server (Gateway or router). Through the automatic IP assignment, user can easily
establish the network connection for the NAS.
Static IP:to manually setup an IP address for the NAS, Simply input IP address,
Subnet Mask, Gateway and DNS in the blank fields. User should make sure the
IP address is on the same network domain and same subnet. Next click on
“Apply” button to finish it.
Hard Disk
This page will allow you to use the imbedded utilities for the hard drive as well as

17
display the hard drive status. The NAS supports FAT32 file system for various
operation systems.
Disk Utility:
You should format the hard disk from this page before you use it.
Click on “Format disk” button and the warning page will prompt on the screen.
Click “OK” to format the hard disk. The formatting process will take a while depends
on the hard drive capacity. Once the formatting process is done, the successfully
information will pop up and indicate the initial disk successfully. Next, click on “OK”
to finish it.
Scan disk:
Click on “Scan disk” button to start scanning the hard disk. The dialogue box will

18
show below, click on “OK” to scan disk. It is particular useful to check if there is any
error on the hard drive. The next dialogue box will show below. The scanning process
will take some time to complete. It depends on the capacity of the hard disk.
Once the hard drive is ready, the PUBLIC fold will be created by default.
File System Language: The system language will define file name in different
languages that you can use it on NAS. Currently it supports 14 languages for localized
operation systems. Click on the drop down menu to select the desired language.
Hard Disk Sleep Time
The disk will idle if hard disk is inactive after “xx” minutes. To setup the hard disk
sleeping time, input the value in the field. The value should be “5” to “60”. The value
“0” can disable this function. The hard drive will standby all the time without idling.
Status Log
Click “Refresh” to refresh the updated system log information. During the scan disk
process, the status log will show the current scanning status and contains.

19
User can clear the log any time by clicking on the Clear Msg button.
Folder Manager
User can create a new folder, rename or delete an existing folder from the Folder List,
making the folder to share on the local network and setup password for folder
accessibility through Sharing List.

20
Create a new folder
1. Click on the “Create” button and the pop up window will show
below.
2. Input folder name and click on “OK” to create a folder.
3. Highlight the folder name to rename or delete the folder
Share a folder
Select a folder name on Folder List table and click on , the folder will
appear on the Sharing List table. Now the folder is available to every one on the entire
network. If the sharing folder needs to be removed, simply highlight the folder name
and click on to disable it.
Table of contents
Other Coolmax Network Hardware manuals