www.cooperandhunter.com
6
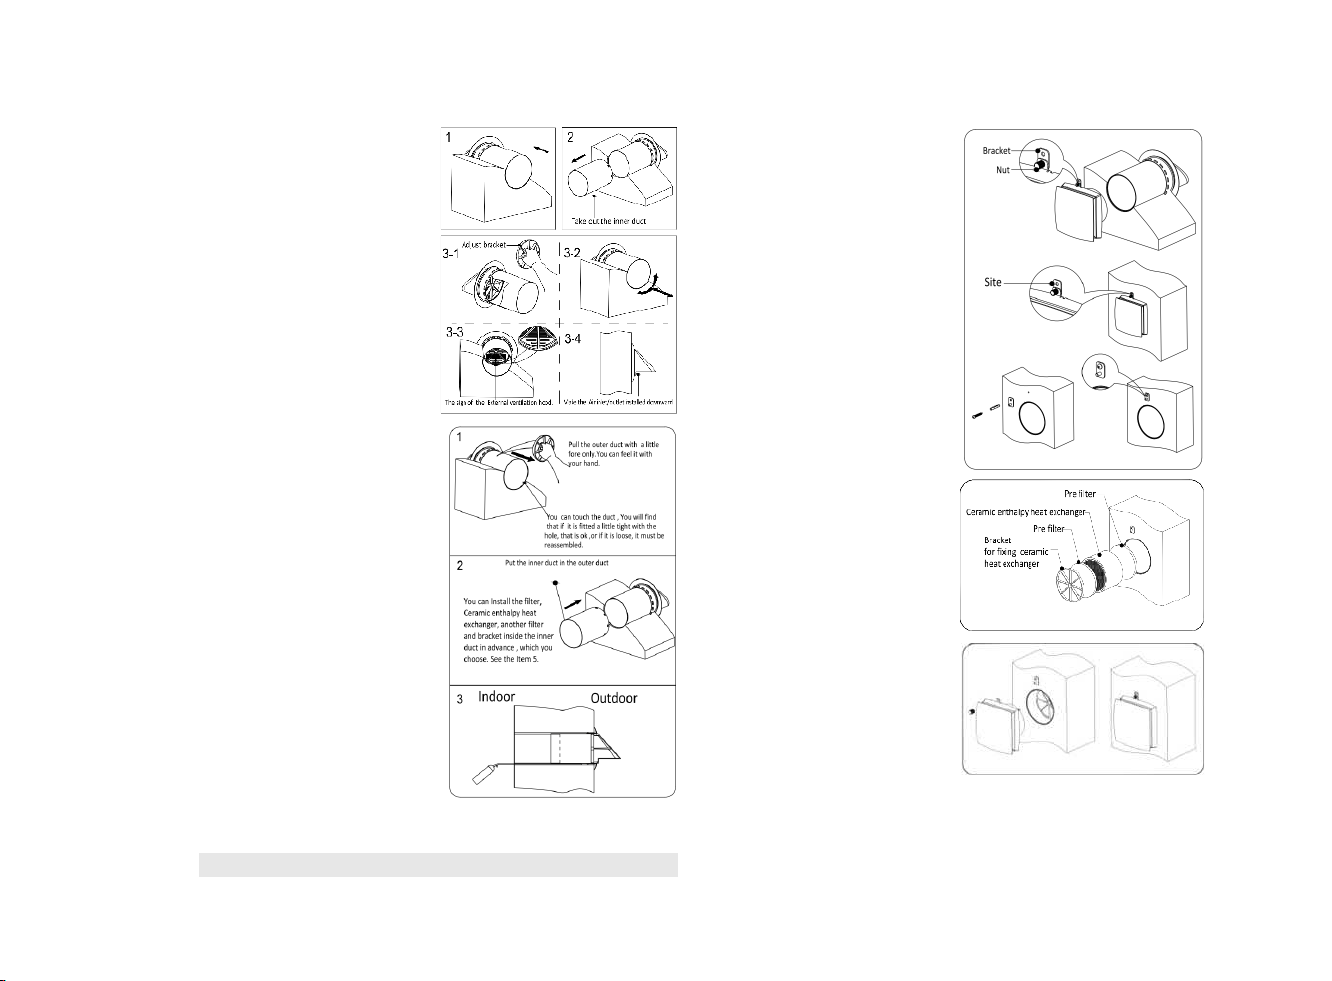
2. Assembly inner duct and outer
duct together to adapt to the
thickness of wall. Then take out
the inner duct. Handle the bracket
to turn the outer duct forward and
backward, left and right to make
the Air inlet/outlet installed
downward correctly by the sign of
the External ventilation hood.
3. Through the wall hole from
indoor, and pull back the duct by
the adjust bracket to make the
inner side rubber ring cling to the
outside wall. Then put the inner
duct in the hole and assembly
inner duct and outer duct
together. Fill the gap between the
wall and duct with foam glue
(Using waterproof sealing glue for
the gap close to indoor to against
rainwater). The inner duct should
parallel with indoor wall surface.
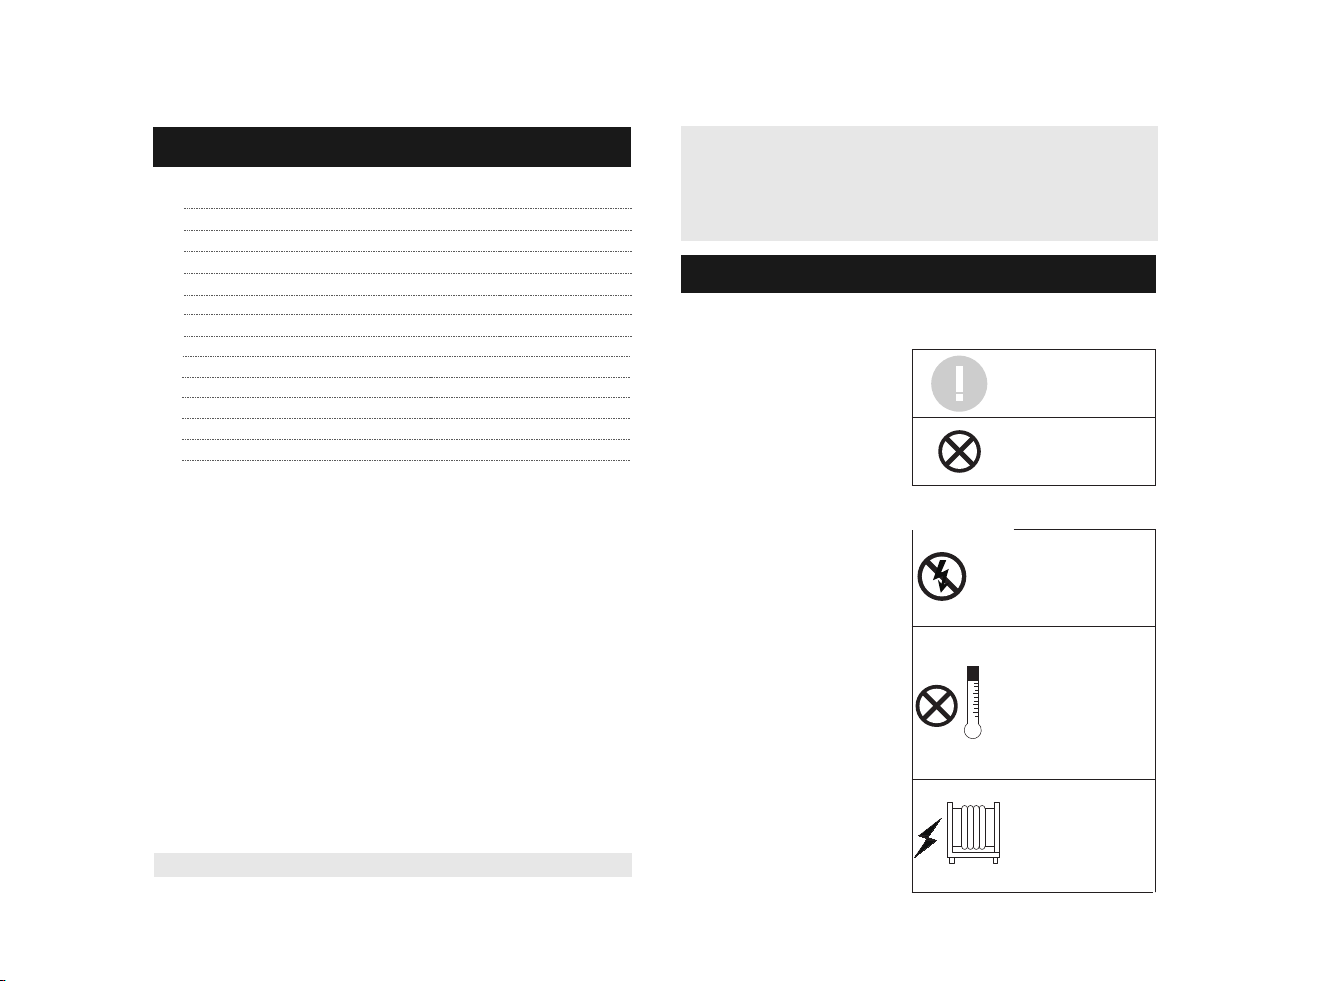
4. Put the fan on the surface wall
as the location, which the bracket
and the nut are installed on the fan
in advance, that the duct of the fan
must be into the inner duct.
Marking the drilling hole site. After
put the fan out Drilling 1*6mm hole
on the marking place and put in
the rubber plug (as pack
accessories). Install the retaining
bracket with a screw(as pack
accessories)
5. Install the filter, Ceramic
enthalpy heat exchanger, another
filter and bracket inside the inner
duct. In this item ,carry out the
step in advance in the item 3,
which you have Put the fittings
in the inner duct.
6. Install the fan on the surface
wall. The fan is fixed with nut.
7. If you install the ventilator in the absence of rain, you can attach the
rubber ring of the accessories bag to the out outer duct with the silicone
glue. Don’t fill the gap between the wall and duct with foam glue.