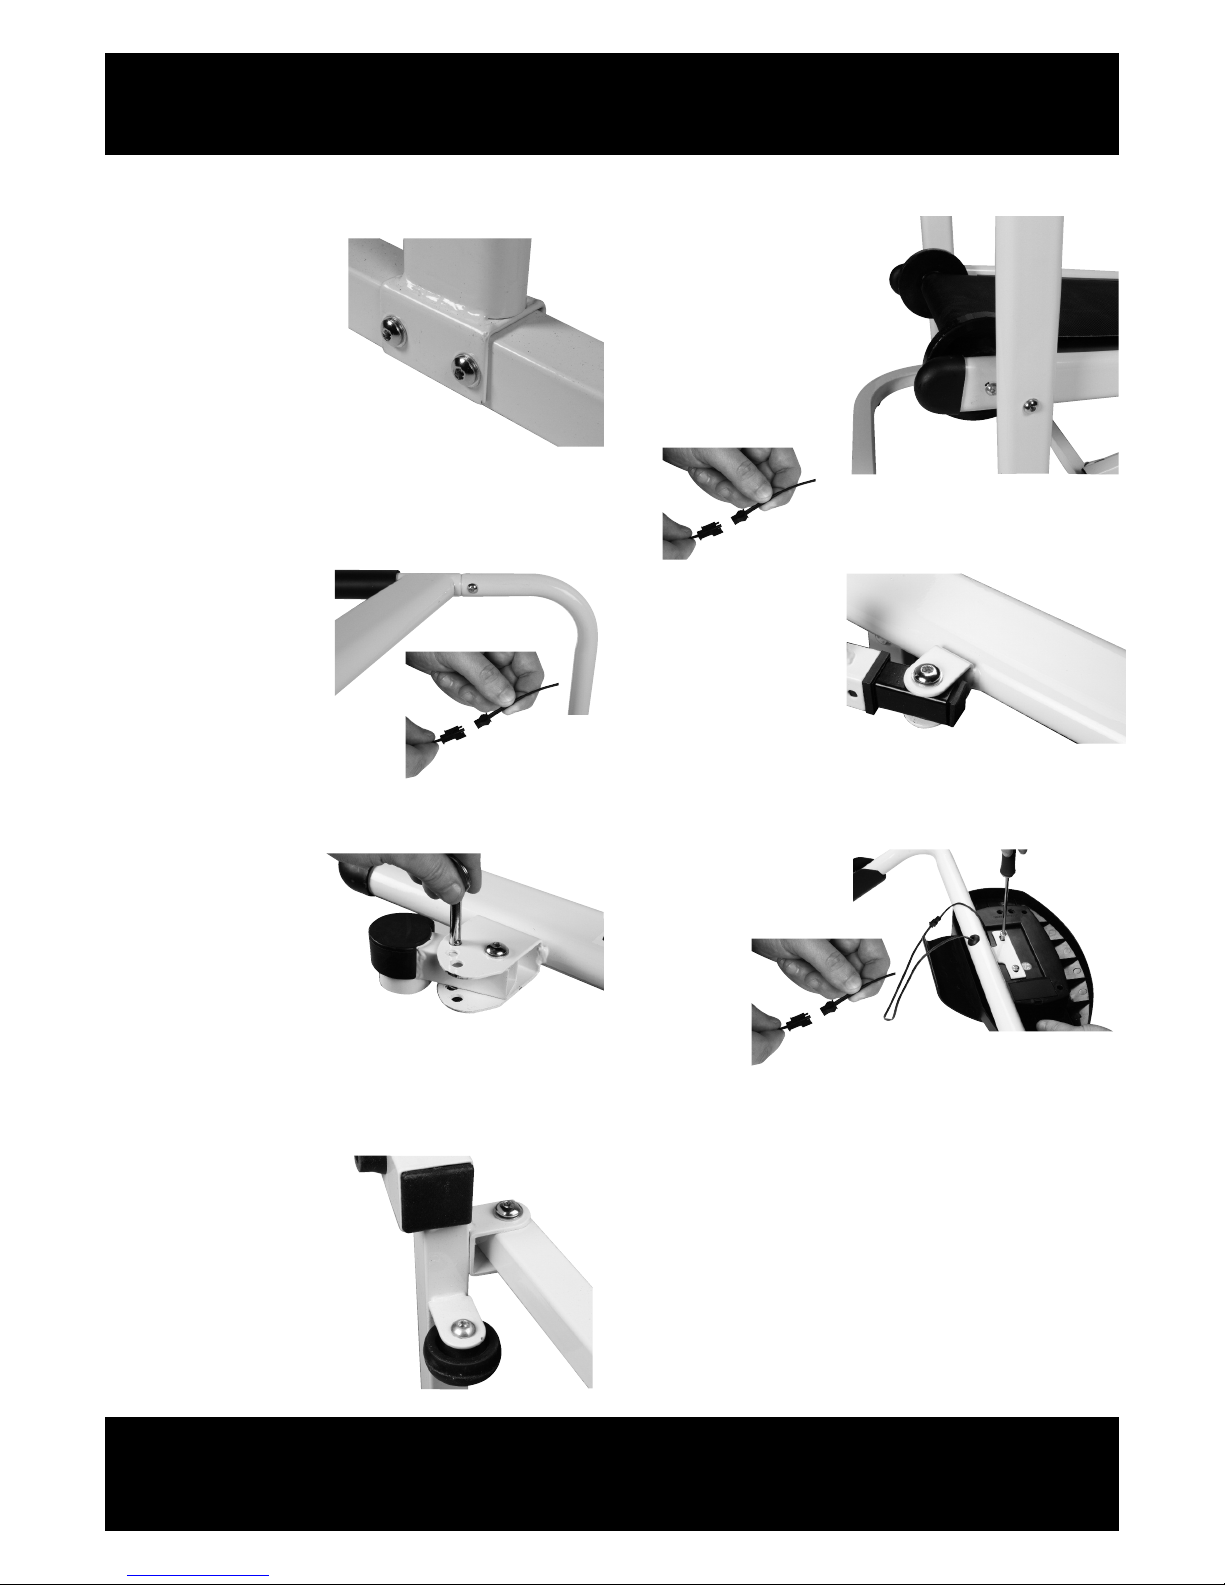
• After use, the treadmill can be folded for easier storage. To fold, loosen
the locking knob and pull the handles downwards allowing the
treadmill to fold flat. nce, flattened, the wheels on the bottom frame
(5) can be used to manoeuvre the treadmill.
• When re-assembling, always ensure the locking knob is securely
tightened before use.
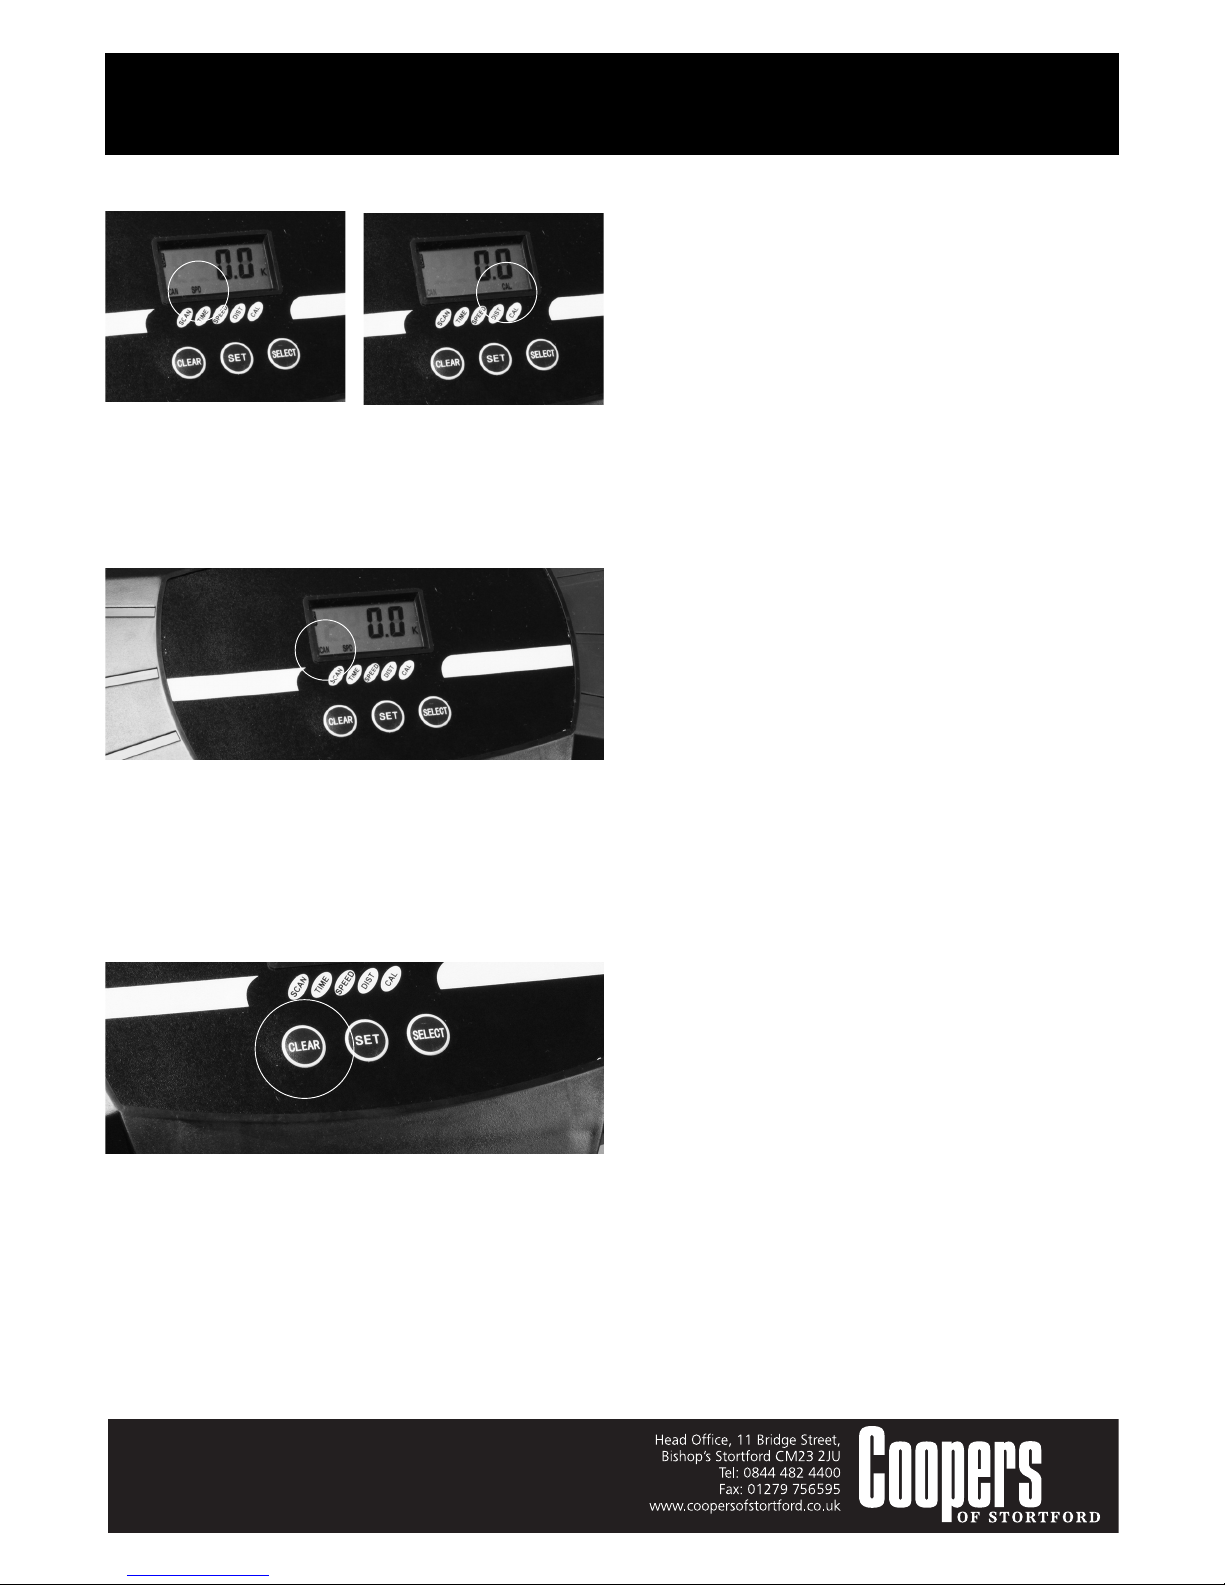
SETTINGS ON THE DISPLAY PANEL
There are four settings on the display panel (time, speed, distance and
calories) with an overall scan setting that will enable you to read all four
settings when in use. You can pre-set the time and distance setting (as
explained below) and the speed and calories are automatically
calculated in either setting.
TIME
If you want to walk for 10 minutes simply press the SELECT button until
you see TMR on the display. Press the SELECT button once more and
then press the SET button till 10:00 appears on the screen (or the
desired amount of minutes is required). As soon as you start to walk the
timer will automatically start to countdown.
DISTANCE
If you want to walk for 1 kilometre simply press the SELECT button until
you see DST on the display. Then press the SET button till 1.00k appears
on the screen (or the desired amount of kilometres are required). As soon
as you start to walk the distance will automatically start to countdown.
BEFORE USE
• Set the treadmill to the desired incline.
• Always warm up fully before use.
• Check the locking knob is locked securely into place.
• Ensure you are wearing suitable sports footwear and suitable clothing
that will not catch in the moving parts.
ADJUSTING THE TREADMILL
• As each person’s gait is different and each individual’s body has a
different left/right bias, the treadmill will need to be set to your
individual needs before you can use it properly. To ascertain the set up
changes that need to be made, use the treadmill for a short period and
check if the mat deviates from the centre. If it does, you need to adjust
the treadmill.
• Adjust the tension screw at the end of the treadmill to which the belt
has deviated towards in a clockwise direction i.e. if the belt has moved
to the right, adjust the screw on the right, likewise if the belt has
moved to the left adjust the screw on the left. You may need to turn
the screw a full 360º depending on how far the belt has moved, more
rotations may be required depending how far the belt has deviated.
When you have adjusted the tension screw return to the treadmill mat
and proceed to walk as normal – you will begin to see the mat move
over to the centre of the machine. If the belt remains off-centre, adjust
the tension screw in a full clockwise rotation and repeat the process.
• If the belt is too tight, it can be loosened by adjusting the tension
screws equally on each side of the treadmill in an anti-clockwise
position, you will then need to return to the mat and proceed to walk
as normal and this will alleviate the strain.
• If the belt is too loose, it can be tightened by adjusting the tension
screws equally on each side of the treadmill in a clockwise position,
you will then need to return to the mat and proceed to walk as normal
and this will increase the belt tension.
HOW TO USE
• Spend at least 10 minutes warming up and stretching prior to use.
• Always start at walking pace and build up speed, lengthening your
stride as you go until you reach the desired pace.
•Ensure the back is kept straight. Lean forward slightly if using on an
inclined setting.
• Always hold onto the handlebars during use.
• To stop, gradually reduce the pace until you reach a stop.
• In case of injury or pain, stop use immediately after a safe stop has
been reached.