manuals.online logo
Brands
  1. Home
  2. •
  3. Brands
  4. •
  5. Mocka
  6. •
  7. Indoor Furnishing
  8. •
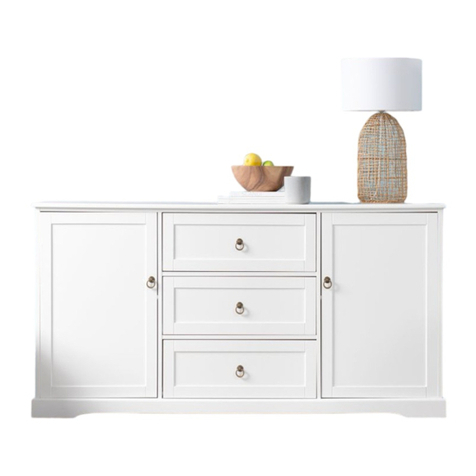
  9. Mocka Genevieve User manual

Mocka Genevieve User manual

mocka.co.nz I mocka.com.au
ASSEMBLY INSTRUCTIONS
Genevieve Six Drawer
Thank you for your purchase.
Please follow the instructions below for correct assembly.
A
51 x
bolt
B
51 x
locking
nut
C
20 x
dowel
W
2x
safety
strap
HARDWARE SUPPLIED
D
21 x
long
screw
E
60 x
small
screw
40 mm
12 mm
12 x 12 x
L+R
slide rail
J
14 x
wedge
2x
long
screw
XY
Z
2x
wall
anchor
2x
screw
2x
washer
L+R
slide rail
I
4 x
handle
K
F
30 x
medium
screw
30 mm
4 x
small
screw
*We recommend using a Flathead screwdriver to tighten all locking nuts 100% before first use.
Phillips & Flathead screwdrivers and hammer required
WARNING: Any furniture that is not anchored to a wall has the potential to
tip over in certain circumstances, i.e. if a child attempts to climb up on the
furniture or in the event of an earthpuake. Accordingly, we recommend that
all furniture is anchored to a wall. We supply a free safety wall anchor with
all furniture sold and we recommend these are used to prevent your product
tipping. The fixing device provided should fit most wall types, but please note
that dierent wall materials may require dierent fixing devices from those
supplied.
CL
CR
DL
DR
L M N O
24 x
cover
1 x
shelf plug
1 x
long screw
6 x
handle
mocka.co.nz I mocka.com.au
ASSEMBLY INSTRUCTIONS
Genevieve Six Drawer
1 2
Attach 3 x left slide rails (CL) to panel [3] and secure with 9 x small screws (E).
Insert 2 x bolts (A) into panel [3]. Tighten with a screwdriver.
A
Insert 13 x bolts (A) into panel [1]. Tighten with a screwdriver.
CL
CL
A
A
AA
A
A
AA
A
A
A
A
A
1
E
1
3
A
A
E
E
E
E
E
E
E
E
E
CL
CL
A
mocka.co.nz I mocka.com.au
ASSEMBLY INSTRUCTIONS
Genevieve Six Drawer
3 4
Attach 3 x right slide rails (CR) to panel [4] and secure with 9 x small screws (E).
Insert 2 x bolts (A) into panel [4]. Tighten with a screwdriver.
E
E
E
E
E
E
E
E
E
A
A
CR
CR
CR
4
CR
E
CL
E
5
E
E
E
E
E
E
E
E
E
A
A
CL
CL
CL
Attach 3 x left slide rails (CL) to panel [5] and secure with 9 x small screws (E).
Insert 2 x bolts (A) into panel [5]. Tighten with a screwdriver.
mocka.co.nz I mocka.com.au
ASSEMBLY INSTRUCTIONS
Genevieve Six Drawer
5 6
Insert 4 x dowels (C) to panels [4], [5] and [6]. Attach panels [4] and [5] to panels
[6] and secure with 4 x locking nuts (B). Tighten with a screwdriver.
E
E
E
E
E
E
E
E
E
A
A
5
CR
CR
CR
CR
E
Attach 3 x right slide rails (G) to panel [5] and secure with 9 x small screws (E).
Insert 2 x bolts (A) into panel [5]. Tighten with a screwdriver.
4
5
6
6
B
B
C
C
C
C
B
B
B
mocka.co.nz I mocka.com.au
ASSEMBLY INSTRUCTIONS
Genevieve Six Drawer
7
8
Insert 6 x dowels (C) into panels [3] and [4]. Attach panel [2] to panels
[3] and [4], securing with 13 x long screws (D).
C
5
4
C
C
C
B
B
B
B
6
6
3
B
Insert 4 x dowels (C) to panels [3], [5] and [6]. Attach panels [3] and [5] to panels
[6] and secure with 4 x locking nuts (B). Tighten with a screwdriver.
4
3
5
7
7
C
C
C
C
C
C
D
D
D
DD
D
D
D
DD
D
D
D
2
8
8
9
9
J
J
J
J
I
I
I
4
5
3
2
D
D
D
D
D
D
D
D
8
8
9
mocka.co.nz I mocka.com.au
ASSEMBLY INSTRUCTIONS
Genevieve Six Drawer
9
10
Attach panels [8] and [9] to panel [2] and secure with 8 xlong screws (D). Attach 1 x
long scrwe (M) to centre support (N) as shown. Tighten with a screwdriver.
Insert 4 x nuts (I) into panels [8]. Attach panels [8] to panels [9] and secure
with 4 xscrews (J). Tighten with a screwdriver.
M
N
M
mocka.co.nz I mocka.com.au
ASSEMBLY INSTRUCTIONS
Genevieve Six Drawer
11
12
Insert 6 x dowels (C) into panel [3], [4] and [5]. Attach panel [1] to panels [3],
[4], [5] and [7], secuure with 13 x locking nuts (B). Tighten with a screwdriver.
Slide panels [10] between the grooves on panels [3], [4], [5] and [7] to form
the back of the unit as shown.
3
5
4
10
10
10
7
7
3
5
4
1
CC
CC
CC
BB
B
BBBB
BBB
7
7
B
mocka.co.nz I mocka.com.au
ASSEMBLY INSTRUCTIONS
Genevieve Six Drawer
13
14
Slide panels [15] between the grooves on panels [12], [13] and [16] to form the
base of the drawer as shown.
Attach panels [12], [13] and [14] to panels [16], secure with 30 x medium screws (F).
Tighten with a screwdriver.
14
12
13
16 15
13
12
F
F
F
F
F
Drawers x 6 Drawers x 6
16
mocka.co.nz I mocka.com.au
ASSEMBLY INSTRUCTIONS
Genevieve Six Drawer
15
16
Attach panels [11] to panels [12], [13] and [14], secure with 30 x locking nuts
(B). Cover locking nuts (B) with 24 covers (O). Tighten with a screwdriver.
Attach 30 x bolts (A) into panels [11]. Insert 6 x handles (L) into panels [17].
Tighten with a screwdriver.
Drawers x 6 Drawers x 6
11
A
A
A
A
A
L
11
B
BB
B
B
14
13
12
B
I
II
BO
x 24
L
mocka.co.nz I mocka.com.au
ASSEMBLY INSTRUCTIONS
Genevieve Six Drawer
17
18
Attach 12 x slide rails (H) to panels [12] and [13], secure with 24 x small screws
(E). Tighten with a screwdriver.
Drawers x 6
CR
DR
CL
DL
11
12
13
DL
DR
E
E
E
E
11
Slide drawers x 6 between the grooves on panels [3], [4] and [5] to form
the back of the unit as shown.
mocka.co.nz I mocka.com.au
ASSEMBLY INSTRUCTIONS
Genevieve Six Drawer
19
20
JK
10
10
11
JK
JK
JK
JK
JK
JK
JK
JK
JK
JK
JK
JK
JK
Attach 14 x wedges (K) to panels [10] and [11]. Tighten with a screwdriver.
10
10
11
7
7
Y
W
W
Y
Attach 2 x wall straps (W) to panels [7] using 2 x screws (Y). Tighten with a screwdriver.
mocka.co.nz I mocka.com.au
ASSEMBLY INSTRUCTIONS
Genevieve Six Drawer
21
Strap
Washer
Wall
anchor
Wall
screw
X
Z
Wall
screw
X
Z
Wall
screw
Once assembled lift furniture into place, do not drag. Use a drill to create a
small hole lining up with the top of the safety stap (W). Fasten to wall using
wall anchor (X), washer (Z) and screw. Ensure the unit is balaced and steady
before use. You’re done, enjoy!

Other manuals for Genevieve

1

Other Mocka Indoor Furnishing manuals

Mocka Vigo Bedside Table User manual

Mocka

Mocka Vigo Bedside Table User manual

Mocka Mod Headboard User manual

Mocka

Mocka Mod Headboard User manual

Mocka Bentley Slim Shelf User manual

Mocka

Mocka Bentley Slim Shelf User manual

Mocka Alexandria Change Table User manual

Mocka

Mocka Alexandria Change Table User manual

Mocka Inca Entertainment Unit User manual

Mocka

Mocka Inca Entertainment Unit User manual

Mocka Canyon User manual

Mocka

Mocka Canyon User manual

Mocka Eliza Buffet User manual

Mocka

Mocka Eliza Buffet User manual

Mocka Essentials 2 Cube User manual

Mocka

Mocka Essentials 2 Cube User manual

Mocka Savannah Entertainment Unit User manual

Mocka

Mocka Savannah Entertainment Unit User manual

Mocka Locka User manual

Mocka

Mocka Locka User manual

Mocka Zander Bench Seat User manual

Mocka

Mocka Zander Bench Seat User manual

Mocka Billy Three Drawer Basket User manual

Mocka

Mocka Billy Three Drawer Basket User manual

Mocka Kennedy Entertainment Unit User manual

Mocka

Mocka Kennedy Entertainment Unit User manual

Mocka Eclipse User manual

Mocka

Mocka Eclipse User manual

Mocka Torrance Occasional Chair User manual

Mocka

Mocka Torrance Occasional Chair User manual

Mocka Hobart User manual

Mocka

Mocka Hobart User manual

Mocka Vera Bar Stool User manual

Mocka

Mocka Vera Bar Stool User manual

Mocka Alps Bedside Table User manual

Mocka

Mocka Alps Bedside Table User manual

Mocka Edmond Buffet User manual

Mocka

Mocka Edmond Buffet User manual

Mocka Hamptons Desk User manual

Mocka

Mocka Hamptons Desk User manual

Mocka Hamptons Entertainment Unit User manual

Mocka

Mocka Hamptons Entertainment Unit User manual

Mocka Parker Buffet User manual

Mocka

Mocka Parker Buffet User manual

Mocka Parker Bedside Table User manual

Mocka

Mocka Parker Bedside Table User manual

Mocka Tahoe Four Drawer User manual

Mocka

Mocka Tahoe Four Drawer User manual

Popular Indoor Furnishing manuals by other brands

Aquaglide HALF DECK 7.5 owner's manual

Aquaglide

Aquaglide HALF DECK 7.5 owner's manual

aspenhome I07-9140-WBR Assembly instructions

aspenhome

aspenhome I07-9140-WBR Assembly instructions

PATIOJOY HW70831-4 manual

PATIOJOY

PATIOJOY HW70831-4 manual

Office Star Products Pro-Line II 83220 operating instructions

Office Star Products

Office Star Products Pro-Line II 83220 operating instructions

East West Furniture BAP Assembly instructions

East West Furniture

East West Furniture BAP Assembly instructions

Ethnicraft BED WITH SLATS Assembly instruction

Ethnicraft

Ethnicraft BED WITH SLATS Assembly instruction

PAIDI 127 9058 instructions

PAIDI

PAIDI 127 9058 instructions

Ashley Signature Five drawer chest Assembly instructions

Ashley

Ashley Signature Five drawer chest Assembly instructions

Coaster 223581Q B1 Assembly instructions

Coaster

Coaster 223581Q B1 Assembly instructions

Crate&Barrel Gallery Wing Queen Bed Assembly instructions

Crate&Barrel

Crate&Barrel Gallery Wing Queen Bed Assembly instructions

Wisteria Lane KX-AL02-2 instruction manual

Wisteria Lane

Wisteria Lane KX-AL02-2 instruction manual

Plus FROZEN manual

Plus

Plus FROZEN manual

Badger Basket 40022 Assembly and use instructions

Badger Basket

Badger Basket 40022 Assembly and use instructions

Studymate DYSON TRESTLE DESK SMDYSONOB Assembly instructions

Studymate

Studymate DYSON TRESTLE DESK SMDYSONOB Assembly instructions

Amart Furniture VALKYRIE 74935 Assembly instruction

Amart Furniture

Amart Furniture VALKYRIE 74935 Assembly instruction

Argos Home Venice 403/7017 instructions

Argos Home

Argos Home Venice 403/7017 instructions

J.Burrows JB5TRHDSR Assembly instructions

J.Burrows

J.Burrows JB5TRHDSR Assembly instructions

STRUCTUBE NASH manual

STRUCTUBE

STRUCTUBE NASH manual

manuals.online logo
manuals.online logoBrands
  • About & Mission
  • Contact us
  • Privacy Policy
  • Terms and Conditions

Copyright 2025 Manuals.Online. All Rights Reserved.