manuals.online logo
Brands
  1. Home
  2. •
  3. Brands
  4. •
  5. Argos
  6. •
  7. Indoor Furnishing
  8. •
  9. Argos Tolga 414/5758 User manual

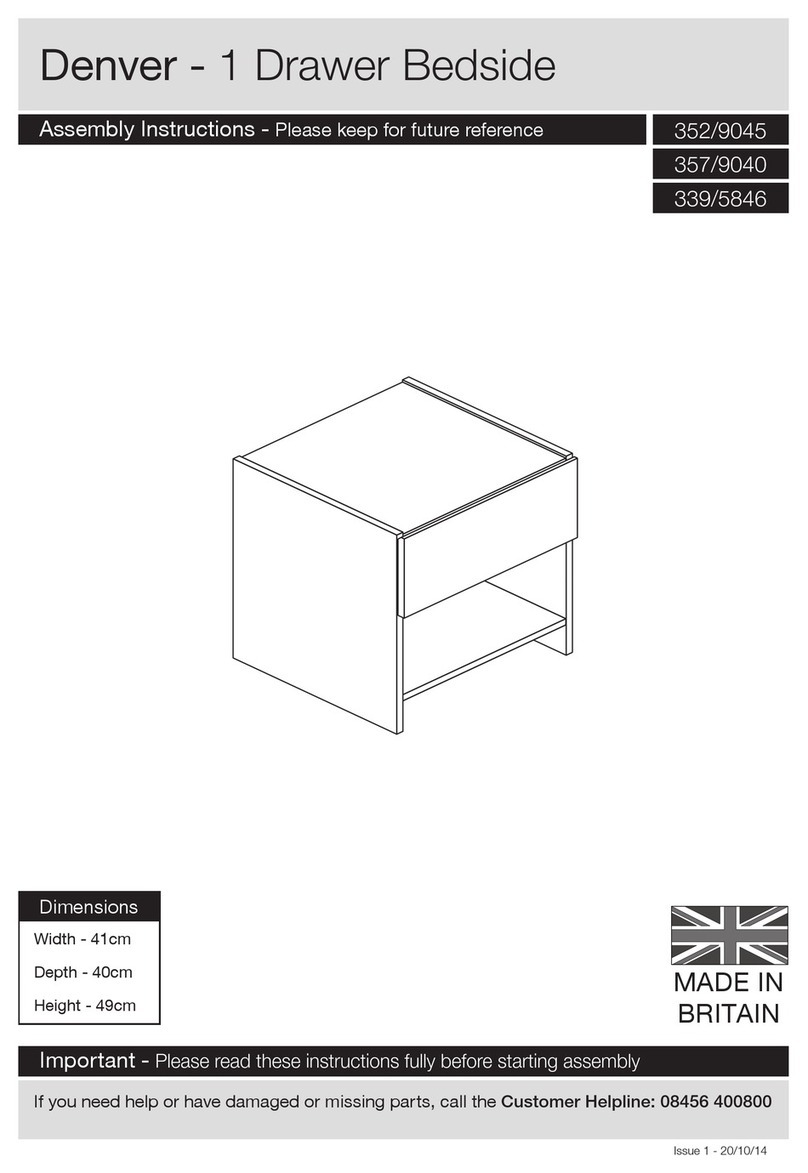
Argos Tolga 414/5758 User manual

Dimensions
Important – Please read these instructions fully before starting assembly
Assembly Instructions - Please keep for future reference
Tip : To prevent damage,
we recommend that you
build your unit on the
carton(s) it was packed in.
Height - 52,8cm
Depth - 39cm
Width - 33,6cm
Tolga - 2drw Bedside
391/3651
414/5758
417/5137
414/5137 PINK
414/5758 BLUE
391/3651 OAK
Issue 2 - 17/09/15
DR82516
MAX.
20kg
Alternatively, call the Spares Helpline on: 0370 112 1928
For any other queries please contact the Customer Helpline on: 0345 640 2020
If you need help or have damaged or missing parts, please visit: www.argos-support.co.uk
or email: [email protected] (quoting your original order number)
1
Note: if required the next
page can be cut out and used
as reference throughout the
assembly. Keep this page with
these instructions for future
reference.
•
• Assemble all parts and bolts
loosely during assembly, only
once the product is complete
should you fully tighten the bolts
• Regularly check and ensure
that all bolts and fi ttings are
tightend properly.
Handy Hints
• Only clean using a damp cloth
and mild detergent, do no use
bleach or abrasive cleaners.
• From time to time check that
there are no loose screws on
this unit.
• This product should not be
discarded with household waste.
Take to your local authority
waste disposal centre.
Care and maintenance
Skin contact: Remove
contamination by washing with
soap and water. This procedure
should also be followed prior to
eating and drinking.
Eye contact: Rinse immediately
with clean water for 15 minutes
and seek medical advice.
If swallowed: Seek medical
advice immediately.
Glue safety - Take care when using glue, please follow the advice below•
Important – Please read these instructions fully before starting assembly
• During assembly do not stand
or put weight on the product,
this could cause damage.
• Assemble the item as close
to its final position (in the same
room) as possible.
• Assemble on a soft level
surface to avoid damaging the
unit or your floor.
• Parts of the assembly will be
easier with 2 people.
• Check you have all the
components and tools listed
on the following pages.
• Remove all fittings from the
plastic bags and separate them
into their groups.
• Keep children and animals
away from the work area, small
parts could choke if swallowed.
• Make sure you have enough
space to layout the parts before
starting.
• To reduce
the likelihood of
damaging your
product please
ensure that your
power drill is set on a low torque
setting.
• Assembly should be carried out
by a competent adult only.
• do not use this item if any
components are missing
or damaged.
• this item is suitable for childeren
from the age of 6.
Safety and Care Advice
Please check you have all the panels listed below
Components - Panels If you have damaged or missing components,
call the Customer Helpline:
2
03456 400 800
Back x 1
(331 x 452 x 2.5mm)
3
BO2541
Left Side x 1
(372 x 528 x 15mm)
5
P2091
Right Side x 1
(372 x 528 x 15mm)
7
P2092
Top x 1
(371 x 306 x 18mm)
1
P1978
Drawer Base x 2
(343 x 267 x 2.5mm)
2
BO2542
Left Drawer Side x 2
(350 x 140 x 12.50mm)
8
LA1614
Drawer Back x 2
(257 x 140 x 12.50mm)
9
LA1616
Right Drawer Side x 2
(350 x 140 x 12.50mm)
10
LA1615
Drawer Front x 2
(333 x 221 x 18mm)
4
P4140
Plinth x 2
(306 x 92 x 15mm)
6
P7059
Please check you have all the fittings listed below
Components - Fittings
Note: The quantities below are the correct amount to complete the assembly. In some cases more fittings
may be supplied than are required.
Tools required
Phillips screwdriver
(medium & large)
Flatblade screwdriver
(medium)
Small
hammer
Ruler/tape
measure
Eye protection
(when using a
hammer or glue)
7mm Suitable drill bit
(for use with wall plug)
Drill
0102030405060708090 100 110 120 130 140 150
0123456
Setsquare
Ruler - Use this ruler to help correctly identify the screws
0 5 10 15 20 25 30 35 40 45 50 55 60 65 70 75 80 85 90 95 100 110 115 120 125 130 135 140 145 150 155 160 165 170
105
The screws length ismeasured from thehead to the point (30mm screw shown).
3
O
NM
L
KJ
IHG
F
E
D
CB
A
Locking screw x 12 (5x24mm)
FK1011
12mm
Locking nut x 4 (12x10mm)
FK1010
15mm
Large locking nut x 8 (15x12mm)
FK1012
Screw x 28 (3x15mm)
FK1311
10mm Fixing screw drawer x 8
FK1301
Nail x 30
FK1515
Wood dowel x 4 (5x30mm)
FK1410
Drawer base support x 4
FK1250
Peg, brown x 1
FK1234
Nail holder x 1
FK1415
Glue x 1
FA1510
Runner left part A x 2
PM1517 LA
Runner left part B x 2
PM1517 LB
Runner right part A x 2
PM1517 RA
Runner right part B x 2
PM1517 RB
Spirit level
Step - 1
Step - 2
Assembly Instructions
2x
a:
b:
4
Finished
front edge
Finished
front edge
6
G
C
G
C
7
A
A
A
A
E
E
E
E
N
N
7D
D
D
D
D
D
G
K
C
A
N
N
DD D
E E
Insert large locking nuts C
into plinth 6.
Make sure the ‘arrow’ on
locking nuts Cpoints
towards the hole in the
edge of 6.
Put drop of glue Kinto the
2 holes of plinth 6.
Put dowels Ginto the
holes of plinth 6.
Do this step twice
Attaching runners
a: Fix runner right part A N
on right right side 7as
shown usesing 10mm fixing
screw drawer Einto right
side 7
Note: look carreful for the
right postion.
Screw 24mm locking
screw Ainto right side 7.
Note: Insert 24mm locking
screw Aas far as shown.
Do not over tighten.
b: Insert screw Das
shown into right side 7
to fix runner right part A N.
Assembly Instructions
a:
b:
5
Step - 3
Step - 4
5L
L
A
A
A
A
E
E
E
E
4
D
D
D
D
D
D
O
O
E E
D DD
A
Attaching runners
a: Fix runner left part A L
on left side 5as shown
usesing 10mm fixing screw
drawer Einto left side 5.
Note: look carreful for the
right postion.
Screw 24mm locking
screw Ainto left side 5.
Note: Insert 24mm locking
screw Aas far as shown.
Do not over tighten.
b: Insert screw Das
shown into left side 5to
fix runner left part A L.
Finished
front edge
Finished
front edge
C
C
C
C
1
C
Insert large locking nuts C
into top 1.
Make sure the ‘arrow’ on
locking nuts Cpoints
towards the hole in the
edge of top 1.
Assembly Instructions
Step - 5
6
Step - 6
1
6
6
7
5
5
7
6
K
7
6
3
6
Fitting back panel
Attach back 3to the back
with the coloured surface
facing the inside using nails
F.Use nail holder Jto
hold the nails Fvertical
and at correct distance as
you secure the back 3.
Nails Fshould be spaced
about 150mm apart.
Attaching panels
Put drop of glue Kinto the
2 holes of left side 5and
right side 7on the bottom
of the sides.
Position left side 5and
right side 7onto plinth 6
and top 1.
Use a screwdriver to turn
locking nuts clockwise to
lock.
Important:
Furniture MUST
be ‘square’ when
back is attached.
Finished
front edge
J
F
F
F
F
F
F
F
J
Assembly Instructions
Step - 8
2x
7
Step - 7
B
B
2
8
910
9
8
10
J
A
A
A
A
4
4
B
Preparing drawer
Insert locking nuts Binto
left drawer side 8and
right drawer side 0.
Make sure the ‘arrow’ on
locking nuts Bpoints
towards the hole in the
edge of 8and 0.
Put drop of glue Kinto the
3 holes of left drawer side
8and right drawer side 0.
Attach left drawer side 8
and right drawer side 0
onto drawer back 9.
Insert drawer back 2.
Screw 24mm locking
screw Ainto drawer front
4.
Note: Insert 24mm locking
screw Aas far as shown.
Do not over tighten.
A
Assembly Instructions
Step - 10
8
Step - 9
4
4
2
2
8
8
9
9
10
10
Screw 24mm locking
screw Ainto drawer front
@.
Note: Insert 24mm locking
screw Aas far as shown.
Do not over tighten.
a: Turn over drawer.
Fix runner left part B M
on left drawer side 8as
shown using 12,5mm pozi
screw D.
Fix runner right part B O
on right drawer side 0as
shown using screw D.
a:
M
2
89
2
89
D
D
D
D
O
M
O
Assembly Instructions
Step - 11
b:
9
Step - 10
O
M
D
D
D
D
D
D
D
D
D
D
D
D
2
89
2
89
O
M
II
II
10
1
5
4
4
I
b: Fix runner left part B M
and runner right part B O
using screw D.
Slide drawer base support
Iin corner as shown and
fix them, using the attached
nail.
Inserting drawers
as shown. For adjusting the
drawers see ‘adjustment’
on page ‘drawer
adjustment’.
Use peg Hto square your
furniture. Knock peg Hin,
as far as you require, under
the end of the side of the
forniture. Then snap off flush
with the side.
10
H
!
H

This manual suits for next models

2

Other Argos Indoor Furnishing manuals

Argos Belle HOME 879/0240 User manual

Argos

Argos Belle HOME 879/0240 User manual

Argos ASHWELL 806/3922 User manual

Argos

Argos ASHWELL 806/3922 User manual

Argos Romantic Series User manual

Argos

Argos Romantic Series User manual

Argos 2667537 User manual

Argos

Argos 2667537 User manual

Argos Tamar Bathroom 833/7146 User manual

Argos

Argos Tamar Bathroom 833/7146 User manual

Argos Anderson Coffee Table 290/8021 User manual

Argos

Argos Anderson Coffee Table 290/8021 User manual

Argos 617/9447 User manual

Argos

Argos 617/9447 User manual

Argos Scandinavia 615/6374 User manual

Argos

Argos Scandinavia 615/6374 User manual

Argos hygena 385/9715 Datasheet

Argos

Argos hygena 385/9715 Datasheet

Argos 144/3556 User manual

Argos

Argos 144/3556 User manual

Argos Jenson 930/7450 User manual

Argos

Argos Jenson 930/7450 User manual

Argos 617/2516 User manual

Argos

Argos 617/2516 User manual

Argos 609/0117 User manual

Argos

Argos 609/0117 User manual

Argos 609/2201 User manual

Argos

Argos 609/2201 User manual

Argos New Sywell 411/1524 User manual

Argos

Argos New Sywell 411/1524 User manual

Argos Malibu 621/3310 User manual

Argos

Argos Malibu 621/3310 User manual
Argos Marcell 4ft6 Frame User manual

Argos

Argos Marcell 4ft6 Frame User manual

Argos TC Marston White Shake XL Blanket Box... User manual

Argos

Argos TC Marston White Shake XL Blanket Box... User manual

Argos 1516610 User manual

Argos

Argos 1516610 User manual

Argos 869/6571 User manual

Argos

Argos 869/6571 User manual

Argos Costa Swivel Chair 6893307 User manual

Argos

Argos Costa Swivel Chair 6893307 User manual

Argos Wow Leo 167/9605 User manual

Argos

Argos Wow Leo 167/9605 User manual

Argos New Hallingford 3 Door 3 Drawer Wardrobe User manual

Argos

Argos New Hallingford 3 Door 3 Drawer Wardrobe User manual

Argos Haversham User manual

Argos

Argos Haversham User manual

Popular Indoor Furnishing manuals by other brands

Knape&Vogt LAZY SUSAN installation instructions

Knape&Vogt

Knape&Vogt LAZY SUSAN installation instructions

West Elm Mid Century Mini Assembly instructions

West Elm

West Elm Mid Century Mini Assembly instructions

Home Styles 88521695 C Assembly instructions

Home Styles

Home Styles 88521695 C Assembly instructions

Home Styles 20 05050 0941 quick start guide

Home Styles

Home Styles 20 05050 0941 quick start guide

Forte OHIO OHSD72 Assembling Instruction

Forte

Forte OHIO OHSD72 Assembling Instruction

Noomi Tera FTERHSF Assembling instructions

Noomi

Noomi Tera FTERHSF Assembling instructions

Home Styles 88502395 C quick start guide

Home Styles

Home Styles 88502395 C quick start guide

BoomChair Video Game Furniture owner's manual

BoomChair

BoomChair Video Game Furniture owner's manual

HAMPTON BAY ROCK CLIFF FRS60605IS-ST-2 Use and care guide

HAMPTON BAY

HAMPTON BAY ROCK CLIFF FRS60605IS-ST-2 Use and care guide

Poliman Moveis 656-BRANCO Assembling instructions

Poliman Moveis

Poliman Moveis 656-BRANCO Assembling instructions

Display Pro D142 Assembly instructions

Display Pro

Display Pro D142 Assembly instructions

Symmons 1003-ACP-24 Installation Brief

Symmons

Symmons 1003-ACP-24 Installation Brief

Gami 087 manual

Gami

Gami 087 manual

Woltra SILKEBORG SI-83 R Assembly instructions

Woltra

Woltra SILKEBORG SI-83 R Assembly instructions

agatameble OLE 864 installation instructions

agatameble

agatameble OLE 864 installation instructions

Furniture of America CM3516T Assembly instructions

Furniture of America

Furniture of America CM3516T Assembly instructions

West Elm Oswald 8982738 quick start guide

West Elm

West Elm Oswald 8982738 quick start guide

ROOMS TO GO AXEL 101-24 Assembly instructions

ROOMS TO GO

ROOMS TO GO AXEL 101-24 Assembly instructions

manuals.online logo
manuals.online logoBrands
  • About & Mission
  • Contact us
  • Privacy Policy
  • Terms and Conditions

Copyright 2025 Manuals.Online. All Rights Reserved.