35
GARANTÍA: Los muebles para cocina CORONA® tienen una garantía de 1 año en partes de
madera y en herrajes, a partir de la fecha de fabricación, la cual usted puede identificar en el
número de lote impreso en el producto y/o el instructivo.
La garantía cubre defectos de fabricación y mala calidad de materiales que impidan el armado y
uso del mueble. Dado el caso se reemplazará la(s) pieza(s) defectuosa(s). El tablero melamínico
no se despega siempre y cuando cumpla estrictamente las recomendaciones sobre el cuidado del
producto. Estos están inmunizados.
Examine completamente las piezas antes de ensamblar, una vez armado el mueble, la empresa
NO se hará responsable por piezas dañadas. La garantía NO aplica para productos que hayan
sido armados incorrectamente, manipulados o utilizados de manera no razonable, modificados,
reparados, o que hayan sido sobrecargados o hayan omitido alguna de las recomendaciones
establecidas. No incluye mano de obra para el ensamble del mueble. Esta garantía aplica
únicamente bajo condiciones normales de uso y manipulación. Para hacer válida la garantía,
comuniquese con nuestra linea de atención al cliente de CORONA.
corona.co
Línea de atención
Corona
1 Año
Garantía
Bogotá: 404 88 84
Colombia: 01 8000 51 20 30
Otros países: +57 (1) 404 88 84
Costumer service
+57 (1) 404 88 84
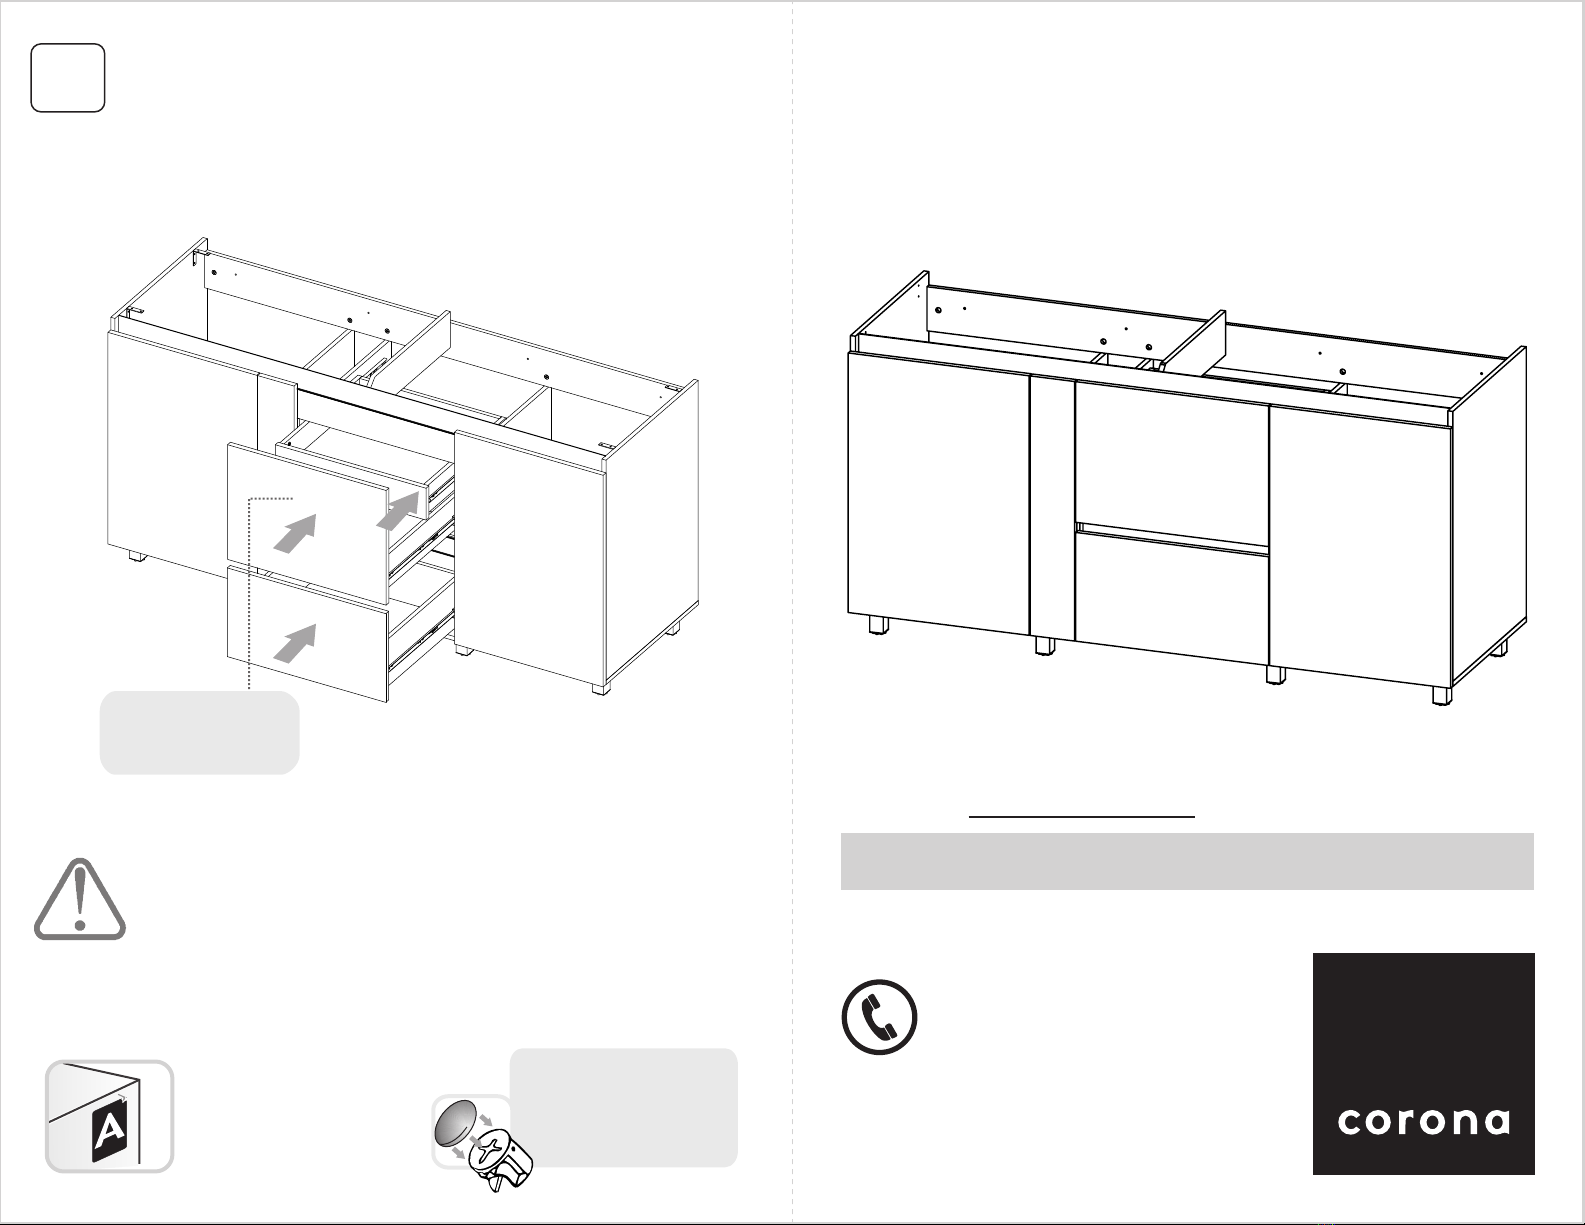
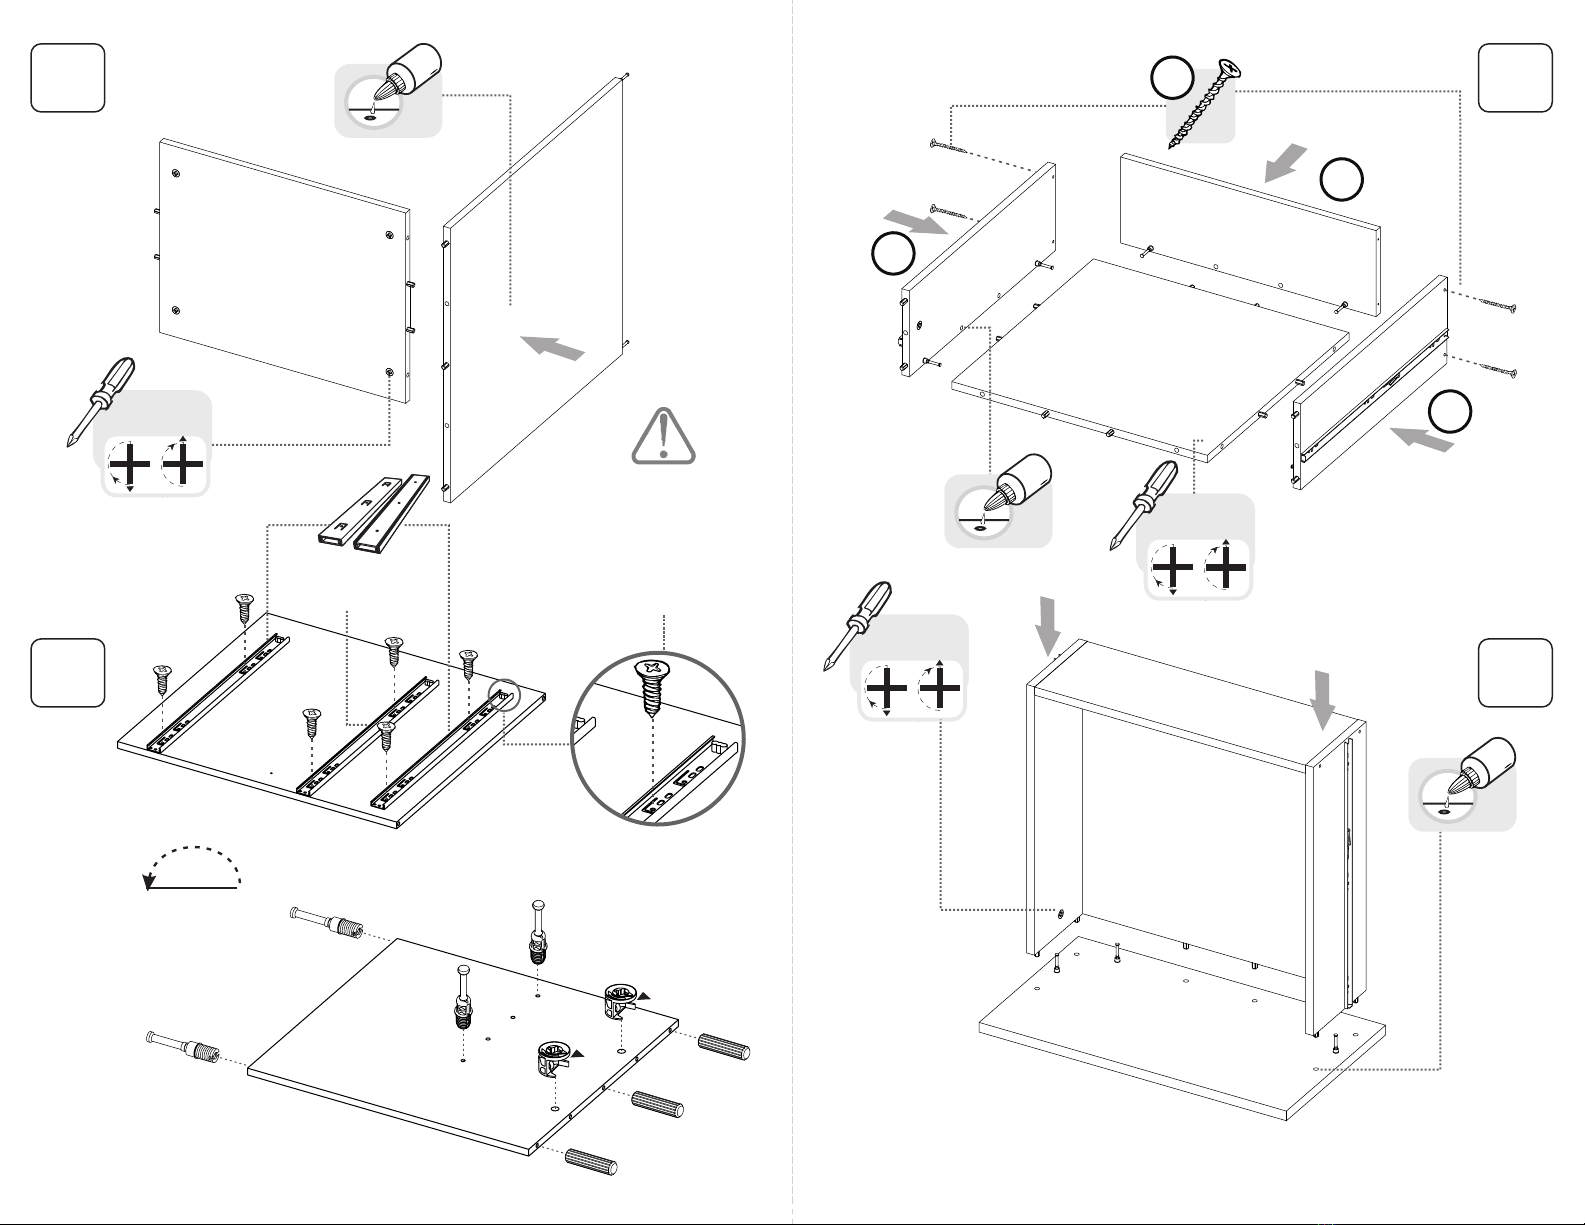
TARUGOS
x
aplique una gota
de pegante en la
perforación
introducirlo hasta
el tope de la
perforación golpeando
suavemente
no inserte TARUGOS en
las perforaciones de
las cajas minifix
1
2
3
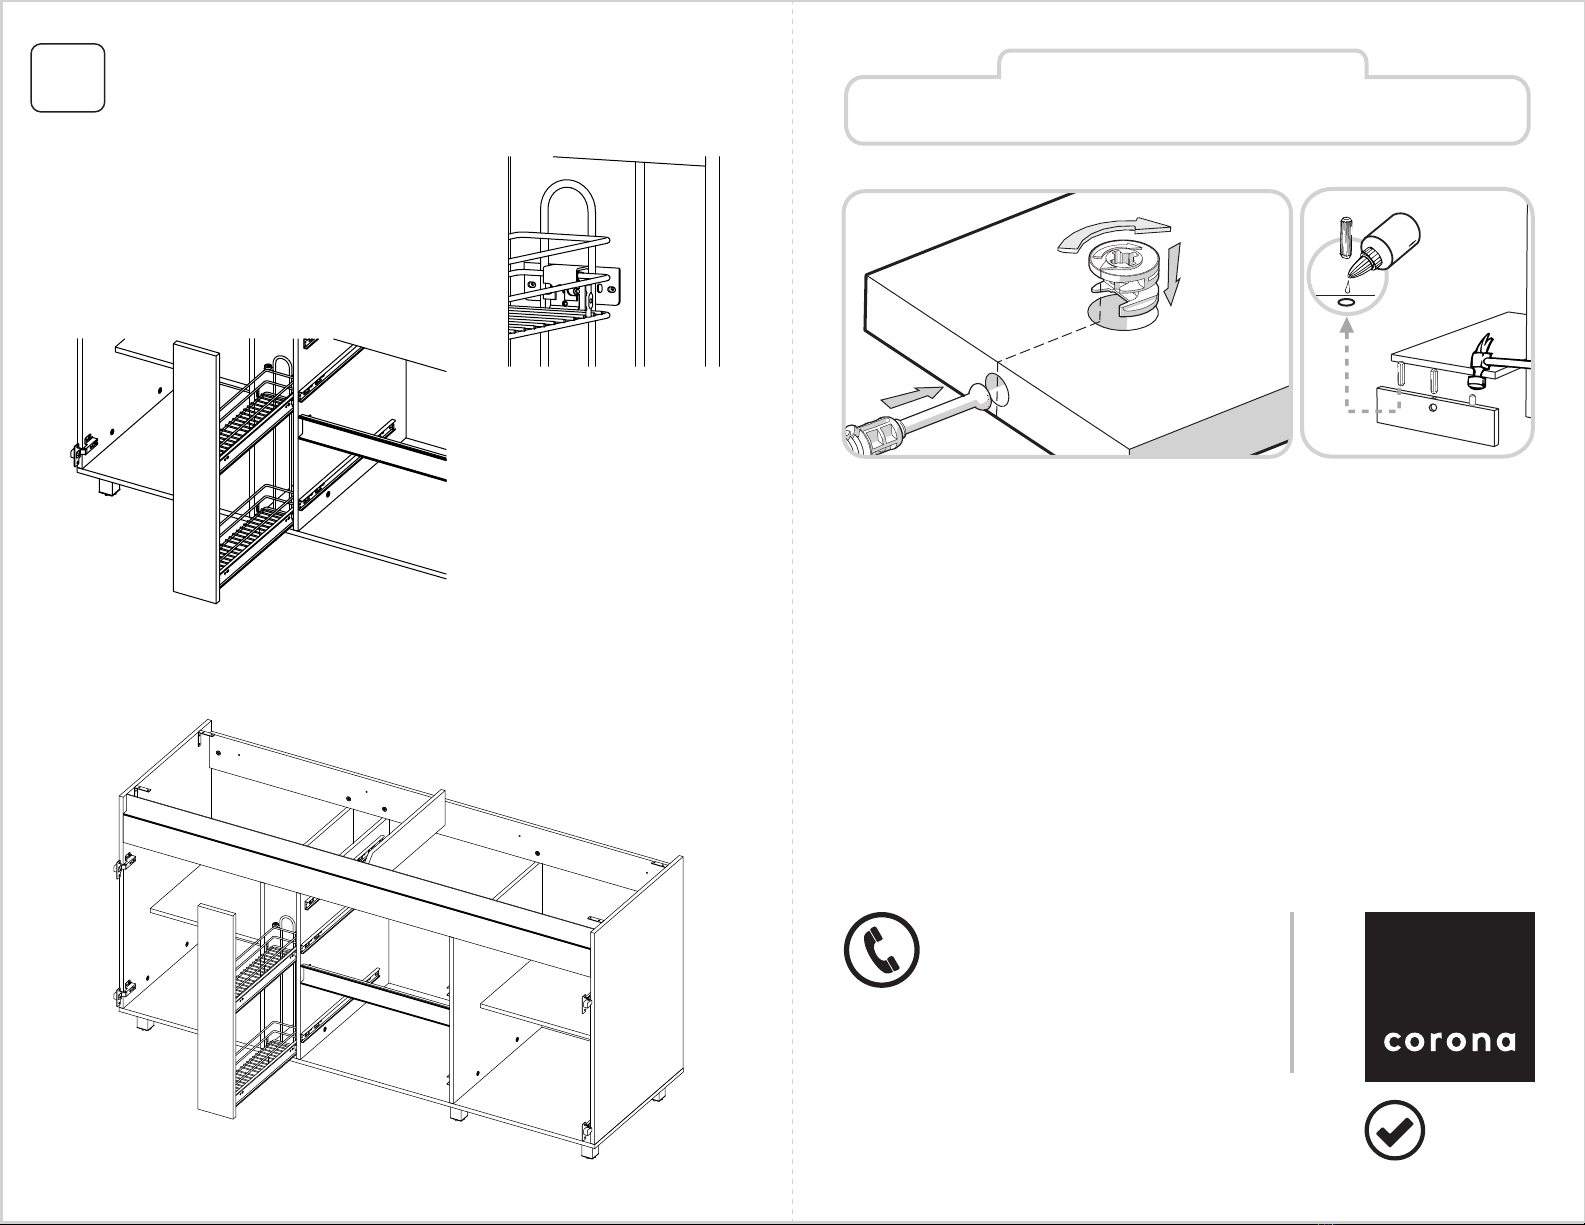
MINIFIX
Girar 180°
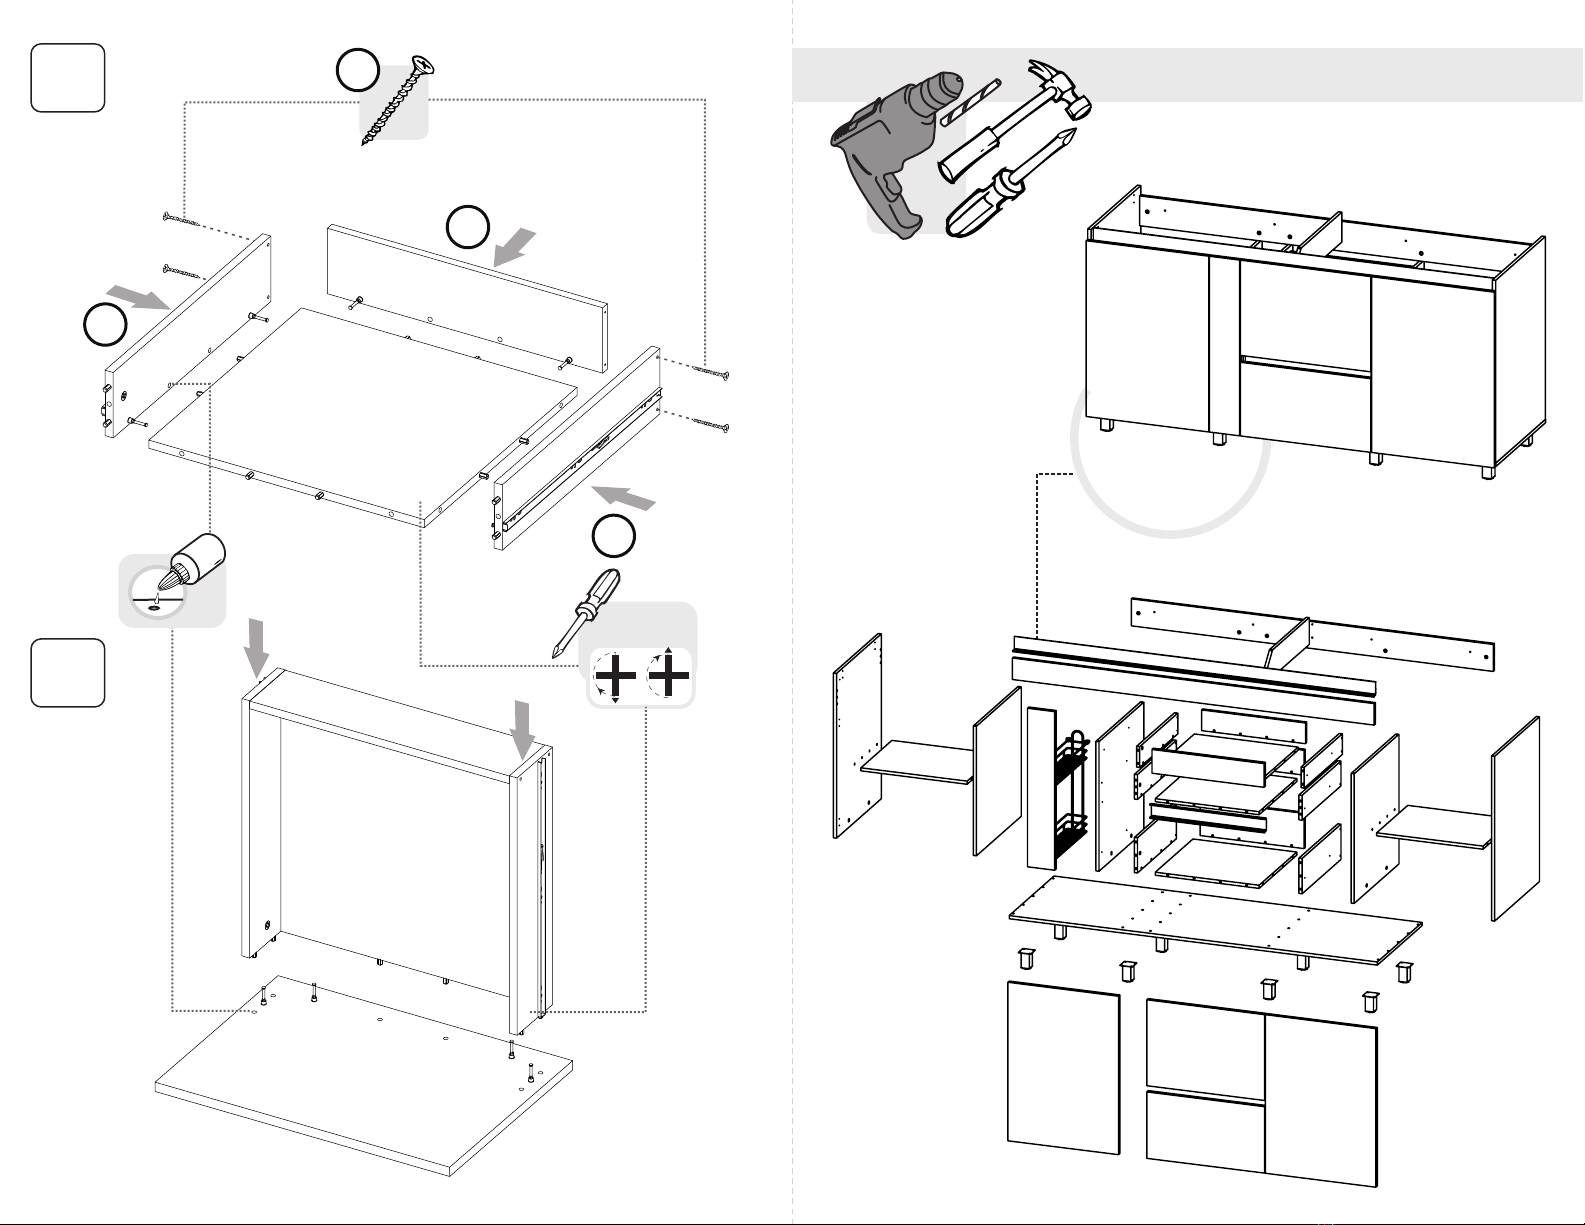
RECOMENDACIONES DE ENSAMBLE
De un adecuado armado del mueble depende su buen funcionamiento.
Following the cabinet assemble instructions will assure its proper functioning.
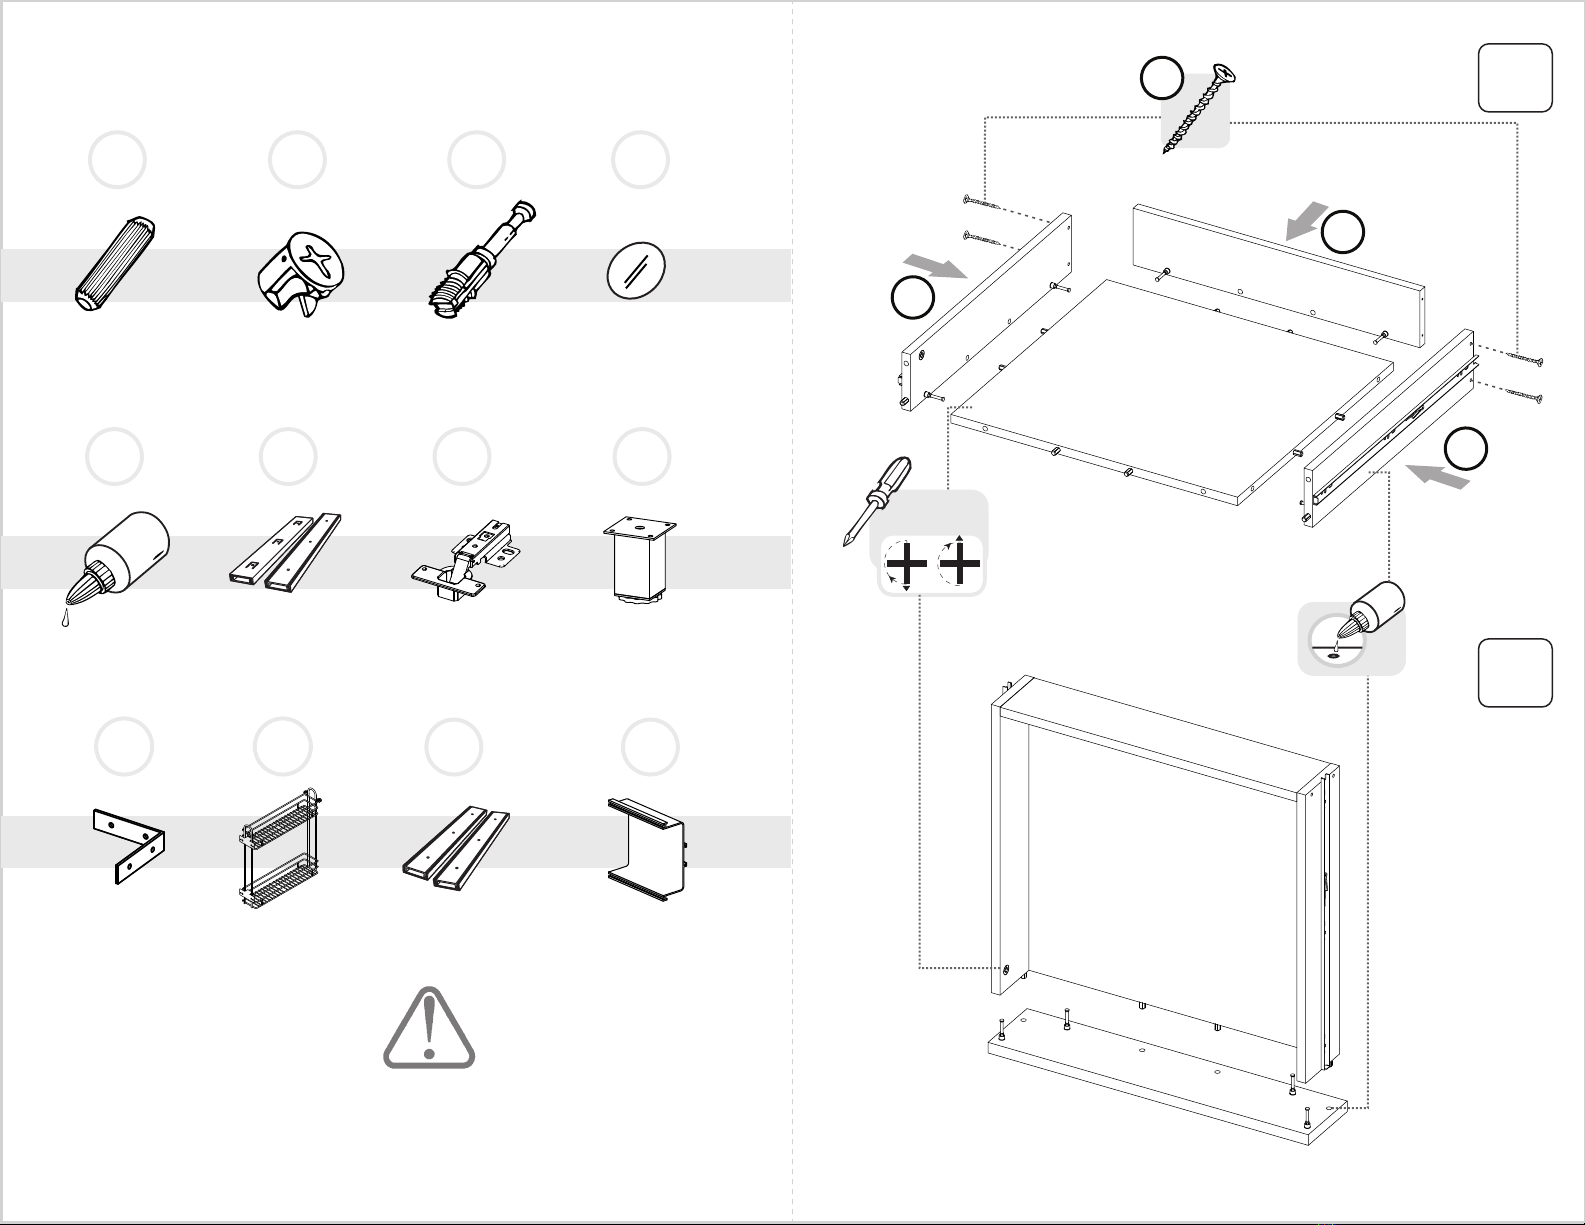
Y
Y
Y
A
B
C
D
E
F
G
H
I
I
V
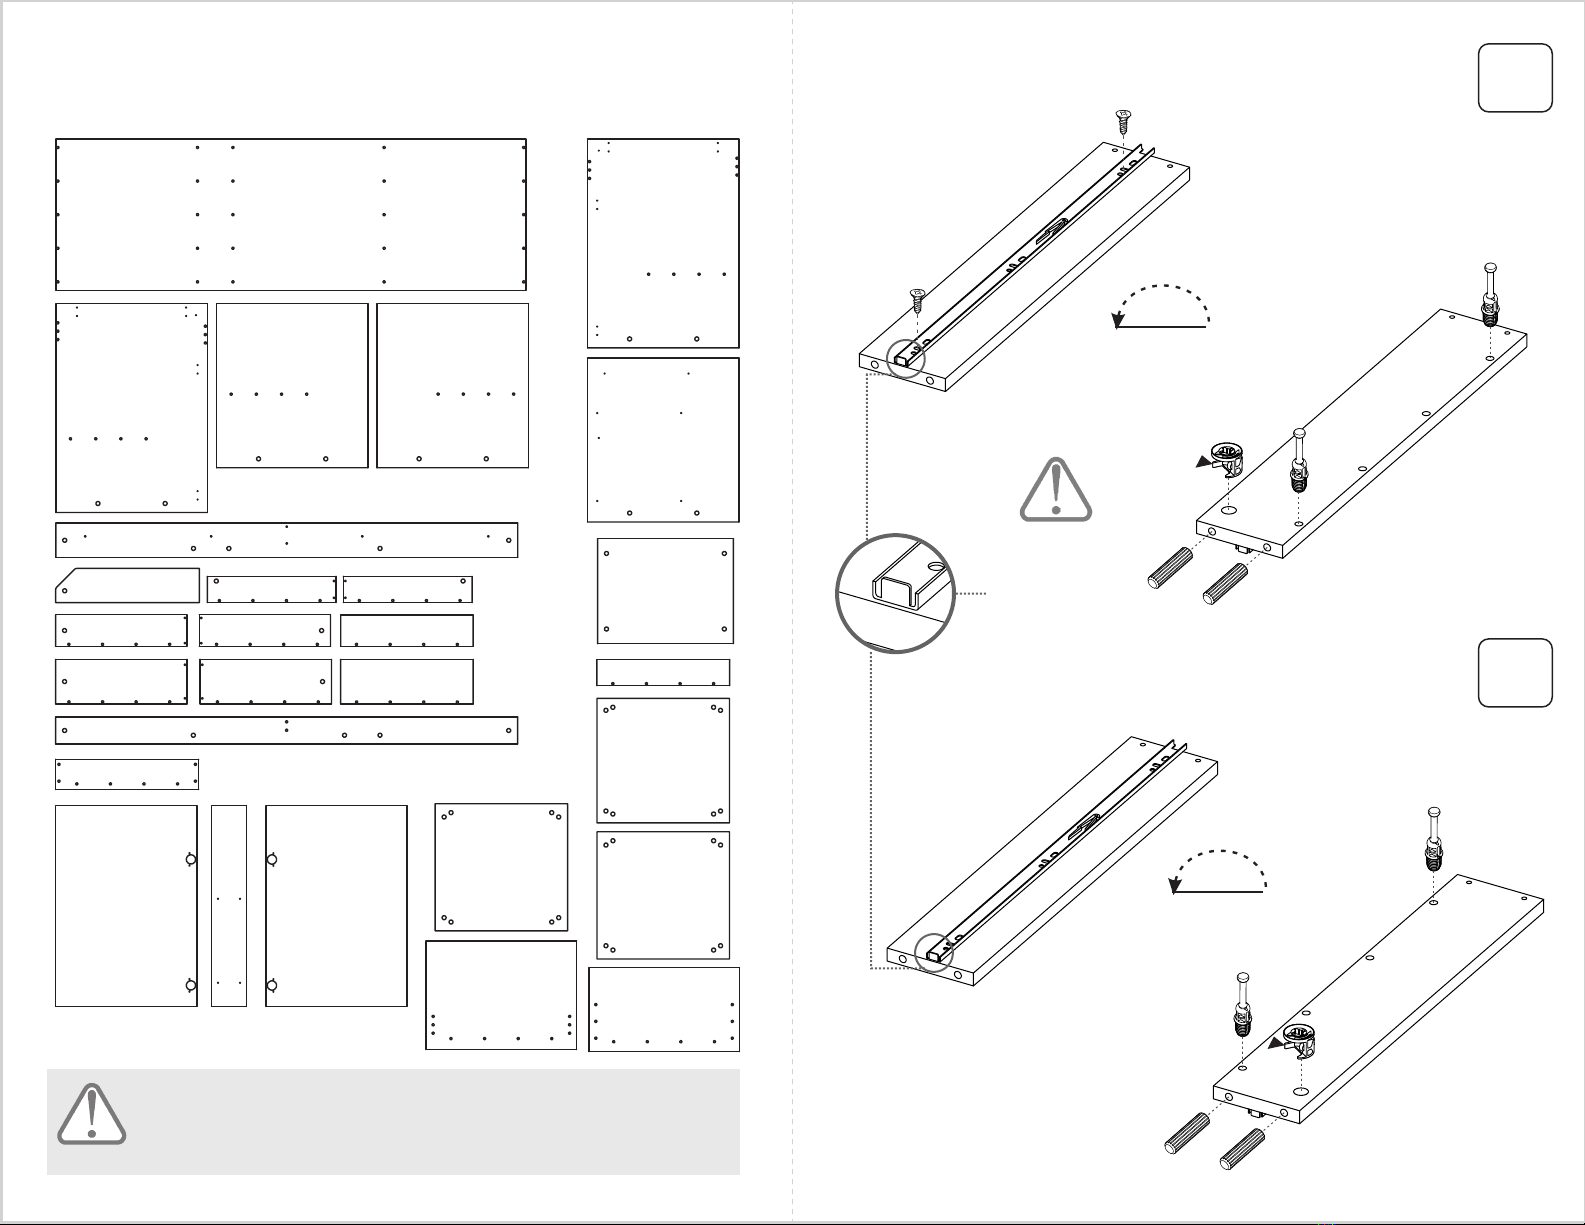
INSTALACIÓN CANASTA BOTELLERO 2 NIVELES/
TWO LEVELS BOTTLE RACK BASKET INSTALLATION